2017 Top 5 Hits and Plans

2017 had a lot of successes. Now that I look back at blogged and unblogged garments, I did pretty good.

My biggest undertaking was my daughter’s cosplay outfit. From her original art drawing, to drafting, to sewing, to the fact she is still now wearing the top as a jacket, it’s a 100% win.

Next up has to be my wearable muslin Ginger Jeans. They are worn all the time. I’m hoping to get my velvet pair done before Christmas, however unlikely that may be.

Also worn a lot, in tandem, is my Papercut Aomori in Britex wool blend knit with my latest voile Seamwork Savannah. The rayon version of the Aomori made the Fails List, but the wool version is adored. I need some tight, long sleeve t-shirts to wear under it for layering more in winter.

Of course, my latest B5526 is on the list. It’s not even old enough to be worn a ton, I just know.  I wear the first version, pre-edits, all the time, so one that fits so much better is going to get worn to death. 

Last but not least is my Sew House 7 Burnside Bibs. After over-dying the fabric to make it less HELLO I’M PURPLE, it got worn a ton. It’s a super quality linen from Britex, so was worn farther into fall than I expected, but now it’s just too cold. I can’t wait for linen-weather to return.

Honorable mention goes to the Friday Pattern Company for the Garamond top. I made it in September, and it’s a short-sleeved number with a Kimono-sleeve design (READ: doesn’t layer well), so it just hasn’t been worn much. I’m pretty sure I’ll wear it more come spring/summer, but I just can’t right now. Brrr.

2018 Goals

  • Sewing Community Participation. I’d like to participate in our sewing community more. I started actually using my Pattern Review profile, I’ve volunteered to help out Sewcialists and do what I can there, I signed up for the RTW Fast 2018, and originally had signed up for the #SewMyStyle 2018, but after seeing the issues with inclusivity, I’m going to bow back out. I’m a member of the PMQG, and I’d like to continue even though I don’t quilt as much as I have in the past.
  • The Sewing Basket. I’ve started cutting out a stack of projects and putting them in a project basket to help with the project paralysis that happens between projects. There are some pros and cons so far….like it either needs to be a muslin or a TNT, there’s no real major changes once it’s cut…but on the other hand, I have everything ready to go and no question of what to do next. I’ll see how it works over the next year.
  • More Data. I like the idea of tracking what I make, what patterns used, and how much it is worn as I’ve seen in some 2017 round-ups. I think I’m going to give that a go as well. Any thoughts/advice there is welcome!

I love the year end round-ups. I’ve been going through all the round-ups posted at Crafting a Rainbow. It’s such a good way to get fresh ideas and see other people enjoy sewing.

Las Señoritas from Alexander Henry Fabrics Butterick: B5526

I’m beyond happy with this shirt. I know I’ve had a lot of angst regarding Big 4 patterns, but this Butterick B5526 has been an exception. I first saw it on Lauren’s blog, and ran out and bought it, then re-purchased it…only to find out now I probably could have just used the original purchase…whatevs.

This time I edited the pattern with my Lazy FBA ™ edits: Right now I have a size 16 cut, although I’m confident in Big 4 Ease that I can cut a 14 or even a 12 if I must. Anyway, cut a 16, added an inch in length above the natural waist line to adjust for my height, graded in to a <14 at the waist across all pieces, all of which is no small fete as it’s princess seamed front and back, plus has button plackets, collar stand, and collar. The only piece I haven’t changed yet is the sleeves, and I’m still thinking I need to take those down to at least 14, and decrease the armscye at the armpit. So, keeping the bust at a 16 more than accommodates my bust, and leaving the hips at 16 allows the length to easily glide over my mom-hips.

This is an older Alexander Henry quilting cotton called Las Señoritas in the “antique” colorway. Are you pro team apparel with quilting cottons or against it? I’m all for it – quality quilting cotton is tough and who can deny the Alexander Henry novelty prints?

However, I was only gifted 2 yards by a much more petite friend, and at only 45 inches wide before washing…some tough choices had to be made. I had to split the collar pattern piece, I made sure I got some good top-back placement, but pretty much all other placement had to come out how it came out. There wasn’t going to be any pattern matching with a huge print across princess seams with only 2 yards.

The gingham, which I love, was also out of necessity.

I placed buttons only 2 1/2″ apart, which allows for a lower neckline if I choose, and no way of any boob flashing while gardening, which I fully intend to do in this shirt come spring.

3/4 sleeves also due to necessity, but also because they go with the vintage feel of the print.

I used to be TOWER PLACKET on the cuff or GTFO, but I’m digging the bias placket lately, and I made tiny cuffs, both out of necessity and because they’re so darn cute. I was going to originally make this a rolled-up sleeve-only, but I’m glad I put in the extra effort on the sleeves. I really like them, and I love them with my vintage bakelite.

I’m so happy with this shirt, I have two more cut out.

oh, I forgot to take photos with the good camera – here’s some iPhone shots. The insides! On this shirt, I sort of fake flat-felled seamed it. I overlock all the seams, then stop-stitch at a distance that looks flat-felled.

Sturdy & neat. I pinked & top-stitched my first wearable muslin version, but now that I’ve made my adjustments, I put a bit more effort into it.

Velvet Agnes Hack, and More Velvet

Oh, velvet, how I love thee….let me count the ways. Le sigh. In 1991 or 1992…there was this store called the Big Bang…I bought the most luscious velvet patchwork skirt. My first love was embroidery….on silk, on velvet, on linen… Damn I’m old. When did that happen?

I picked up a remnant of black stretch velvet – the tag said something like 0.8 yards, and of course I know I can squeeze something out of it. I still had the Agnes pattern floating around, so did a quick and dirty re-draw of the neckline, and with utter disregard for nap, cut out and serged a quick shirt. You can’t tell unless you rub me that the nap isn’t going all the same direction, so don’t rub me.

I grabbed this RTW circle skirt out of my teen daughter’s closet to see how it looked dressed up. I dig it. Now, as I type this, I’m wearing it with jeans. Works equally as well.

I think I’m going to need a half dozen more.

I like it paired with my wool and velvet flocked Papercut Patterns Rigel Bomber. I wear this jacket a lot – but it’s really more of a transition-season piece. It’s only lined in silk, and I like it that way- any more bulk and I think I’d look like a wool-covered marshmallow.

I was thinking maybe I need to make a velvet scarf… maybe something not quite this plain – although this red is hardly plain.

Red works ok too with the bomber, but….what about after Christmas? I’m not sure I still want to be sporting RED SCARF.

This wine-brown doesn’t look as nice as I thought it might… Maybe something sort of patchworky? Like Kambriel’s scarves? Or like…I’ve been working on some Victorian crazy quilt – meets – modern quilt blocks ideas:

Ok, maybe I should stick a pin in that for a bit?

I’ve got this lovely striped velveteen, but being there’s about 2 yards of it, I want to make something more substantial out of it…like a vest or…a jacket or…a skirt…but I rarely wear skirts, so, maybe pants?

open to suggestions there…

I really like this fabric too…I’ve been wearing it as a make-shift skirt for Halloween, but I think it’s sad that it only comes out once a year…

Or maybe it’s a little too….Beetlejuice? I feel like I’m getting on the other side of old, though, where I don’t give AF and can comfortably start moving into mildly eccentric….

2017 Fails

I was doing my blog roll reading last night as I do before bed, and I was inspired by Gillian’s Top 5 Misses of 2017.  It’s a good idea to go over the last year to see what worked, what didn’t, and try to improve for the coming year.

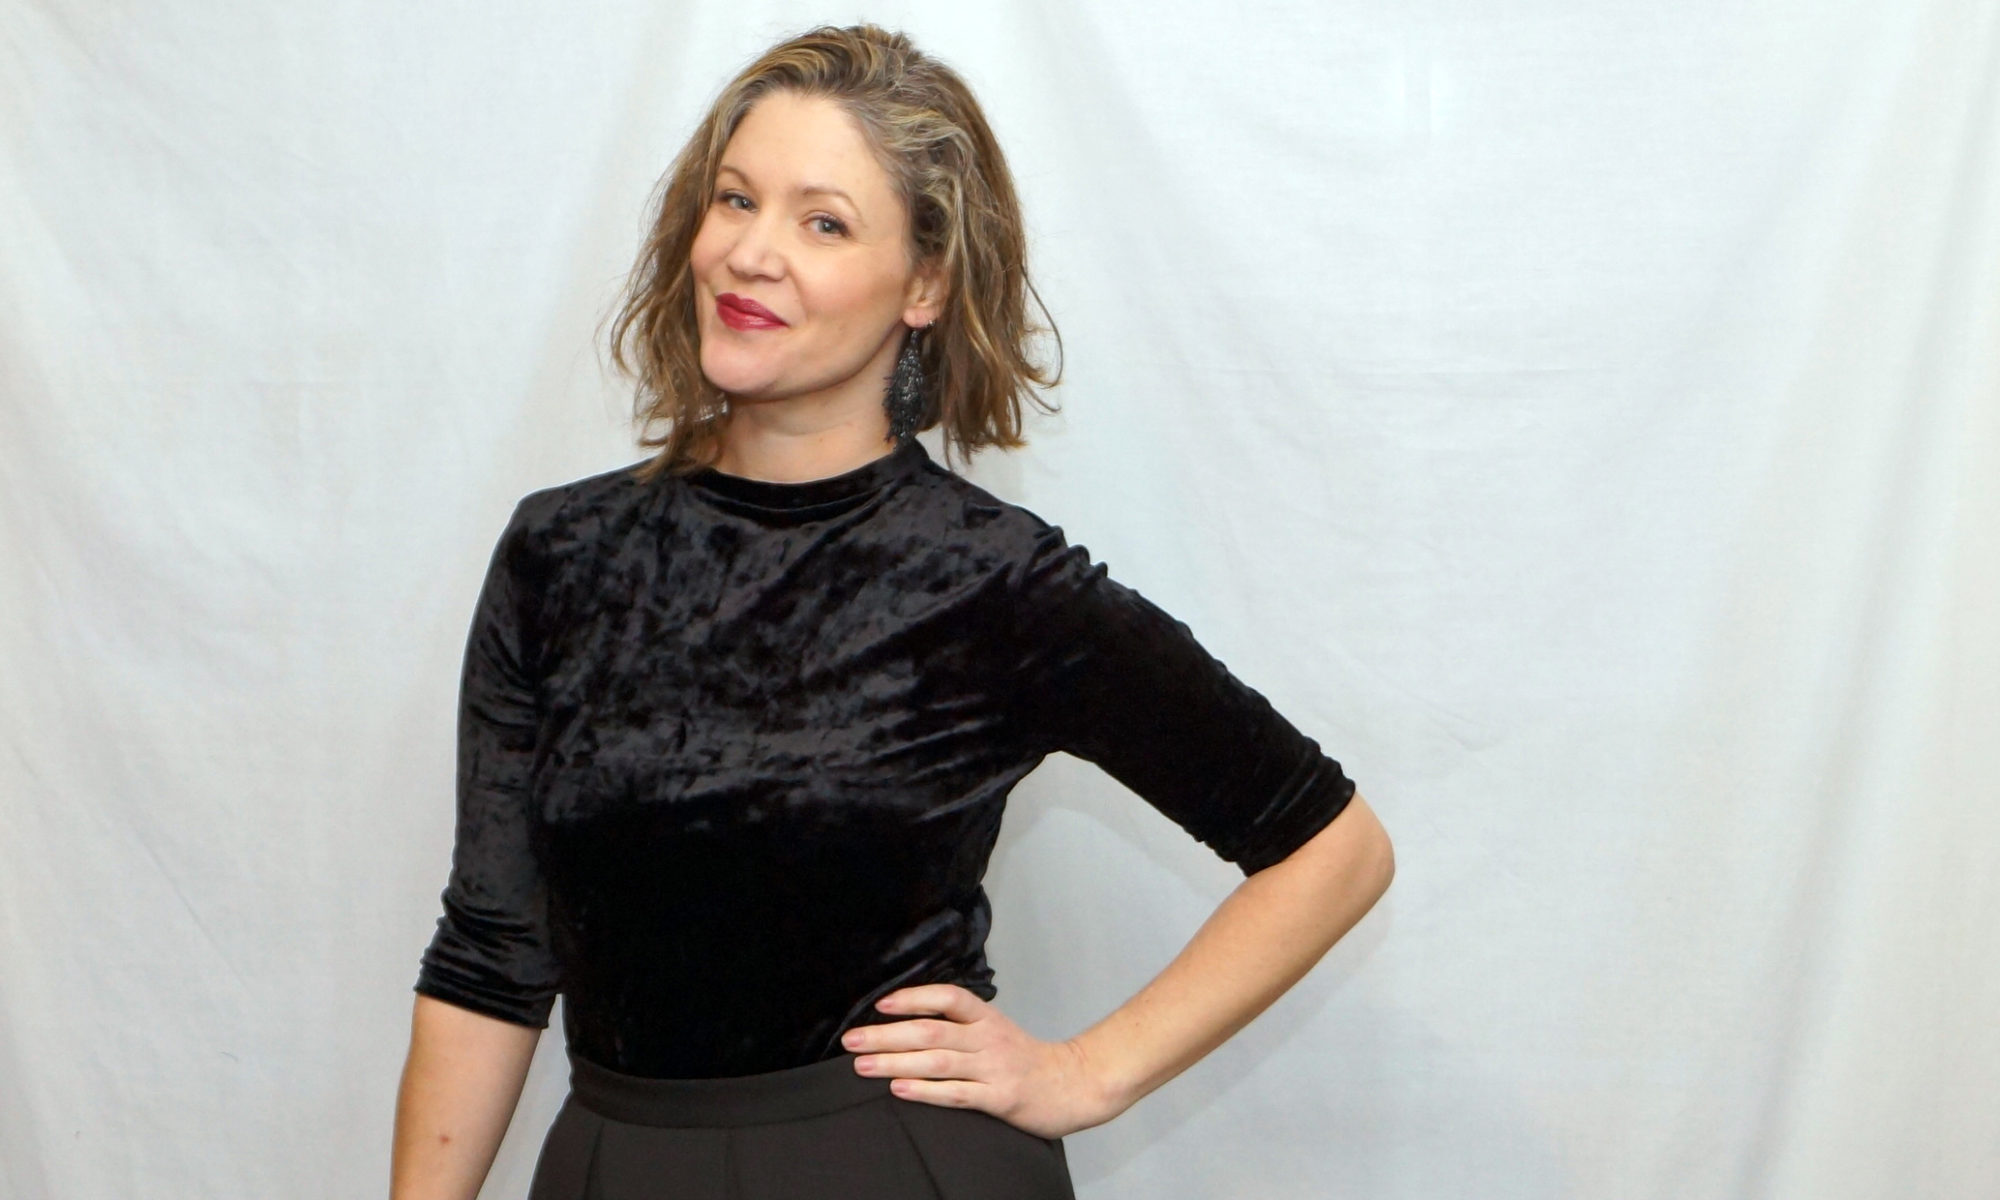
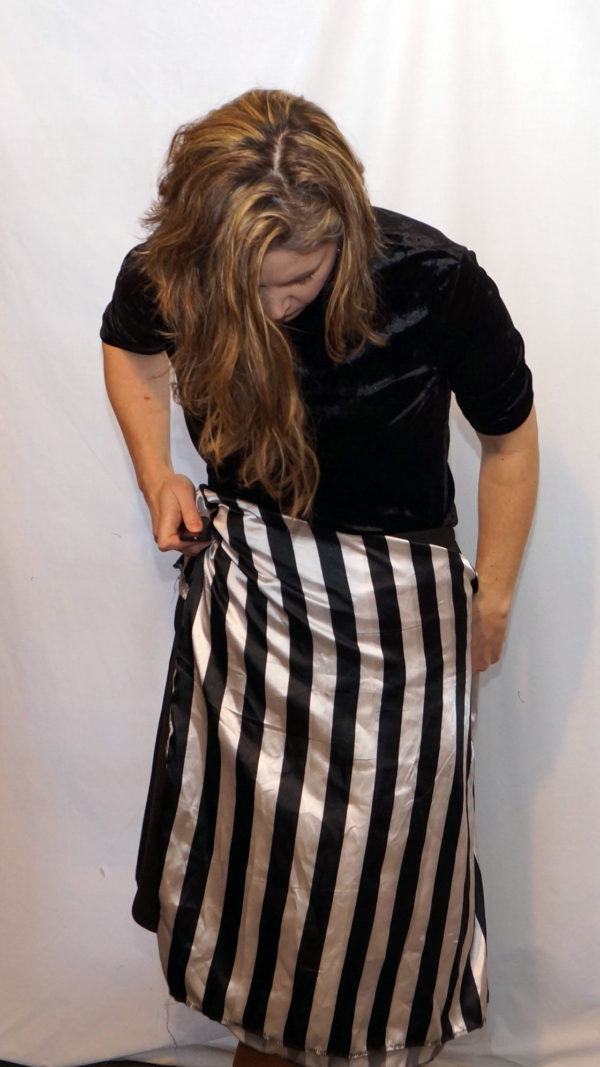
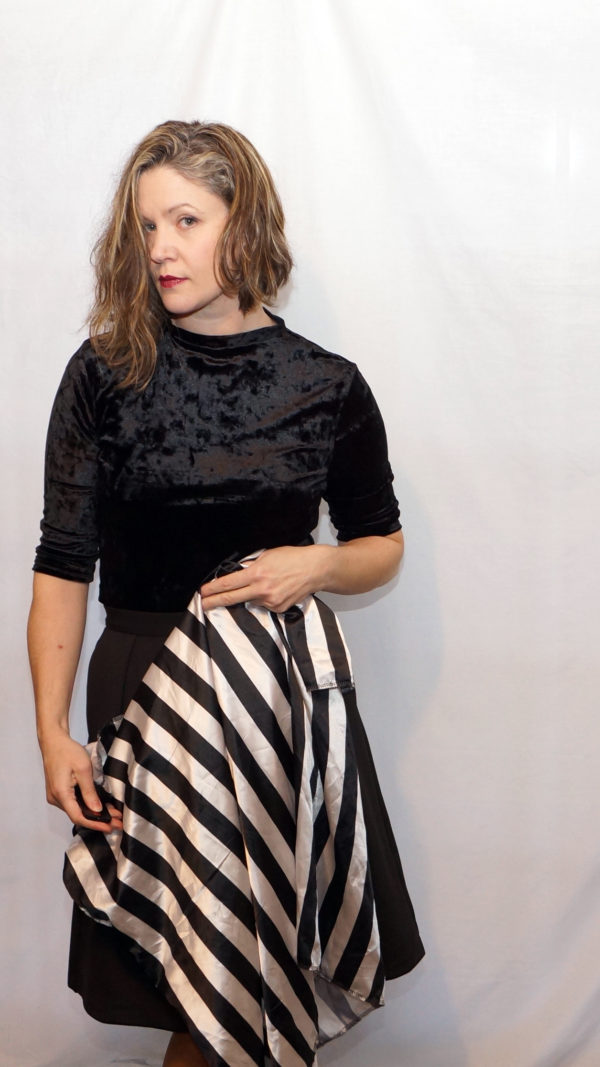
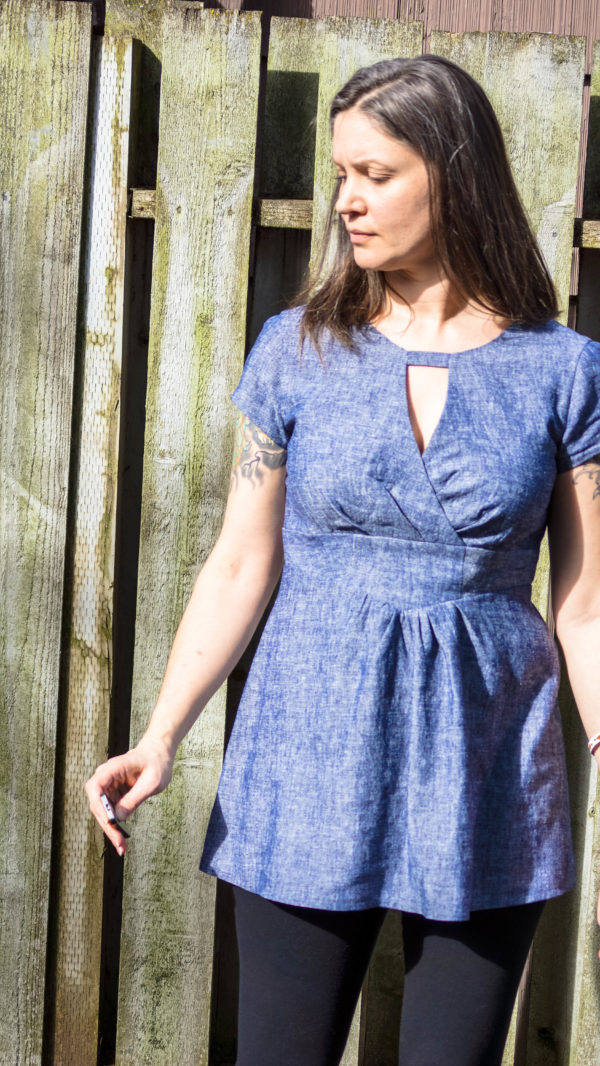
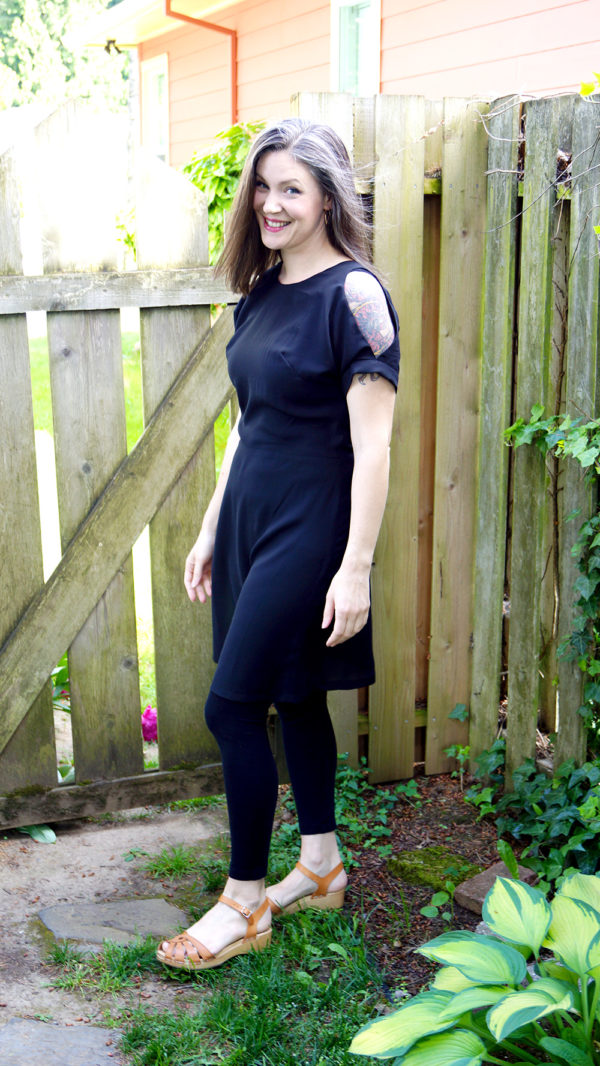
My top, #1 miss of 2017 is the Lisette B6168. You guys. I don’t know if it’s the fit/flare I don’t like….the preggo look…or just that I’m rarely a “dress” kinda gal, but I never, NEVER wear this dress. I don’t like the chest, I’ve already been pregnant for reals FOUR TIMES (don’t worry, I’m fixed now), the sleeves are not me….the whole thing is a bust. No pun intended. It is made from yummy Robert Kaufman yarn dyed linen-cotton, so I’m going to cannibalize the fabric, but it’s just a dust collector for now. As an hourglass figure, I’d think I’d like fit/flare, so maybe that’s not it? I really don’t like the neck-strap thing, I really don’t like the faux wrap part, I don’t like the hip-accentuation, I don’t like the cap sleeves making my mom-arms look like BINGO arms – it’s just not for me.

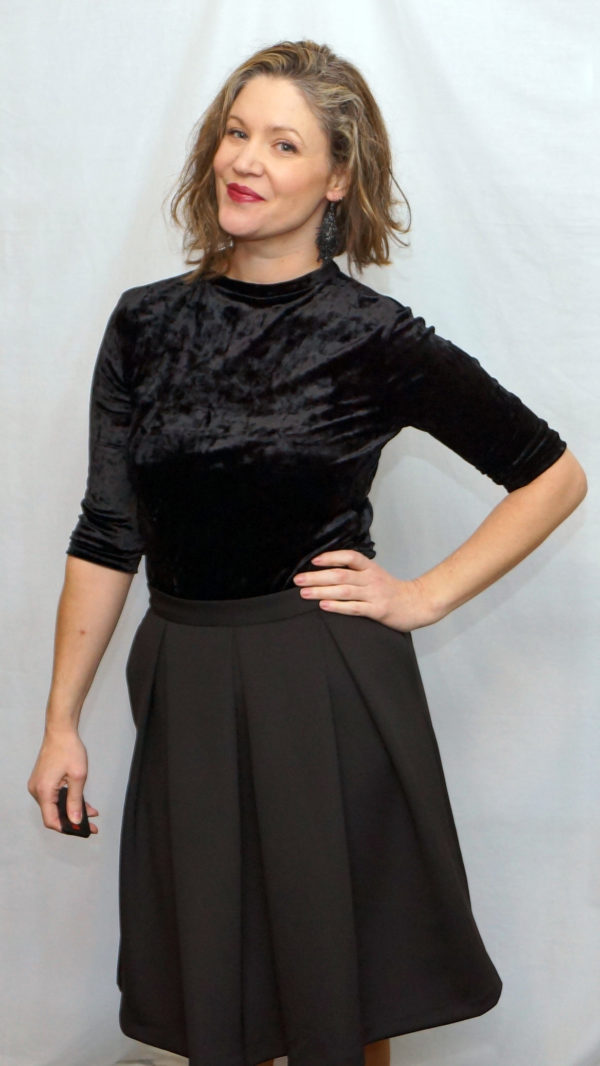
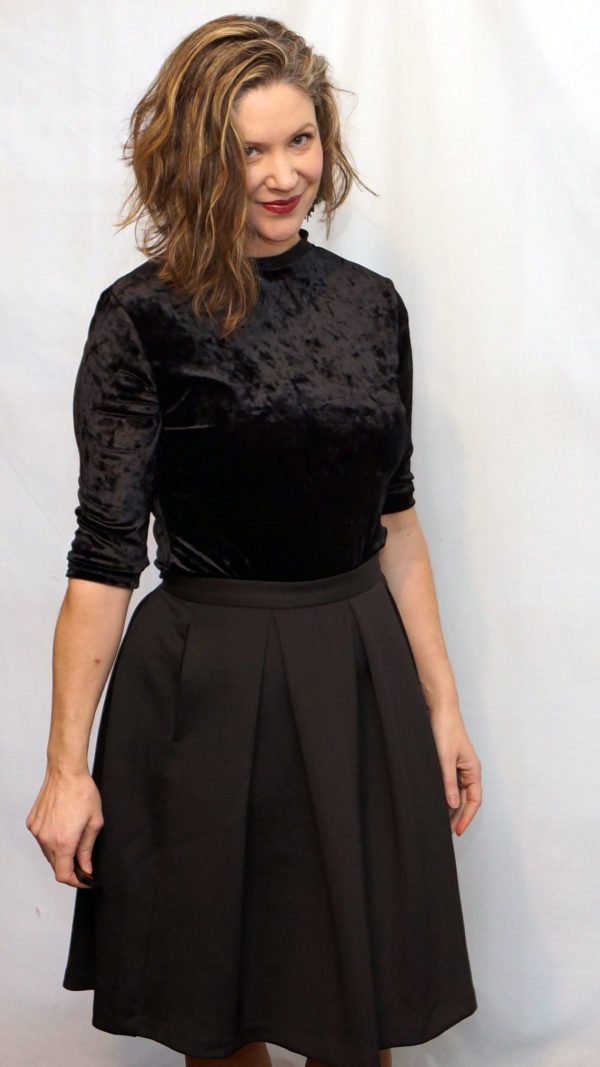
#2 is another dress… again, fit/flare, and some peakaboo action going on that just makes me feel like I’m screaming “I NEED ATTENTION.” It was a pattern test, and while it’s a pretty good pattern, I didn’t drop the bust darts… The pattern designer, after we discussed my size-based muslin, suggested I grade between sizes on a cup-based dress, and while that usually works for me, in fact I call it my Lazy FBA ™, it still assumes I am as short as the base block…and I’m not. So, lesson for me is when using a cup-based pattern, be aware of height distribution and the pattern maker’s base height. The fabric was a gift, the pattern was free, so I’m not calling a total loss, and I still have delusions I’ll pull it out of the closet for layering or something, but honestly, I have not.

This is a good time to point out that Chuleenan of CSews has been keeping a chart of pattern makers and their base height usage. Spoiler: most are 5’6″ – as was this dress.

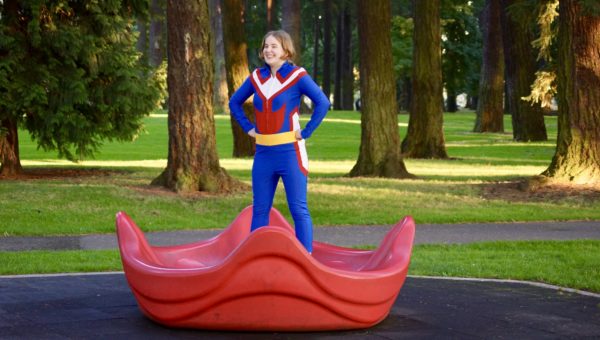
#3 – I love, love, LOVE these Burnside Bibs overalls by Sew House 7. I wear them all the time in warmer weather. My fail wasn’t the pattern. My fail, and I knew this was a possibility going in, was the color of the linen. This was a tutorial post for Britex, so being I thought I would probably over-dye them when they were done, I went ahead and used a white cotton thread, which worked out great for the tutorial, AND would take dye later if I felt too clownish in the bright purple. I didn’t wait more than a week to over-dye them with some black, and now they’re a nice, dark, drab purple and I love them.

Really love them. Way more my color.

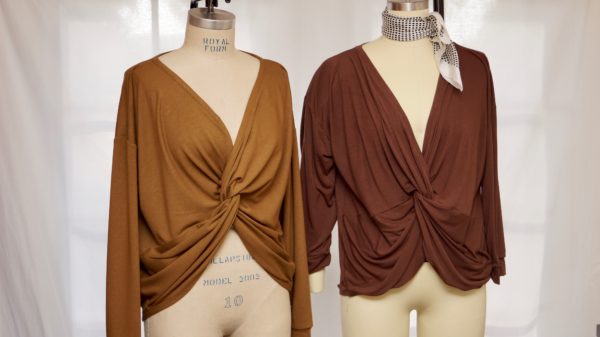
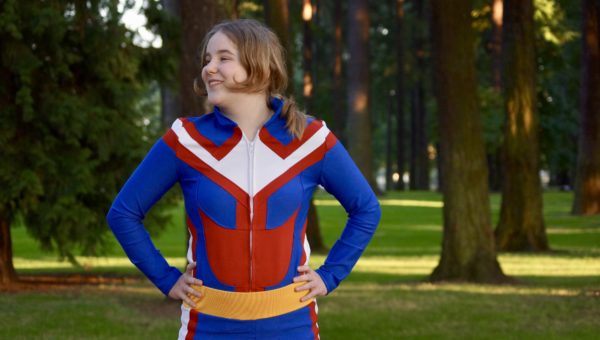
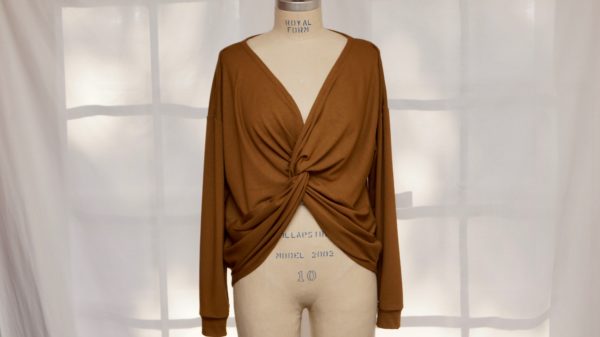
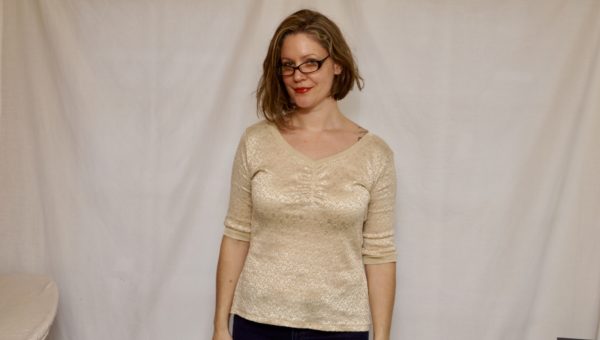
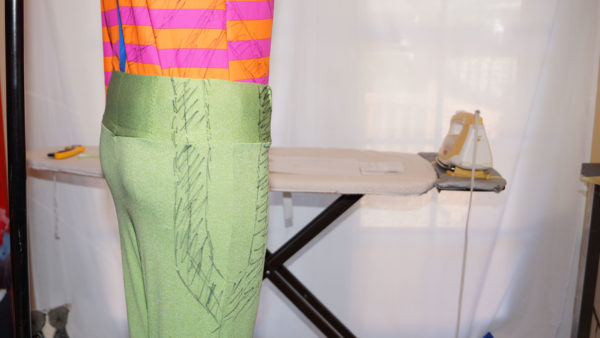
#4 is a fabric issue again. I wear the mustard Britex wool knit version on the left ALL THE TIME. I love it. I accidentally thew it in the dryer once, and it was still fine! Such a quality fabric, feels soft, but substantial, warm but not sweaty…it’s just a great piece. That Britex wool was made for the Aomori. I wear it over the April Rhodes Savannah – which BTW totally shaped up after a wash – the plain cotton voile I used as bias pulled in more after another wash/dry, and it fits like a dream. But I digress. The brown rayon knit on the right? No. It’s a frumptastic disaster. It’s a loss. Another right pattern/wrong fabric victim. Just to prove it to you that I’m not imagining it: in the photo above, the same size pattern was used, and the dress form on the right is a size 12, the one on the left is a size 10. Such a bad fabric.

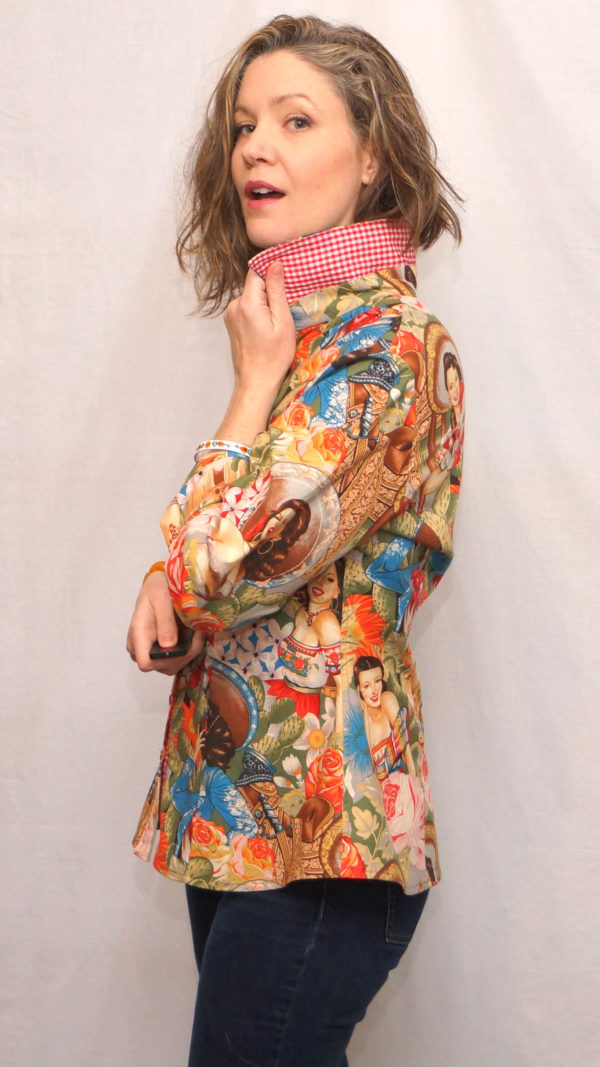
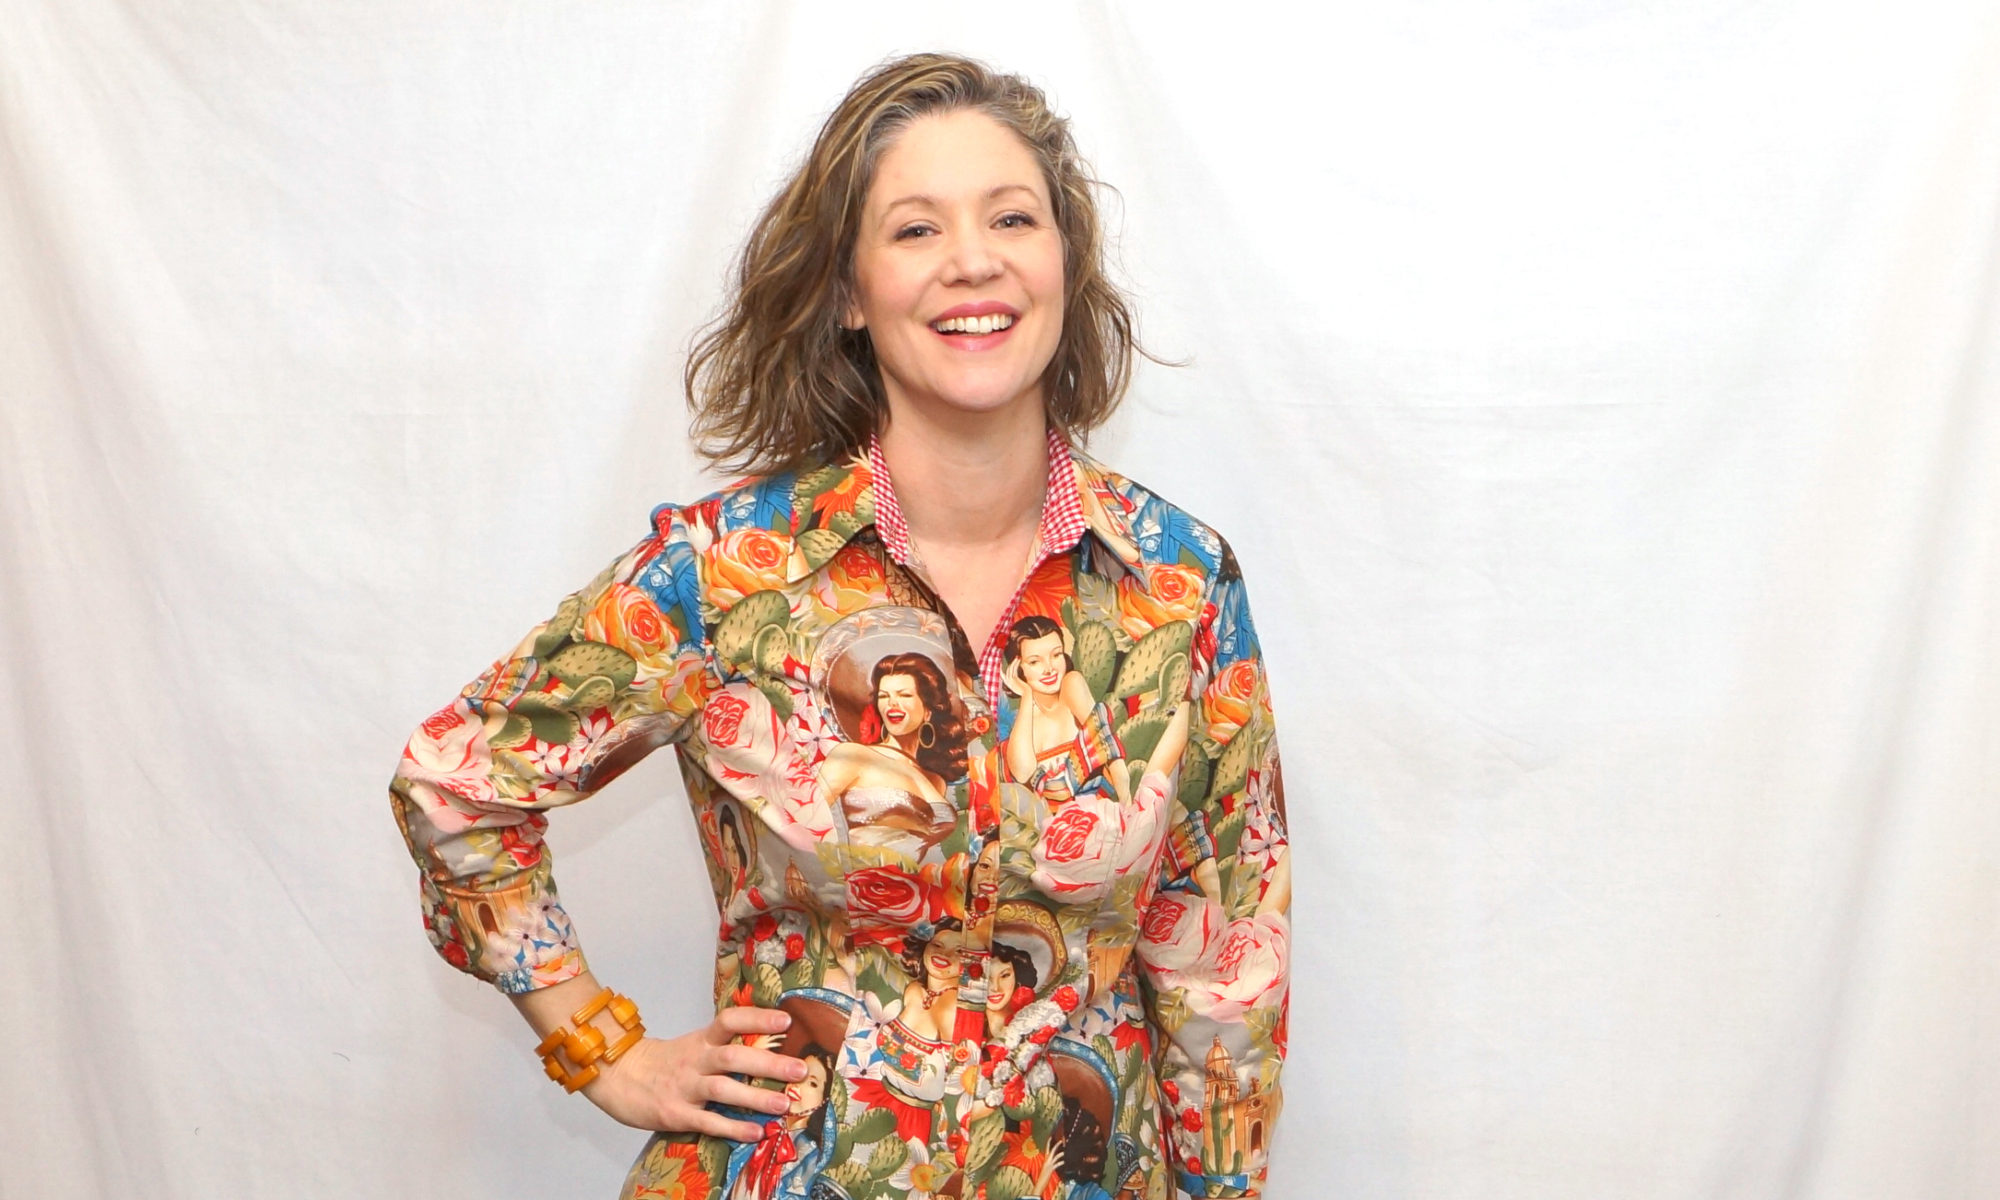
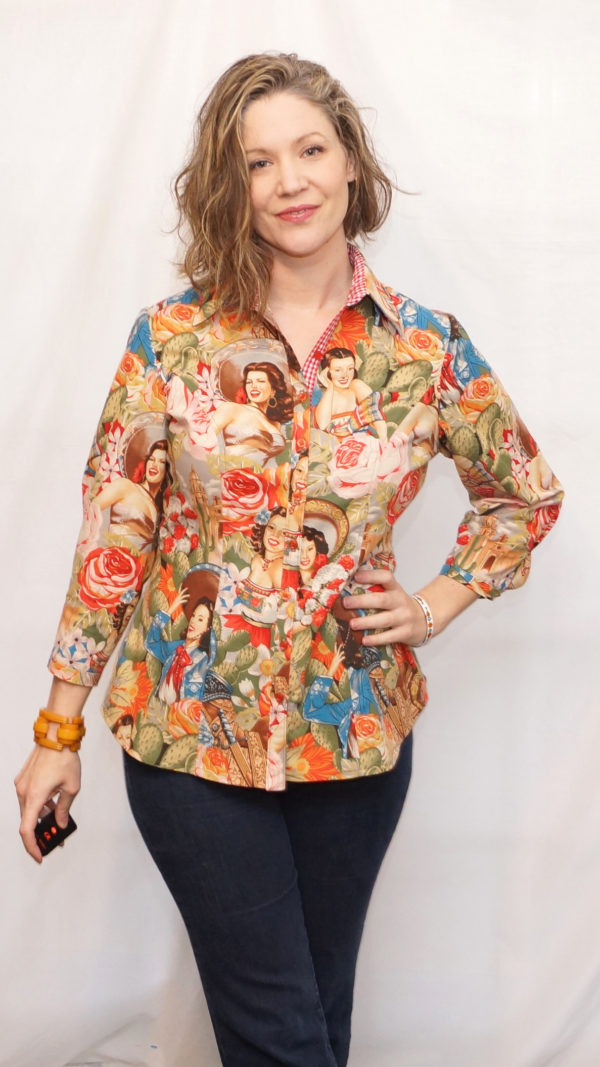
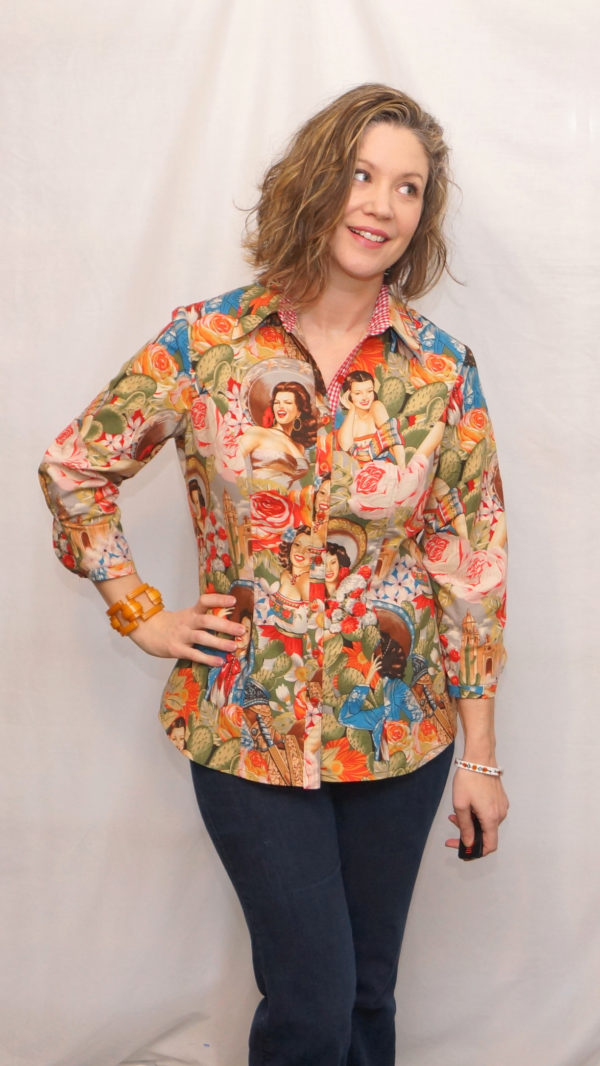
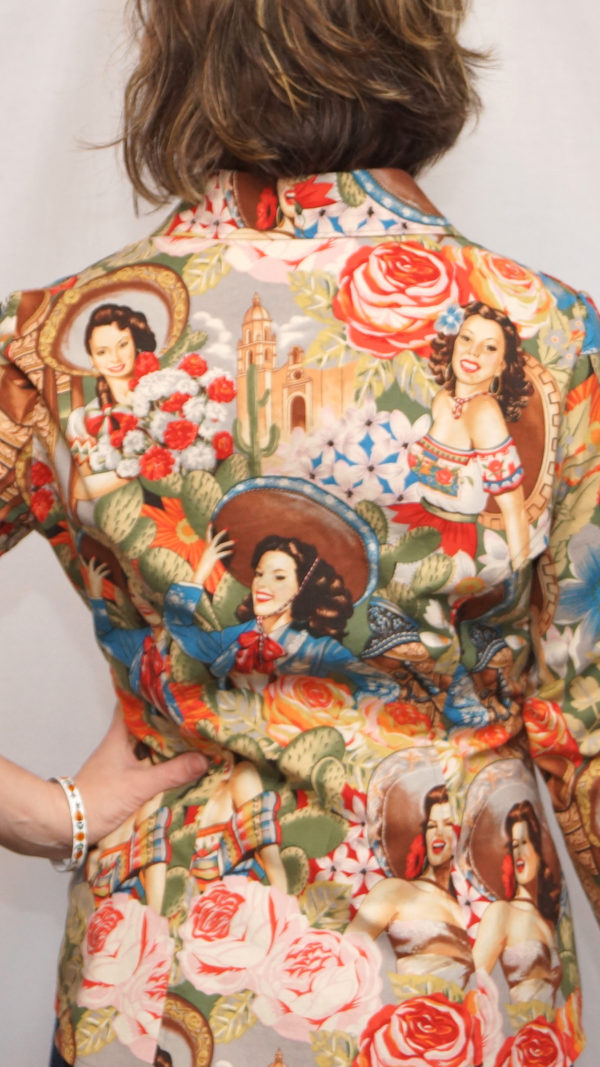
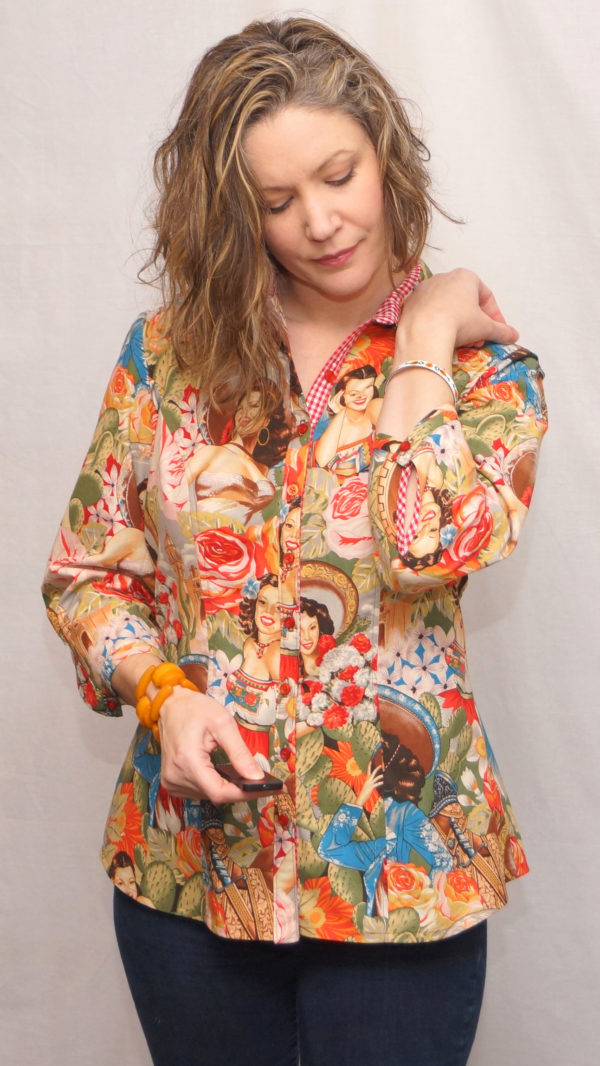
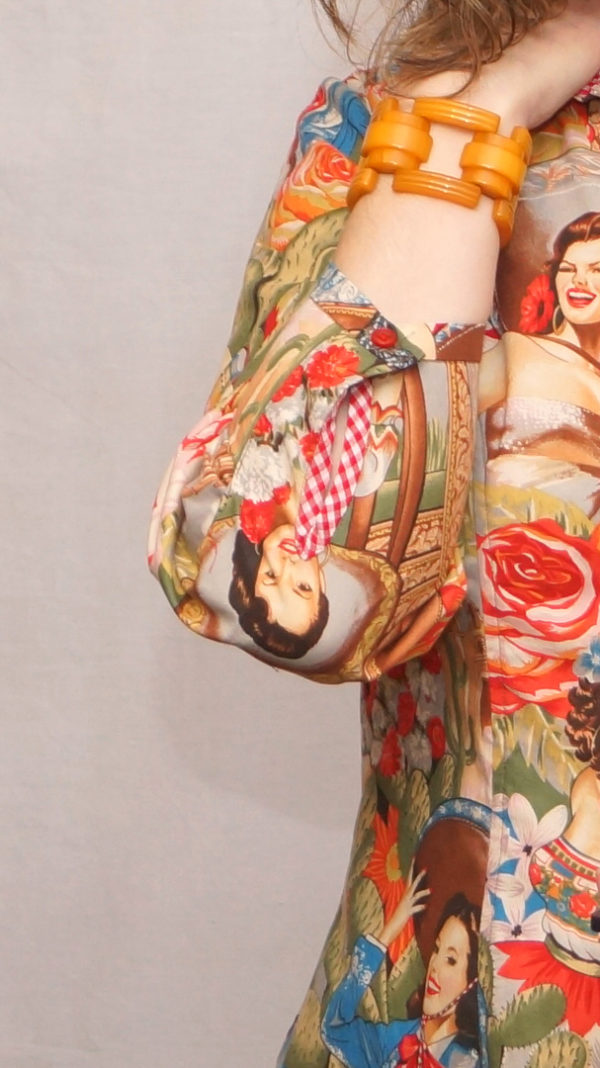
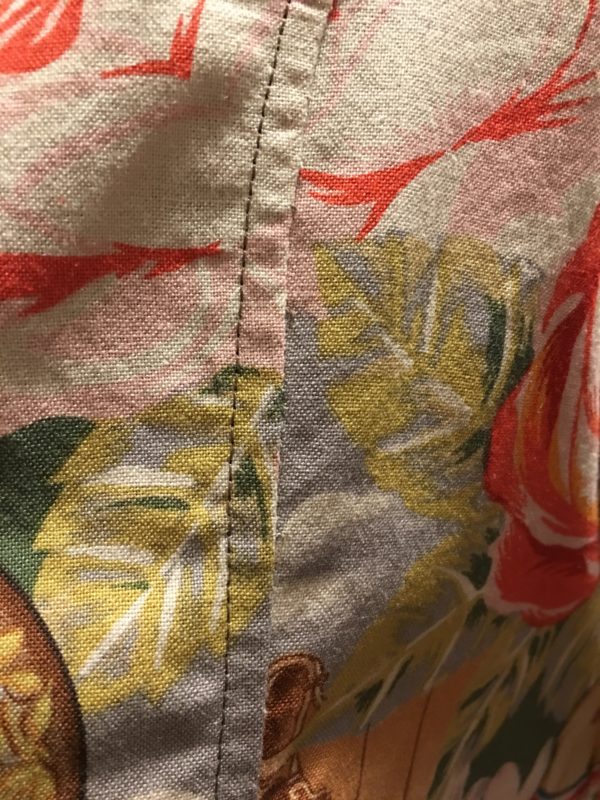
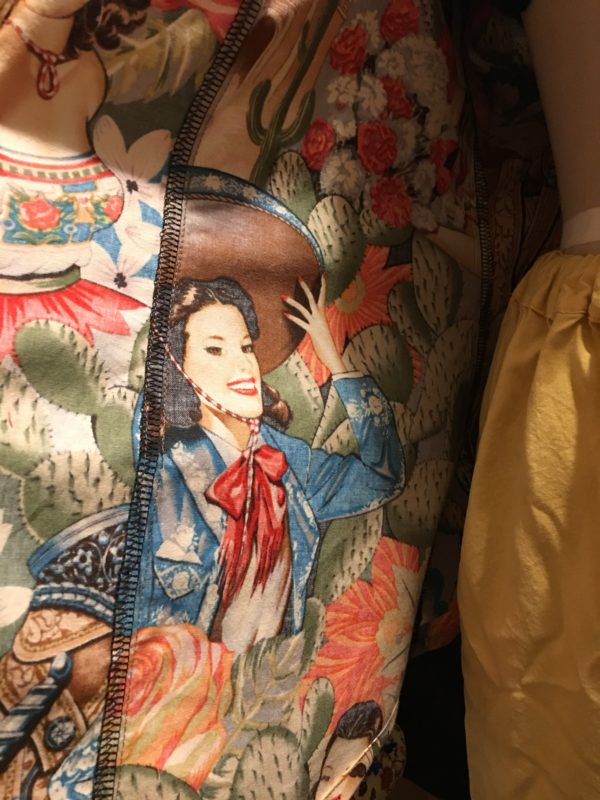
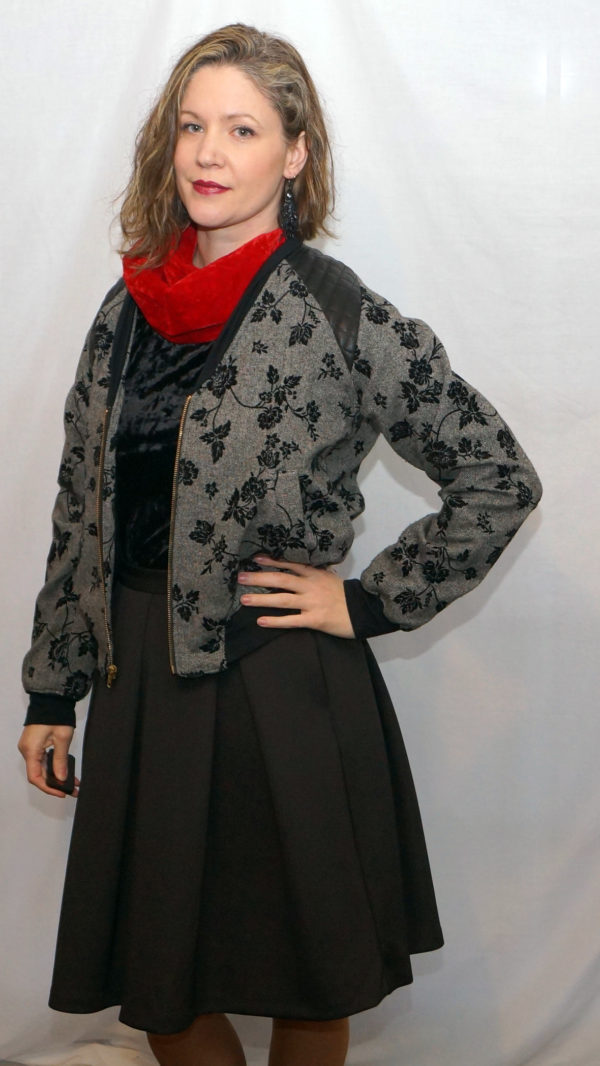
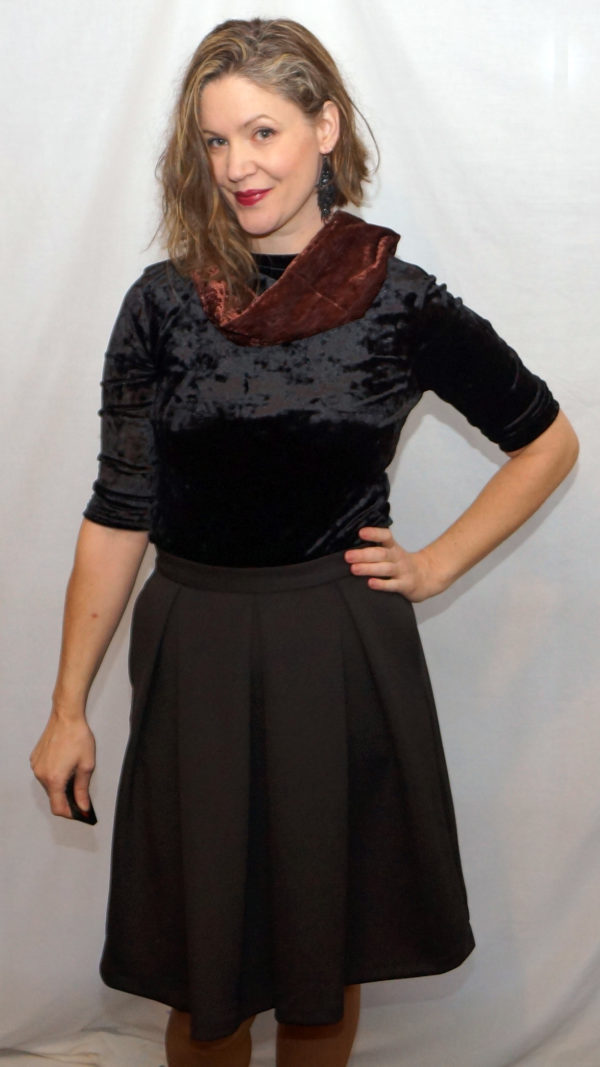
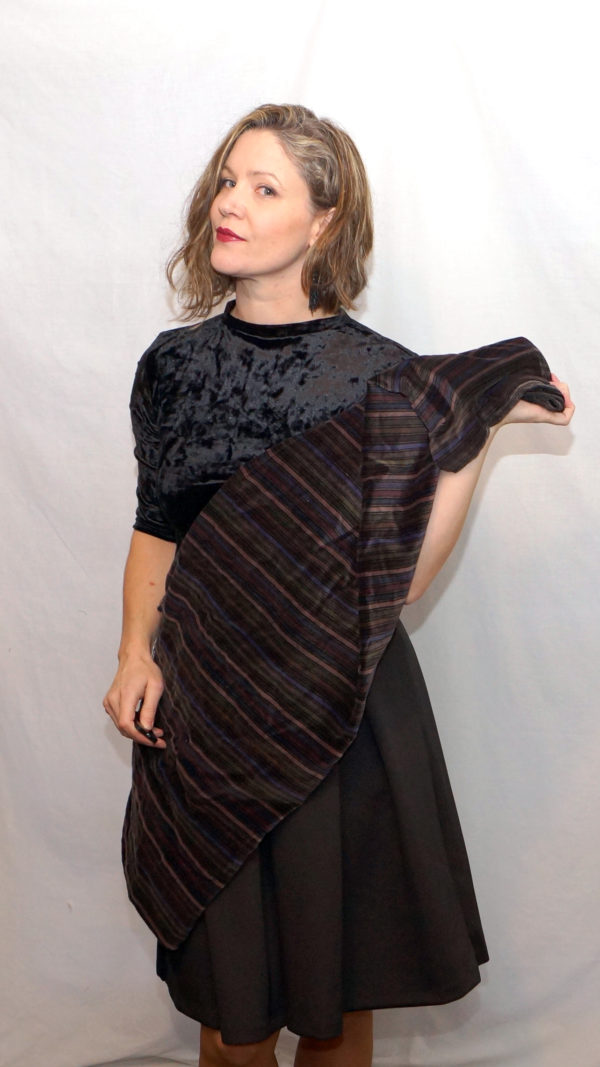
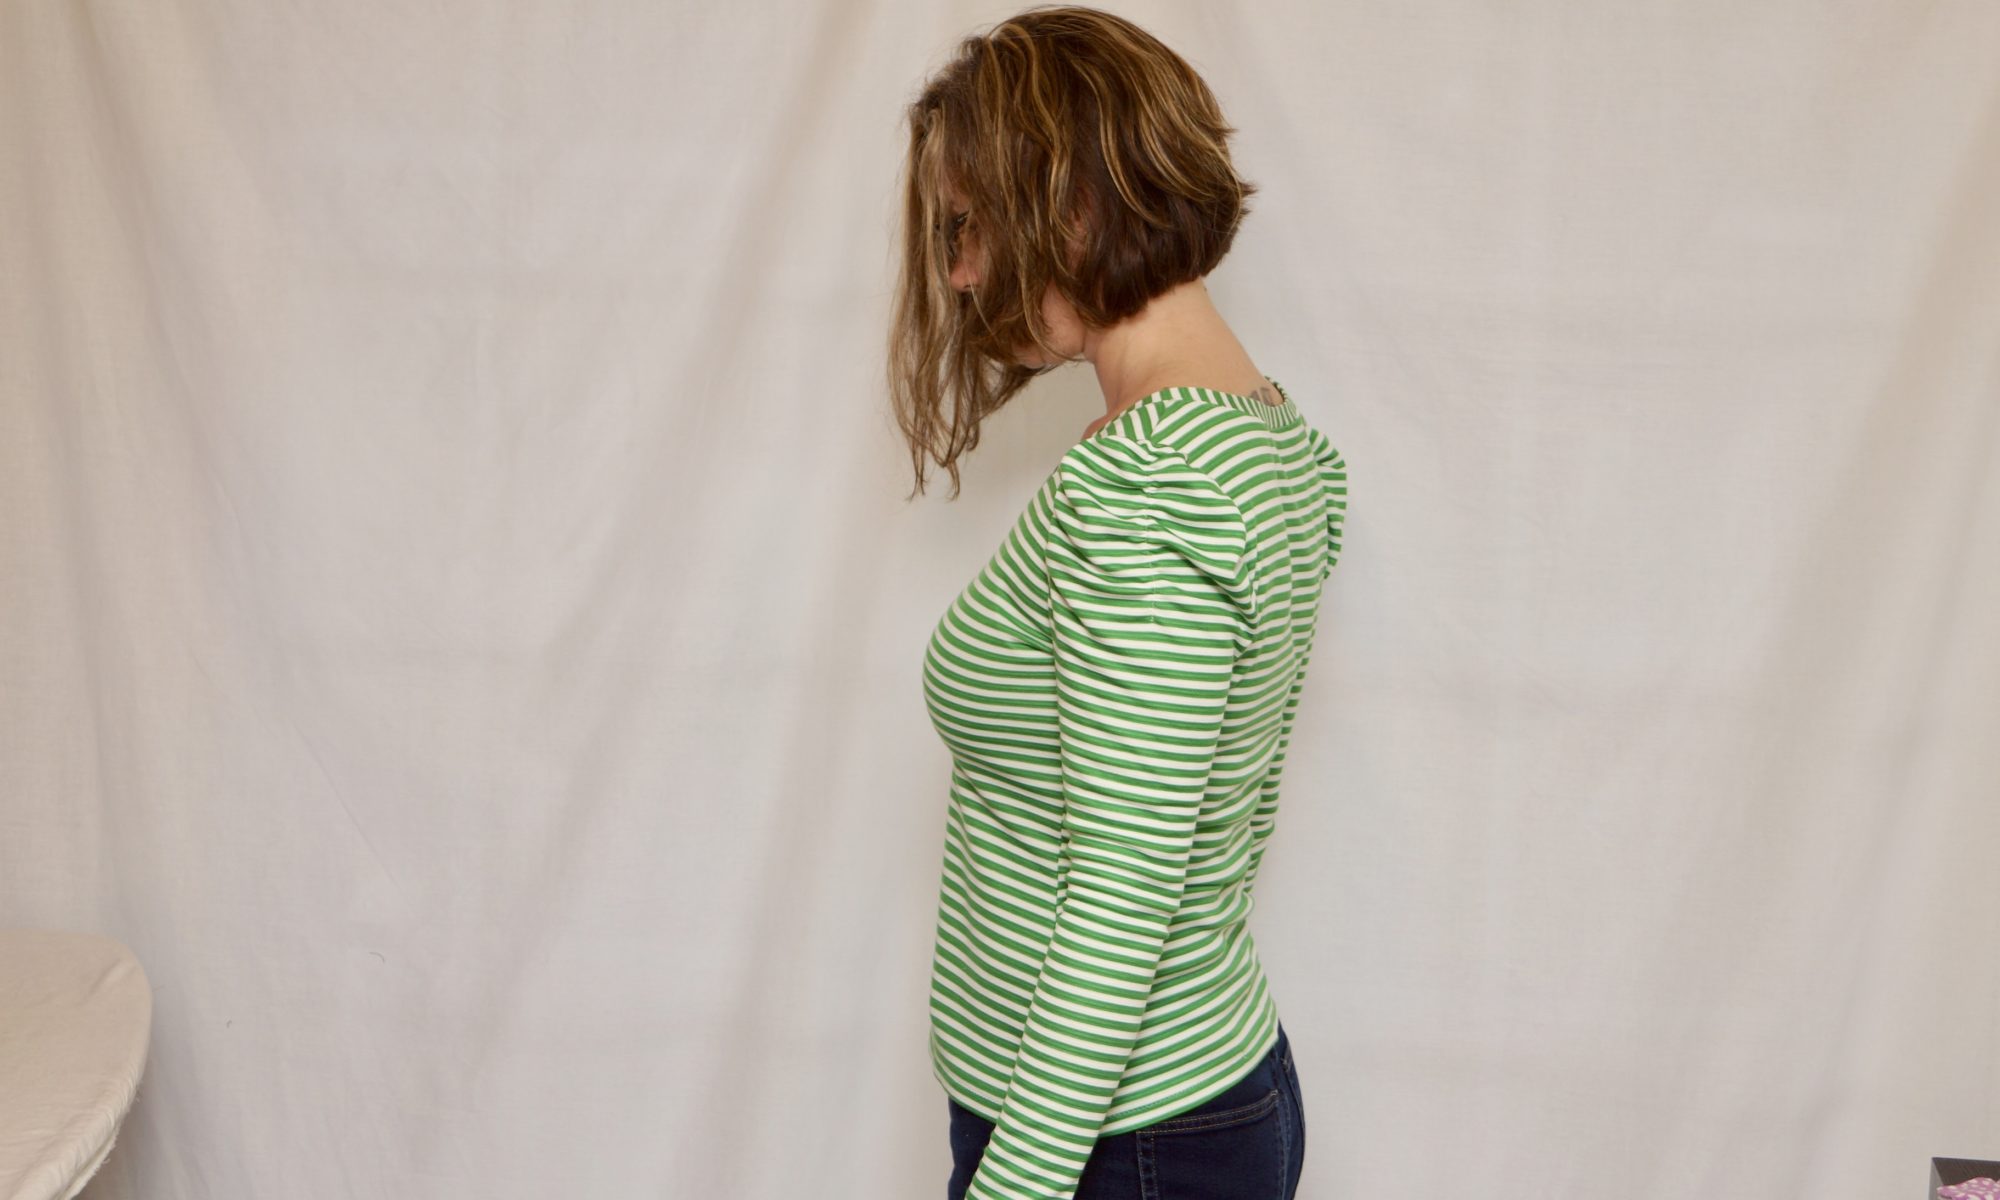
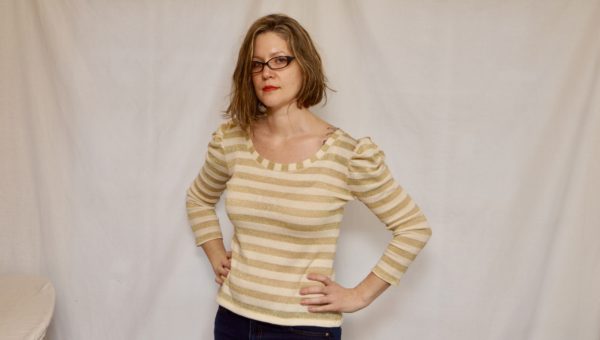
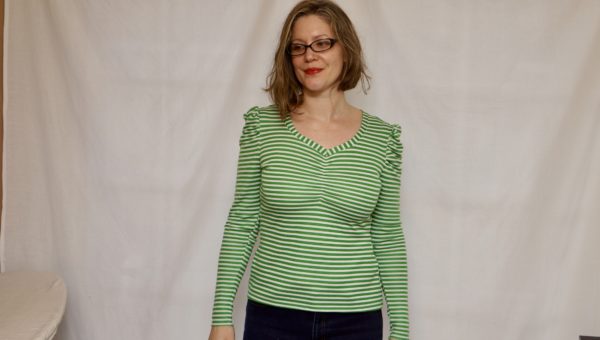
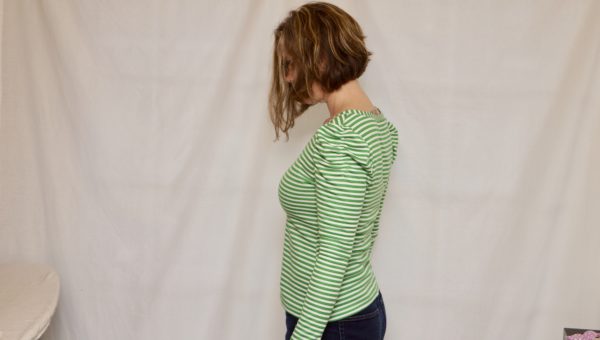
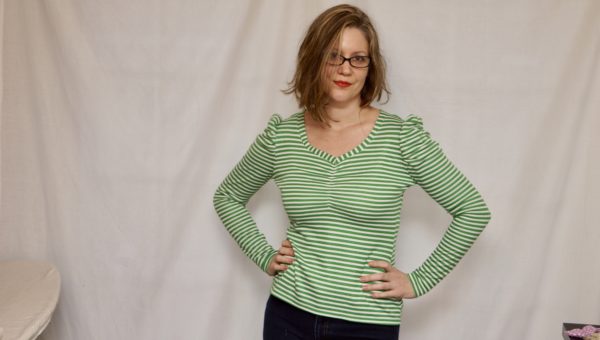
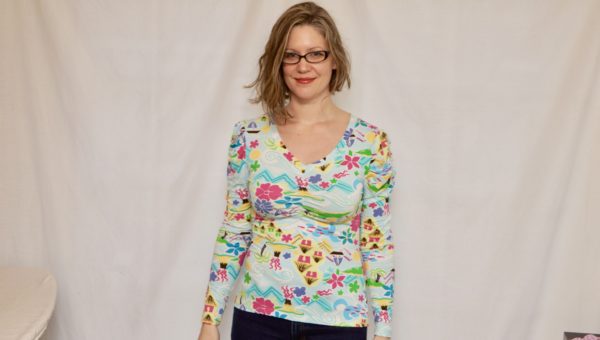
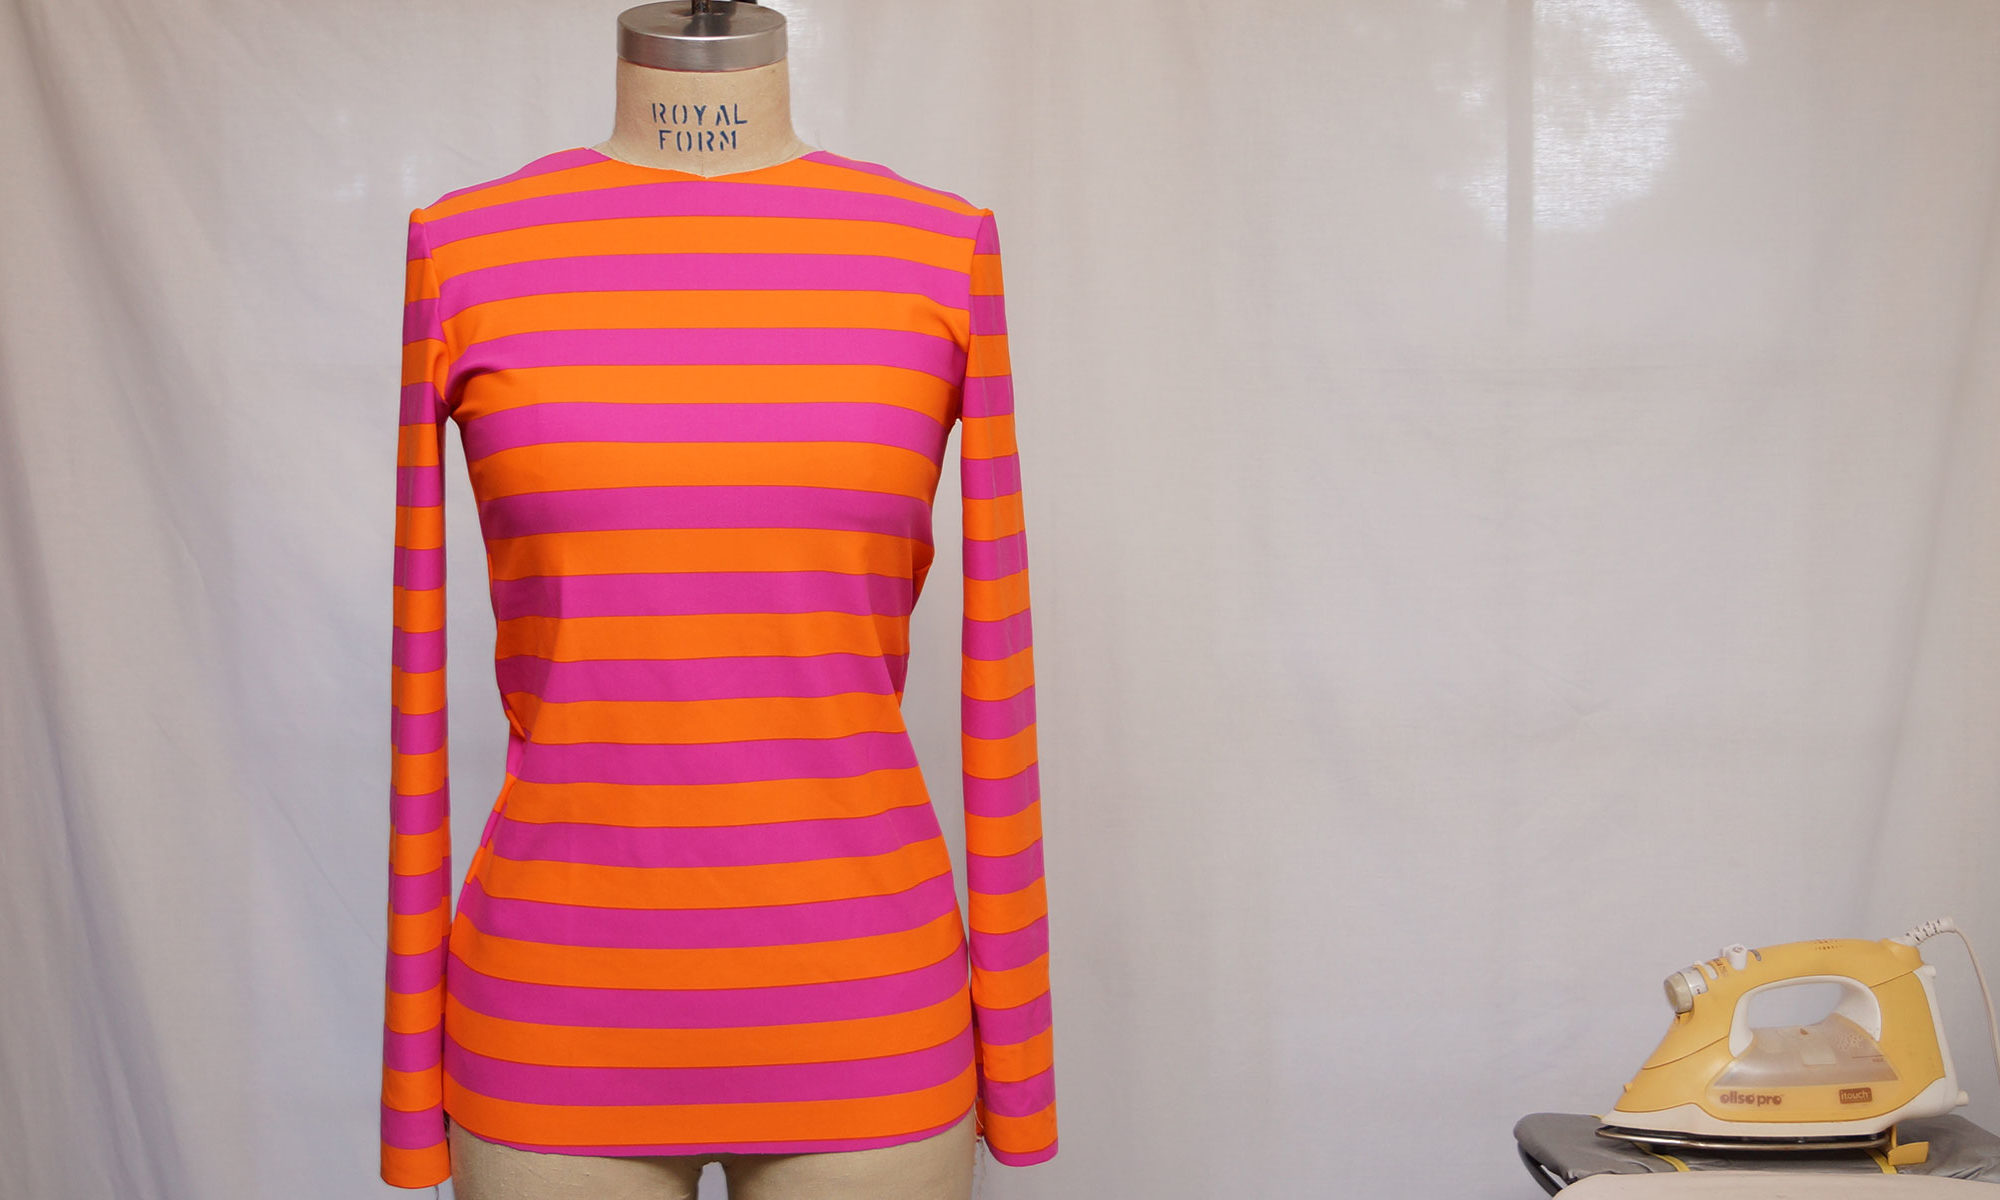
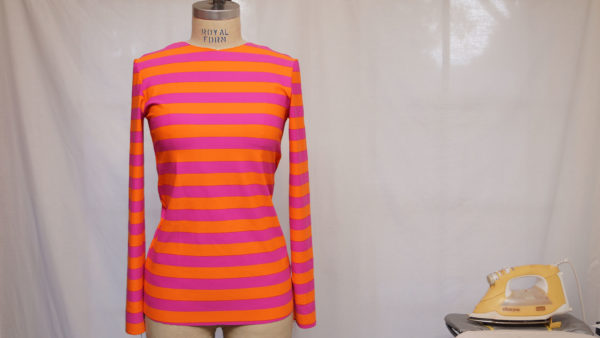
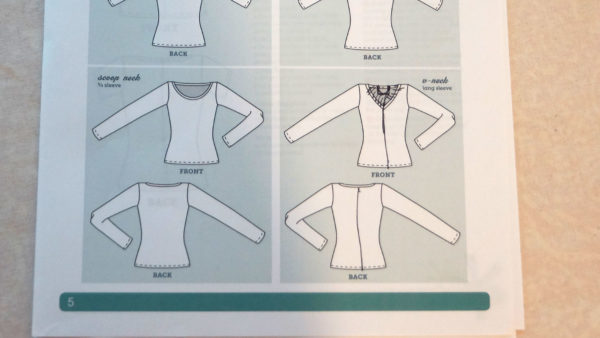
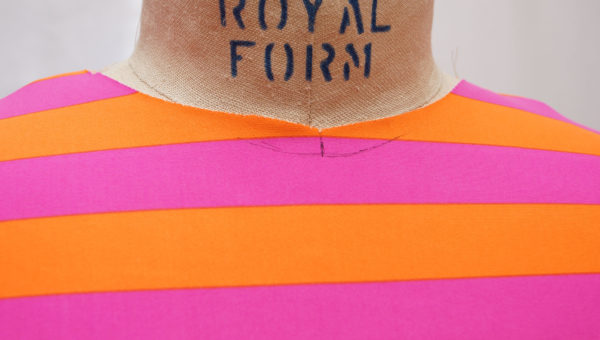
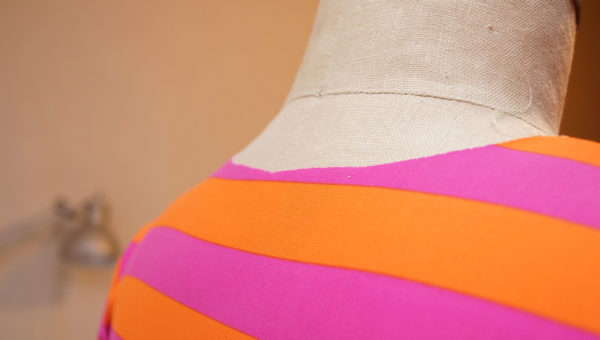
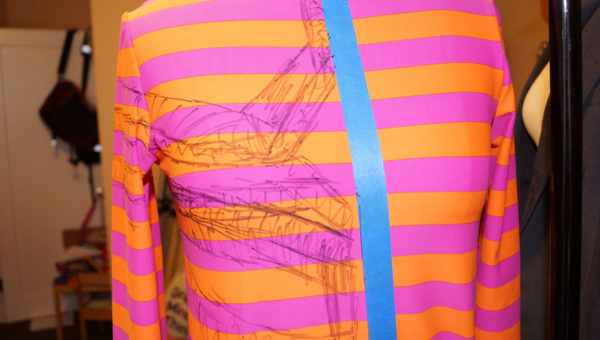
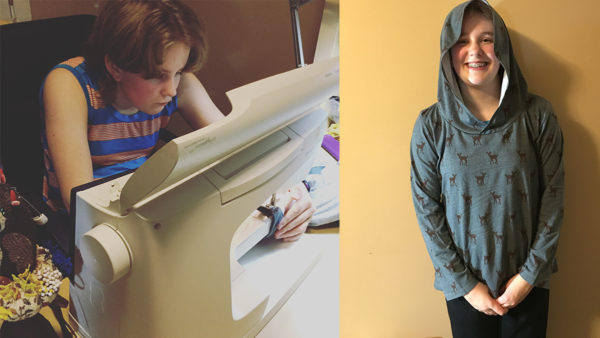
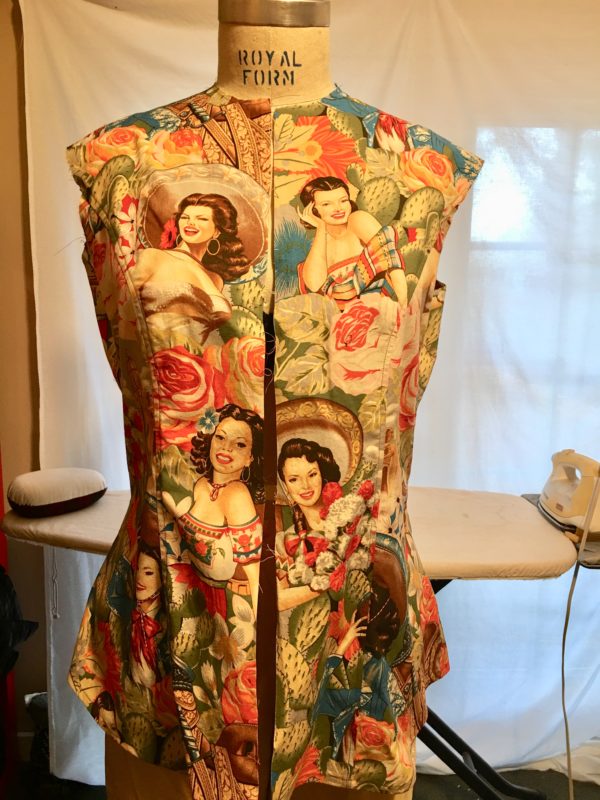
My final #5 was a tough call. While I’m disappointed in the quality of the Agnes pattern, I haven’t actually thrown it out. Yet. I’ve only worn the green-striped version since, my teen daughter wears the Hawaiian acid trip as loungewear, and the other two will probably collect dust. I have another one cut out, but it has been shoved to the end of a project basket and will likely never get made.

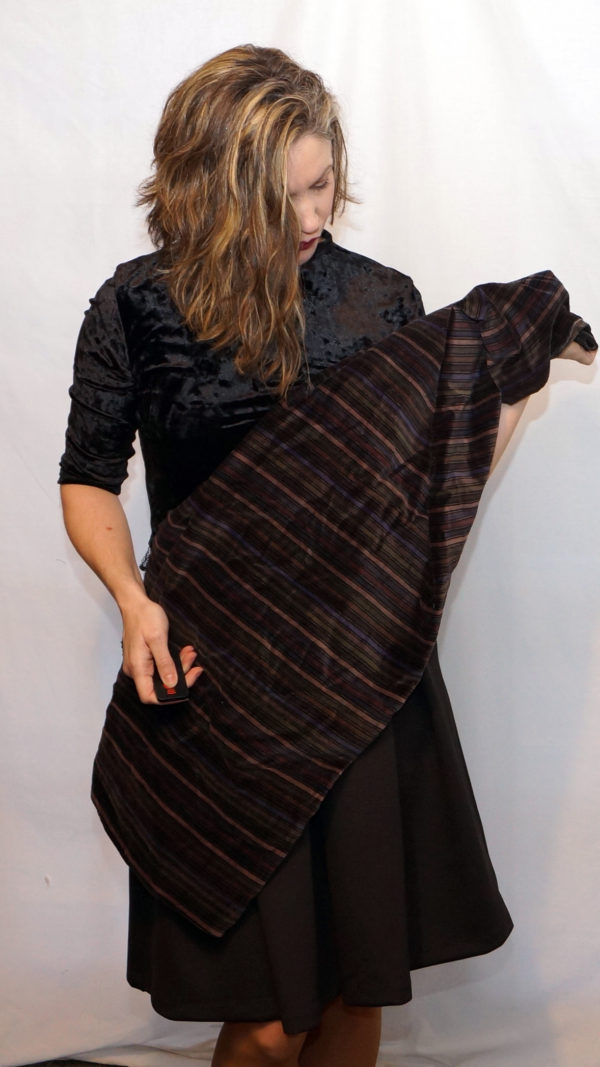
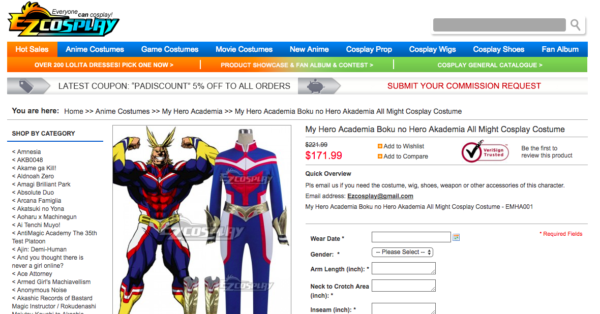
The winner of the #5 slot goes to yet another Big 4 pattern fail, and also happens to be a Vogue pattern. Again.

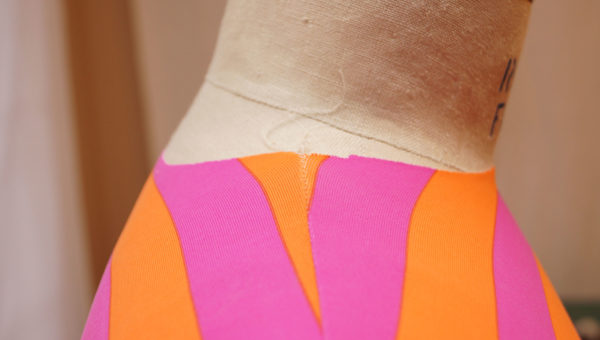
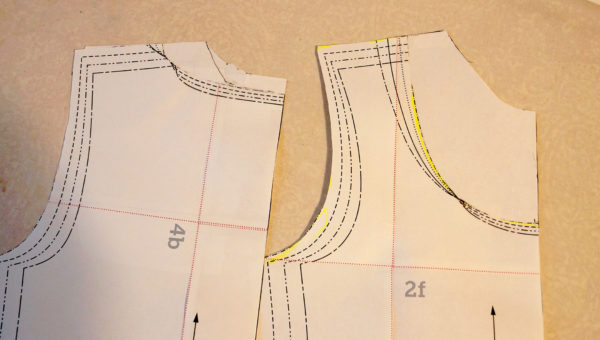
Menswear patterns are few and far between, and more formal menswear? Well, it’s pretty much only Big 4 that really puts out anything. So when the husband-unit requested a suit jacket, I got a few Vogue patterns thinking, how bad could it be? He wanted a peaked lapel, so I figured I could make Vogue V4988 work.

So. Much. Bad. I’ve already thrown it out and I’m not even done with the coat. I mean, I altered the suit to fit his boxer-shoulders, made lining patterns, absorbed Craftsy classes on tailoring, INTERVIEWED AN ACTUAL SAVILE ROW TAILOR, and still hate it so much I threw the pattern out before I have even finished.

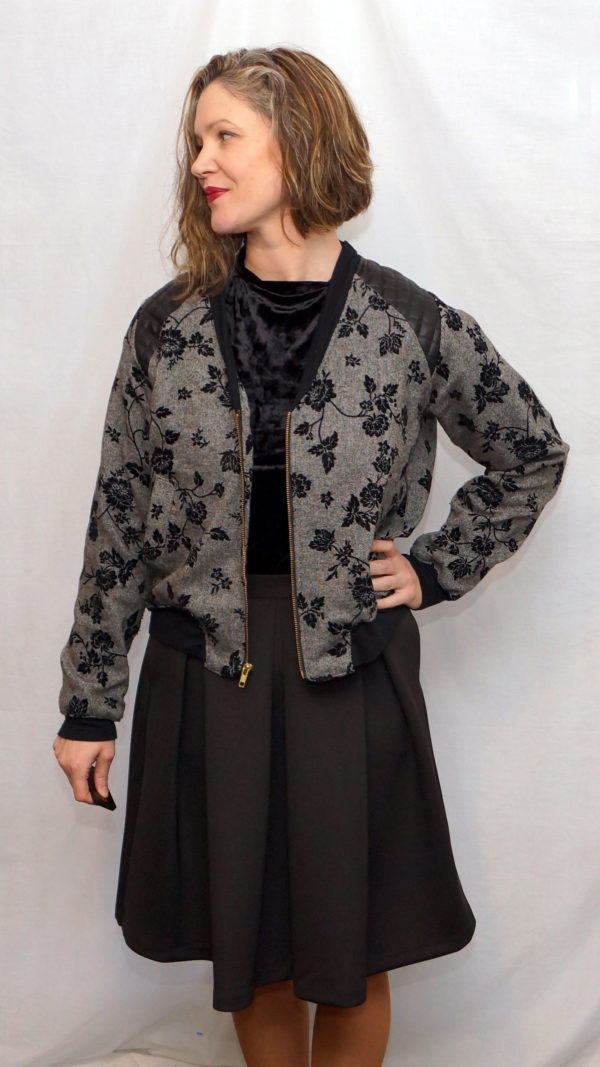
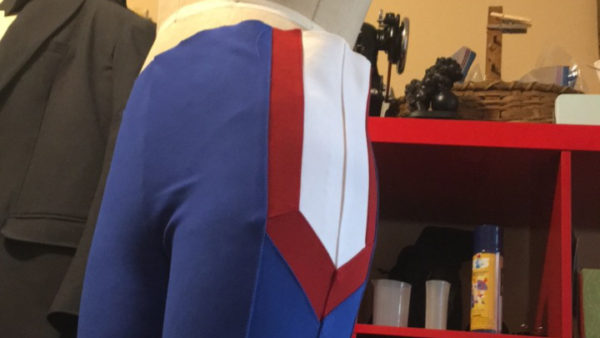
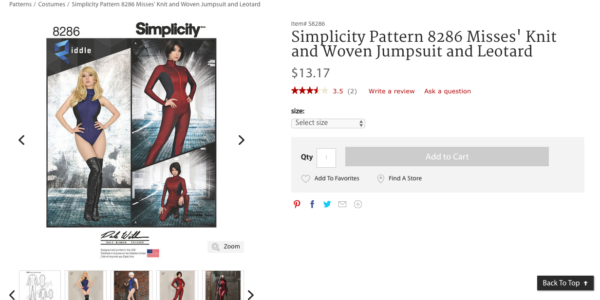
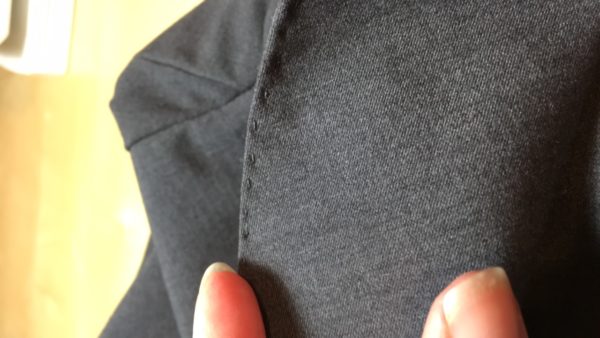
Needless to say, I’m putting myself on a Big 4 moratorium. The exception will be an already-owned Butterick B5526. In fact, I’ve finally added an inch in length to the Butterick pattern across all pieces, graded the waist in a full size across all pieces (more of my Lazy FBA ™), have one 60% done (below) and two more cut out in the project basket (the project basket is new, and I’ll have to address that another time.)  However, as much as I love to peruse the Big 4 patterns, especially the Vogue designer patterns, I just can’t justify the failure rate. Sure, I’ve had a few successes, but not enough to justify the expense. In the long run and in MY experience, a more expensive Indie pattern is more likely to become a TNT (tried and true) pattern than a Big 4. While I haven’t blogged as much as I’ve sewn, my successes are most often Indie patterns.

I hope more people put out Fails and Successes posts – I just love round up posts in general – it’s like everything I love about magazines, and nothing I hate about Pinterest.

Edited to add this is in, uh, solidarity? LOL. This is the brainchild of Crafting A Rainbow. Gillian came up with this, not me. 😀 I just think it’s a great idea.


TILLY & THE BUTTONS: Agnes

We need to talk about Agnes. HAHAHA. I have such extreme RBF! I can’t help it!

Seriously, though, Tilly & The Buttons Agnes is a SUPER cute top, right? And if you’re the tiny size with an A-cup, I’m sure it will come out super cute just like on the pattern cover, even if you’re a beginner sewist.

Let’s talk about everyone else though… I bought the pattern during the 20% off Black Friday sale, but it’s been out for a few years. If you’re about to sew this pattern, or you have and you don’t look like the cute girl on the cover, let’s go over it. It has some grading errors, it’s missing some information, and I’m 5’9″-ish, 150 lbs-ish, and in the realm of a 36D – I’m not tiny. So, I’ve made a list of some things I’ve worked out.

1. Elastic markings: The pattern elastic placement on both the bust and the arm is not graded out to larger sizes. If you place the elastic where it says, then your ruching will not go to the seam allowance, and your ruching will start too low.

You need to move the placement in correlation to the size you are cutting.

2. Starting the elastic and the top and stretching down, as per the instructions, will leave you with a flat 1/3″-1/2″ anchor point at the top. Reverse the anchor point FROM the bottom and stretch UP.

Serious grandma boobs happening. The fabric isn’t the best, but also that flat part up top where I anchored the elastic isn’t helping anyone’s boobs, let alone my wide-set D-cups.

3. See that wrinkle on top of my boobs? Normally that indicates I need a full bust adjustment (FBA), however, in the case of the Agnes, the armscye is too long, and the armpits are too low, which also causes that wrinkle. I should take a wedge out of the armscye, but I got lazy/irritated towards the end and just shaved some out some of the pit with my serger. Besides – stretchy fabric should accommodate my bust with my size – so really, on my body, it’s the armscye that is primarily the issue. Looking through Instagram and seeing others’ Agnes tops, I’m not alone. There’s a lot of bust wrinkles across a lot of sizes, and when you see a photo with an arm out stretched, you can see the gap in the armpit. Looking at the last of these green shirt versions, you can see I’ve still got some gap.

4. The direction of stretch on the neckband. This is something I almost didn’t catch because I’ve done so many knit garments, I do a lot of it on autopilot. But going through Instagram and seeing a ton of bagged-out necklines and comments about how they had to remove length in the neckband, I realized a beginner wouldn’t know that you need to reverse the direction of stretch on a neckband.

The neckband is actually graded perfectly IF you know to switch it so the greatest amount of stretch goes the short way, as in image above.

I’ve done my fair share of pattern testing, and I’m mostly disappointed none of the testers caught these issues. This pattern has been out for awhile, but Tilly’s customer base is mostly beginners, and I don’t expect they’d catch these issues, but testers should be experienced enough to go through the steps and pattern pieces with beginners in mind and catch these issues, especially the grading marks.

I also mitered the neckband to make a V at the point of ruching, and did the neckband last, instead of before the ruching as the instructions indicate, but that is a personal preference, so I’m not including that as a fix-it item.

A note about fabrics. I made this top in everything. The top is a cotton/poly sweater knit from Joann’s, the grandma boobs is a poly-something from Mill End, the green/white is a very yummy cotton double-sided knit from Britex, and this monstrosity below is a rayon blend from Girl Charlee – I like getting their weird off-print clearance fabrics for testing:

The pattern works well with various percentages of stretch…the Hawaiian acid trip has the most stretch, then the sweater stripe, then the Grinch green stripe, and last, the grandma metallic gold has the least amount of stretch.

I’m still WAY more in support of indie patterns overall, but this will probably be my last Tilly pattern. I’ve sewn the Miette skirt up a few years ago and wasn’t in love with that one either – so let’s just say they’re not for me. It’s an ok pattern, but for me, it’s no Renfrew. I still wear my stack of Renfrews, including in my last Ginger Jeans post. I’d rather hack the Renfrew to accommodate ruching before I wrestle with the Agnes anymore.

Or maybe there are some other go-to knit shirts out there I need to play with? I understand the Grainline Linden is popular. I might go that route next.

CLOSET CASE PATTERNS: Skinny Ginger Jeans

I DID IT! I’ve had the Closet Case Patterns Skinny Ginger Jeans pattern since June 2015. (sheepish grin)

Now, normally I’m not afraid to sew anything – I’m not really afraid to fail. It’s just fabric, and it’s always a lesson. However… My pants fitting has been on the scale from “Meh” to “I-JUST-BLEW-OUT-THE-ASS-OF-MY-PANTS-AT-COSTCO.” It’s true. Normally I have to scoop out the crotch, or add some hip length – I’m tall with most of it in my torso. Thanks to our amazing sewing community, Bad Mom, Good Mom pointed out on my Colette Juniper pants, most of my fit issues could be fixed with going up a larger backside size than the front. I’ve made about a dozen pairs of pants, but nothing quite like my Colette Clovers that actually split up the backside while picking up a case of water at Costco. That has steered me clear of close-fitting pants for a few years.

I had enough of the fear, and frankly, everyone else and their dog has made Ginger jeans now, so I was bordering on being pathetic.


I picked up a 1.5 yard remnant at Modern Domestic…it wasn’t labeled and it’s not on their site, but knowing MD, I’d says it’s a Robert Kaufman, probably close to this 8.6 oz stretch denim here. I paid about $25, so that’s about right MD would be a bit higher priced than fabric.com as they’re my locally owned fabric store. I would definitely recommend it and use it again.

I was going for a hopefully wearable muslin, as I wasn’t ready to cut into the Cone Mills I’ve been hoarding or the velvet bottom weight I have from Britex, but actual muslin fabric wasn’t going to test correctly, so hell with it, right? Just do it.

I only had a hot pink denim zip in my stash (hee hee), and I FUBARed the placement a bit – it’s about 3/8″ off – I read “line up edge of zip” wrong at the fly. Whatevs. I also have just a regular button on them, and skipped the belt loops – I’m still having top stitch thread issues. In fact, half of the top stitching is popping off a bit, but that’s a technical issue on my end, not the pattern. I tried to do it on the Janome and on the Viking, but I’m going to have to break out one of the vintage machines IF I’m to get that top stitch thread to work – or I may just ditch it. I’m not that in love with it anyway.

What do you think of the pocket placement? Should I move them up a cm? I can’t tell. I’m not a good judge of my own butt. I took a 3 inch wedge out of the back yoke – which I need to blend better on future pairs, but other than that, it’s pretty spot on. I’ve worn these for days, and this is fresh out of the dryer, so they’re a bit “packed sausage” at this point. They will loosen up a smidge, but the denim is really good and there’s no bagging out anywhere. You can see below where the wedge of the yoke meets the back seem of the butt and there’s a little wrinkle where it wasn’t blended well on this version.

For me, the waist is now at 0, the largest point of my butt/hips almost at a 14, and the rest is at 12. I’m fairly hourglass shaped, and gain/lose weight pretty evenly in that hourglass ratio, so this is normal for me.

Here’s the IG post of that wedge – I didn’t get a “good camera” shot of it:

The legs fit perfectly. They’re bunching up a bit because I’m refusing to hem them.

My husband keeps teasing me that he’s going to hem them. I don’t want to….I want to leave them raw. We’ll see. I don’t know what the fashion consensus is on that. This is the full length of the pattern without any removed, as reference if you’re looking to make the pattern.

Sexy pants. LOL. Didn’t the 80s just totally ruin that word? Sexy. Ew. But the pocket stay on the inside?!? Holy crap. It’s like…it’s like a smoothing magic, without the discomfort of actual gross sweaty spanx or something.


Please excuse my mud room – it’s Oregon and we’re in the rain-half of the year.

Post post notes:

I had the pattern printed before the latest updates to the pattern. I think there have been 2 updates, and my version is smack in the middle. Meaning, IF I would have had the latest version, I would have probably scooped the crotch out the cm or so that was put in, and taken more out of the yoke? I think? Regardless, I did baste the sides, and the construction of the pants makes fitting on-the-fly really easy.

Let’s talk drafting for a minute. I’m just now learning pattern drafting and it looks so much easier than it truly is. The base pattern/sloper, or block, must be good before moving on to style, and then eventually grading to different sizes. To have the success of these jeans on the level that Closet Case has had, which is near cult status…well, they have the magical block. Will this fit everyone as easily as me? Well, no. But, again as reference, I fit J Crew/Banana Republic size 8 or 10 off the rack just fine. Sometimes I have broader shoulders/bust and the waist is too big, or whatever, but for the most part, I’m shaped pretty RTW-friendly. So, if that’s you, then this pattern will be GOLD!

If that is NOT you, Cashmerette JUST released the Ames jeans in different body shapes. While I have not sewn any Cashmerette, I have seen the detail work that has gone into their drafting, not to mention their HUGE fan base. Sewists aren’t fans of crap pattern companies. Well, I take that back, Big 4 still exists, but I submit that’s because they’re cheap (read that how you will.) Indie patterns cost more, and must be made better to succeed, and damn if Cashmerette hasn’t succeeded! I can’t wait to see Cashmerette’s jeans all over the Sewscialsphere.

Final All Might Cosplay Post!

It’s done! Aaaaaah!

This is the last post for my daughter’s custom My Hero Academia All Might cosplay outfit! She loves it and it fits her perfectly.

She loves it, and really that is all that matters.

The top has a full jacket zip so she can wear the top casually, as I knew she’d want to later.

I used 3-inch elastic for the waistband and covered it with a really finicky yellow ribbed Lycra to make the belt easier to deal with.

The pants are fine cropped as she’ll cover a pair of boots with the remainder of the yellow fabric, but can also wear them whenever – because she’s 13 and can get away with that!

We’re both happy with the end result, and I’m SO GLAD to be done. I’m glad I CAN do something this epic, it was a lot of fun, but it’s exhausting! I need to make some easy stuff before I take on something epic again!

She was a good sport, and we walked to a nearby park to take some action shots in the fading autumn light.

For the most part, my pattern worked really well.

I laid them out and pieced them in what seemed to be the best logical blocks to then sew together.

There were a few adjustments on the fly, like removing unnecessary Y-seams (seams that come together in a Y-formation and are more evil than anything else on earth.) I top-stitched most seams, and when inserting the zipper, I used a Gutermann clear, nylon thread so the stitching wouldn’t be visible over the alternating colors. The nylon thread isn’t the easiest to stitch with, so I didn’t do the entire outfit in it…I’m generally not a fan of the thread, but it was perfect for the hem and the zip insertion. LOTS of hand-basting and tacking the zip in before sewing to get each of those pieced sections to line up across the chest! LOTS.

And we’re done! YAY! Post 1, Post 2, Post 3, and Post 4 if you’re interested in the entire process.

Are you done with your Halloween sewing?


Custom Cosplay – My Hero Academia’s All Might – Part 4

Here we go. The last part of making the custom pattern. You’re going to need a roll of paper. I’m using an inexpensive roll of art easel paper from IKEA. You can use freezer paper, craft paper, Swedish tracing paper – whatever floats your boat. If this is something to be done again and again, Swedish tracing paper or brown craft paper is more long-lasting. I don’t use freezer paper anymore, and this is a one-trick-pony for me, so using the paint roll was the best option for me.

You’re also going to want a few more colors of pens/pencils that you didn’t use in your design.

I used a black Sharpie to cut my piecing lines. Naturally, I edited as I went x-marking out lines I decided against. I numbered my pattern pieces so that when I come back to this photo later with the pieces, I can see where it goes. You’re not going to remember all of your edits, so make sure you take a lot of photos BEFORE you cut, take notes if you need, etc. There will be edits on-the-fly as well…the better organized you are, the better you’ll be prepared.

I drew green lines across all of my pattern before cutting into pieces. These green lines indicate the direction of greatest stretch. You want the greatest amount of stretch in your fabric to go around your body, not up/down. This will be key in order to not get weird warping, and to make sure the garments will stretch around your body. Unlike in quilting, which lays flat, this will be 3-dimmentional around a body and needs to be designed that way. Quilting, you can make a bunch of strips on-grain and cut-to-length. Apparel, the grain must be in line with the body.

I used a yellow highlighter for areas I wanted to add extra seam allowance, such as the middle front of the top, so I could have enough seam allowance to add a zipper.  I cut the pieces and glued them to the roll of paper. Using the edge of a ruler against the pieces, I added 3/8″ seam allowance for most edges, except the yellow, I added 1 full inch. Curves are tricky – I favor pivoting the ruler around the edge and making dots to connect. You CAN do the trick where you tape 2 pencils together and it will be about 3/8″ between each leaded point….but there’s a LOT of tracing here, and I wanted to be more accurate. There are also specially made tracing wheels and all that jazz out there, but I chose not to go that route.

I had my tape handy for any edits or pieces that needed more securing.

A mistake I made was forgetting to mark edges that already had seam allowance. Luckily I caught it before I got too far along – so don’t do as I did. Use another color, like I used orange here when I caught it, and mark edges that already have seam allowance.

Another option is to add seam allowance as you cut either by cutting with a ruler guide, or marking directly on fabric as I did above on my leggings pieces. This works if you only have a few things and you’re not going to be interrupted in the middle of all of your work because it’s difficult to remember all the details on the fly – and cutting is permanent. So…you make a mistake this way, you can’t go back. I don’t recommend it, in general. This was for an example, and I knew during cutting the leggings, I had the time to get it all done at once. Even then…I did make a mistake, but had enough fabric to correct it. Barely. It’s better NOT to leave things to chance, or to memory in this case.

Here is why we put the green lines of grain/stretch on the pattern pieces. Would you remember which piece goes which direction once you have them cut out like this? Not likely. And more importantly, why would you want to? For the red, I had enough strips that I cut a couple yards on grain, and a few on the 45-degree (remember I made all angles 45-degrees to be easier later?), and lined up patter pieces on the corresponding grain-strips. I have fewer patterns in the white, so they got cut out one at a time. All pattern pieces are cut on the doubled fabric, so I’ve got my mirror images for left/right sides cut at the same time.

I highly recommend you stay organized. Something you learn in quilting is the magic of ziploc bags. Keep your corresponding parts together. I have a bag for sleeves, one for shirt front, one for shirt back, and one for leggings. Pin your pieces to the paper pattern pieces and keep them organized. Take a lot of photos.

Next is piecing it all together.

Continue to the Final Post.

New York Comic Con and Sewing

Singer Sponsors NYCC

I am SO inspired by New York Comic Con this year. Granted, maybe I would have been in years past if I was sewing cosplay then, but you tend to find things as you find them, you know?

See the comment on the IG post above about a “repair station?” How freakin’ cool is that? Sign me up to host a repair station at a comic con! I couldn’t find such a listing on their event site, but honestly, most event sites are pretty hard to navigate anyway, so I may have missed that one.

Singer is a sponsor, and…

Mood at NYCC 2017

Mood Fabrics! Incidentally, Mood is also running a prize for homemade costumes this month with the hashtag #MoodMadeCostume17.  

AND….

Brother Sewing NYCC 2017

Brother Sewing USA has a booth, AND, naturally, …

Simplicity NYCC

Simplicity has really been growing their cosplay/costume section lately, so that’s a given, right? AND…

Dritz / Prym booth at NYCC 2017

Dritz / Prym. I could totally move into that booth. Click the link on the photo caption – there are 4 photos. My screen shot doesn’t do it justice.

There’s also a new-to-me company called Cosplay Fabrics. It looks like they have some pretty cool stuff on their site. I have no experience with them, but the more, the merrier.

This is great. I hope there are more and more people joining the sewing / DIY community. I hope to see even more sewing people and companies supporting the cosplay/comic-con/anime genres of art and sewing.

Alright, I gotta get back to my own cosplay pattern making, currently in progress!

Custom Cosplay – My Hero Academia’s All Might – Part 3

For Part 3, you’re going to want a BIG eraser. Or…perhaps you have a steadier hand at hand drawing than I do? OK, for this part I wanted a BIG eraser. I also relied heavily on an Omnigrid ruler and a basic French curve ruler. You could get away with other measuring tools, such as a basic ruler, and for many years, I used a plate or cup edge for curves.

Couple things to keep in mind before drawing:

  • You’re going to have to sew these pieces together, so keep your angles as simple as possible. Everywhere I could, I used a 45-degree angle or a 90-degree angle.
  • Also filed under sewing these together, remember each piece will need a seam allowanced added. That includes the new “cut on center” lines that were used to cut full fronts/backs, as this will now have each side of front/back split into mirror images on the left/right. I’ll be adding 3/8″ to each of mine. “Cut On Center” is now +3/8″ to allow for sewing both sides together.
  • Try to keep your lines to a uniform size, if you can. Keeping my lines to 1″+ 3/8″ seam allowance on both sides will allow me to cut strips of 1 3/4″ that can be cut to lengths needed.
  • Remember to match up bottoms to tops, and backs-to-fronts through the sleeves – more on that later.
  • Colored pencils are your friend. You’re going to want to have these colored the final color, numbered, and labeled left/right on the front/back so you remember to cut mirrored images in the same color. Do yourself a favor, and do it as you go.
  • Have an eraser close by. It’s easier to draw your basic lines, then erase connecting/crossover lines.

An Omnigrid is great because it has 45-degree markers on it, and I can line up a previously drawn line under the ruler, add an inch over, keep it parallel, and draw the next line. It’s not necessary, just easier. color as you go, so you don’t get confused as to which line is connecting to where.

When you’re ready to match patterns on the shirt front and back, make sure the BOTTOM of the shirts are matched up, NOT the arm whole aka armscye. The armscye may not match due to the curvature of the sleeve inset, so match the hems. Put your first design on top of your next piece and match up your starting points. This is also where it is good if you’re using uniform sizing and angles. I just had to notch where the top of the red line started, draw a 1″ thick line of red at a 45-degree angle, and the rest falls into place.

See my arrow? There’s a little red line there – that is where I marked my start so I could match it up. When I go to match this to the leggings, I’ll match up the side seams of the leggings to the side seams of the top.

But first, let’s talk about sleeves. “Walking up a seam line” is exactly what it sounds like it is…you want to match up the sleeve head curve to the shirt-body sleeve hole (armscye) 1 cm at a time, until you get to a line, and mark that part on the sleeve, walk up to next mark, and so on. Repeat on both front and back, then connect and color your marks.

When you’re done with your top pieces, they will look something like this:

Next, you’re ready to line up your bottoms and match your lines. Now it might be late to add, but since I just remembered it…if you’re hacking patterns like I am, please be sure both patterns have the same seam allowance…if my bottoms have a 5/8″ seam allowance, and my top has 3/8″ – then my matching is going to be 1/2″ off on both sides (1/4″ for each seam.) That would suck after all this work, amirite?

OK, other than that, since my bottom pattern is pretty easy, matching up the bottom was a cinch (famous last words):

Next up, will be pattern piecing. If you’ve ever done quilt paper piecing, the idea will be the same. If not, you’re in for a real treat. 😉 Insert sarcasm. I can’t stand paper piecing, to be honest, but I’m glad I’ve done it.

Now, this is all fly-by-the-seat-of-my-pants here…applying experience I have elsewhere. If I was going to actually make a sellable pattern from this work, I’d have to test and retest this all multiple times….I tell you this so that you know, when you buy a sewing or quilt pattern, that intellectual property they put out in the world is worked over and over and tested. I’ve done pattern testing…trust me, it takes a lot of work to even get the pattern to me to be tested. So while I put this all here for free and for fun, please know Seamwork & Sew Liberated put in the time and hours for the blocks I’m hacking, and many a quilter has spent time making paper piecing patterns for me to tinker with – off the top of my head, Elizabeth Hartman’s alphabet taught me a ton. This will be a bit different as we’re not using stiff quilting cotton – that has it’s own set of pros and cons, but hey, you can’t know what you don’t know, and if you don’t know, just go with it and have fun.

ALTERNATE ROUTE 1. You can stop here and cut out your color pieces. Make your base outfit in the base color, appliqué (sew on top) your stripes and patterns. In fact, if you’re not sure about sewing a curved line in spandex, and/or sewing 45-degree angles in spandex lycra slippery stuff, that is a good option. Bonus: no seam allowances needed.

ALTERNATE ROUTE 2. Hell, you don’t even have to sew the parts on. You could fuse them on with 2-sided interfacing – but for the love of the Iron Gods, put a piece of cotton or silk between your iron and the lycra unless you want a hot, melted mess and a ruined iron. Same bonus of no seam allowances needed.

Continue to Part 4


Custom Cosplay – My Hero Academia’s All Might – Part 2

Here we are in Part 2. In Part 1, we chose our base patterns to hack for a custom All Might cosplay costume. Being I want to get this done well before Halloween, we are truckin’ right along.

First, I altered the patterns to make the crew neck I wanted, and to widen the shoulder coverage. I sketched on the drawing the alterations I thought I would need and made those adjustments to the pattern.

Second, I made a muslin, or a fitting sample, of the pattern pieces to be sure they were where we wanted them. I drew directly on the muslin, while it was still on my daughter, the alterations that would need to be made on the final draft. The neckline needed to come down about a centimeter in the front, up about 2 cm in the back, and the leggings needed widening in the calves plus 2 inches in length added.

These alterations are pretty simple. I’ll be using knit fabric with a lot of stretch, which allows a lot of forgiveness. This isn’t like making a custom corset out of woven silk – I’d have about zero wiggle room there and would have to be much more precise. I’m going to be using a fairly thick ponte knit with rayon/nylon/spandex content. I chose a ponte because it will be thick enough to be opaque, and only have about 10% stretch so it won’t get all baggy, but will have enough stretch for movement and fit.

I let my daughter take a run at directly sketching the design on to the fabric. This route proved to be ineffective, albeit a great learning moment for her. I need more precise pattern pieces…and the ability to erase LOL. So….live and learn. As a 13 year old, she doesn’t have the experience to know what needs to line up, and where…and how pattern pieces are made. Letting her make mistakes and showing how it will be corrected is all part of the process.

I leave these here so you can see how this can go very wrong. There are ways of doing this correctly… I put tape down the centerline, because you’re only going to pattern half of the shirt front/back, add seam allowance, make a mirrored version, and combine (or add a zip if you’re making a body suit.) You *could* cut these pieces and use them as pattern pieces this way IF everything was drawn accurately. In this case, it was not, and that’s ok. There’s always a Plan B. 😀

However, I’m going to take this moment to say if you’re only making this once, which I am, don’t over think it too much. Although I will be making more accurate pattern pieces, I’m not making pattern pieces that will last. This will be a one-trick-pony.

Next post, Part 3, will have how to sketch directly on the base pattern to create pattern pieces.

Custom Cosplay – My Hero Academia’s All Might – Part 1

My oldest daughter is 13 and is having fun with cosplay. I’ve coached her through sewing a thing or two…

…and she’s put together a cosplay outfit here and there…but now she wants to be All Might, aka Toshinori Yagi, from My Hero Academia for Halloween.

This is a screenshot from a site, EZ Cosplay, where you can order a custom-fitted cosplay of the character you want.

I don’t have experience ordering from them, but honestly, that’s really not a bad price if they really fit and it comes on time.  My daughter wanted to be sure it would fit and on time, so she requested mom-help.

We have purchased things on eBay in the past, and have been perfectly happy there as well. These Attack on Titan belts were complicated, but worked out great.

Point being, however you get to your outfit is how you get to it, and it’s all about enjoying it.

For this adventure, however, we are going full custom. We looked at Simplicity’s many, many base costume/cosplay options:

This base pattern of a jumpsuit and leotard was a strong contender, but at the end of the day, I wanted my daughter to do a lot of the designing, and be able to use the restroom easily, so we opted to use a basic long sleeve t-shirt top and leggings patterns as a starting point. We have enough pattern hacking to do without having to remove panels, or deal with snap crotches. We’ve also borrowed The Hero’s Closet from the library.

It’s a great book with a lot of base patterns, and if you’re new to sewing and pattern hacking, it would be a great resource. In our instance, my daughter has me, and I’m not new to it, so we’re going to use what we have on hand.

Like I said, we’ve opted out of using a leotard or unitard, and we’re going to hack a long sleeve t-shirt and a pair of leggings. The basic t-shirt we are using is from the same Craftsy class the hoodie my daughter is wearing above, and the leggings base will be the Seamwork Manila leggings.

from the wiki on My Hero Academia

So, if you’re interested in following along, I’ll document our journey on creating a custom costume based off of these basic patterns.

Seamwork Manila
Craftsy class on sewing knits by Sew Liberated

Part 2 is here.