Pattern: Pipe Dream Pattern Company – Inbhir Nis

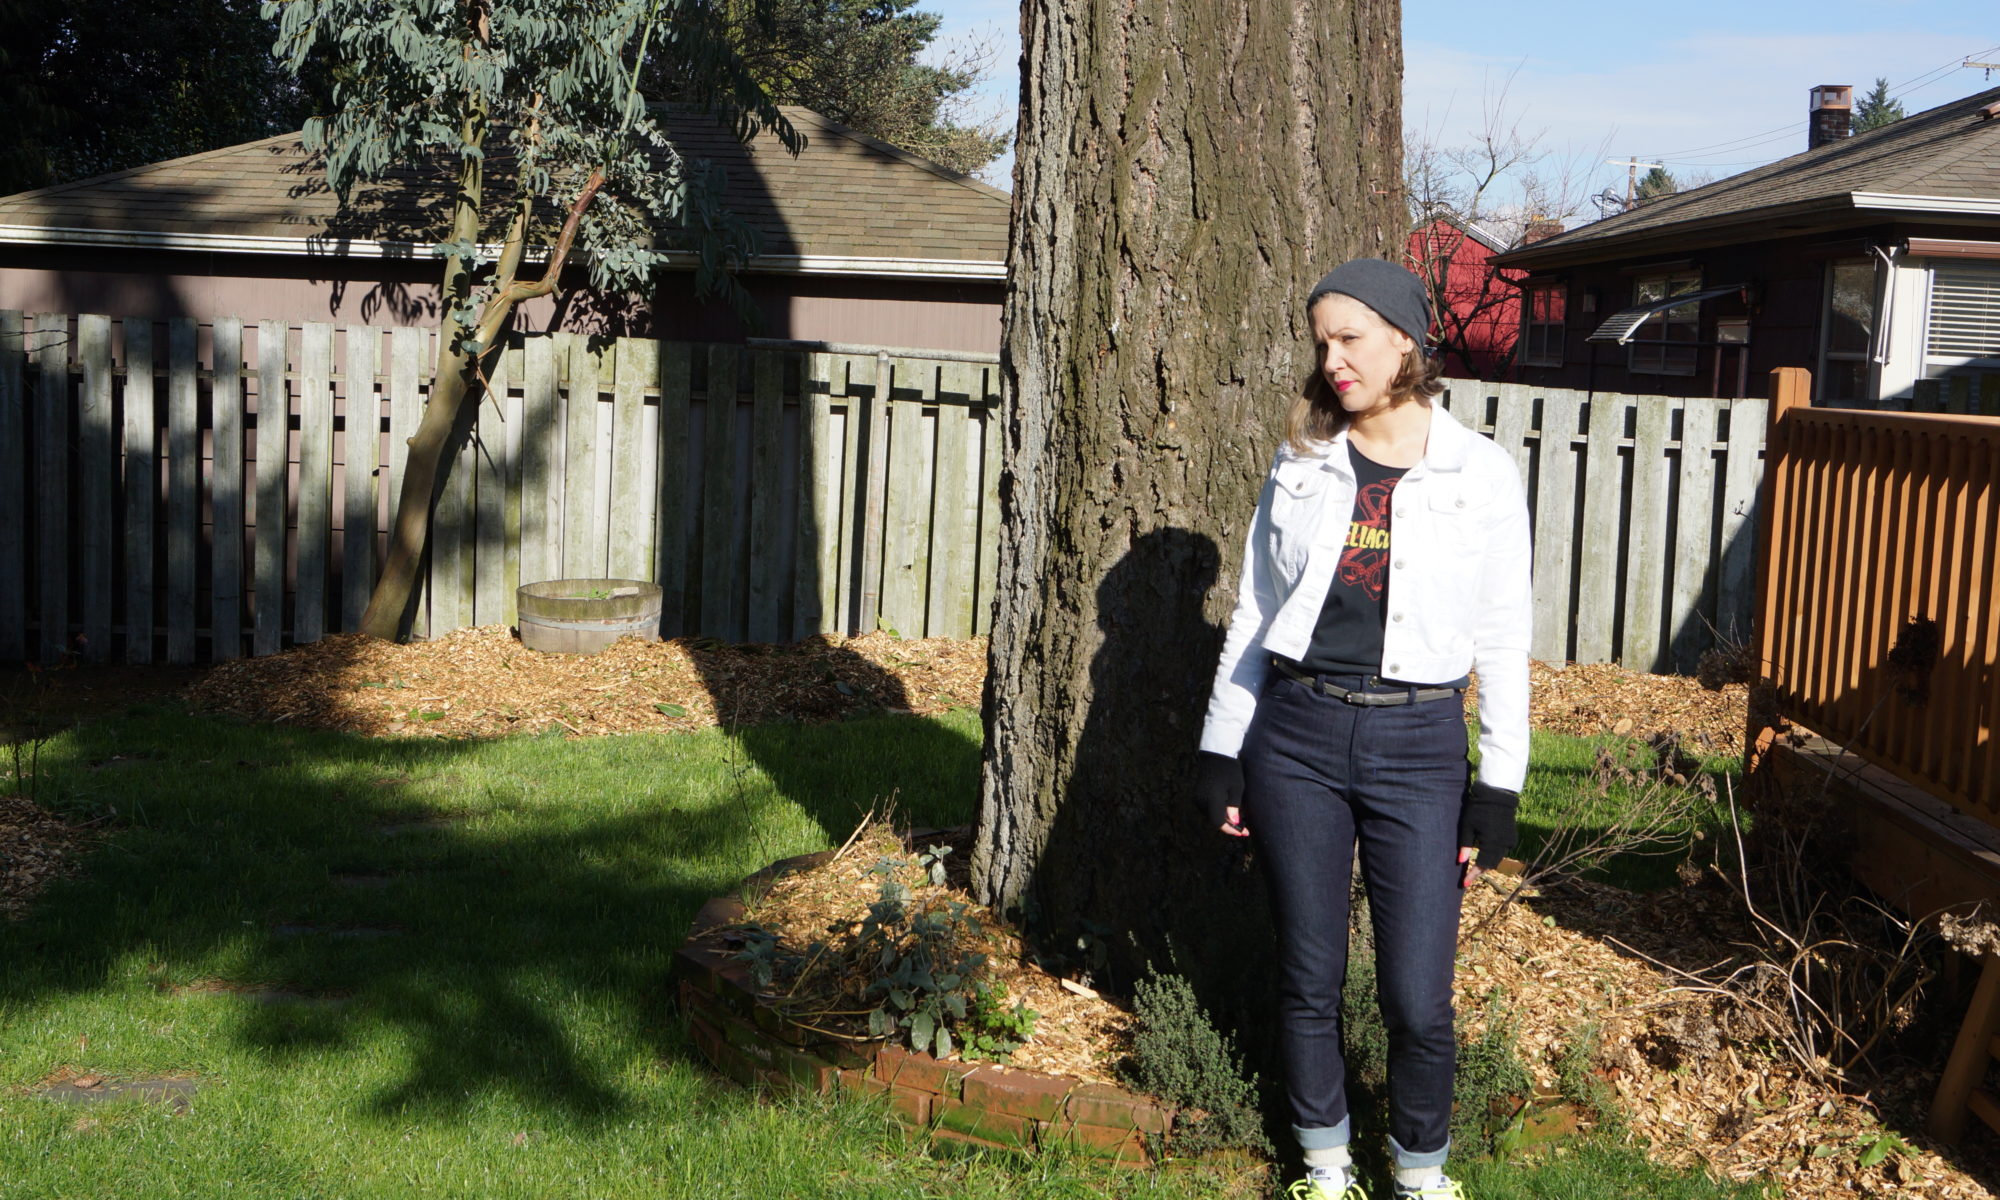
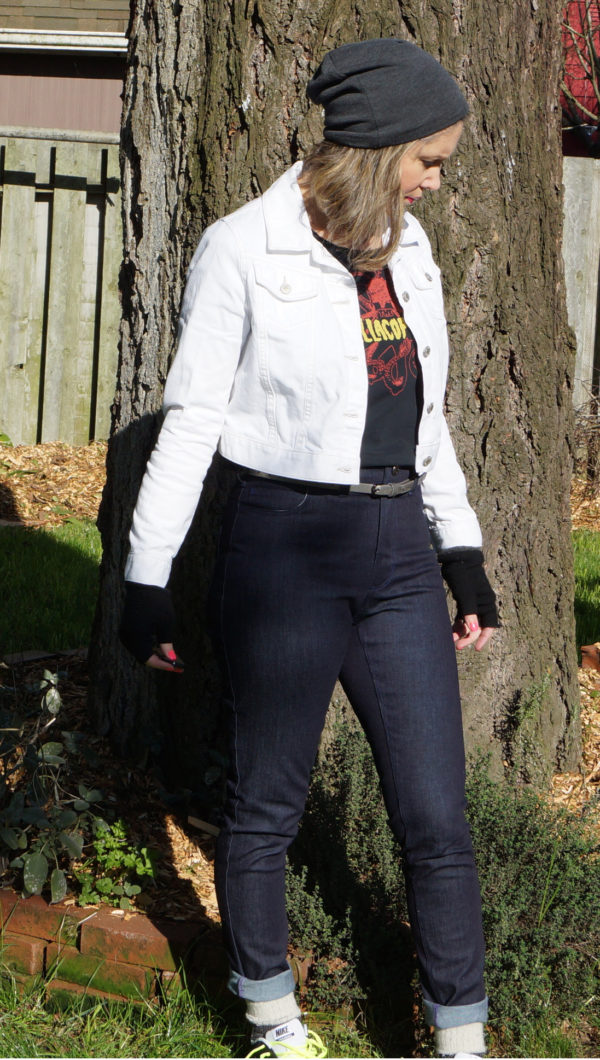
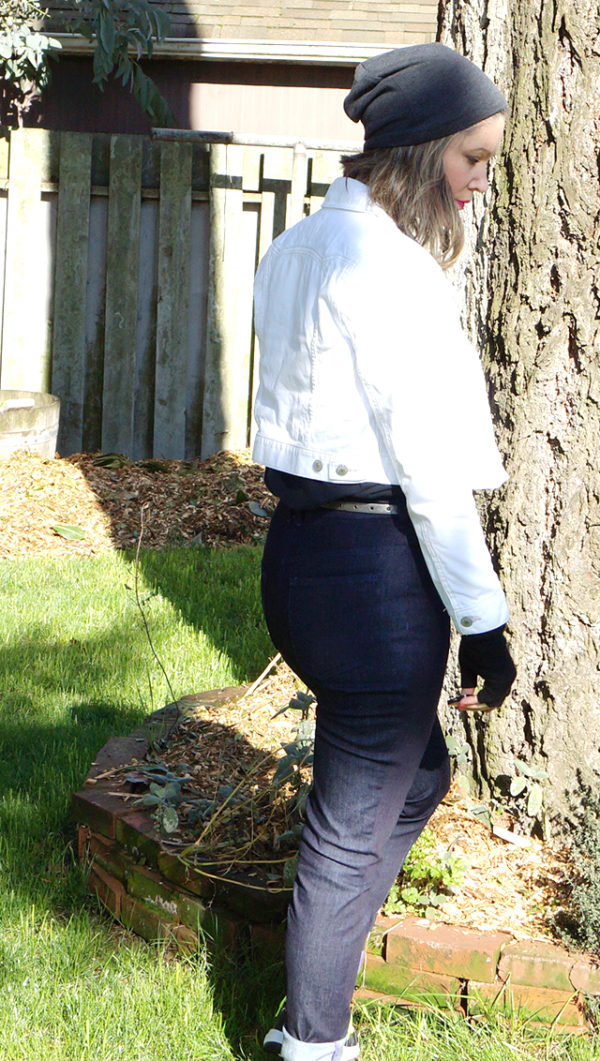
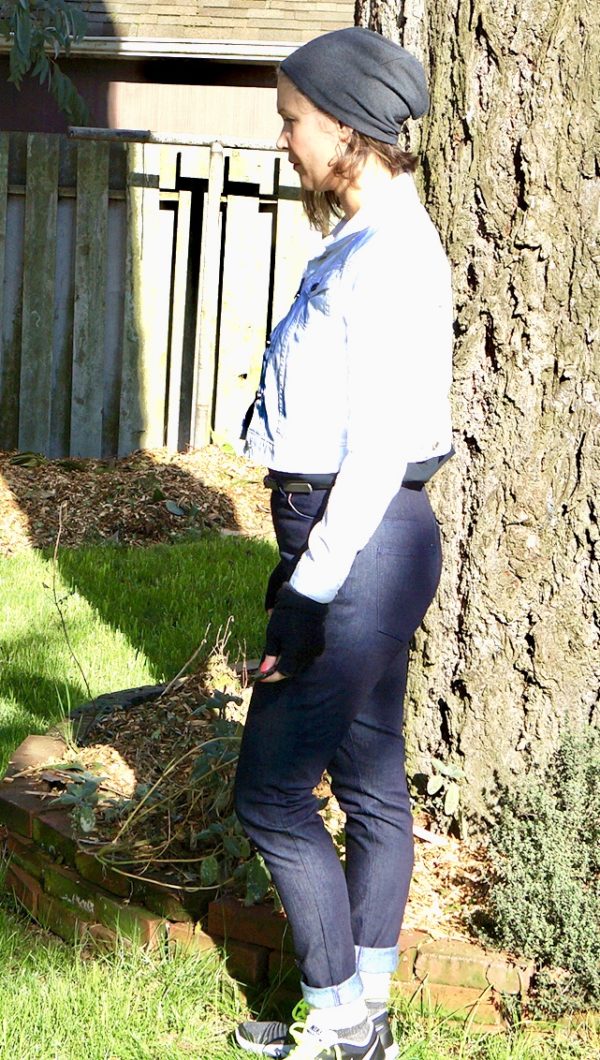
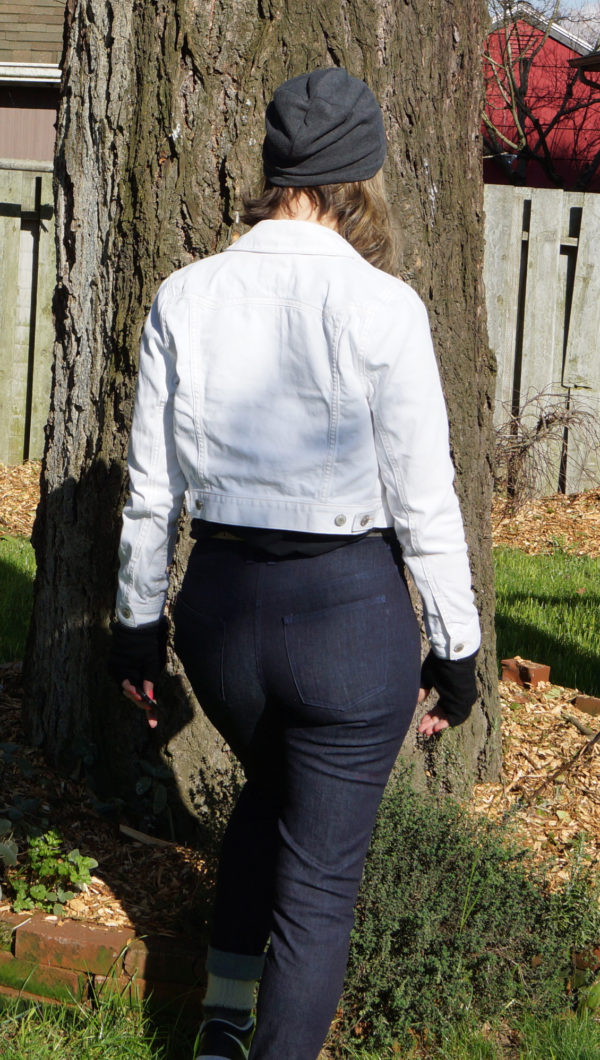
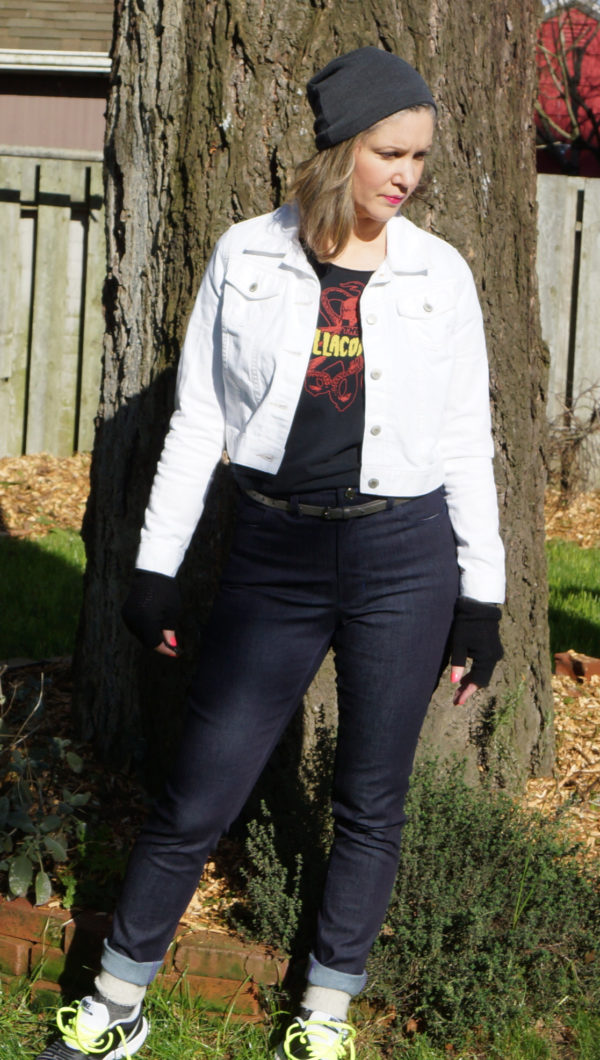
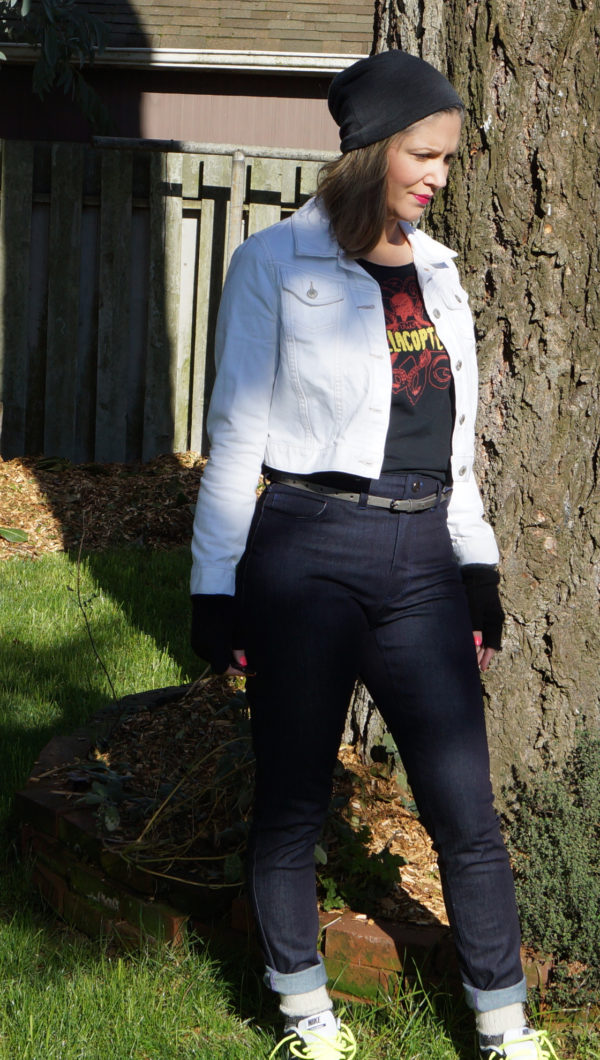
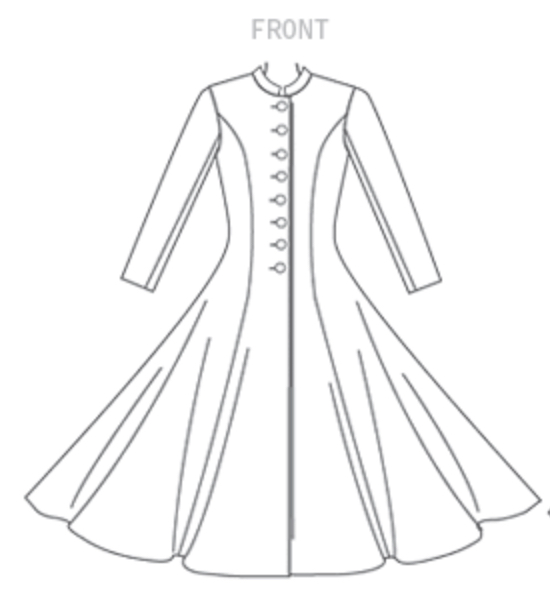
This week, Pipe Dream Patterns is showcasing the Inbhir Nis Trench Cape pattern. I tested this pattern along with the 80’s Marion denim jacket…and as I promised a post for the Trench Cape following the Marion, I guess it’s good I’m late on my promise! lol

I recommend looking at the Pipe Dreams feature post, as you can see some of the inspiration photos testers were given…how could I NOT want to test this? It’s EVERYTHING. With the vision of fabric I had in my mind, it’s Cate Blanchett’s dark, mystical roles, it’s dramatic, it’s posh, it’s my 90’s goth dreams. I learned long ago I can’t wholly subscribe to a singular aesthetic, so I asked to test both, and as a bonus I got the add-on hood pattern (to be released at a later date.) I’m the most winningest wannabe part-time old goth.

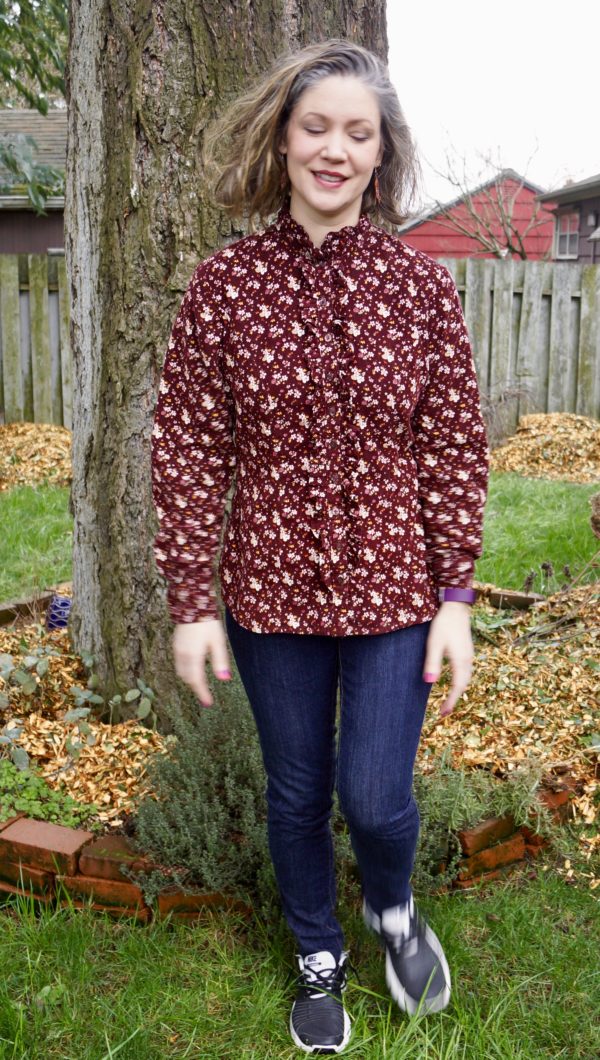
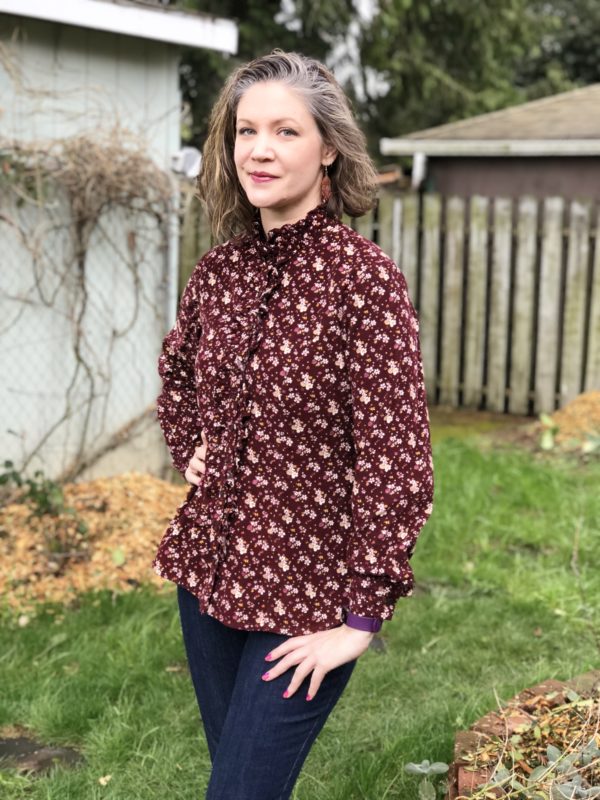
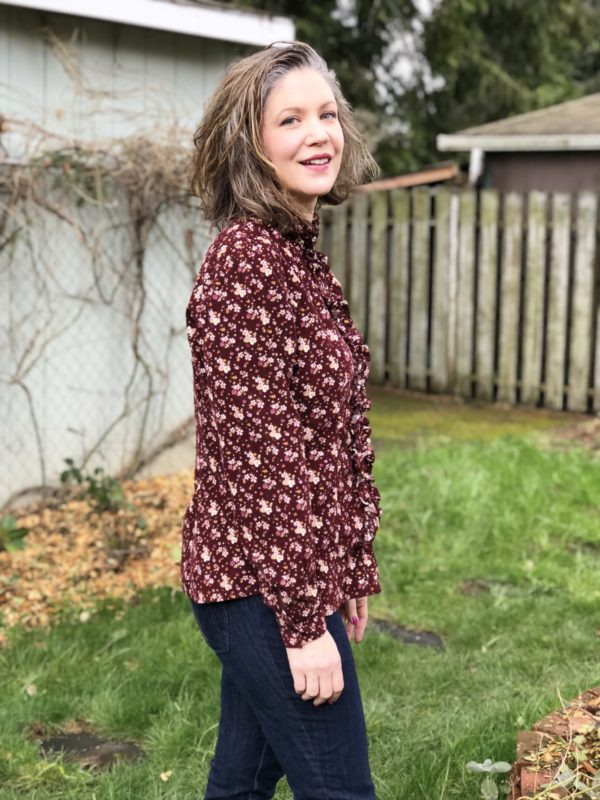
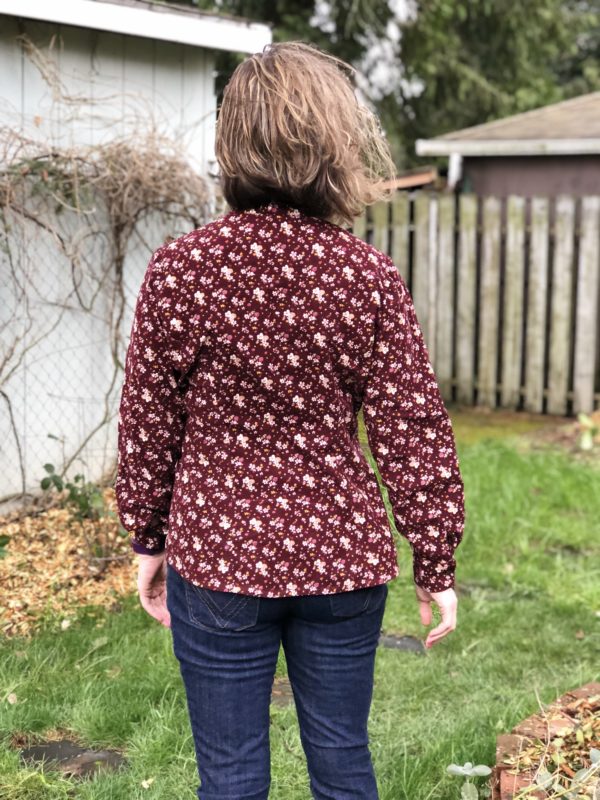
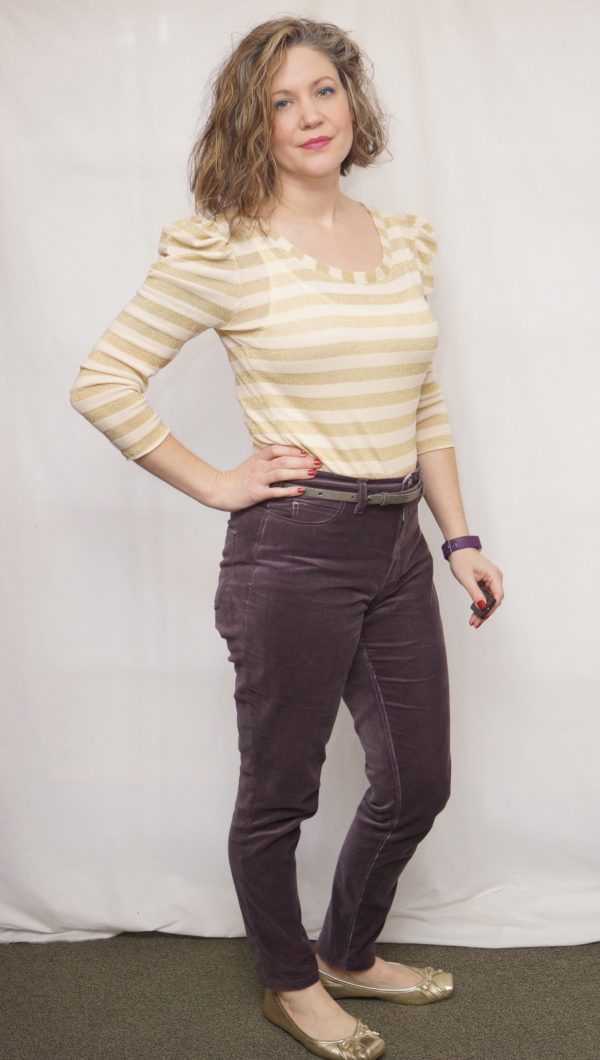
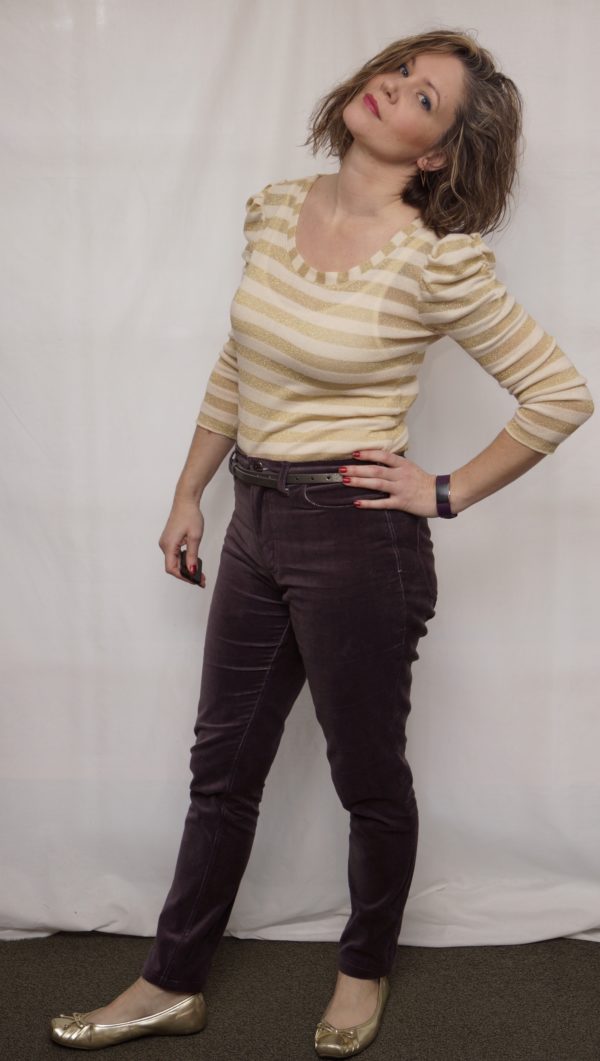
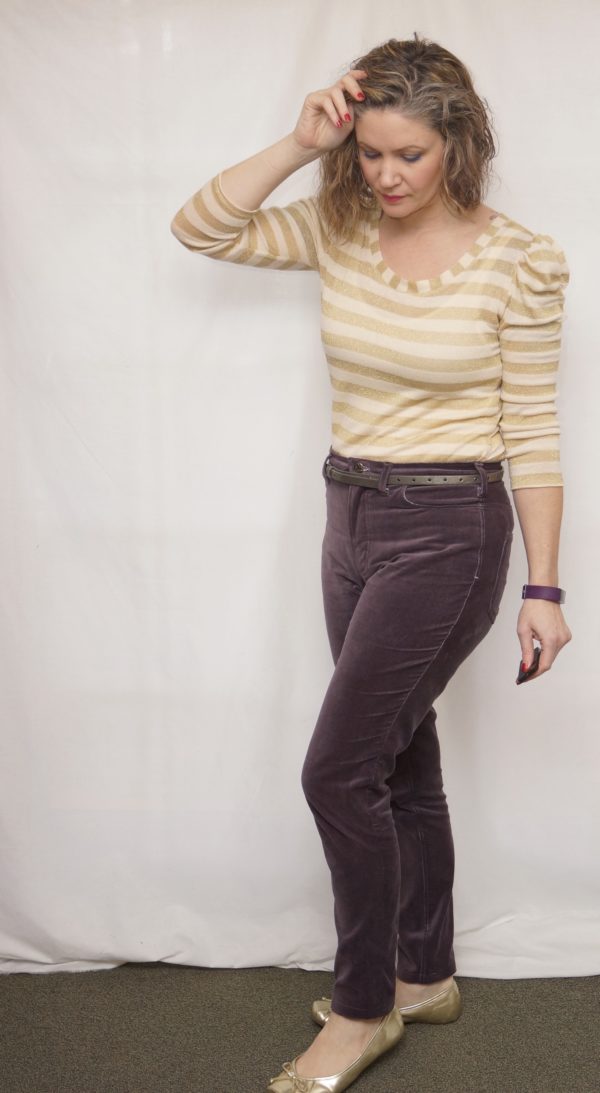
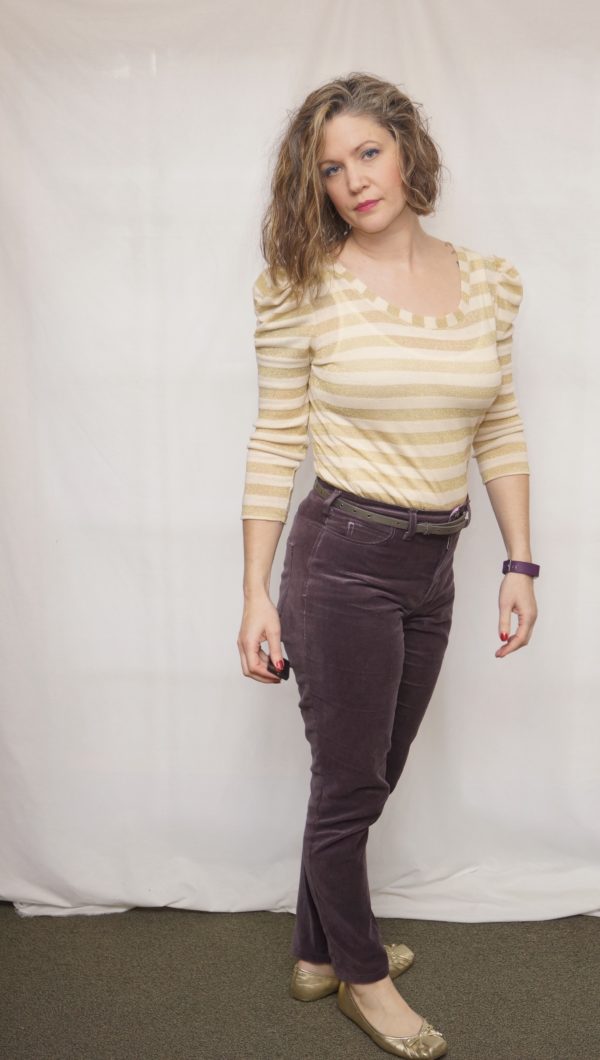
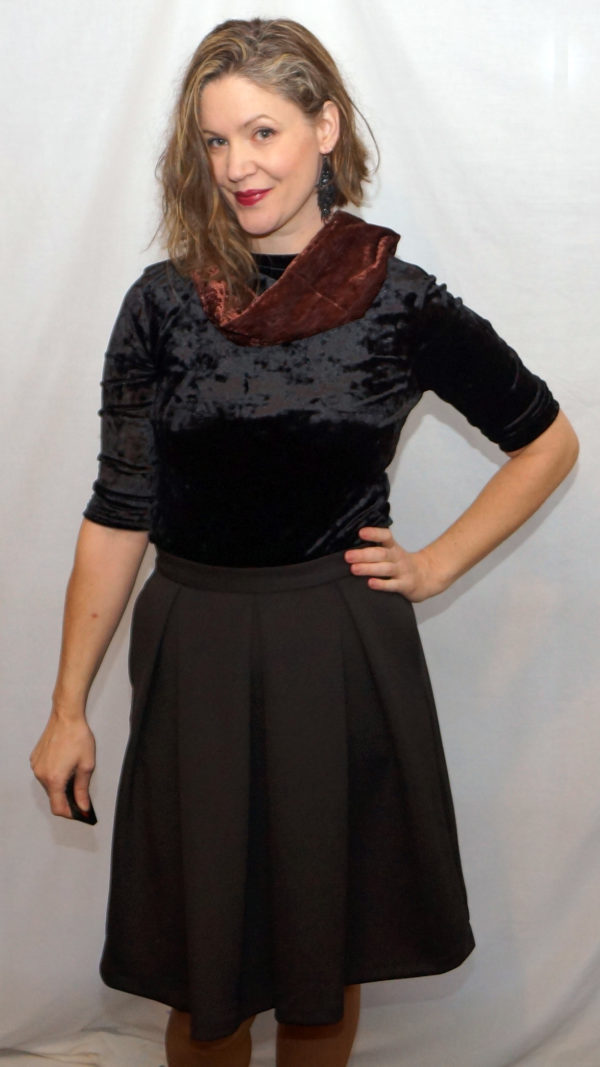
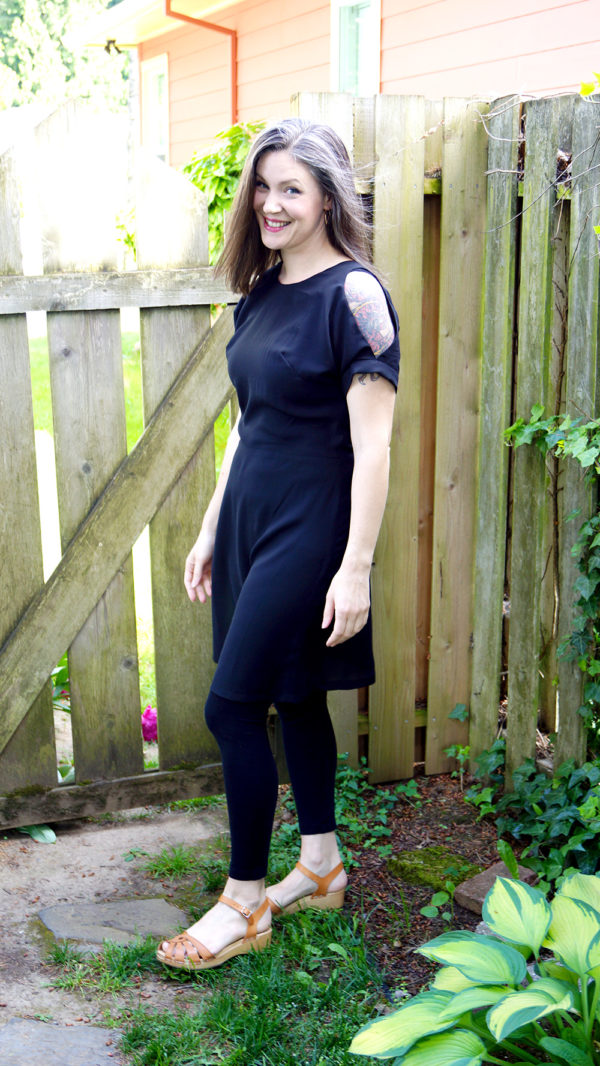
About the pattern. I’m going to give you a mix of indoor dress form and outdoor on-me shots to hopefully help illustrate the AMAZE that is this pattern.

  1. It looks SO FANCY and complicated, but I spent more time picking out lining than sewing all 3 parts. For reals. It sews up really fast.
  2. My lining went in like…PRO. Once you’ve sewn a few patterns with linings, you know how that can be….well, it can be a colossal mess on the bad days. But this…like buttah.
  3. Modular like IKEA! Want to just wear a Trench vest for that Creative Director interview? BAM! You got it. Trench cape for evening drama? Call me Anna Wintour. Need to have a proper entrance on the Depeche Mode tour? Add the hood. And that’s just with MY fabric choices. Choose a family tartan or hit up Pendleton for entirely different looks.
  4. Modifications: The trench isn’t really fitted at all, so the base block measurements don’t really come into play unless height is an issue….and with me, it is. I’m a few inches taller than the designer, so I added 2 inches in length to the trench, cape, and 10 inches to the belt length out of personal preference.

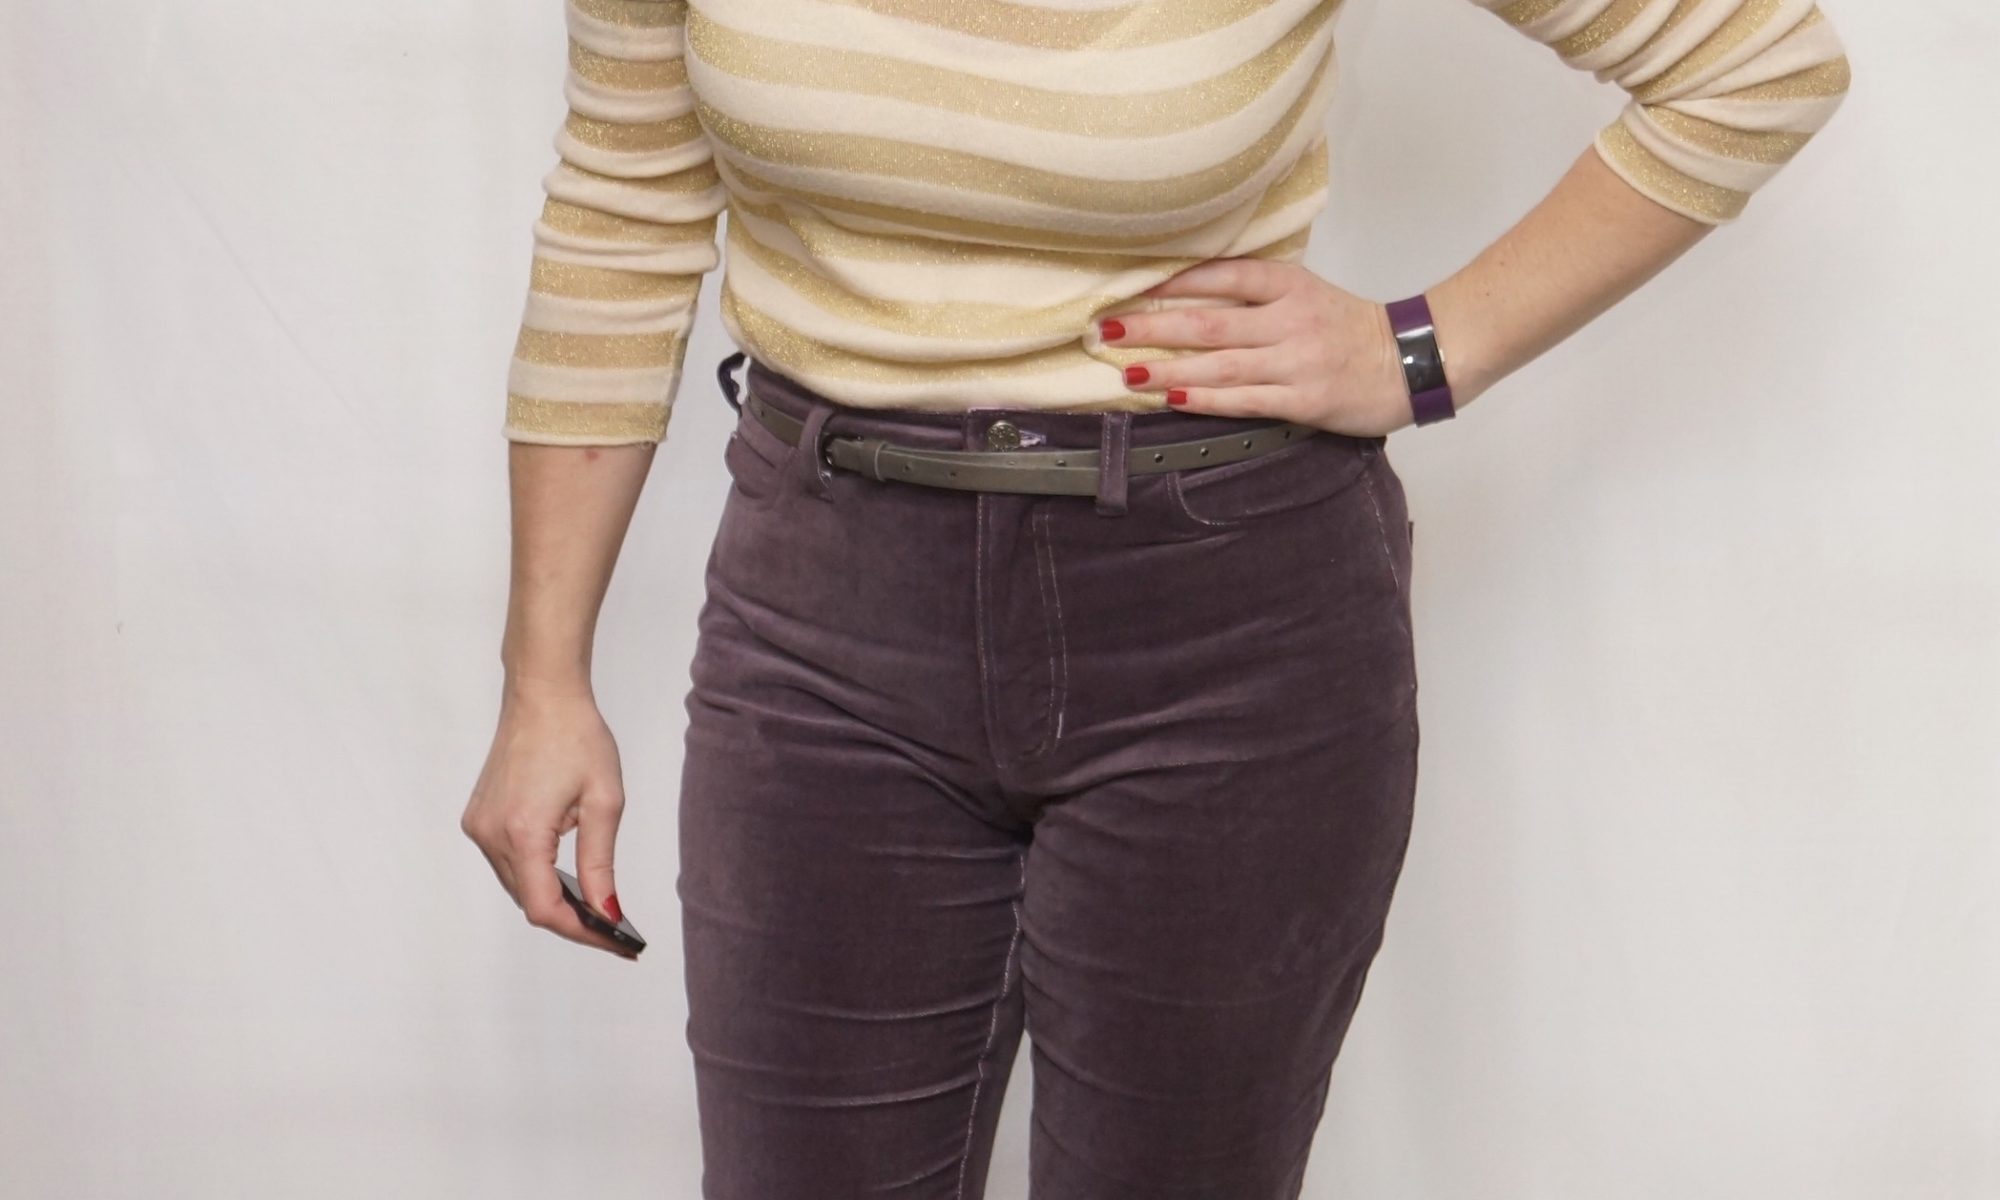
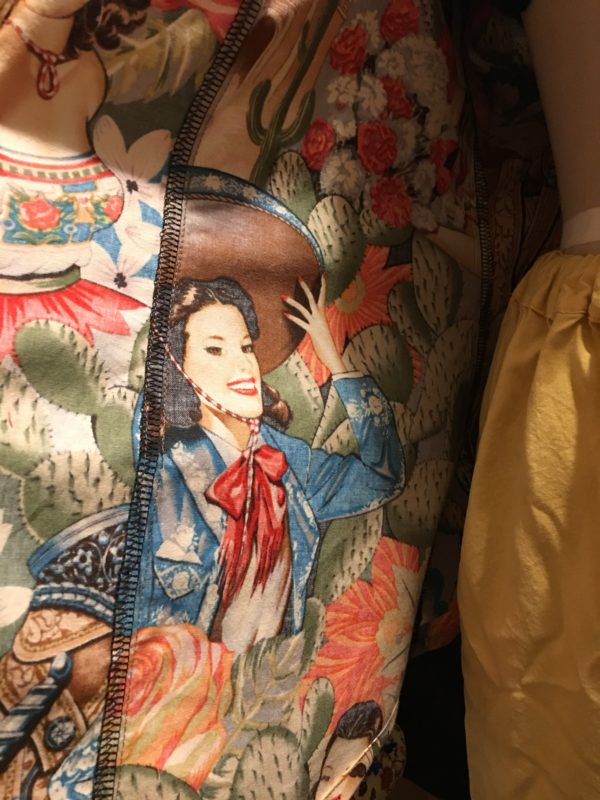
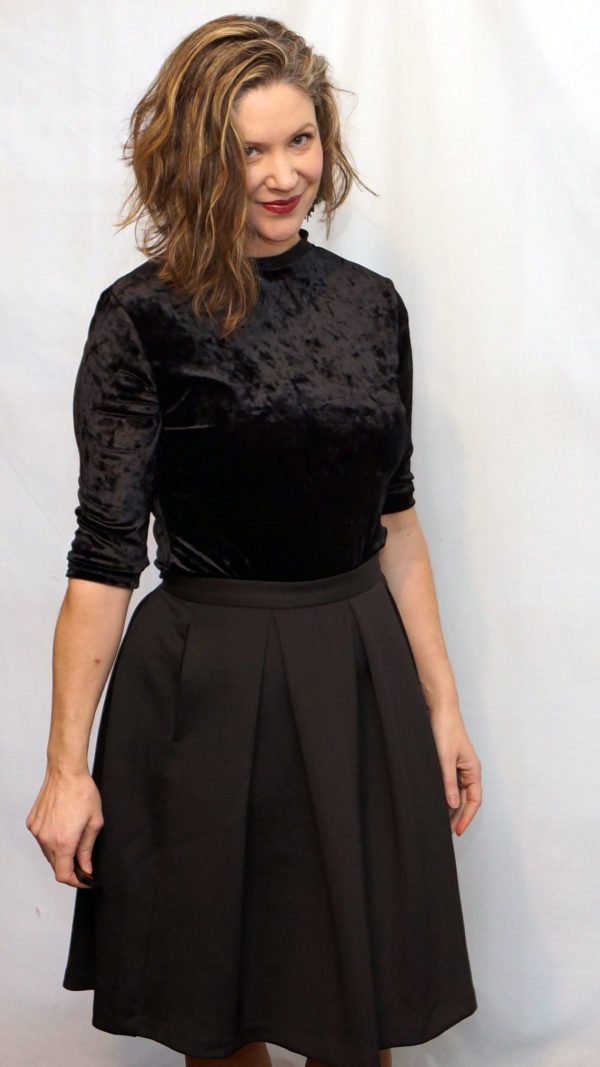
Now, let’s get on to the good stuff. I used Mood Fabrics linen suiting, underlined with a cotton flannel, and lined with a poly satin, both from Joann’s. The lining is this crushed-look poly, and it sews and feels much better than you’d expect…so, hey, when you win at Joann’s, it’s awesome. The suiting – you can look for yourself. Highly rated, heavier weight, pretty opaque. It does wrinkle as linen does, but less so both because of the weight and the underlining. I’m not mad at it, and it feels REALLY nice.

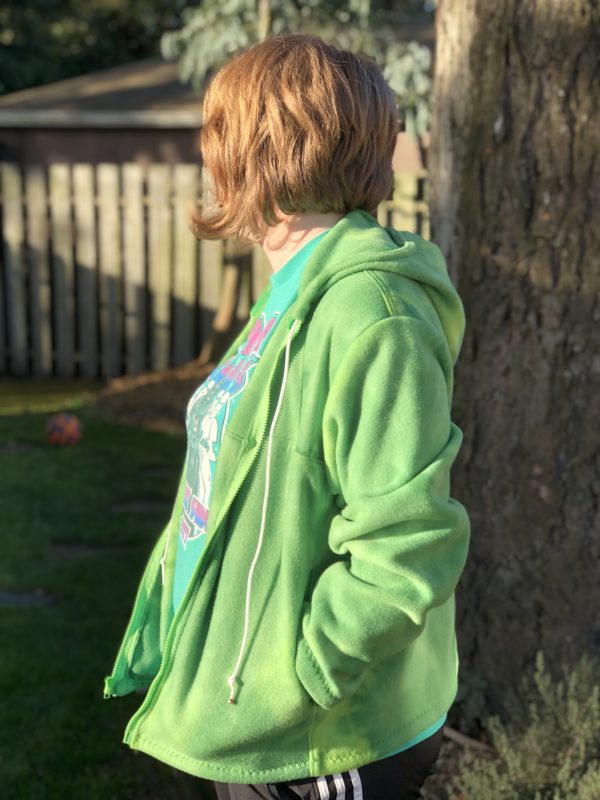
Hood down photo. I chose the trench option without the rolled collar because of opting in for the hood. I don’t see myself ever wearing the cape without the hood…so, consider that my thought process there.

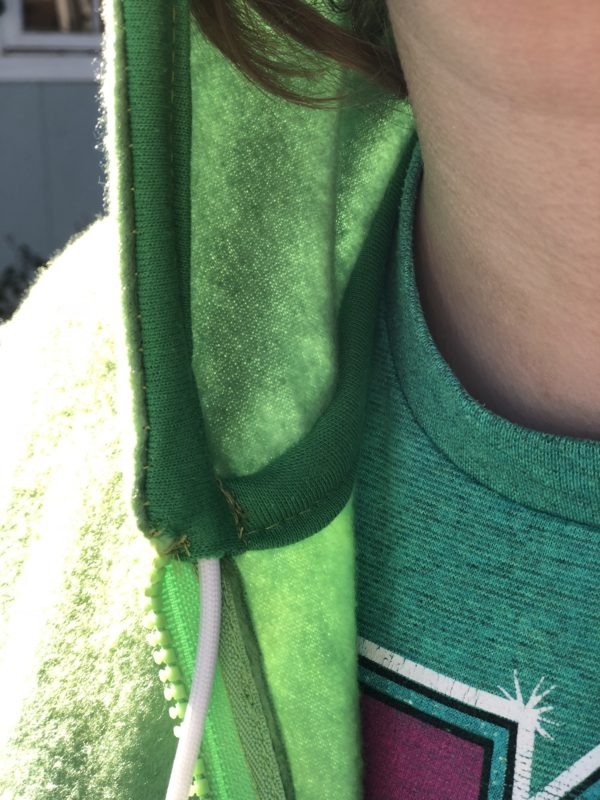
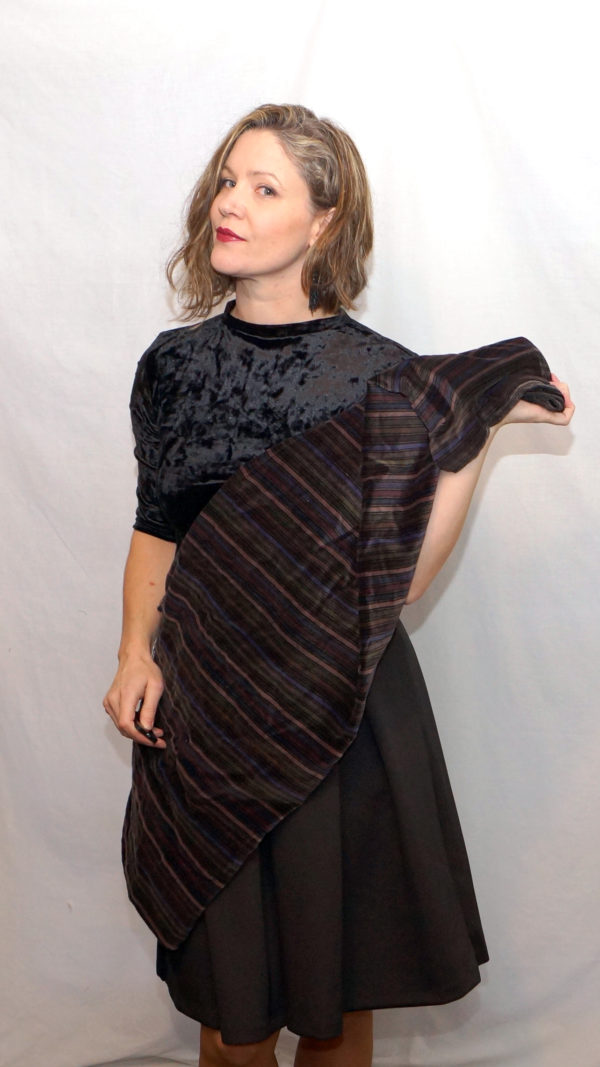
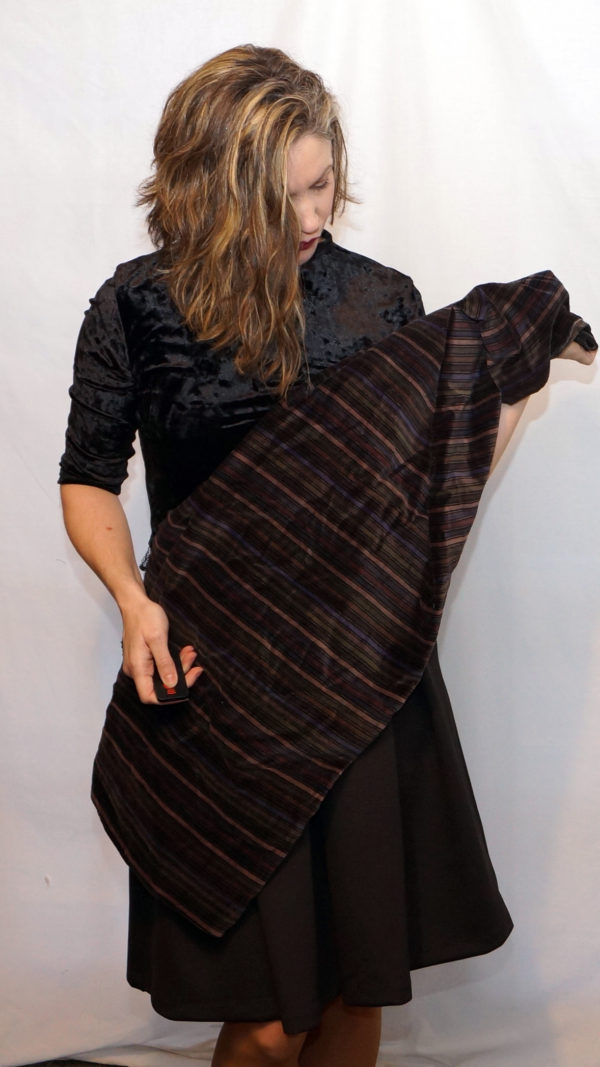
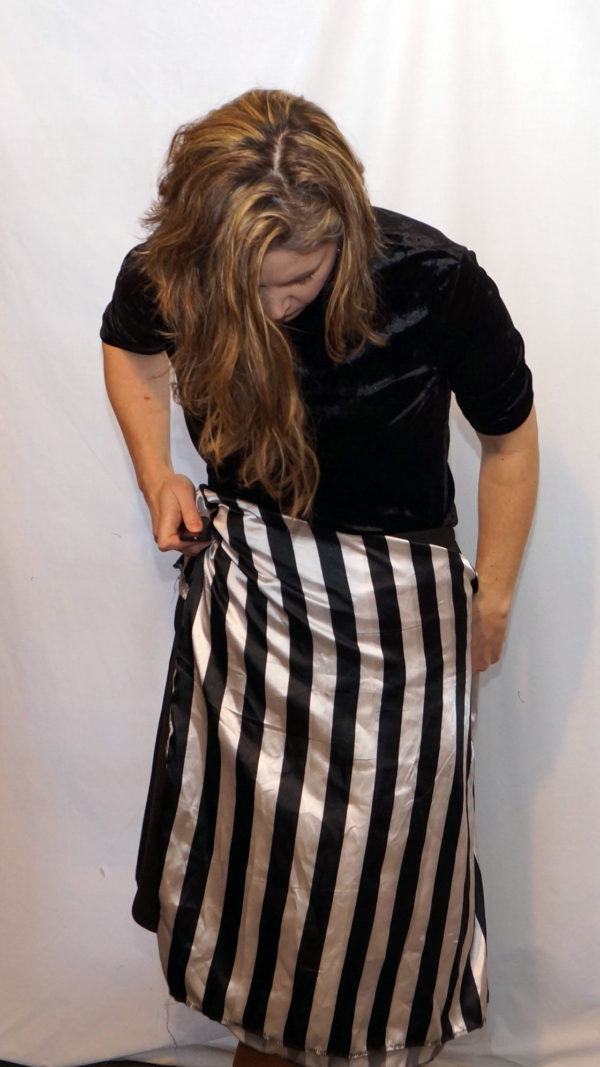
The scarf done up and undone covers the front cape buttons most of the time.

On the back, this is the hood button that shows when the scarf is done up.

When the scarf is undone and the hood is up, you can see the cape buttons that are on the trench. I previously put on plastic buttons as holders until these came in (you can see those in photos below), but I recommend if you go with the no collar option, you find buttons that make you happy, because they will show.

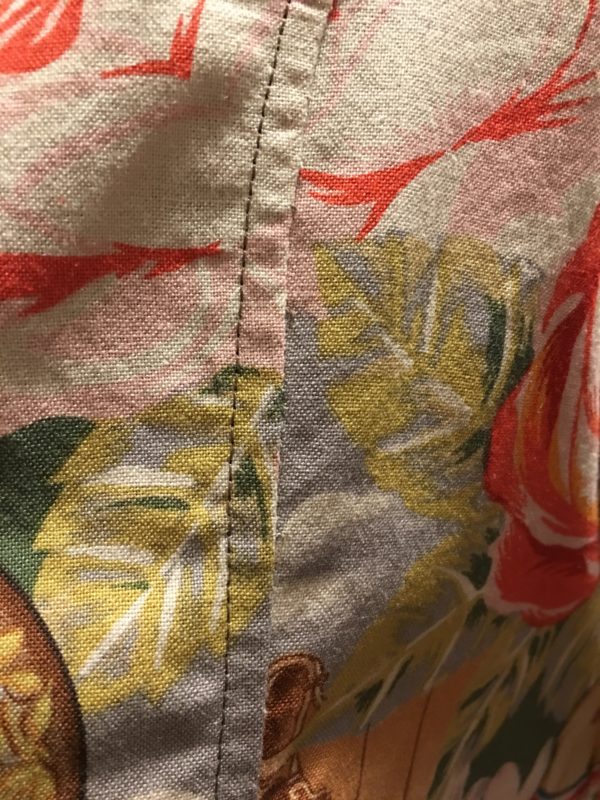
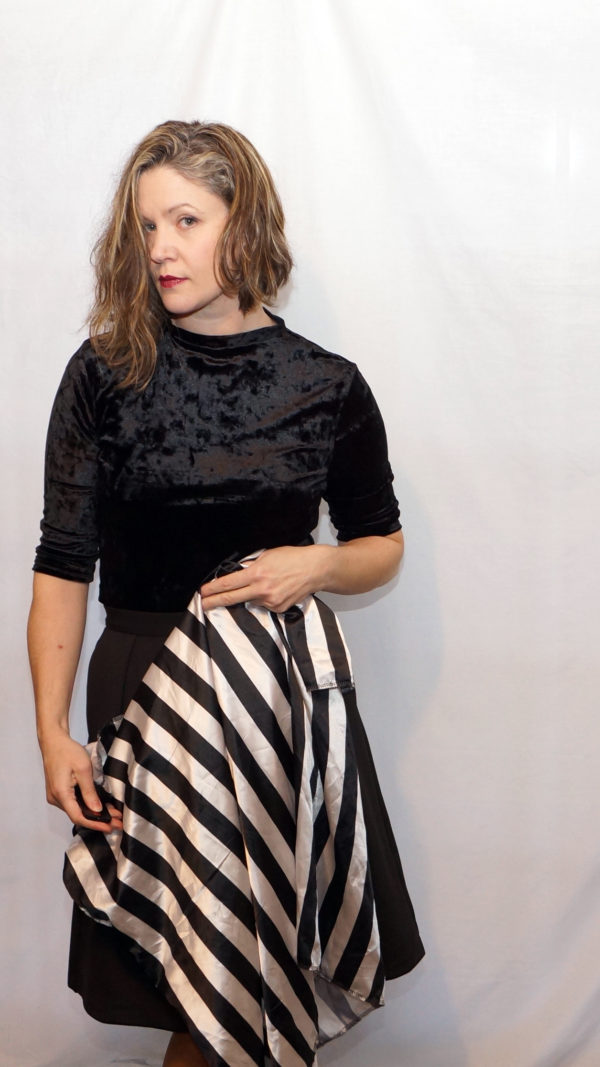
Front buttons holding on front of cape are little owls. They’re smaller than I envisioned when ordering them, but honestly with the scarf and hood, no one will know they’re even there but me. Gah, I love that linen and satin together.

Trench lapel is fully faced…Pipe Dreams gives all kinds of options here. You can put in shearling, fully line it so that you have contrasting lapels, or whatever else you can dream up. An easy sew with lots of options means a coat pattern that can make up its cost by giving you multiple garments that are all different. Between that and Pipe Dreams being really fairly priced, I think there’s a lot of value here, and you can spend more money on fabric. Who doesn’t like THAT?

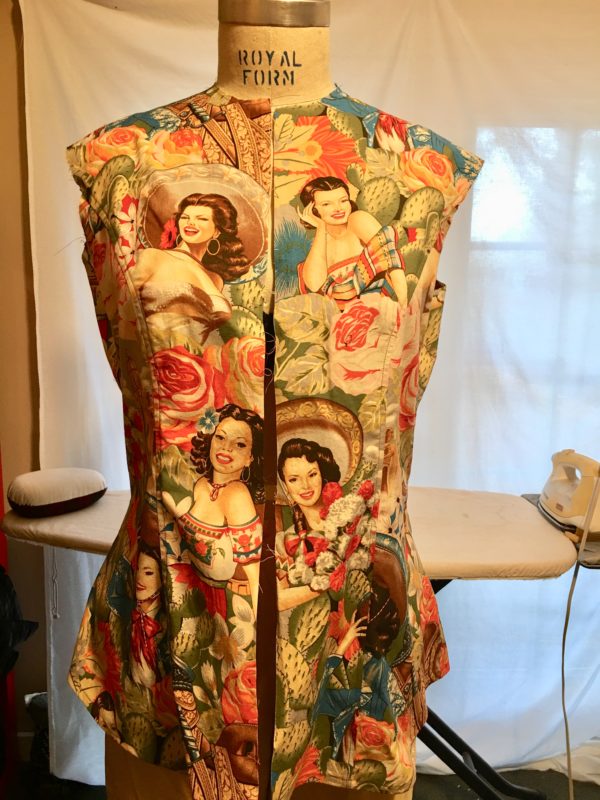
Front trench by itself.

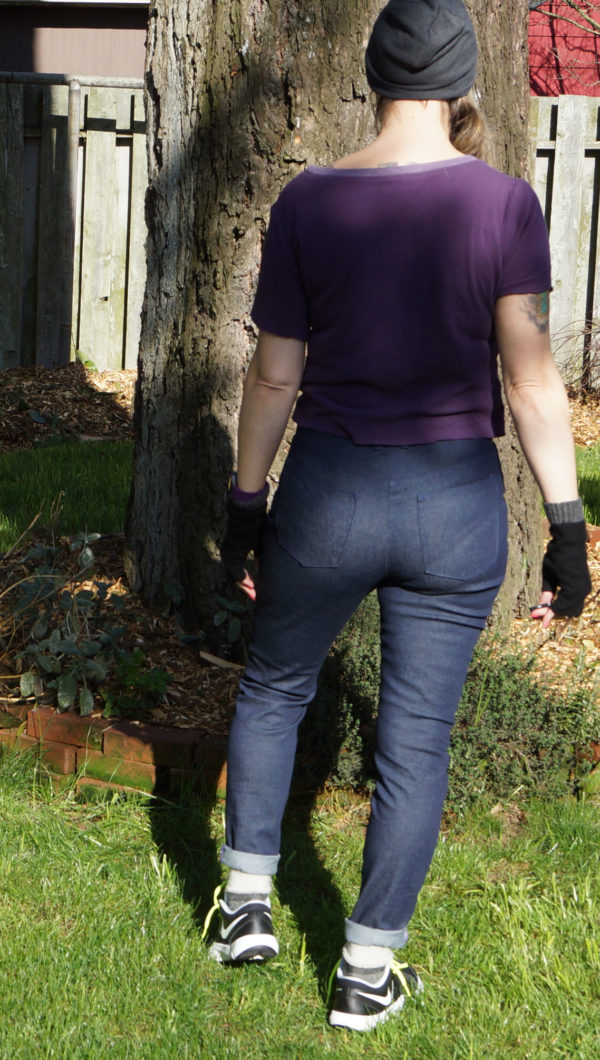
Back trench by itself. Singular belt stay is stylish and easy. Please note again those buttons have been swapped out for the prettier ones above. If you opt for the collared trench, this is a moot point. I’m a D-cup with fairly broad shoulders, hourglass measurements and usually a sway-back adjustments. I added my 2″ height adjustment above the natural waist as I usually do but didn’t make any other adjustments. I think it fits pretty darn good as-is.

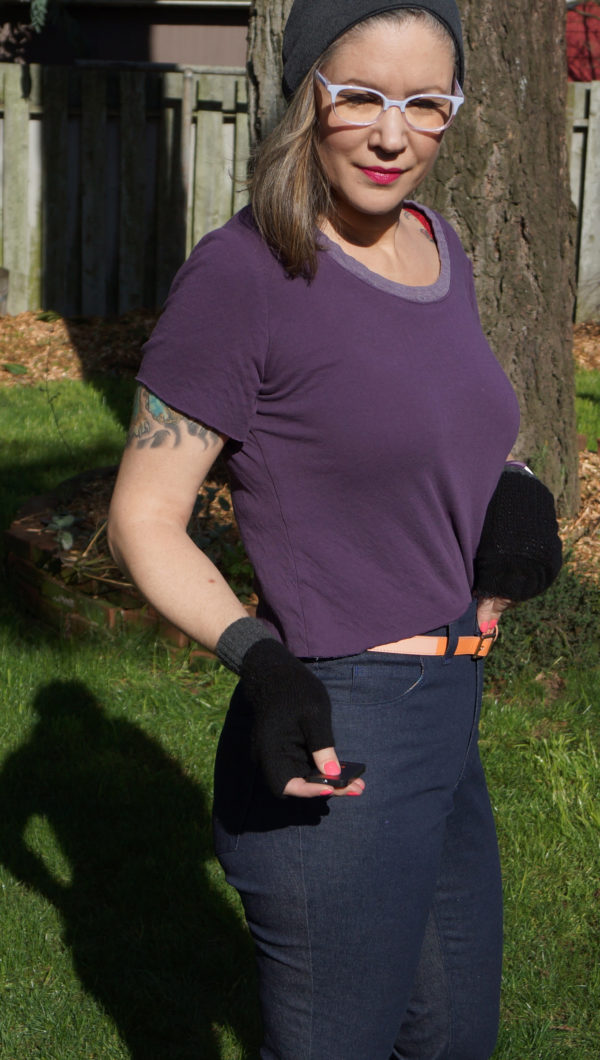
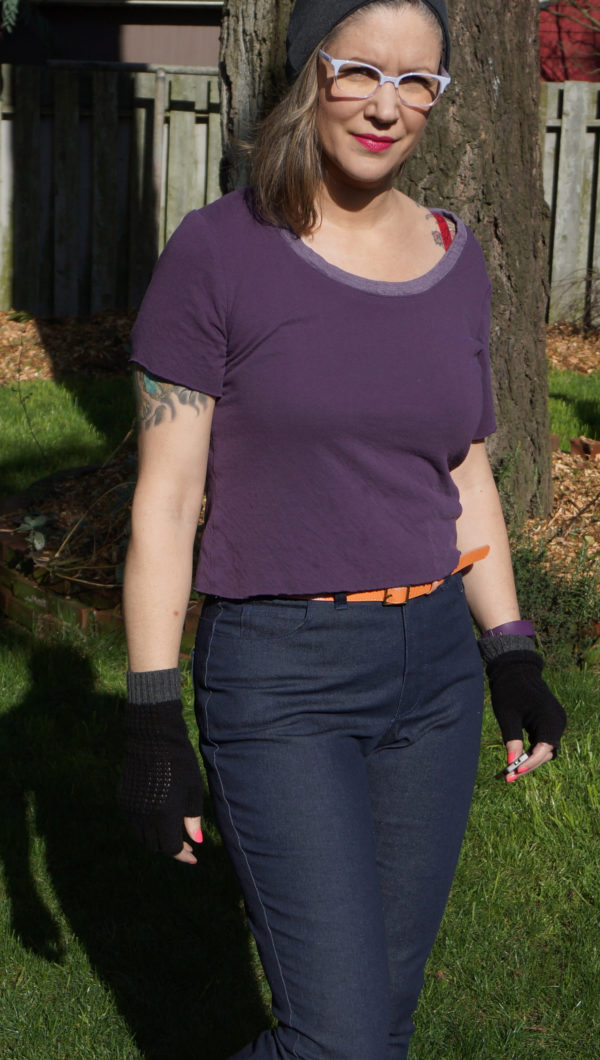
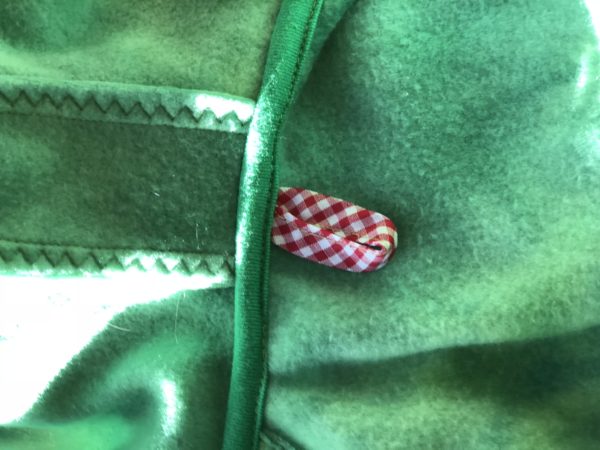
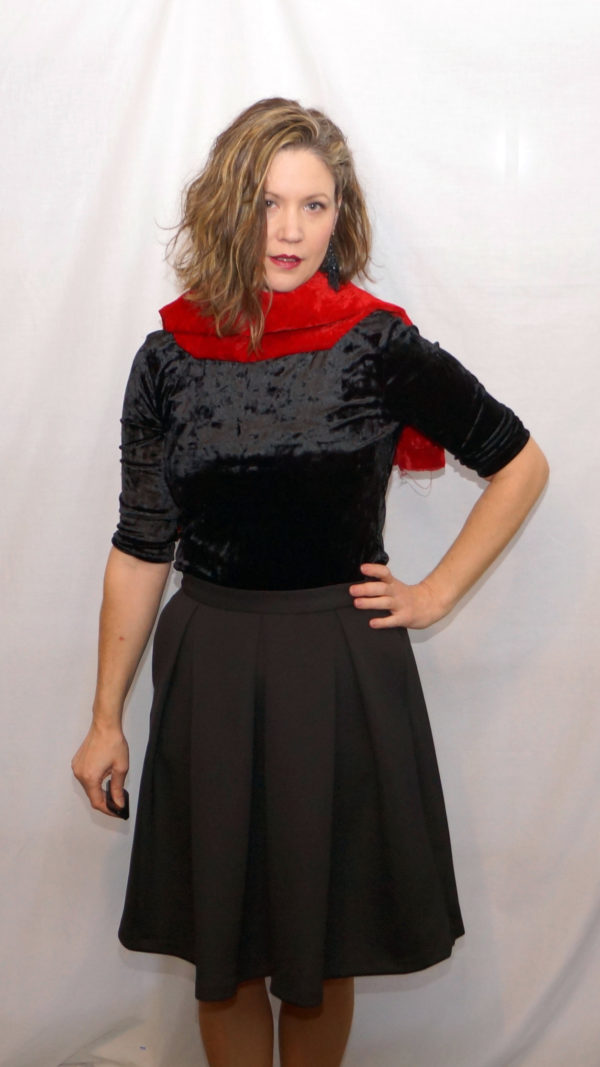
You can of course opt to have the belt a solid color…I’m just really into the red. 😀

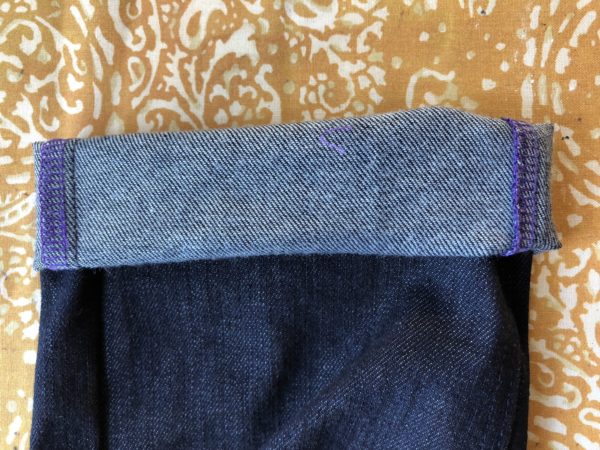
And last, but not least…pockets!

When I saw the pocket pattern piece, I cringed. BUT as a tester, you have to test as-is. I was soooo so so so thrilled with these pockets. I thought for sure these were going to be patch pockets. I hate patch pockets. But these are cleverly caught in the cape seams and really quite cute! It was such a nice surprise.

The new patterns from Pipe Dream are still on sale, I think through the end of the month, so get on your spring coat sewing! This would be the PERFECT coat to wear to Mother’s Day brunch!

Side note: no, I’m not paid by Pipe Dream. I signed up to pattern test with my own time, money, supplies, and fabric. You gotta know by now I’m painfully honest, so all opinions are obviously my own. The only compensation I received was the pattern because I had to make it to test it, some lovely conversation with the designer, and pride in my finished piece. 😀

One last side note. I’m thrilled with my buttons. This is not sponsored, nor an ad, nor do they even know I exist. I’m just passing it on because I’m happy with my product. Fair prices, great quality, fast shipping, really great selection. I’m just passing it on if you need a source. I found Button Jones on Etsy, then went and ordered directly from their site.

Pattern: Pipe Dream Patterns Marion Jacket

Oh…the 80s. I can bring up the exact feeling of walking through my middle school’s halls. The feeling of walking into the local Esprit store after saving up babysitting money and getting my own Esprit bag. My first Duran Duran tape. Keds that never stayed white.

Enter: The Marion Jacket. Pipe Dream Patterns is releasing 3 (!!!) coat patterns today. I’m going to show you one today, and one tomorrow.

I’m going to tell you a little secret. I took a big break from pattern testing, then I tested a couple and was so…what’s the word? Disillusioned? Disappointed? Meh? I’ve been generally not very thrilled with a few independent pattern makers lately. I expect more out of them than Big 4, and it’s been really hit & miss. Ginger jeans being the exception (and an unblogged Named Patterns Kielo dress I’m wearing now.) That, and some have been pushing affiliate programs to sell their patterns, and that just smacks of inauthenticity to me. Keep your LuLaRoe-schemes out of my good hearted sewing people’s lives, YKWIM? Is that grumpy? I don’t care. It’s a weasel move to post affiliate links in sewing forums. THERE. I SAID IT. We can have more independent pattern makers in the market without resorting to crappy sales tactics.

Why am I going on this Negative Nelly tangent here? Because I REALLY do love these patterns and I want anyone reading this to know I’m authentic when I tell you I love them. I took a risk to test these patterns. I put my own pattern making on hold, the teaser shots were that good. I used my own, rather expensive, fabric. I put in my time to crawl over instructions as if I was both a beginner sewists AND my middle school Lit teacher (shout out to Mrs. Z!!)

The Marion fits my current “I want to be 80s Bananarama” vibe. I used 2 yards of my left over Cone Mills denim, 1 yard of the ultra dark, and 1 yard of the very dark, or whatever they were called. I put them both in the bathtub with a pretty strong concentration of bleach and let them sit for a couple hours. I tested with 4″ scraps beforehand, naturally, so I knew pretty close to what I’d get. The Marion has these incredibly cool origami-like pieces that finally come together in the end, and it’s magical. I wanted to accentuate those lines and also relive some of the early denim bleaching of the 80s, let’s be honest.

The jacket is cropped and a bit oversized with perfect batwing-dolman sleeves. I added on a cuff, however, I only did it to add another contrast piece, and the cuff is folded back, so that sleeve length you see is actual-sleeve-length. I’m of the tall variety, so the sleeves, I feel, are pretty dang long. I like this, but if you’re going true blue 80s, you’re might going to want to crop those or roll them.

Let’s talk drafting for a second. I made absolutely zero changes to size. I cut a straight size US 12. Joann is pear/hourglass, so her sloper is too – which I LOVE because I am hourglass. I didn’t muslin/toile either pattern. I’m taller than Joann by quite a bit, but I wanted this coat cropped, so didn’t lengthen it, and like I already said, the sleeves are spot-on for me. Additional note: most beginners don’t know this, but in a collar there is something called “turn of the cloth” and that’s the amount of fabric taken up by folding the collar. If not accounted for, it can make your collar roll back up – this is more common on coats due to the thickness of the fabric. This pattern has a separate piece for the top and bottom part of the collar so you don’t have that flip-up-collar problem. In my book, that means a pretty darn good pattern drafter.

There are two waistband options – straight down to a fifth button, or a belt extension to pull through a D-ring. I chose the D-ring and have no regrets.

Please ignore my confused face, but this really is the best shot I took with the belt done but the front open. I will not be using this for my Bananarama cover band headshot. My face aside, there are also pockets. I know y’all like pockets. Being a cropped jacked, they’re a bit high to not feel like you’re cupping yourself or acting like a wounded chicken – as would be the nature of a cropped jacked, but they are roomy and useful for keys/phones, etc.

Even with the flat-felled seams on the thick denim fabric, this was a really quick sew. Seriously. The bleaching experimentation took more time than the actual project.

So, the usual stuff: pattern was provided to me, all fabric, tools, bad facial expressions, opinions about really great new patterns, and opinions about other companies’ crappy sales tactics are my own. 

Cone Mills Stretch Denim Gingers x 2

All the hype about Cone Mills Stretch denim? It’s real. It’s so real. I’m A, really happy I bought 6 yards last year from Blackbird Fabrics, but, B, so freakin’ bummed, even more than before, that the American mill has closed.

Sorry ’bout the lighting – I was chasing some morning sun…some wins, some fails. Whatevs.

Back to the denim and the Ginger skinny pattern. If you use another jeans pattern, I implore you to construct them so that you’re basting your outside leg seams last, so that you can try them on before committing to serged seams/flat-felled seams and all that jazz.

The Cone Mills has a lot more stretch to it than the Robert Kaufman pair, so I went down a whole size in this dark pair, and almost a full size in the lighter pair (below with purple shirt.) No reason on the discrepancy between the dark and the light other than I want the dark ones really tight. I’m hoping both shrink up even more in the wash.

I want them PAINTED on! lol

While this denim has more stretch to it, it also feels a bit more….sturdy. It’s got a really good feel to it. I wish I had another 6 yards.

Denim jacket is a used eBay find from last year, Hellacopters shirt is from, well, Hellacopters. 😀 Hat I made, and shoes by NIKE. Gloves are some RTW I got a few years ago and are well loved…I’ve had to stitch them back together a few times.

Damn bright winter sun.

The lighter pair lends themselves to more pastels.

Some of these photos look like I’ve got some weird cat whiskers thing happening with the crotch, and some look perfect….that’s just a difference in me sitting in these, about a cm more room in them, and just room for movement. I’ll probably wash them on hot a few times.

Obligatory butt shots. I moved the pockets up higher than my first Robert Kaufman pair too…. my flat butt needs all the help it can get. I can do squats until the cows come home – the strength is there…but it ain’t gonna be no poppin’ booty without a LOT more work.

Sweatshirt is an old me-made Renfrew in a double-knit from Bolt Fabrics.

some closer up so you can see the fit…I am a bit knock-kneed (TRUTH: I look like a goofy ostrich when I run) but I don’t care enough to do a knock-kneed adjustment…as much as I move and am active, I prefer the extra bit there.

I’ve got a smidge more room in the waist of these, and that is why I went even more extreme-tight on the darker pair.

Alright, a little tech talk.

Alexander Henry fabrics for the pockets (this is where being a quilting cotton hoarder comes in real handy), basic metal “denim” zip, shanked metal button – but I may swap that out for a matching brass button later…

I knew it as I was doing it but didn’t really care…yeah, that’s some pocket material visible from the outside.

I’m skilled enough to copy RTW, sure, but that’s not my goal. I couldn’t care less about copying RTW. So, yeah. That’s how that’s gonna be.

Serged…but you can see my first set of seams….and then where I took it down farther….then top stitched.

I haven’t hemmed any of my jeans except my Velvet Gingers. And I’m not going to. For now I’m wearing them rolled up anyhow….I like keeping my options open. Just a 3-step zig-zag to keep them from fraying too crazy.

So, that’s a pretty lengthy, double project post…I think I covered it all. I top-stitched with the same color thread that I assembled with…Gütermann Poly 40wt.

I see there are still a lot of people scared of sewing jeans…and yeah, fitting pants is kind of a pain….but once it’s done, you can copy the general shape of the crotch that works for you on to other pants patterns. So…bonus!

Pattern: The Green Pepper Fleece Hoodie

I made my tweens winter fleece jackets. They’re both around 5’8″ and 140-50 pounds, so we’re into adult patterns for both of them. They both are also athletic, are hard on clothing, and still growing, so I don’t sew for them too often, but made an exception for Christmas-ish jackets.

I used a local Oregon company called The Green Pepper. I don’t think they’re too big, or even very hands-on at this point, but I’ve been wanting to try them out.

The pattern is “Adult” – as in gender-neutral, and I’d say it’s even more neutral than the drawings portray. There’s a lot of ease in that waistline! It’s not at all a fit-line garment, but for our needs, that’s just fine.

I made the boy’s first as he was more immediately in need having lost his new winter coat. already. again. sigh.

The instructions are pretty straight-forward. There’s…what, 14 pieces and 3 zippers for the long-sleeved hoodie? Oh, and the bindings…so 16 pieces, plus 3 zippers and hoodie cord.

The pocket zips are a nice touch, and the pockets are HUGE. They go from the bottom hem, all the way up to the chest yoke. Seriously massive. Both times I inserted the zips the same way, so one zips up to close, and one zips down. Derp. Oh well. That’s what I get for skimming instructions. I don’t even know if the instructions say to flip it, but I keep missing that part.

They have you make a cord channel with the facing around the hood out of a lycra. It works really well.

I made a ‘tag’ on the boy’s version. The inside has a matching tag with his name in Sharpie. He likes to lose things. A lot.

The hood is a 3-piece construction which is nice, but a bit too shallow.

I deepened the hood on the girl’s version, and reinforced the shoulder seams. I almost brought the sides of the hood forward too, but I’m glad I didn’t – for better visibility. Her face is covered, but she can easily see traffic.

As you can see on both versions, there’s no problem fitting their wide shoulders in a Medium size, and lots of room below – which is great for self-conscious tweens.

I used a 3-step zig-zag stitch a lot more on the second version, which I prefer for stability.

Tween-girl had some glow-in-the-dark laces from her grandmother that work perfect for her hoodie strings.

Both fleece purchases and the pattern were bought at Joann’s Fabric – so nothing too exciting to report there.

What do you think about the visible zig-zag? I see it a lot in RTW lately, especially high end swimwear, and I like it, but some people still think it’s a little too….Becky From Home-Ecky?

Overall, I really liked the Green Pepper pattern and I’m happy to support a local, “little guy” company.

The second version took me two afternoons of a few half-hour chunks here and there to cut out and assemble…it gets a little tight there around the hood cord, and I used a cotton knit I had on hand instead of a lycra, so I tacked a few hand-stitches in there to keep it in place.

Overall, that’s pretty good in my book. They only take <2 yards of fabric for the XS-L sizes, so when fleece is on sale, that makes for some inexpensive work. Zippers can add up, but when at Joann’s, that’s when you use the coupons on those, right?

A Different Take on Butterick B5526

Another B5526, but this time I did the ruffle placket and collar. This is my 4th…version. My 3rd will probably never see the light of day….I made a leopard print version, and quickly remembered: I don’t wear animal prints. I look like a Flintstone in animal print. Does. Not. Work. On. Me.

I did not slim down the sleeves as this was already cut out, but the poofier sleeves work with the ruffles on this lightweight, ditzy floral, tiny corduroy I picked up at Jo-Ann’s Fabric last fall.

I only had enough matching buttons for the placket as I put 10 buttons down the front to keep them really close (2.5″ apart) and more fussy/Victorian-y, so I put gray-pearl buttons on the cuffs. Not enough ruffles for the cuffs, so cuffs are standard.

In fact, the whole ruffle thing was done on-the-fly. I didn’t have enough fabric leftover to do the proper swirl-cut bias ruffle, so I just used my ruffle foot on some strips and winged-it.

Whatevs. It works in a pinch and I’ve already worn it a ton.

I think I need a super high waist pencil skirt. Where I need to wear a pencil skirt, I have no idea, but just go with it. Humor me. And ignore my winter-messy yard. I was tired of indoor shots.

I know everyone is channeling 70s right now, but I’m all about 80s. 1985 Desperately Seeking Susan, 1986 Jennifer Grey, Duran Duran & Depeche Mode, Brat Pack. Big fried hair. Mix of boxy and weirdly tight-high neck-Victorian mash up of the 80s. I didn’t like the 50s resurgence that happened, so I’ll skip that part. I look stupid in Wayfarers – much like animal print.

Anyway, back to the shirt. I still want to slim down the back lower armscye there, but that will have to wait. I have other things I want to play with for awhile.

What else – Oh, I bias-faced the hem this time. On the fly as well….which made putting on the button placket kind of funny as I didn’t account for the extra length the bias hem would create, but it worked out fine. The collar stand covered up the gap that was still there after I reduced seam allowance – YAY for Big 4’s giant seam allowances! Also, skipped all interfacing as it’s still corduroy and would have resulted in ridiculously thick bits.

This is a fun shirt and all, and very winter-friendly, but I’m ready for spring sewing already. How about you??

2018 Make Nine Picks

If you sew and/or are on Instagram, then you know of Lucky Lucille and her yearly Make Nine prompt. If not….I want to know what rock you hide under, and is it on AirBnB?

Seriously though, I’ve not participated until this year because…I generally sew as my needs and whims dictate. But this year, I have some real, intentional goals. I also have some lofty whims that may change. I’m sharing them here to hold myself accountable, and so that I may revisit during the year to keep myself on track, and at end of year for review.

First off, my nine is not a literal 9. Sure, I cobbled a collage of nine like all the interwebs, but really, my goals are bigger and open to evolution.

1. My dearest husband-unit spoils me and bought me an iPad Pro with all the bells and whistles for Christmas. I’m putting the pencil to immediate use and working on my own design ideas and croquis. As a die-hard CAD user and not a hand-drawer, this is a learning curve. I hope to see marked improvement by end of year.

2. I have all 9 of Suzy Furrer’s sloper/block/drafting classes. Whatever you want to call them. I want to have them complete by end of year with projects to show. I want to document my learning process. This will leave me very open and vulnerable to the world, but if I’m going to tear apart other’s work, I should be able to put my own ass on the line. Consider this my declaration of putting my own ass on the line. After I absorb Suzy’s classes, I will look to find other teachers, classes, books, etc. Sewing, like software, cooking, and so many other things, has more than one way to get from point A to point B, and I don’t like being myopic in focus.

My end goal is to make my own designs into reality. The market is already saturated with indie pattern makers, so I’m not sure I need to throw my hat in that pool, but this is where I’ll keep the goal open ended. No one needs another sloppy pattern maker, and I would not release anything that wasn’t up to my standards.

3. I’m in the 2018 RTW Fast. I’m number 136 of over a thousand. That’s not a huge reach for me, but I do have a weakness for purchasing my workout/athleisure wear. I have WAY too many Fehr Trade patterns to be doing this, so the Knot-maste outfit is high on my list.

4. I need to quit making dresses I don’t wear and realize I DO wear maxi dresses/skirts. So, whether I buy the Named Kielo dress or draft my own, this is high on my list. Sarah on Wanderstitch is my muse for this revelation. Seeing her Kielo was like a much-needed smack upside the head. DERP.

5. Le sigh. I own too many Megan Neilsen patterns, also unmade. The Flint being at the top of my list to make. Sigh. I’m a bad pattern hoarder.

6. More hoarding. I have both the skirt and the vest to this….I will be making the vest. The skirt….let’s say is inspiration.

7. This Yaya Han coat is another Sarah/Wanderstitch inspiration. I reserve the right to switch this to a possible capelet design, like this Papercut version, or possible self-drafted, but regardless, my winter coat is looking haggard and I need a new one.

So, while I’ve only typed to number 7, I’m WAY past 9. The husband-unit also would look damn sexy in some men’s Hudson pants…so, I’ve added that to my mental list, a few more Seamwork Savannahs, I may also try a swimsuit again, probably some Sewcialists challenges in there, and whatever my little cosplay teen comes up with – I’m hoping she’ll also give me some fresh artwork to engineer designs.

Woohoo, bring on 2018!

Velvet Ginger Jeans

Ugh. Christmas cookies. You know you’re testing the strength of your seams and fabric if you make skinny Ginger jeans after the holidays. After making a batch of pecan tassies and pretty much eating them all by myself…yeah, I did it. Do these cookies make me look fat? Don’t answer that… I already know. My usual hourglass shape is now more of a keg shape. Whatever. This Fitbit will fix that in no time…

I cut the same as my first denim pair, with a bit more smoothing out in the back yoke, and this time did not grade out to a 14 at the hips as I found that bags out a bit in the last pair too much.

I’ve already been wearing these for a few hours before shooting these photos and they hold up nicely. VPLs be damned. I’m into my giant granny underwear right now. See above about cookies. I’m packing at least 5 lbs more than usual.

No regrets.

These are made from Italian midweight stretch velveteen from Britex. As of this post, there’s still some left. It’s holding up to my abuse (cookies) really well. I’m pleasantly surprised. I’m not sure why…with Britex you get what you pay for…sure, they cost a bit more, but the quality is aces. I haven’t been disappointed yet with any of their fabric.

I think I bought 2 yards, pre-washed and dried, and easily got a pair of Gingers out of it, keeping the nap going the same way. It’s a messy fabric to cut…little velvet nap bits everywhere, and it frays quite a bit, but I was gonna serge it all anyway, so that’s no big deal. It feels amazing. Cotton, so while velvet, not overly warm.

I paid better attention to the instructions this time, and actually got the zip in right. Lol. I’ve only used a 7” zip…the instructions for a 12 say to go up to an 8” but I haven’t found that to be necessary. I’ve got a 1/2” of zip to spare with the 7”.

I hemmed them this time – two turns at a 1/2” each, and this is the length on me. No adjustments to pattern length.

Wearing with my puffy sleeved TATB Agnes. Gotta keep with the 80s theme.


I’m calling this a TAT (tried and true) pattern. I’ve got two more cut in Cone Mills denim, ready to go. There’s something about having a pants pattern that just comes out perfectly that is really….refreshing. I didn’t even baste and try these on as I went. They came together really quickly this time, and just fit. So refreshing.

A pretty happy finish to the first sewn garment of 2018…now to go work off these cookies.


2017 Top 5 Hits and Plans

2017 had a lot of successes. Now that I look back at blogged and unblogged garments, I did pretty good.

My biggest undertaking was my daughter’s cosplay outfit. From her original art drawing, to drafting, to sewing, to the fact she is still now wearing the top as a jacket, it’s a 100% win.

Next up has to be my wearable muslin Ginger Jeans. They are worn all the time. I’m hoping to get my velvet pair done before Christmas, however unlikely that may be.

Also worn a lot, in tandem, is my Papercut Aomori in Britex wool blend knit with my latest voile Seamwork Savannah. The rayon version of the Aomori made the Fails List, but the wool version is adored. I need some tight, long sleeve t-shirts to wear under it for layering more in winter.

Of course, my latest B5526 is on the list. It’s not even old enough to be worn a ton, I just know.  I wear the first version, pre-edits, all the time, so one that fits so much better is going to get worn to death. 

Last but not least is my Sew House 7 Burnside Bibs. After over-dying the fabric to make it less HELLO I’M PURPLE, it got worn a ton. It’s a super quality linen from Britex, so was worn farther into fall than I expected, but now it’s just too cold. I can’t wait for linen-weather to return.

Honorable mention goes to the Friday Pattern Company for the Garamond top. I made it in September, and it’s a short-sleeved number with a Kimono-sleeve design (READ: doesn’t layer well), so it just hasn’t been worn much. I’m pretty sure I’ll wear it more come spring/summer, but I just can’t right now. Brrr.

2018 Goals

  • Sewing Community Participation. I’d like to participate in our sewing community more. I started actually using my Pattern Review profile, I’ve volunteered to help out Sewcialists and do what I can there, I signed up for the RTW Fast 2018, and originally had signed up for the #SewMyStyle 2018, but after seeing the issues with inclusivity, I’m going to bow back out. I’m a member of the PMQG, and I’d like to continue even though I don’t quilt as much as I have in the past.
  • The Sewing Basket. I’ve started cutting out a stack of projects and putting them in a project basket to help with the project paralysis that happens between projects. There are some pros and cons so far….like it either needs to be a muslin or a TNT, there’s no real major changes once it’s cut…but on the other hand, I have everything ready to go and no question of what to do next. I’ll see how it works over the next year.
  • More Data. I like the idea of tracking what I make, what patterns used, and how much it is worn as I’ve seen in some 2017 round-ups. I think I’m going to give that a go as well. Any thoughts/advice there is welcome!

I love the year end round-ups. I’ve been going through all the round-ups posted at Crafting a Rainbow. It’s such a good way to get fresh ideas and see other people enjoy sewing.

Las Señoritas from Alexander Henry Fabrics Butterick: B5526

I’m beyond happy with this shirt. I know I’ve had a lot of angst regarding Big 4 patterns, but this Butterick B5526 has been an exception. I first saw it on Lauren’s blog, and ran out and bought it, then re-purchased it…only to find out now I probably could have just used the original purchase…whatevs.

This time I edited the pattern with my Lazy FBA ™ edits: Right now I have a size 16 cut, although I’m confident in Big 4 Ease that I can cut a 14 or even a 12 if I must. Anyway, cut a 16, added an inch in length above the natural waist line to adjust for my height, graded in to a <14 at the waist across all pieces, all of which is no small fete as it’s princess seamed front and back, plus has button plackets, collar stand, and collar. The only piece I haven’t changed yet is the sleeves, and I’m still thinking I need to take those down to at least 14, and decrease the armscye at the armpit. So, keeping the bust at a 16 more than accommodates my bust, and leaving the hips at 16 allows the length to easily glide over my mom-hips.

This is an older Alexander Henry quilting cotton called Las Señoritas in the “antique” colorway. Are you pro team apparel with quilting cottons or against it? I’m all for it – quality quilting cotton is tough and who can deny the Alexander Henry novelty prints?

However, I was only gifted 2 yards by a much more petite friend, and at only 45 inches wide before washing…some tough choices had to be made. I had to split the collar pattern piece, I made sure I got some good top-back placement, but pretty much all other placement had to come out how it came out. There wasn’t going to be any pattern matching with a huge print across princess seams with only 2 yards.

The gingham, which I love, was also out of necessity.

I placed buttons only 2 1/2″ apart, which allows for a lower neckline if I choose, and no way of any boob flashing while gardening, which I fully intend to do in this shirt come spring.

3/4 sleeves also due to necessity, but also because they go with the vintage feel of the print.

I used to be TOWER PLACKET on the cuff or GTFO, but I’m digging the bias placket lately, and I made tiny cuffs, both out of necessity and because they’re so darn cute. I was going to originally make this a rolled-up sleeve-only, but I’m glad I put in the extra effort on the sleeves. I really like them, and I love them with my vintage bakelite.

I’m so happy with this shirt, I have two more cut out.

oh, I forgot to take photos with the good camera – here’s some iPhone shots. The insides! On this shirt, I sort of fake flat-felled seamed it. I overlock all the seams, then stop-stitch at a distance that looks flat-felled.

Sturdy & neat. I pinked & top-stitched my first wearable muslin version, but now that I’ve made my adjustments, I put a bit more effort into it.

Velvet Agnes Hack, and More Velvet

Oh, velvet, how I love thee….let me count the ways. Le sigh. In 1991 or 1992…there was this store called the Big Bang…I bought the most luscious velvet patchwork skirt. My first love was embroidery….on silk, on velvet, on linen… Damn I’m old. When did that happen?

I picked up a remnant of black stretch velvet – the tag said something like 0.8 yards, and of course I know I can squeeze something out of it. I still had the Agnes pattern floating around, so did a quick and dirty re-draw of the neckline, and with utter disregard for nap, cut out and serged a quick shirt. You can’t tell unless you rub me that the nap isn’t going all the same direction, so don’t rub me.

I grabbed this RTW circle skirt out of my teen daughter’s closet to see how it looked dressed up. I dig it. Now, as I type this, I’m wearing it with jeans. Works equally as well.

I think I’m going to need a half dozen more.

I like it paired with my wool and velvet flocked Papercut Patterns Rigel Bomber. I wear this jacket a lot – but it’s really more of a transition-season piece. It’s only lined in silk, and I like it that way- any more bulk and I think I’d look like a wool-covered marshmallow.

I was thinking maybe I need to make a velvet scarf… maybe something not quite this plain – although this red is hardly plain.

Red works ok too with the bomber, but….what about after Christmas? I’m not sure I still want to be sporting RED SCARF.

This wine-brown doesn’t look as nice as I thought it might… Maybe something sort of patchworky? Like Kambriel’s scarves? Or like…I’ve been working on some Victorian crazy quilt – meets – modern quilt blocks ideas:

Ok, maybe I should stick a pin in that for a bit?

I’ve got this lovely striped velveteen, but being there’s about 2 yards of it, I want to make something more substantial out of it…like a vest or…a jacket or…a skirt…but I rarely wear skirts, so, maybe pants?

open to suggestions there…

I really like this fabric too…I’ve been wearing it as a make-shift skirt for Halloween, but I think it’s sad that it only comes out once a year…

Or maybe it’s a little too….Beetlejuice? I feel like I’m getting on the other side of old, though, where I don’t give AF and can comfortably start moving into mildly eccentric….

2017 Fails

I was doing my blog roll reading last night as I do before bed, and I was inspired by Gillian’s Top 5 Misses of 2017.  It’s a good idea to go over the last year to see what worked, what didn’t, and try to improve for the coming year.

My top, #1 miss of 2017 is the Lisette B6168. You guys. I don’t know if it’s the fit/flare I don’t like….the preggo look…or just that I’m rarely a “dress” kinda gal, but I never, NEVER wear this dress. I don’t like the chest, I’ve already been pregnant for reals FOUR TIMES (don’t worry, I’m fixed now), the sleeves are not me….the whole thing is a bust. No pun intended. It is made from yummy Robert Kaufman yarn dyed linen-cotton, so I’m going to cannibalize the fabric, but it’s just a dust collector for now. As an hourglass figure, I’d think I’d like fit/flare, so maybe that’s not it? I really don’t like the neck-strap thing, I really don’t like the faux wrap part, I don’t like the hip-accentuation, I don’t like the cap sleeves making my mom-arms look like BINGO arms – it’s just not for me.

#2 is another dress… again, fit/flare, and some peakaboo action going on that just makes me feel like I’m screaming “I NEED ATTENTION.” It was a pattern test, and while it’s a pretty good pattern, I didn’t drop the bust darts… The pattern designer, after we discussed my size-based muslin, suggested I grade between sizes on a cup-based dress, and while that usually works for me, in fact I call it my Lazy FBA ™, it still assumes I am as short as the base block…and I’m not. So, lesson for me is when using a cup-based pattern, be aware of height distribution and the pattern maker’s base height. The fabric was a gift, the pattern was free, so I’m not calling a total loss, and I still have delusions I’ll pull it out of the closet for layering or something, but honestly, I have not.

This is a good time to point out that Chuleenan of CSews has been keeping a chart of pattern makers and their base height usage. Spoiler: most are 5’6″ – as was this dress.

#3 – I love, love, LOVE these Burnside Bibs overalls by Sew House 7. I wear them all the time in warmer weather. My fail wasn’t the pattern. My fail, and I knew this was a possibility going in, was the color of the linen. This was a tutorial post for Britex, so being I thought I would probably over-dye them when they were done, I went ahead and used a white cotton thread, which worked out great for the tutorial, AND would take dye later if I felt too clownish in the bright purple. I didn’t wait more than a week to over-dye them with some black, and now they’re a nice, dark, drab purple and I love them.

Really love them. Way more my color.

#4 is a fabric issue again. I wear the mustard Britex wool knit version on the left ALL THE TIME. I love it. I accidentally thew it in the dryer once, and it was still fine! Such a quality fabric, feels soft, but substantial, warm but not sweaty…it’s just a great piece. That Britex wool was made for the Aomori. I wear it over the April Rhodes Savannah – which BTW totally shaped up after a wash – the plain cotton voile I used as bias pulled in more after another wash/dry, and it fits like a dream. But I digress. The brown rayon knit on the right? No. It’s a frumptastic disaster. It’s a loss. Another right pattern/wrong fabric victim. Just to prove it to you that I’m not imagining it: in the photo above, the same size pattern was used, and the dress form on the right is a size 12, the one on the left is a size 10. Such a bad fabric.

My final #5 was a tough call. While I’m disappointed in the quality of the Agnes pattern, I haven’t actually thrown it out. Yet. I’ve only worn the green-striped version since, my teen daughter wears the Hawaiian acid trip as loungewear, and the other two will probably collect dust. I have another one cut out, but it has been shoved to the end of a project basket and will likely never get made.

The winner of the #5 slot goes to yet another Big 4 pattern fail, and also happens to be a Vogue pattern. Again.

Menswear patterns are few and far between, and more formal menswear? Well, it’s pretty much only Big 4 that really puts out anything. So when the husband-unit requested a suit jacket, I got a few Vogue patterns thinking, how bad could it be? He wanted a peaked lapel, so I figured I could make Vogue V4988 work.

So. Much. Bad. I’ve already thrown it out and I’m not even done with the coat. I mean, I altered the suit to fit his boxer-shoulders, made lining patterns, absorbed Craftsy classes on tailoring, INTERVIEWED AN ACTUAL SAVILE ROW TAILOR, and still hate it so much I threw the pattern out before I have even finished.

Needless to say, I’m putting myself on a Big 4 moratorium. The exception will be an already-owned Butterick B5526. In fact, I’ve finally added an inch in length to the Butterick pattern across all pieces, graded the waist in a full size across all pieces (more of my Lazy FBA ™), have one 60% done (below) and two more cut out in the project basket (the project basket is new, and I’ll have to address that another time.)  However, as much as I love to peruse the Big 4 patterns, especially the Vogue designer patterns, I just can’t justify the failure rate. Sure, I’ve had a few successes, but not enough to justify the expense. In the long run and in MY experience, a more expensive Indie pattern is more likely to become a TNT (tried and true) pattern than a Big 4. While I haven’t blogged as much as I’ve sewn, my successes are most often Indie patterns.

I hope more people put out Fails and Successes posts – I just love round up posts in general – it’s like everything I love about magazines, and nothing I hate about Pinterest.

Edited to add this is in, uh, solidarity? LOL. This is the brainchild of Crafting A Rainbow. Gillian came up with this, not me. 😀 I just think it’s a great idea.


TILLY & THE BUTTONS: Agnes

We need to talk about Agnes. HAHAHA. I have such extreme RBF! I can’t help it!

Seriously, though, Tilly & The Buttons Agnes is a SUPER cute top, right? And if you’re the tiny size with an A-cup, I’m sure it will come out super cute just like on the pattern cover, even if you’re a beginner sewist.

Let’s talk about everyone else though… I bought the pattern during the 20% off Black Friday sale, but it’s been out for a few years. If you’re about to sew this pattern, or you have and you don’t look like the cute girl on the cover, let’s go over it. It has some grading errors, it’s missing some information, and I’m 5’9″-ish, 150 lbs-ish, and in the realm of a 36D – I’m not tiny. So, I’ve made a list of some things I’ve worked out.

1. Elastic markings: The pattern elastic placement on both the bust and the arm is not graded out to larger sizes. If you place the elastic where it says, then your ruching will not go to the seam allowance, and your ruching will start too low.

You need to move the placement in correlation to the size you are cutting.

2. Starting the elastic and the top and stretching down, as per the instructions, will leave you with a flat 1/3″-1/2″ anchor point at the top. Reverse the anchor point FROM the bottom and stretch UP.

Serious grandma boobs happening. The fabric isn’t the best, but also that flat part up top where I anchored the elastic isn’t helping anyone’s boobs, let alone my wide-set D-cups.

3. See that wrinkle on top of my boobs? Normally that indicates I need a full bust adjustment (FBA), however, in the case of the Agnes, the armscye is too long, and the armpits are too low, which also causes that wrinkle. I should take a wedge out of the armscye, but I got lazy/irritated towards the end and just shaved some out some of the pit with my serger. Besides – stretchy fabric should accommodate my bust with my size – so really, on my body, it’s the armscye that is primarily the issue. Looking through Instagram and seeing others’ Agnes tops, I’m not alone. There’s a lot of bust wrinkles across a lot of sizes, and when you see a photo with an arm out stretched, you can see the gap in the armpit. Looking at the last of these green shirt versions, you can see I’ve still got some gap.

4. The direction of stretch on the neckband. This is something I almost didn’t catch because I’ve done so many knit garments, I do a lot of it on autopilot. But going through Instagram and seeing a ton of bagged-out necklines and comments about how they had to remove length in the neckband, I realized a beginner wouldn’t know that you need to reverse the direction of stretch on a neckband.

The neckband is actually graded perfectly IF you know to switch it so the greatest amount of stretch goes the short way, as in image above.

I’ve done my fair share of pattern testing, and I’m mostly disappointed none of the testers caught these issues. This pattern has been out for awhile, but Tilly’s customer base is mostly beginners, and I don’t expect they’d catch these issues, but testers should be experienced enough to go through the steps and pattern pieces with beginners in mind and catch these issues, especially the grading marks.

I also mitered the neckband to make a V at the point of ruching, and did the neckband last, instead of before the ruching as the instructions indicate, but that is a personal preference, so I’m not including that as a fix-it item.

A note about fabrics. I made this top in everything. The top is a cotton/poly sweater knit from Joann’s, the grandma boobs is a poly-something from Mill End, the green/white is a very yummy cotton double-sided knit from Britex, and this monstrosity below is a rayon blend from Girl Charlee – I like getting their weird off-print clearance fabrics for testing:

The pattern works well with various percentages of stretch…the Hawaiian acid trip has the most stretch, then the sweater stripe, then the Grinch green stripe, and last, the grandma metallic gold has the least amount of stretch.

I’m still WAY more in support of indie patterns overall, but this will probably be my last Tilly pattern. I’ve sewn the Miette skirt up a few years ago and wasn’t in love with that one either – so let’s just say they’re not for me. It’s an ok pattern, but for me, it’s no Renfrew. I still wear my stack of Renfrews, including in my last Ginger Jeans post. I’d rather hack the Renfrew to accommodate ruching before I wrestle with the Agnes anymore.

Or maybe there are some other go-to knit shirts out there I need to play with? I understand the Grainline Linden is popular. I might go that route next.