CLOSET CASE PATTERNS: Skinny Ginger Jeans

I DID IT! I’ve had the Closet Case Patterns Skinny Ginger Jeans pattern since June 2015. (sheepish grin)

Now, normally I’m not afraid to sew anything – I’m not really afraid to fail. It’s just fabric, and it’s always a lesson. However… My pants fitting has been on the scale from “Meh” to “I-JUST-BLEW-OUT-THE-ASS-OF-MY-PANTS-AT-COSTCO.” It’s true. Normally I have to scoop out the crotch, or add some hip length – I’m tall with most of it in my torso. Thanks to our amazing sewing community, Bad Mom, Good Mom pointed out on my Colette Juniper pants, most of my fit issues could be fixed with going up a larger backside size than the front. I’ve made about a dozen pairs of pants, but nothing quite like my Colette Clovers that actually split up the backside while picking up a case of water at Costco. That has steered me clear of close-fitting pants for a few years.

I had enough of the fear, and frankly, everyone else and their dog has made Ginger jeans now, so I was bordering on being pathetic.


I picked up a 1.5 yard remnant at Modern Domestic…it wasn’t labeled and it’s not on their site, but knowing MD, I’d says it’s a Robert Kaufman, probably close to this 8.6 oz stretch denim here. I paid about $25, so that’s about right MD would be a bit higher priced than fabric.com as they’re my locally owned fabric store. I would definitely recommend it and use it again.

I was going for a hopefully wearable muslin, as I wasn’t ready to cut into the Cone Mills I’ve been hoarding or the velvet bottom weight I have from Britex, but actual muslin fabric wasn’t going to test correctly, so hell with it, right? Just do it.

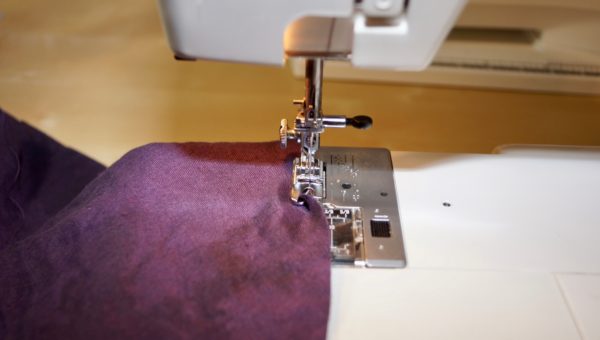
I only had a hot pink denim zip in my stash (hee hee), and I FUBARed the placement a bit – it’s about 3/8″ off – I read “line up edge of zip” wrong at the fly. Whatevs. I also have just a regular button on them, and skipped the belt loops – I’m still having top stitch thread issues. In fact, half of the top stitching is popping off a bit, but that’s a technical issue on my end, not the pattern. I tried to do it on the Janome and on the Viking, but I’m going to have to break out one of the vintage machines IF I’m to get that top stitch thread to work – or I may just ditch it. I’m not that in love with it anyway.

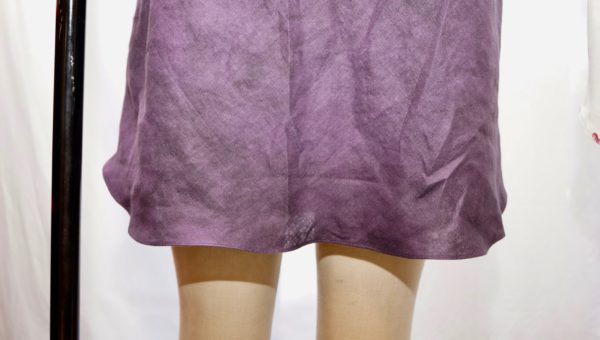
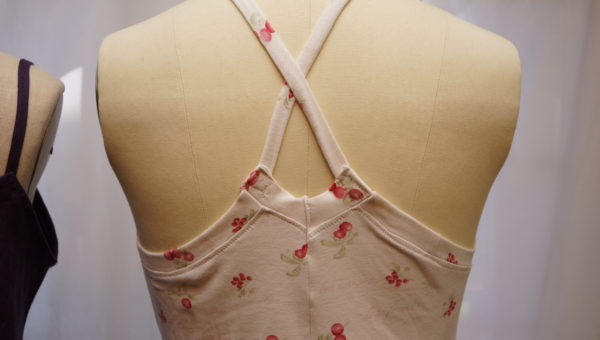
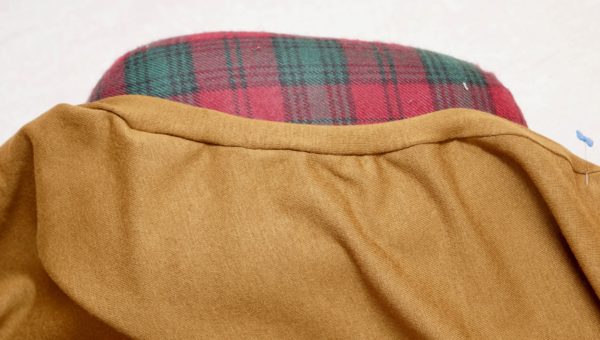
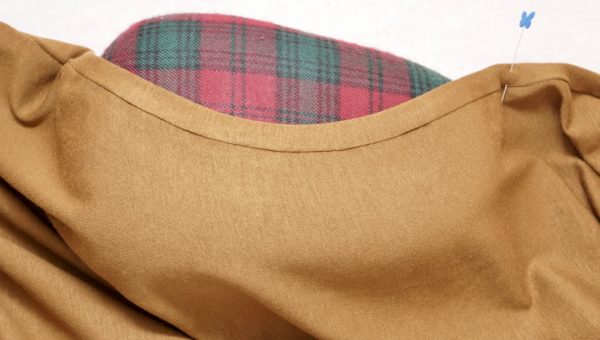
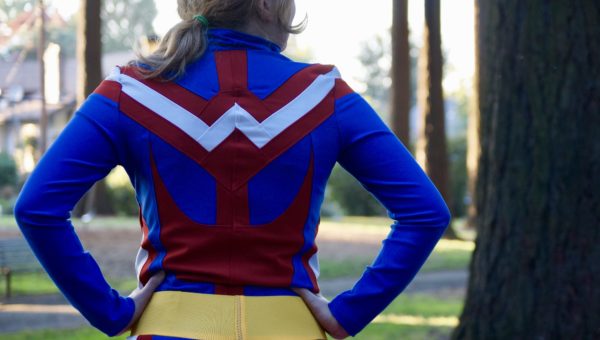
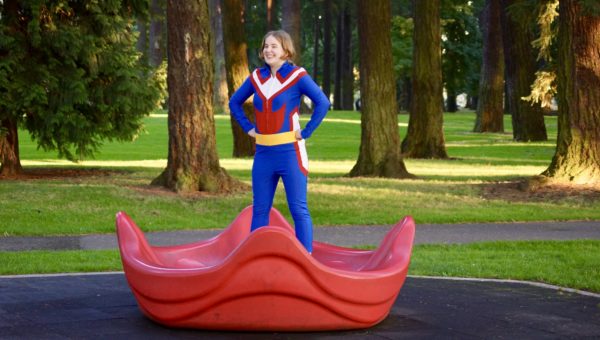
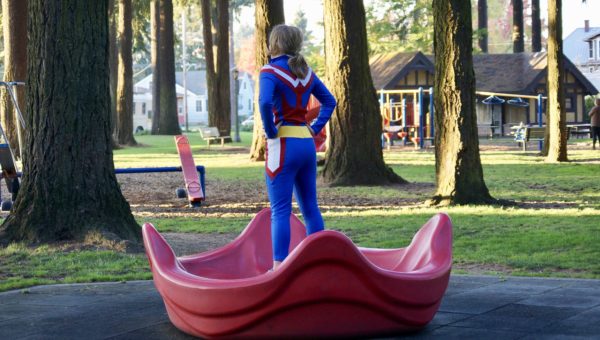
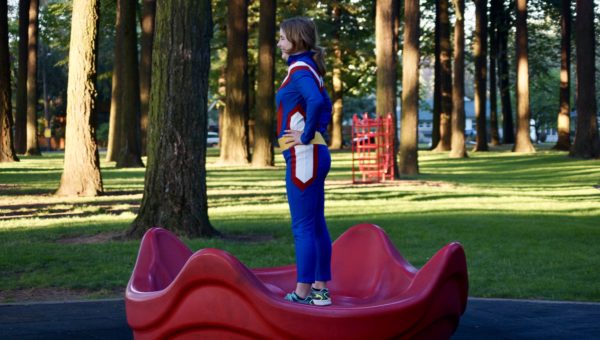
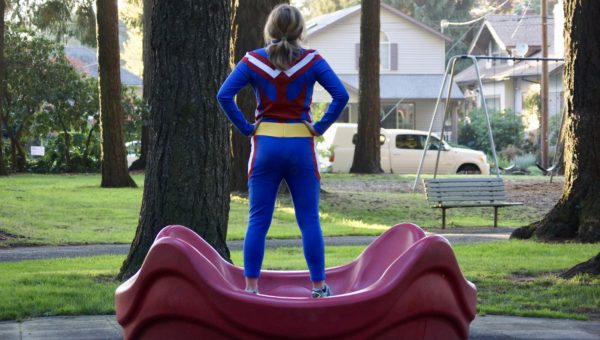
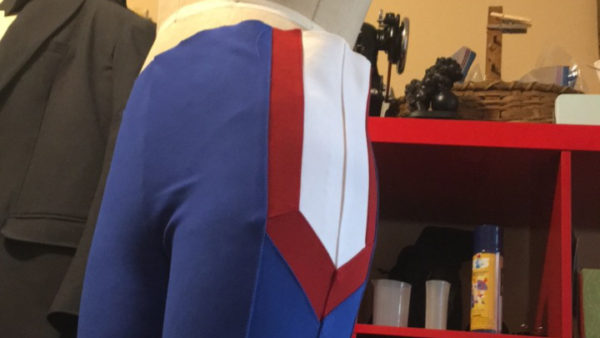
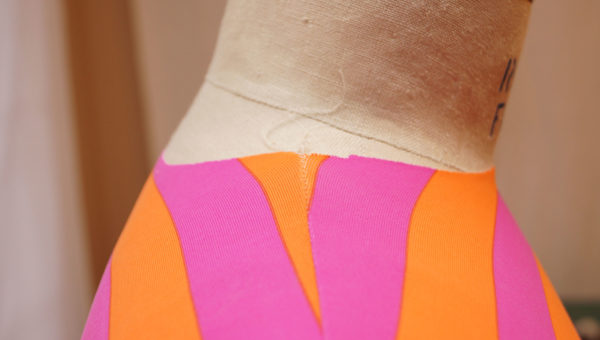
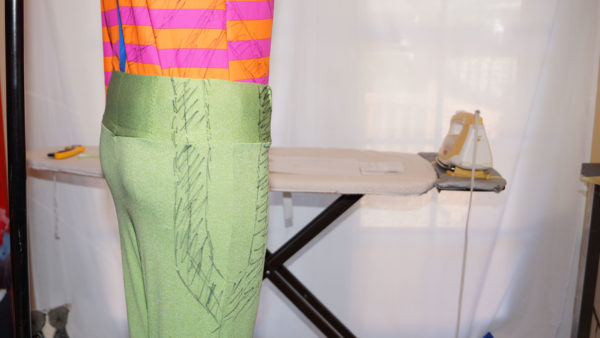
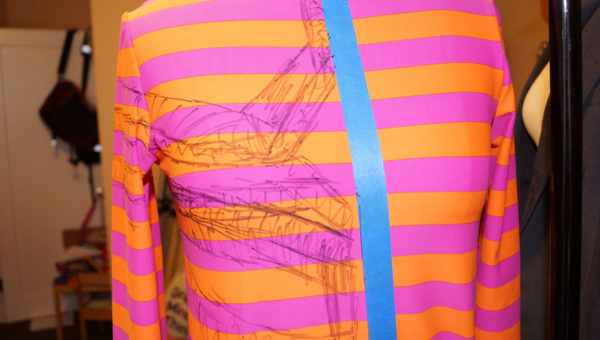
What do you think of the pocket placement? Should I move them up a cm? I can’t tell. I’m not a good judge of my own butt. I took a 3 inch wedge out of the back yoke – which I need to blend better on future pairs, but other than that, it’s pretty spot on. I’ve worn these for days, and this is fresh out of the dryer, so they’re a bit “packed sausage” at this point. They will loosen up a smidge, but the denim is really good and there’s no bagging out anywhere. You can see below where the wedge of the yoke meets the back seem of the butt and there’s a little wrinkle where it wasn’t blended well on this version.

For me, the waist is now at 0, the largest point of my butt/hips almost at a 14, and the rest is at 12. I’m fairly hourglass shaped, and gain/lose weight pretty evenly in that hourglass ratio, so this is normal for me.

Here’s the IG post of that wedge – I didn’t get a “good camera” shot of it:

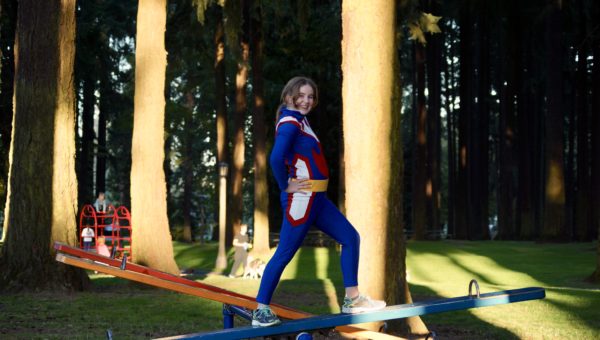
The legs fit perfectly. They’re bunching up a bit because I’m refusing to hem them.

My husband keeps teasing me that he’s going to hem them. I don’t want to….I want to leave them raw. We’ll see. I don’t know what the fashion consensus is on that. This is the full length of the pattern without any removed, as reference if you’re looking to make the pattern.

Sexy pants. LOL. Didn’t the 80s just totally ruin that word? Sexy. Ew. But the pocket stay on the inside?!? Holy crap. It’s like…it’s like a smoothing magic, without the discomfort of actual gross sweaty spanx or something.


Please excuse my mud room – it’s Oregon and we’re in the rain-half of the year.

Post post notes:

I had the pattern printed before the latest updates to the pattern. I think there have been 2 updates, and my version is smack in the middle. Meaning, IF I would have had the latest version, I would have probably scooped the crotch out the cm or so that was put in, and taken more out of the yoke? I think? Regardless, I did baste the sides, and the construction of the pants makes fitting on-the-fly really easy.

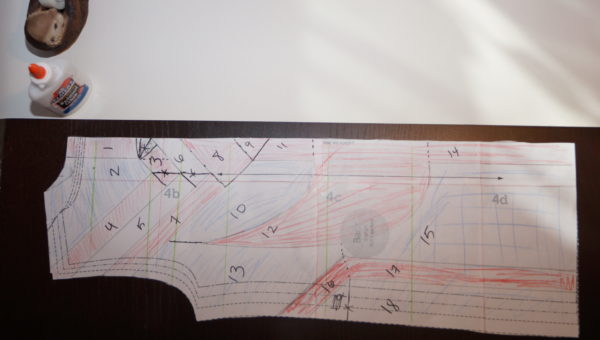
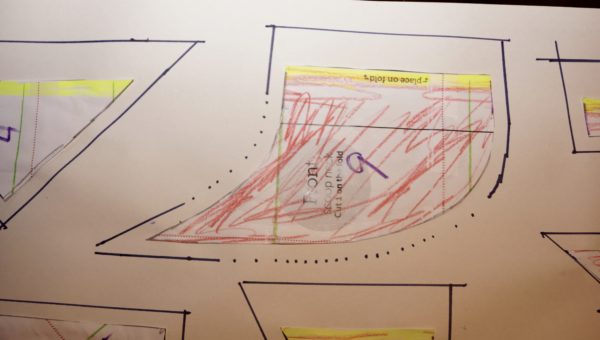
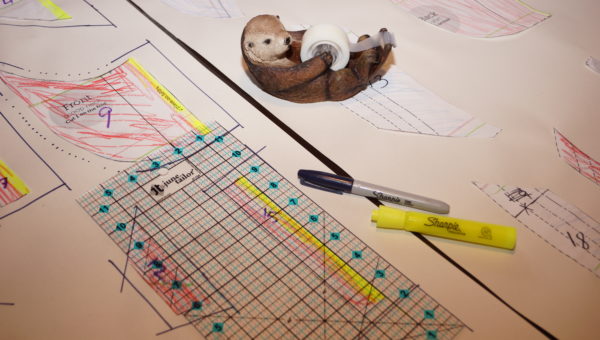
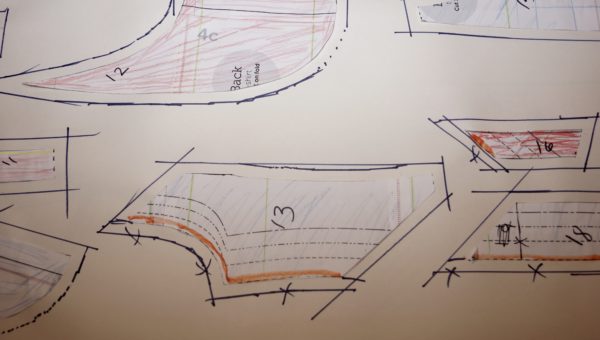
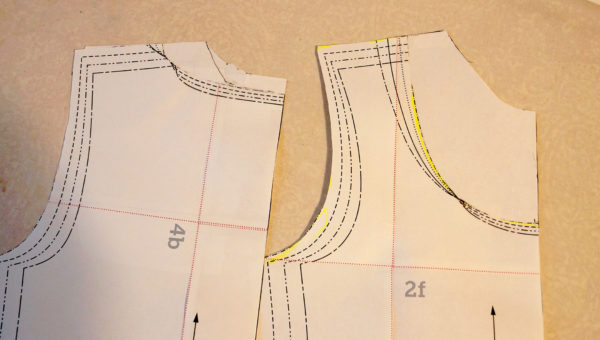
Let’s talk drafting for a minute. I’m just now learning pattern drafting and it looks so much easier than it truly is. The base pattern/sloper, or block, must be good before moving on to style, and then eventually grading to different sizes. To have the success of these jeans on the level that Closet Case has had, which is near cult status…well, they have the magical block. Will this fit everyone as easily as me? Well, no. But, again as reference, I fit J Crew/Banana Republic size 8 or 10 off the rack just fine. Sometimes I have broader shoulders/bust and the waist is too big, or whatever, but for the most part, I’m shaped pretty RTW-friendly. So, if that’s you, then this pattern will be GOLD!

If that is NOT you, Cashmerette JUST released the Ames jeans in different body shapes. While I have not sewn any Cashmerette, I have seen the detail work that has gone into their drafting, not to mention their HUGE fan base. Sewists aren’t fans of crap pattern companies. Well, I take that back, Big 4 still exists, but I submit that’s because they’re cheap (read that how you will.) Indie patterns cost more, and must be made better to succeed, and damn if Cashmerette hasn’t succeeded! I can’t wait to see Cashmerette’s jeans all over the Sewscialsphere.

Final All Might Cosplay Post!

It’s done! Aaaaaah!

This is the last post for my daughter’s custom My Hero Academia All Might cosplay outfit! She loves it and it fits her perfectly.

She loves it, and really that is all that matters.

The top has a full jacket zip so she can wear the top casually, as I knew she’d want to later.

I used 3-inch elastic for the waistband and covered it with a really finicky yellow ribbed Lycra to make the belt easier to deal with.

The pants are fine cropped as she’ll cover a pair of boots with the remainder of the yellow fabric, but can also wear them whenever – because she’s 13 and can get away with that!

We’re both happy with the end result, and I’m SO GLAD to be done. I’m glad I CAN do something this epic, it was a lot of fun, but it’s exhausting! I need to make some easy stuff before I take on something epic again!

She was a good sport, and we walked to a nearby park to take some action shots in the fading autumn light.

For the most part, my pattern worked really well.

I laid them out and pieced them in what seemed to be the best logical blocks to then sew together.

There were a few adjustments on the fly, like removing unnecessary Y-seams (seams that come together in a Y-formation and are more evil than anything else on earth.) I top-stitched most seams, and when inserting the zipper, I used a Gutermann clear, nylon thread so the stitching wouldn’t be visible over the alternating colors. The nylon thread isn’t the easiest to stitch with, so I didn’t do the entire outfit in it…I’m generally not a fan of the thread, but it was perfect for the hem and the zip insertion. LOTS of hand-basting and tacking the zip in before sewing to get each of those pieced sections to line up across the chest! LOTS.

And we’re done! YAY! Post 1, Post 2, Post 3, and Post 4 if you’re interested in the entire process.

Are you done with your Halloween sewing?


Custom Cosplay – My Hero Academia’s All Might – Part 4

Here we go. The last part of making the custom pattern. You’re going to need a roll of paper. I’m using an inexpensive roll of art easel paper from IKEA. You can use freezer paper, craft paper, Swedish tracing paper – whatever floats your boat. If this is something to be done again and again, Swedish tracing paper or brown craft paper is more long-lasting. I don’t use freezer paper anymore, and this is a one-trick-pony for me, so using the paint roll was the best option for me.

You’re also going to want a few more colors of pens/pencils that you didn’t use in your design.

I used a black Sharpie to cut my piecing lines. Naturally, I edited as I went x-marking out lines I decided against. I numbered my pattern pieces so that when I come back to this photo later with the pieces, I can see where it goes. You’re not going to remember all of your edits, so make sure you take a lot of photos BEFORE you cut, take notes if you need, etc. There will be edits on-the-fly as well…the better organized you are, the better you’ll be prepared.

I drew green lines across all of my pattern before cutting into pieces. These green lines indicate the direction of greatest stretch. You want the greatest amount of stretch in your fabric to go around your body, not up/down. This will be key in order to not get weird warping, and to make sure the garments will stretch around your body. Unlike in quilting, which lays flat, this will be 3-dimmentional around a body and needs to be designed that way. Quilting, you can make a bunch of strips on-grain and cut-to-length. Apparel, the grain must be in line with the body.

I used a yellow highlighter for areas I wanted to add extra seam allowance, such as the middle front of the top, so I could have enough seam allowance to add a zipper.  I cut the pieces and glued them to the roll of paper. Using the edge of a ruler against the pieces, I added 3/8″ seam allowance for most edges, except the yellow, I added 1 full inch. Curves are tricky – I favor pivoting the ruler around the edge and making dots to connect. You CAN do the trick where you tape 2 pencils together and it will be about 3/8″ between each leaded point….but there’s a LOT of tracing here, and I wanted to be more accurate. There are also specially made tracing wheels and all that jazz out there, but I chose not to go that route.

I had my tape handy for any edits or pieces that needed more securing.

A mistake I made was forgetting to mark edges that already had seam allowance. Luckily I caught it before I got too far along – so don’t do as I did. Use another color, like I used orange here when I caught it, and mark edges that already have seam allowance.

Another option is to add seam allowance as you cut either by cutting with a ruler guide, or marking directly on fabric as I did above on my leggings pieces. This works if you only have a few things and you’re not going to be interrupted in the middle of all of your work because it’s difficult to remember all the details on the fly – and cutting is permanent. So…you make a mistake this way, you can’t go back. I don’t recommend it, in general. This was for an example, and I knew during cutting the leggings, I had the time to get it all done at once. Even then…I did make a mistake, but had enough fabric to correct it. Barely. It’s better NOT to leave things to chance, or to memory in this case.

Here is why we put the green lines of grain/stretch on the pattern pieces. Would you remember which piece goes which direction once you have them cut out like this? Not likely. And more importantly, why would you want to? For the red, I had enough strips that I cut a couple yards on grain, and a few on the 45-degree (remember I made all angles 45-degrees to be easier later?), and lined up patter pieces on the corresponding grain-strips. I have fewer patterns in the white, so they got cut out one at a time. All pattern pieces are cut on the doubled fabric, so I’ve got my mirror images for left/right sides cut at the same time.

I highly recommend you stay organized. Something you learn in quilting is the magic of ziploc bags. Keep your corresponding parts together. I have a bag for sleeves, one for shirt front, one for shirt back, and one for leggings. Pin your pieces to the paper pattern pieces and keep them organized. Take a lot of photos.

Next is piecing it all together.

Continue to the Final Post.

New York Comic Con and Sewing

Singer Sponsors NYCC

I am SO inspired by New York Comic Con this year. Granted, maybe I would have been in years past if I was sewing cosplay then, but you tend to find things as you find them, you know?

See the comment on the IG post above about a “repair station?” How freakin’ cool is that? Sign me up to host a repair station at a comic con! I couldn’t find such a listing on their event site, but honestly, most event sites are pretty hard to navigate anyway, so I may have missed that one.

Singer is a sponsor, and…

Mood at NYCC 2017

Mood Fabrics! Incidentally, Mood is also running a prize for homemade costumes this month with the hashtag #MoodMadeCostume17.  

AND….

Brother Sewing NYCC 2017

Brother Sewing USA has a booth, AND, naturally, …

Simplicity NYCC

Simplicity has really been growing their cosplay/costume section lately, so that’s a given, right? AND…

Dritz / Prym booth at NYCC 2017

Dritz / Prym. I could totally move into that booth. Click the link on the photo caption – there are 4 photos. My screen shot doesn’t do it justice.

There’s also a new-to-me company called Cosplay Fabrics. It looks like they have some pretty cool stuff on their site. I have no experience with them, but the more, the merrier.

This is great. I hope there are more and more people joining the sewing / DIY community. I hope to see even more sewing people and companies supporting the cosplay/comic-con/anime genres of art and sewing.

Alright, I gotta get back to my own cosplay pattern making, currently in progress!

Custom Cosplay – My Hero Academia’s All Might – Part 3

For Part 3, you’re going to want a BIG eraser. Or…perhaps you have a steadier hand at hand drawing than I do? OK, for this part I wanted a BIG eraser. I also relied heavily on an Omnigrid ruler and a basic French curve ruler. You could get away with other measuring tools, such as a basic ruler, and for many years, I used a plate or cup edge for curves.

Couple things to keep in mind before drawing:

  • You’re going to have to sew these pieces together, so keep your angles as simple as possible. Everywhere I could, I used a 45-degree angle or a 90-degree angle.
  • Also filed under sewing these together, remember each piece will need a seam allowanced added. That includes the new “cut on center” lines that were used to cut full fronts/backs, as this will now have each side of front/back split into mirror images on the left/right. I’ll be adding 3/8″ to each of mine. “Cut On Center” is now +3/8″ to allow for sewing both sides together.
  • Try to keep your lines to a uniform size, if you can. Keeping my lines to 1″+ 3/8″ seam allowance on both sides will allow me to cut strips of 1 3/4″ that can be cut to lengths needed.
  • Remember to match up bottoms to tops, and backs-to-fronts through the sleeves – more on that later.
  • Colored pencils are your friend. You’re going to want to have these colored the final color, numbered, and labeled left/right on the front/back so you remember to cut mirrored images in the same color. Do yourself a favor, and do it as you go.
  • Have an eraser close by. It’s easier to draw your basic lines, then erase connecting/crossover lines.

An Omnigrid is great because it has 45-degree markers on it, and I can line up a previously drawn line under the ruler, add an inch over, keep it parallel, and draw the next line. It’s not necessary, just easier. color as you go, so you don’t get confused as to which line is connecting to where.

When you’re ready to match patterns on the shirt front and back, make sure the BOTTOM of the shirts are matched up, NOT the arm whole aka armscye. The armscye may not match due to the curvature of the sleeve inset, so match the hems. Put your first design on top of your next piece and match up your starting points. This is also where it is good if you’re using uniform sizing and angles. I just had to notch where the top of the red line started, draw a 1″ thick line of red at a 45-degree angle, and the rest falls into place.

See my arrow? There’s a little red line there – that is where I marked my start so I could match it up. When I go to match this to the leggings, I’ll match up the side seams of the leggings to the side seams of the top.

But first, let’s talk about sleeves. “Walking up a seam line” is exactly what it sounds like it is…you want to match up the sleeve head curve to the shirt-body sleeve hole (armscye) 1 cm at a time, until you get to a line, and mark that part on the sleeve, walk up to next mark, and so on. Repeat on both front and back, then connect and color your marks.

When you’re done with your top pieces, they will look something like this:

Next, you’re ready to line up your bottoms and match your lines. Now it might be late to add, but since I just remembered it…if you’re hacking patterns like I am, please be sure both patterns have the same seam allowance…if my bottoms have a 5/8″ seam allowance, and my top has 3/8″ – then my matching is going to be 1/2″ off on both sides (1/4″ for each seam.) That would suck after all this work, amirite?

OK, other than that, since my bottom pattern is pretty easy, matching up the bottom was a cinch (famous last words):

Next up, will be pattern piecing. If you’ve ever done quilt paper piecing, the idea will be the same. If not, you’re in for a real treat. 😉 Insert sarcasm. I can’t stand paper piecing, to be honest, but I’m glad I’ve done it.

Now, this is all fly-by-the-seat-of-my-pants here…applying experience I have elsewhere. If I was going to actually make a sellable pattern from this work, I’d have to test and retest this all multiple times….I tell you this so that you know, when you buy a sewing or quilt pattern, that intellectual property they put out in the world is worked over and over and tested. I’ve done pattern testing…trust me, it takes a lot of work to even get the pattern to me to be tested. So while I put this all here for free and for fun, please know Seamwork & Sew Liberated put in the time and hours for the blocks I’m hacking, and many a quilter has spent time making paper piecing patterns for me to tinker with – off the top of my head, Elizabeth Hartman’s alphabet taught me a ton. This will be a bit different as we’re not using stiff quilting cotton – that has it’s own set of pros and cons, but hey, you can’t know what you don’t know, and if you don’t know, just go with it and have fun.

ALTERNATE ROUTE 1. You can stop here and cut out your color pieces. Make your base outfit in the base color, appliqué (sew on top) your stripes and patterns. In fact, if you’re not sure about sewing a curved line in spandex, and/or sewing 45-degree angles in spandex lycra slippery stuff, that is a good option. Bonus: no seam allowances needed.

ALTERNATE ROUTE 2. Hell, you don’t even have to sew the parts on. You could fuse them on with 2-sided interfacing – but for the love of the Iron Gods, put a piece of cotton or silk between your iron and the lycra unless you want a hot, melted mess and a ruined iron. Same bonus of no seam allowances needed.

Continue to Part 4


Custom Cosplay – My Hero Academia’s All Might – Part 2

Here we are in Part 2. In Part 1, we chose our base patterns to hack for a custom All Might cosplay costume. Being I want to get this done well before Halloween, we are truckin’ right along.

First, I altered the patterns to make the crew neck I wanted, and to widen the shoulder coverage. I sketched on the drawing the alterations I thought I would need and made those adjustments to the pattern.

Second, I made a muslin, or a fitting sample, of the pattern pieces to be sure they were where we wanted them. I drew directly on the muslin, while it was still on my daughter, the alterations that would need to be made on the final draft. The neckline needed to come down about a centimeter in the front, up about 2 cm in the back, and the leggings needed widening in the calves plus 2 inches in length added.

These alterations are pretty simple. I’ll be using knit fabric with a lot of stretch, which allows a lot of forgiveness. This isn’t like making a custom corset out of woven silk – I’d have about zero wiggle room there and would have to be much more precise. I’m going to be using a fairly thick ponte knit with rayon/nylon/spandex content. I chose a ponte because it will be thick enough to be opaque, and only have about 10% stretch so it won’t get all baggy, but will have enough stretch for movement and fit.

I let my daughter take a run at directly sketching the design on to the fabric. This route proved to be ineffective, albeit a great learning moment for her. I need more precise pattern pieces…and the ability to erase LOL. So….live and learn. As a 13 year old, she doesn’t have the experience to know what needs to line up, and where…and how pattern pieces are made. Letting her make mistakes and showing how it will be corrected is all part of the process.

I leave these here so you can see how this can go very wrong. There are ways of doing this correctly… I put tape down the centerline, because you’re only going to pattern half of the shirt front/back, add seam allowance, make a mirrored version, and combine (or add a zip if you’re making a body suit.) You *could* cut these pieces and use them as pattern pieces this way IF everything was drawn accurately. In this case, it was not, and that’s ok. There’s always a Plan B. 😀

However, I’m going to take this moment to say if you’re only making this once, which I am, don’t over think it too much. Although I will be making more accurate pattern pieces, I’m not making pattern pieces that will last. This will be a one-trick-pony.

Next post, Part 3, will have how to sketch directly on the base pattern to create pattern pieces.

Custom Cosplay – My Hero Academia’s All Might – Part 1

My oldest daughter is 13 and is having fun with cosplay. I’ve coached her through sewing a thing or two…

…and she’s put together a cosplay outfit here and there…but now she wants to be All Might, aka Toshinori Yagi, from My Hero Academia for Halloween.

This is a screenshot from a site, EZ Cosplay, where you can order a custom-fitted cosplay of the character you want.

I don’t have experience ordering from them, but honestly, that’s really not a bad price if they really fit and it comes on time.  My daughter wanted to be sure it would fit and on time, so she requested mom-help.

We have purchased things on eBay in the past, and have been perfectly happy there as well. These Attack on Titan belts were complicated, but worked out great.

Point being, however you get to your outfit is how you get to it, and it’s all about enjoying it.

For this adventure, however, we are going full custom. We looked at Simplicity’s many, many base costume/cosplay options:

This base pattern of a jumpsuit and leotard was a strong contender, but at the end of the day, I wanted my daughter to do a lot of the designing, and be able to use the restroom easily, so we opted to use a basic long sleeve t-shirt top and leggings patterns as a starting point. We have enough pattern hacking to do without having to remove panels, or deal with snap crotches. We’ve also borrowed The Hero’s Closet from the library.

It’s a great book with a lot of base patterns, and if you’re new to sewing and pattern hacking, it would be a great resource. In our instance, my daughter has me, and I’m not new to it, so we’re going to use what we have on hand.

Like I said, we’ve opted out of using a leotard or unitard, and we’re going to hack a long sleeve t-shirt and a pair of leggings. The basic t-shirt we are using is from the same Craftsy class the hoodie my daughter is wearing above, and the leggings base will be the Seamwork Manila leggings.

from the wiki on My Hero Academia

So, if you’re interested in following along, I’ll document our journey on creating a custom costume based off of these basic patterns.

Seamwork Manila
Craftsy class on sewing knits by Sew Liberated

Part 2 is here.

FRIDAY PATTERN COMPANY: Garamond Top

This is the Friday Pattern Company‘s latest top, the Garamond. Do you follow Chelsea on Instagram? You should. Super cute, fresh patterns, she’s adorable, and super amiable. I love friendly, approachable people, and she’s that kind of people.

Chelsea let me get my hands on this pattern before release, and being I’m a total pattern-testing addict, I couldn’t resist digging right in. The PDF was a breeze to put together, and it sewed up REALLY fast. This is the knit top you want to sew if you don’t have, or don’t want to use, a serger. I didn’t touch my serger. This is all machine sewn.

I used a ponte with about…. 10% stretch. You could totally use a stretch cotton woven too. As you can see here…I could have even gone down a size or put in additional lower darts if I wanted to make it more fitted. I cut a large for my bust, graded to a small waist, and a medium hip…I got the curves, what can I say? I like pizza.

Here it is from the back. Plenty of ease…but I’m not swimming in it. It runs a bit short…not quite cropped…like, if I lift my arms, I’m not going to make any children cry…

Here I am, adjusting my waistband, and no wardrobe malfunction.

If you wanted to add a few inches in length, or wear higher waisted bottoms, it would be adorable tucked in. Dolman sleeves make for easy wearing and easier sewing.

Pretend casual walking shots:

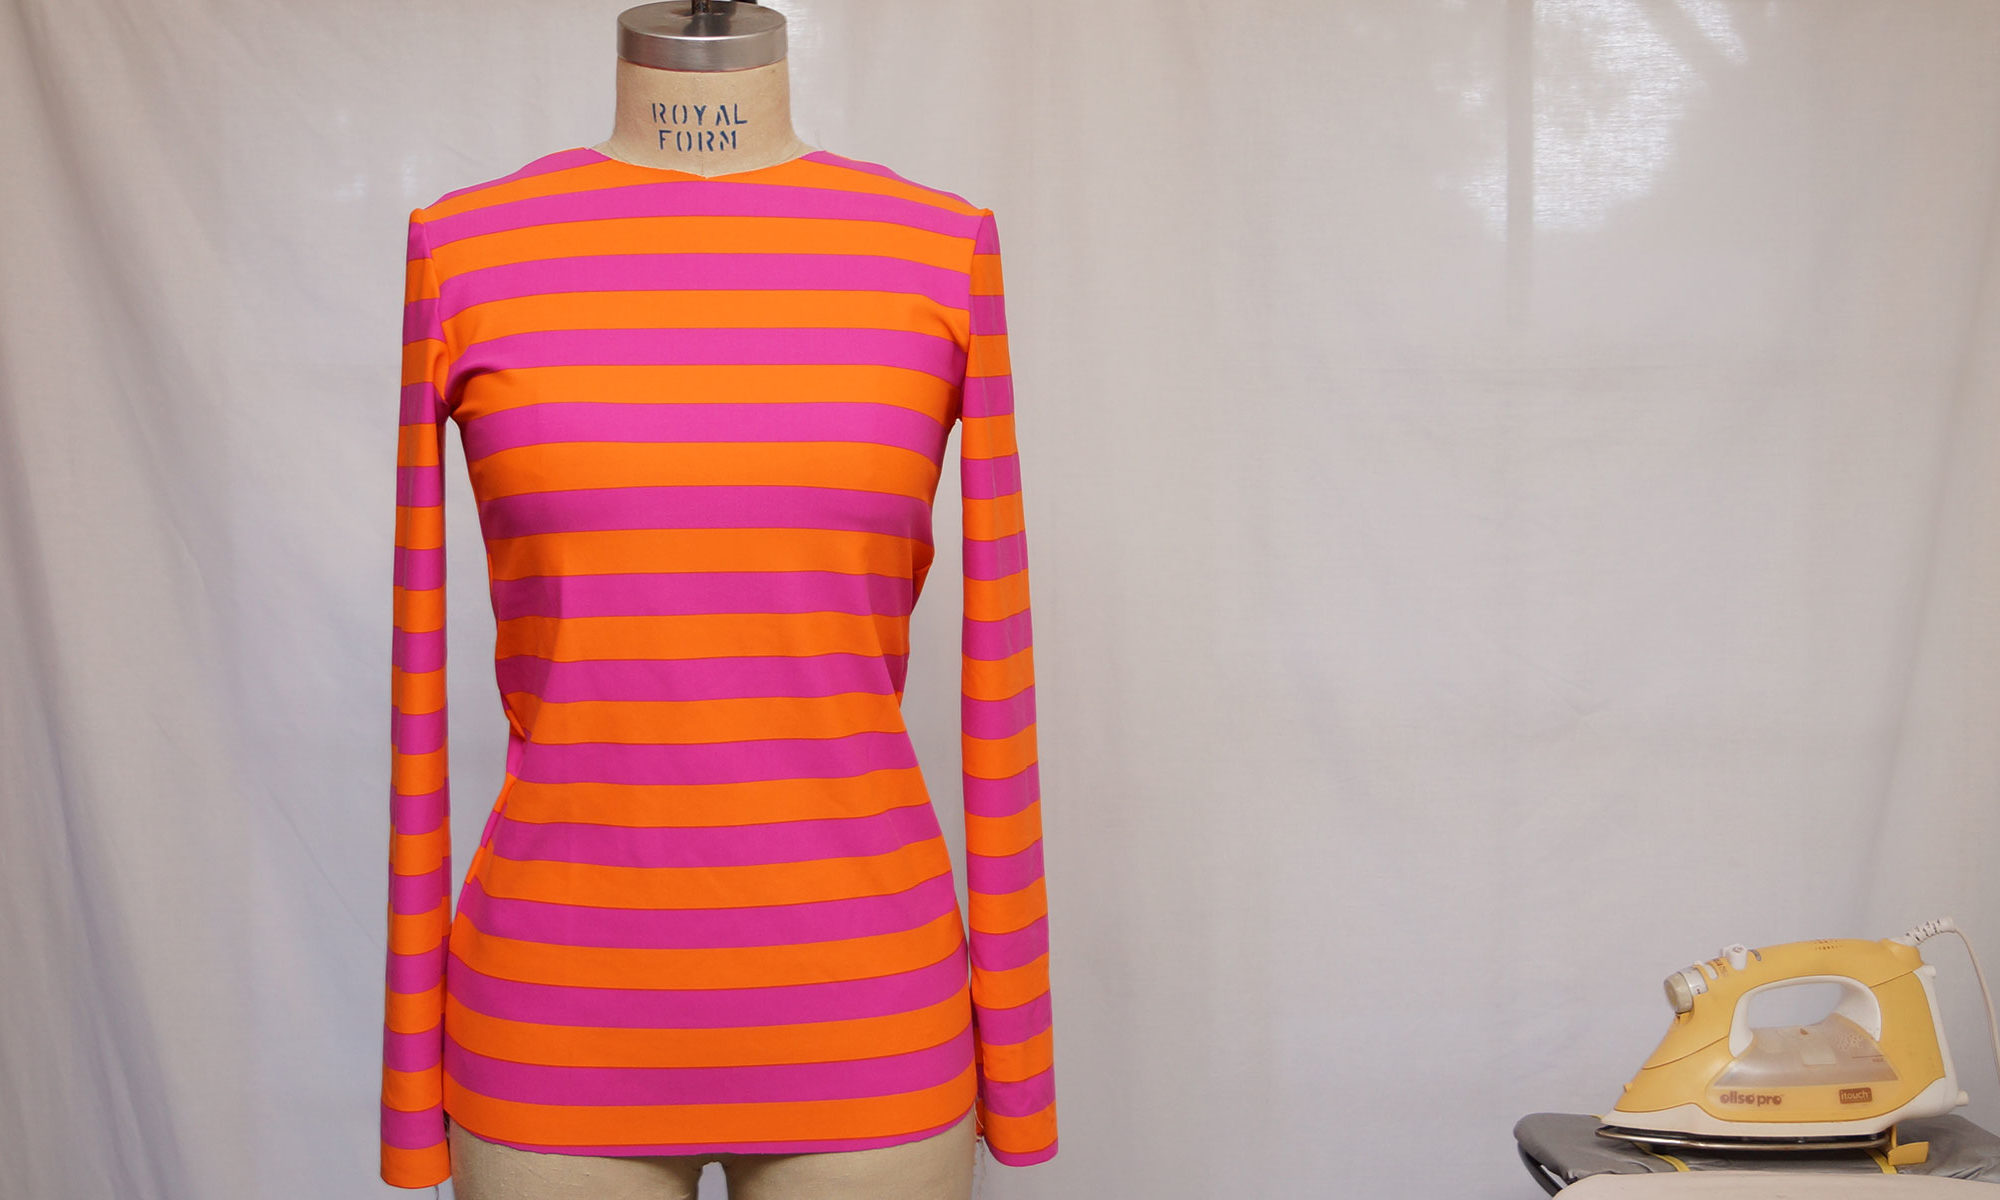
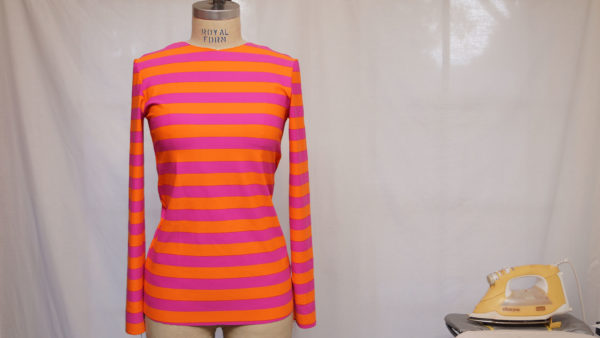
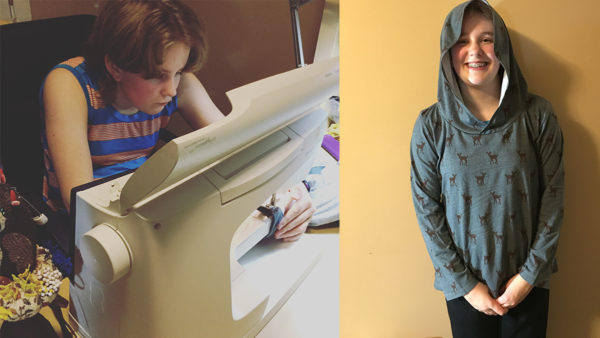
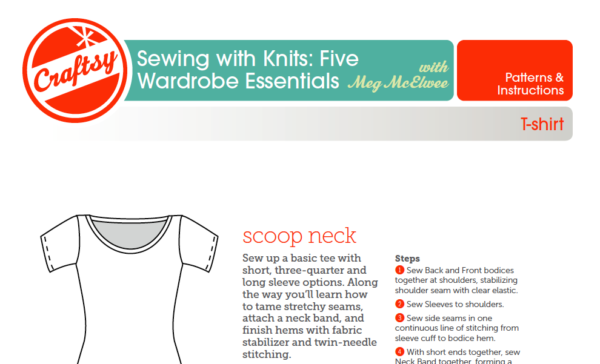
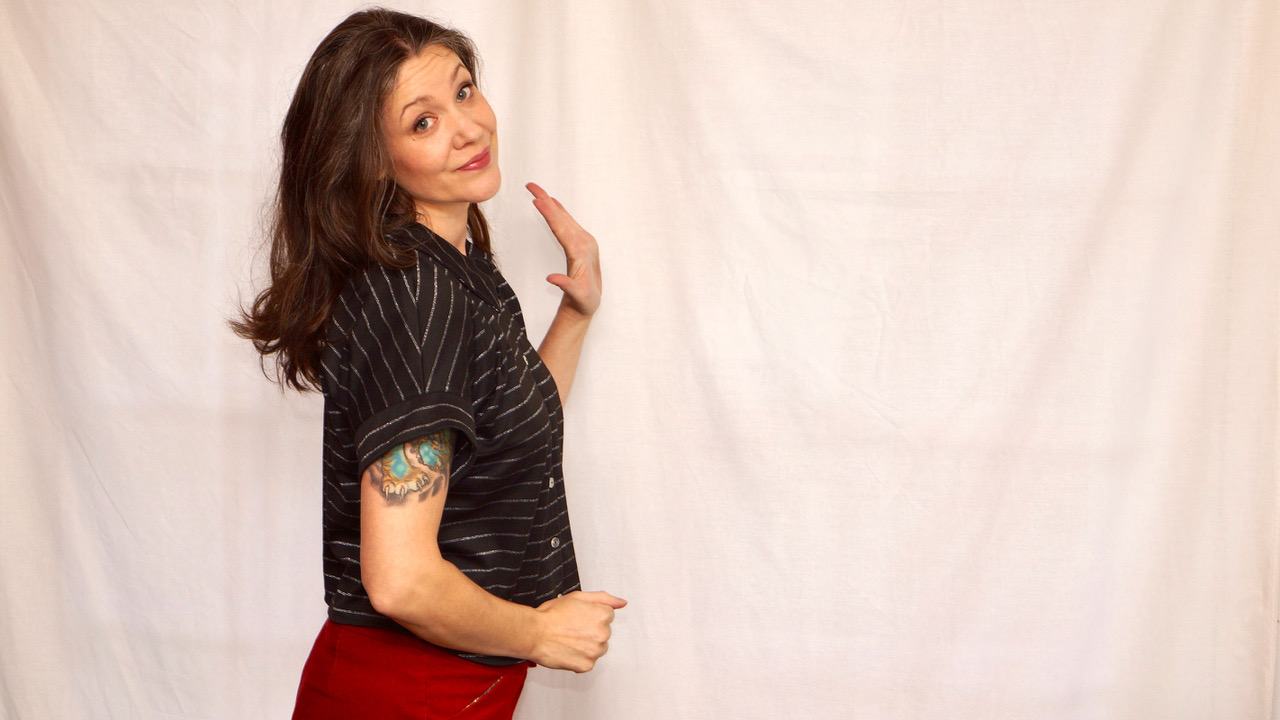
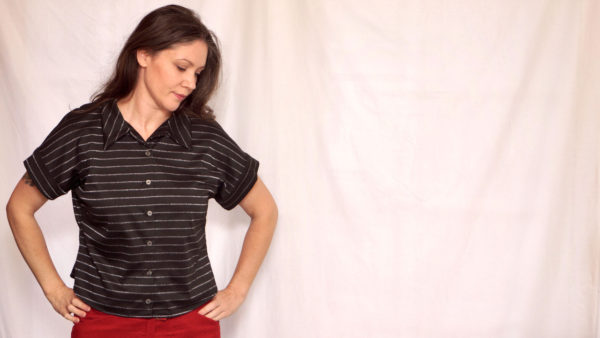
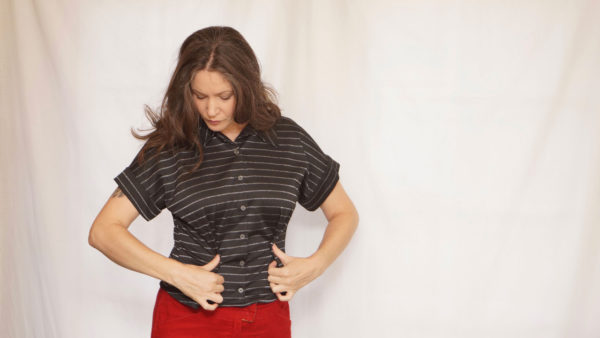
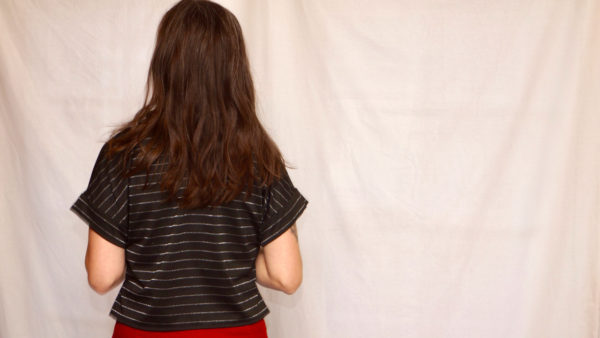
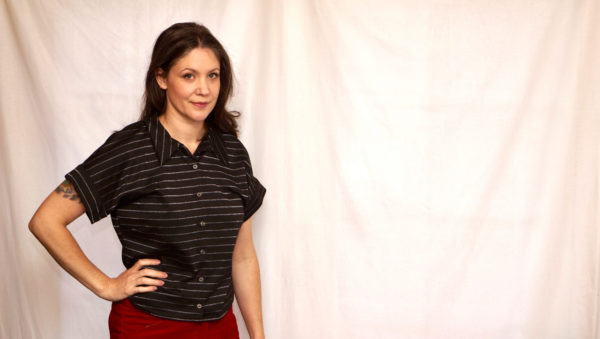
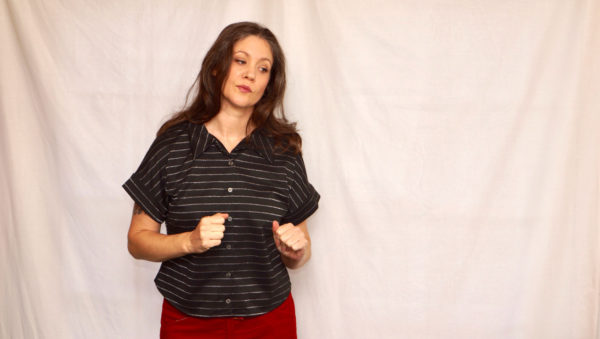
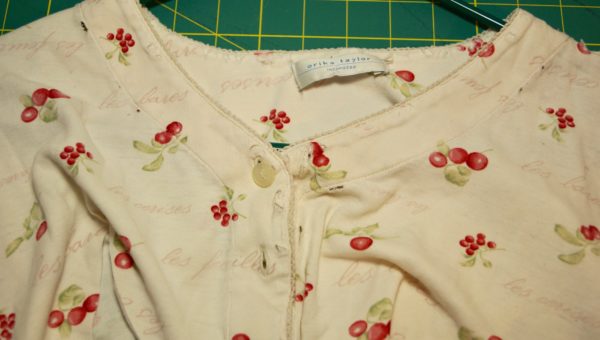
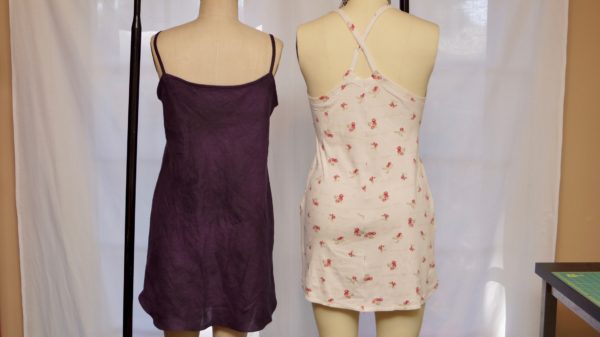
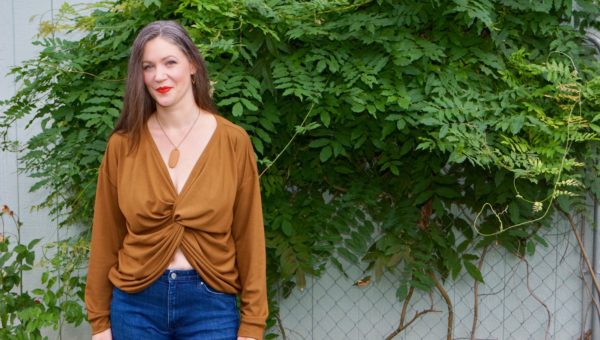
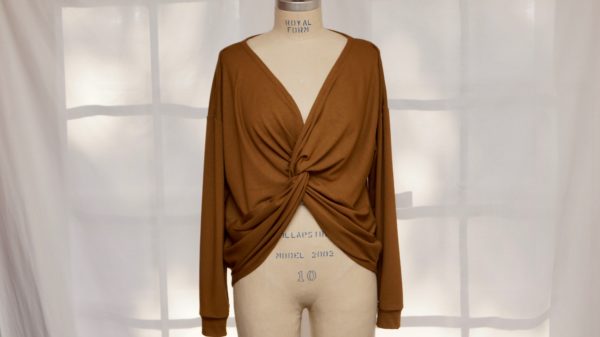
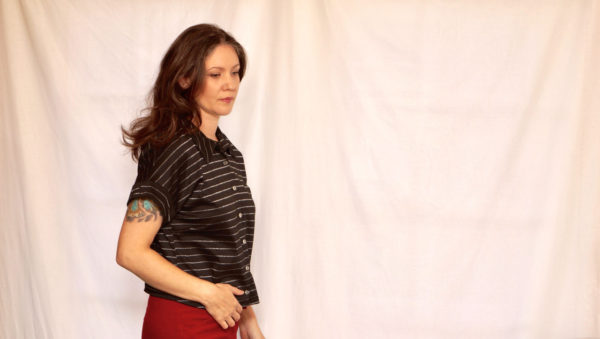
Fun, casual shirt. This is one of those patterns where you could easily sew up 5 versions over a weekend, and have that basics slot filled.

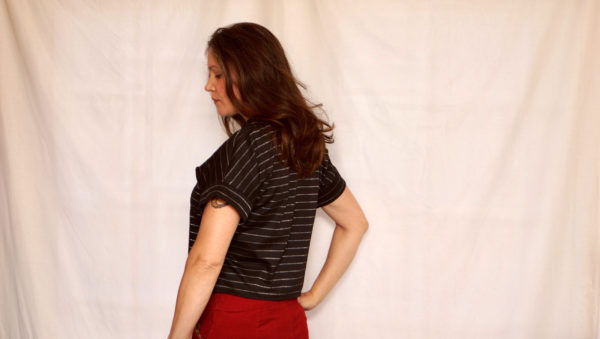
Real talk: my teen daughter already has plans to steal it from me. Seriously. I had to tell her to wait until I took photos….and then I’ve worn it 3 times in the last, ahem, 2 weeks since I’ve sewn it.

Bonus: Friday Pattern Company donates 5% of all proceeds to a rotating collection of the top-ranked charities in the world. That’s right. You buy a pattern, other people benefit.

White girl dancing… side notes. These are Colette Juniper pants…unblogged but often worn. Also..I’m playing around with a shooting set-up indoors in prep for the Pacific Northwest Rainy Season…Not quite there yet, but I’m working on it. If you have tips, I’m ALL EARS. Less time in photo processing = more time sewing. Also…need to figure out a set-up for indoor video – if’n y’all like the sewing machine tinkering I do. I’d like to share more…thoughts on that?

Sweat Bees

If you follow my IG account at all, you might know I FUBARed a sports coat peaked lapel pretty good recently. I had to tear out a lot of work. I cried. Ugly cried.

So, I’m back at it. Taking it slower.

At least double welt pockets are easy enough.

I took a bit of a break today. This one had her last immunization today before Kindergarten starts…didn’t even shed a tear. Please make time stop. She’s my last baby.

So we played in the yard. Sprayed each other with the hose. Marveled at sweat bees on a lone surviving sunflower.

This one has even been knocked down by the squirrels too, but keeps on keepin’ on.

That’s kind of how I have to re-approach this lapel again.

Slow, methodical, and enjoy the process. I’m so used to speeeeeeeding through and around everything. I just started liking yoga a couple years ago, but I’m still not going to start paper-piecing quilts anytime soon.

Walk away. Come back. No manic allowed.

Not sure what is going on there….I think these are end of summer males getting a little angsty if I’m reading the wiki right.

I think I might quit Twitter.  It’s exhausting. I can get news and opinion elsewhere….but I feel like I’m in a vacuum, on Twitter, of this hive mind and I’m not sure I want to be in it anymore…there’s no growth there anymore…

I prefer Instagram… for now. Even with their stupid new algorithm. I feel the discussions are more productive. For now.

I’ve also been enjoying my quilt guild more this year than in years past. I think there’s been a refresh in the guild and it’s a more supportive atmosphere than it has been before, whereas other places, like Twitter, feel stagnate and not where I want to be anymore.

There’s my meandering Friday thoughts. And my sweat bees. Kind of a gross name for something so incredibly beautiful.

A Refashion and A Scrap Bust

Two nightgowns based on the Seamwork Savannah pattern, more or less. I’ve been tinkering with the arm/bust area and have narrowed it by about an inch at the top on both sides to prevent the gaping I was getting. I also paid more attention at keeping the bias tape facing taut as I sewed. I added 4 inches to length with some leftover Britex linen I experimented with over-dying.

I also have been getting more comfortable with the knew-to-me rolled hem foot.

I don’t quite have it perfected. This time I hemmed before I put in the French seams – the foot does not like to have bulk of any kind roll through it. It worked a bit better, but I’m not quite there. I’ve got a few warbly spots, and a couple spots where it has rolled back on itself, and at the side seams it’s not quite right. For my 2nd time, I’m pretty happy with it, but will need to practice much more.

Linen & wrinkles. Like peanut butter and chocolate. Not my best dye job either… I over-dyed the Burnside Bibs too after this, learning from this blotchy mess, and they came out almost perfect. I used Rit black, a cup of salt, hot water, and was much more patient with the bibs.

The second is a refashion. My mom loved this nightgown for over 10 years and asked if I could salvage some of it. It really is a very soft cotton. I’m not sure how long it’s going to live after the refashion, but some is better than none.

I started with my Savannah-turned-nightgown pattern. Since it was originally a very full henley nightgown I didn’t think to take in much ease, but that proved to be a mistake. There was a huge gap at the back, even with crisscrossing the straps.

I had already put on the binding. Whoops. In hindsight, I should have made a figure 8 with the binding and straps…Live and learn. HOWEVER. I have an excellent jumping off point to re-draft this as an original design from scratch.

Crappy iPhone photos showing gap-mishap. It was was WAY worse on. Dress form linen is a bit sticky, not slinky, and grip the fabric.

I went with the crisscross straps, then I took my rotary cutter and cut an 8 inch wedge down to zero at the hem, and ran it through the serger.

It’s a little slap-dash, but I feel it has a lot of potential. I really like the back. I’m going to start from scratch next time, but I think I’ve got something here. You can probably visualize better here the figure 8 that the binding and straps should be making, and they’d just cover the back and front binding ends so neatly.

I left the original hem on the knit gown.

I had to cut the binding from the sleeves, so technically the stretch is in the wrong direction, but it turned out great. Really flat and solid.

Overall, I’m happy with my double wearable muslins.

Sewing and Stabilizing Knit Garments

This post first appeared on Britex Fabrics.

It’s almost my favorite time of year: autumn layering time! I looked through the beautiful woven wool fabrics at Britex, but when I saw this raw umber viscose & wool knit, it was love at first sight. I’m not exaggerating when I tell you, if you want it, buy it now. Mark my words, it will sell out.

I know a lot of sewists are scared of knit fabrics. Maybe you think you need a special machine, or special stitches, or some pro-level techniques and materials. I’m here to tell you that all you need is a zig-zag stitch and an iron. I’ve sewn knits on a pre-WWII era machine, and on a modern computerized machine. Knits are easy. For this instructional post, I’ve this easy Aomori Papercut pattern, which also happens to be a perfect transitional fall piece.

I know what you’re thinking, “But Becky, that pattern isn’t listed as easy!” The pattern’s sleeveless version is made for wovens or knits. The sleeved version isn’t even a “set-in” sleeve.

Lesson 1: Put a piece of masking tape on the wrong-side of your cut pieces, and you’ll instantly make this an easy pattern.

Lesson 2: Let’s talk stretch percentage really quickly. This pattern doesn’t list a recommended stretch percentage, it’s that easy, but my advice is 30-50% would be best for the sleeve cuffs and binding. How do you know percentage? Just like anything else, you have the difference in ratio, and multiply by 100. So, if I take 10 inches of the Britex viscose/wool knit, put it next to a ruler, and I can stretch it to 15 inches, my formula is [(15-10)/10)]x100=50%. A=original measurement. B=stretch measurement. B-A to get the difference. Difference of B-A divided by A. Bounce the decimal point to the right twice, AKA multiply by 100. [(B-A)/A]x100=%

Here we have the top in two different fabrics. The Britex viscose/wool (left) and a rayon I had in my stash to make the muslin. You can see how two fabrics make a very different top.

Lesson 3: Stabilize your shoulders. There are a million opinions on what to use to do this and I’m going to tell you to use what you have. I’m not a fan of using clear plastic elastic in my shoulders; I think clear plastic elastic is for swimsuits and occasionally lingerie, but you do you, just stabilize your shoulders. The entire weight of the garment is being held on your shoulders.

Here are 4 stabilizer options, with both an overlocker stitch and a basic zig-zag stitch, and what they look like pressed from the right-side. As you can see, stitch doesn’t change anything drastically, nor does stabilizer preference.

From top to bottom: rayon hem tape, twill tape, clear elastic, light iron-on stabilizer

Pin the stabilizer of your choice on the shoulder seam and sew on together.

Lesson 4: Press and steam with your iron. Do you know any knitters? You know how they “block” their pieces after they’re done? Same idea. You’re creating new fiber-memory for the fabric so that it stays in your new shape. The fabric has been flat on a bolt, and you’re asking it to be 3-dimensional. You need to re-block it. Use steam and an ironing cloth. I use a scrap piece of voile, but Britex has some affordable silk organza that is even better.

When necessary, use a pressing ham. Let each part you press cool in-place before going to the next section to reset the fiber-memory.

If you’re in doubt at all, before pressing the binding on a curve:

After pressing the binding:

If anything, Britex high-quality fabric makes a bigger difference than any technique or equipment used. Get some of the wool/viscose (before I go back and buy the rest of it), and get on to making!

This post was written by me, Becky Johnson of sewbeckyjo.com, for Britex Fabrics. Fabric was provided as compensation, however all opinions, photos, and intellectual content contained herein is my own. The pattern used is my own purchase, and this is not an endorsement, nor was I compensated in using the pattern.

How to Clean Spray Baste or Glue

I’ve written how to clean or remove spray baste gunk before, but since it is one of my most popular posts, I thought it deserved a refresh. This is not a debate on spray baste or spray glue. I love it for making bras and gluing tiny bits of lace to power mesh before sewing, or for stabilizing knit minky to a woven fabric.

Overspray happens. Here’s how we deal.

Clockwise from top left: quilting cotton, sheer poly-lycra-blend hatchi knit, poly minky, linen-cotton blend

Here are a number of fabrics you may be using with spray baste. I first encountered the gunk when making a baby blanket with minky.

Fabric with spray baste gunk

For this tutorial, I sprayed half of each fabric and literally dabbed them with dryer lint to recreate a worst-case scenario. Don’t worry, this will also work if you’ve already washed and dried your item, and your gunk looks like silly putty mated with an old bathrobe.

Use 99% Alcohol

I prefer 99% isopropyl alcohol for removing gunk. I buy cheap toothbrushes just for cleaning. I suspect that is why there are medium and hard bristle options even after years of our dentists telling us to only buy soft bristles.

non-reactive surfaces

Use non-reactive cups and surfaces. Pour some alcohol into the cup, dip toothbrush into alcohol, and scrub.

spray baste removal

It will take a few dips and some scrubbing, but it is the best method. I’ve tried Simple Green, Biokleen, vinegar, dish soap, crying…nothing else works. Ronsonol lighter fluid or Goof Off would probably work according to “handy man” sites, but I have not tried those on fabric.

Spray Baste Cleaned

After you give it a good scrub, let it dry. Feel it. If any sticky remains, give it a good scrub again with fresh alcohol.