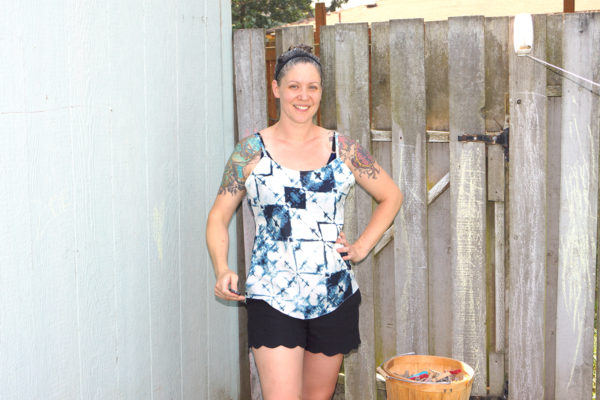
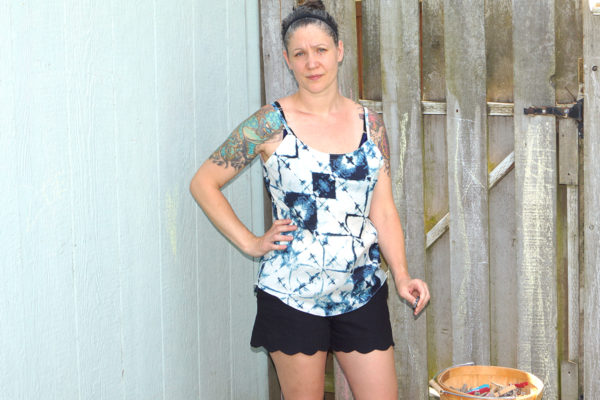
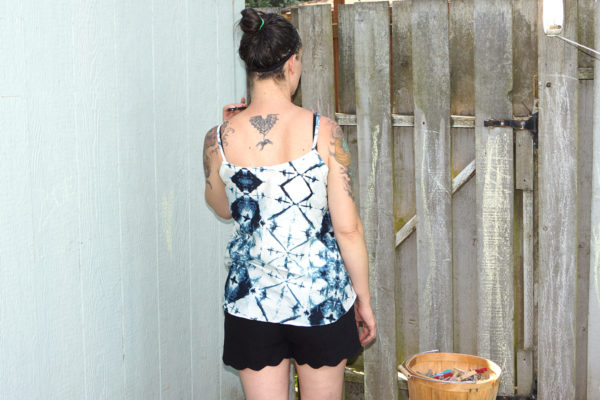
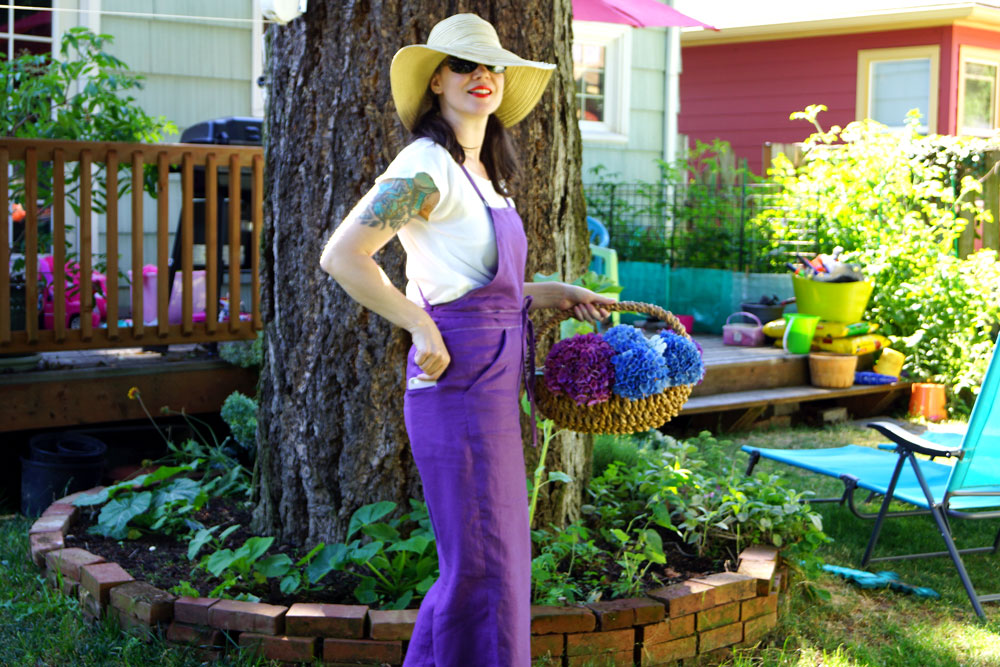
That smile is 100% fake. It’s 106 degrees. I’m born and raised in the Pacific Northwest. We don’t do Arizona temperatures. We don’t even build houses with air conditioning…maybe a heat pump, but unless you’re in some suburb, there’s no AC. Sigh.
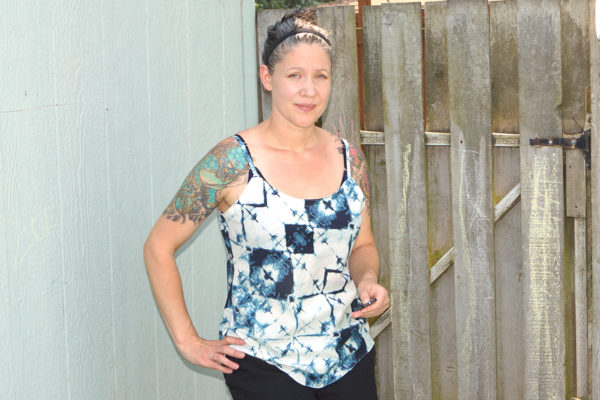
I found 3/4 yard of April Rhodes voile at Modern Domestic. I knew I’d try to squeeze an Akita or Savannah out of it, and opted for a 2nd Savannah. My first Savannah is in rayon and I wear the Sydney over it..so I totally forgot about the armpit gaping and didn’t fix it. Life goes on.
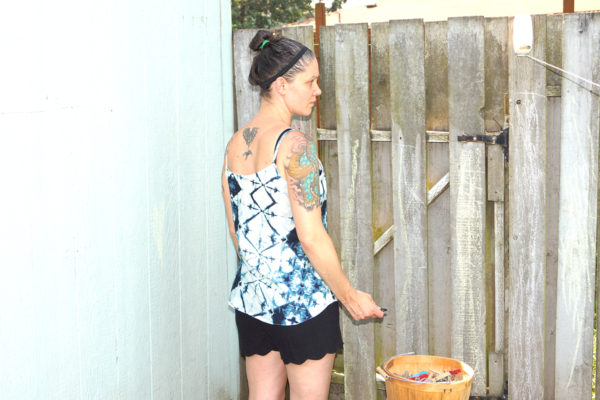
I didn’t have enough fabric to quite cut the back on the 45 degree bias, but whatevs. In Portland, most of the time, I’d use this as a layering piece anyway.
Upshot is I can hang my laundry outside and it’s done in 10 minutes…
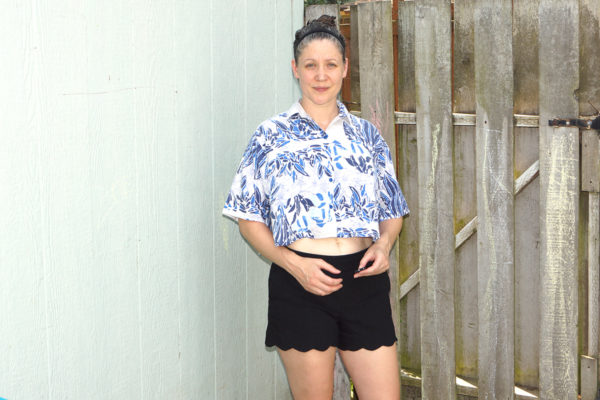
So…funny thing. My mom saved one of my favorite childhood shirts. This shirt is from Huntington Beach, California, summer of 1988. I wore it proudly in my 8th grade school photos with my perm.
At least I’m consistent.
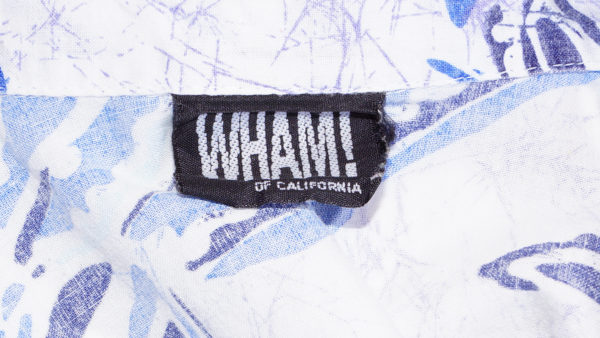
The label is the best part:
I’m going to go listen to some sexy sax man. Stay cool.
PART 1 of this series is information overload, amirite?
If you were to do all the internet searching and talking to all the people, PART 1 is basically what you would find. Now, I’m going to go over some basic issues people have, and the more you pay for a machine, the more of these issues are removed for you, and you can just get to sewing something cool, smooth sailing all the way. The less expensive the machine, the more the tinkering.
In my experience, the biggest frustration people have with their sewing machine, if you ask them, is the tension. Sometimes they’re right…but I find it’s like a catch-all phrase for people to say the tension or the timing is off, which can be an expensive fix if that is really what it is….or at least you’ll get charged for it, take it home, and shocking! You’ll have the same issues!
A few little things.
Thread.
Yes, you gotta use the right thread. You just want to sew something cool, I get it. It seems trivial, doesn’t it?When you’re starting, get 4 spools of Gütermann All Purpose 40wt in light tan, med gray, black, and white. That will blend enough for quite awhile. Worry about the finer details and “correct thread” as you get better.
My cousin called me. She was piecing a quilt and her machine was skipping stitches. Before she went and bought a new machine, she called me to go through everything, inch by inch. The first thing she said was she was using quilting thread. I took that to mean Gütermann, Mettler, or Aurifil 50wt, which is what long time, experienced quilters mean…heh. See my mistake? We then went through everything….and I double checked her thread type and one last time before telling her it was time for a new machine…I asked the BRAND. That’s when she said, “It says ‘quilting thread’ right on it…” OH. A spool of “quilting thread” means a thick, coated, HAND QUILTING thread. I’m not going to reinvent others’ posts on threads and types and whens, but, yeah. It matters.
Just get the 4 to start. That’s like <$8 with a coupon.
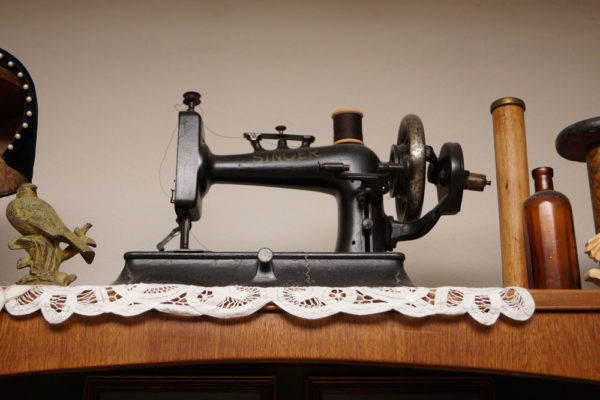
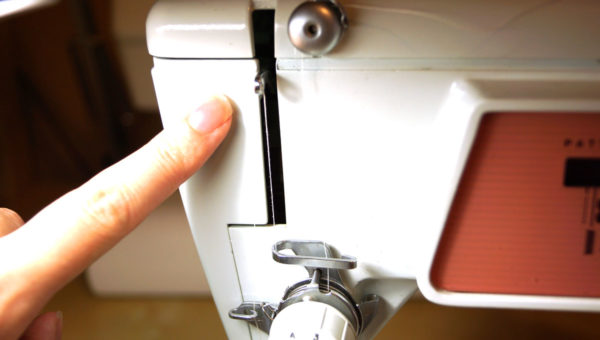
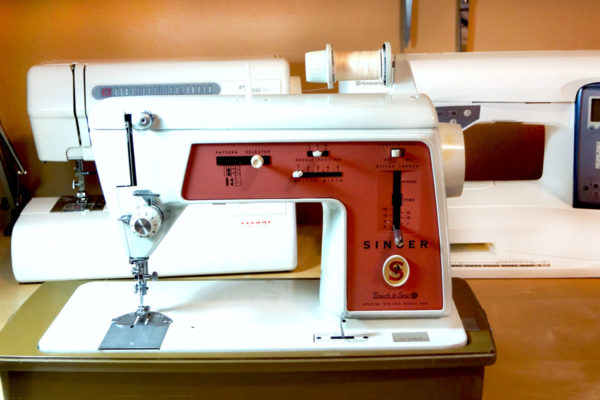
Singer Touch & Sew 626
Needles.
I haven’t seen any modern machine that requires a particular brand, nor have I run across a vintage machine that requires any special needles. I’ve used Singer, Klassé, Schmetz, Organ, Inspira…I don’t see a difference. There used to be different lengths/sizes or “Types”…but not anything you’re going to find without an antique dealer is going to require anything other than a basic Type AA needle. I’ve ripped an industrial needle out of a domestic machine. Don’t let anyone shove in an industrial needle…but industrial needles are specialty and you’re not going to find one easily.
DO make sure your needle shank, or the flat side, is facing the right way for your machine.
DO make sure your needle is all the way UP before you tighten down the clamp. This can cause skipped stitches if it is hanging down too low.
DO use the right type of needle for your fabric. Lots of posts out there about that. Start with a Universal 80 for wovens, and a Stretch 75 for knits; go from there.
Bobbins
Bobbins.
You will need to use the bobbins required by your manufacturer. This isn’t the place to save money. If Juki tells you to buy only Juki bobbins, then buy only Juki bobbins. If someone hands you a bunch of Class 15 metal bobbins and some story about how they’re better because they’re metal, but your machine takes plastic Class 15J, use the plastic ones.
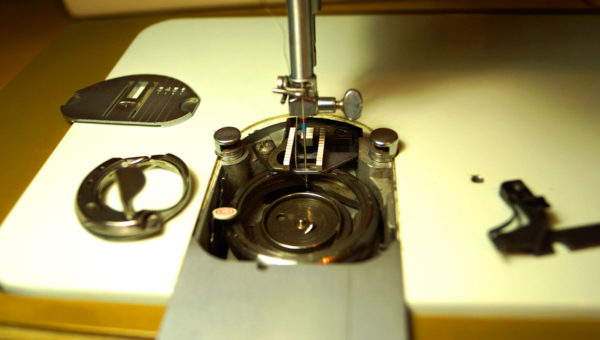
The photo above is an open Janome top-loading bobbin case. I bought this machine for $25, and took out the metal Class 15 bobbin, the nest of thread, the tangles, cleaned it, put in the correct plastic 15J plastic bobbin, and now it runs perfectly.
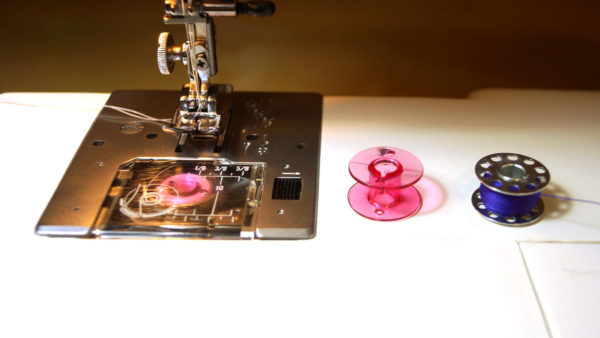
Class 15J and 15
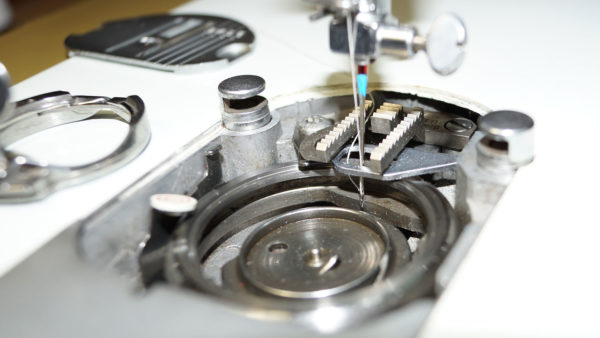
Here I have taken out the bobbin, the bobbin case, and the plate of the 1960s Singer. I want you to see how much of a tight squeeze it is:
The amount of area between the bobbin and the needle is in millimeters. This is how you can have a home sewing machine and not a factory industrial machine. This is also why you want to use the correct bobbin. There’s a millimeter of room between that needle and the outer part of the bobbin rotary mechanism. This goes around at a high speed. Use the correct bobbin.
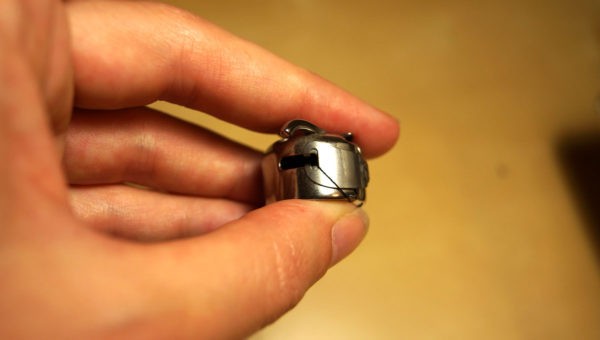
When putting bobbin in your bobbin case, there are directions on where to pull the thread through. When you do this, hold the bobbin and pull the thread through taught. You’re pulling the thread through the tension spring – which do not look like traditional “springs,” and if you don’t pull it through, the sewing-motions of your machine will not always pull it into correct position for you, and you’ll get skipped stitches/bobbin thread nest. In a metal case, which sits perpendicular to the machine bed, the “spring” is that metal flap:
Some bobbins lay flat to the machine bed. My Janome version easily slips through the “channels” while my Viking needs the thread to “snap” into place. I need to give the thread a little tug…these are all idiosynracies of owning a machine. Add another point to dealer classes from PART 1.
You can PAY more for easier bobbin features. There are machines with bobbin sensors, bobbin thread cutters, separate bobbin motors for winding, auto-tension…or you can be more hands-on. How much money do you want to spend?
I’m not going to get into the housing around it, or shuttle vs rotary shuttle. That’s a bit more advanced. We just want to sew something cool at this point. I’m also not going to get into the bobbin tension – when you’re beginning, don’t mess with the bobbin tension, and it won’t get messed up. The point here is how hands-on do you want to be? The bobbin is the #1 user error. Which brings me to:
User Error
Let’s go through some photos of the thread take up lever and the bobbin case.
For the TOP thread to wrap around the BOTTOM thread and make a stitch, the TOP thread goes down with the needle, gets caught by the bobbin “HOOK”, thereby gets wrapped around the BOTTOM thread, and the needle comes up, pulling it tight to make a full TOP thread revolution AROUND the bobbin CASE and completing the stitch.
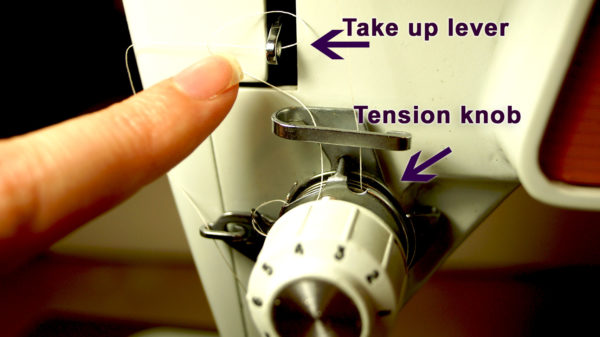
Thread the machine and adjust the tension knob when the sewing foot is UP, when foot is down, it engages the tension disks. There are machines with auto tension if you want to pay more. These take away the possible tension frustrations, for a price, and you can just sew.
Take Up Lever, and Tension Knob & Disks
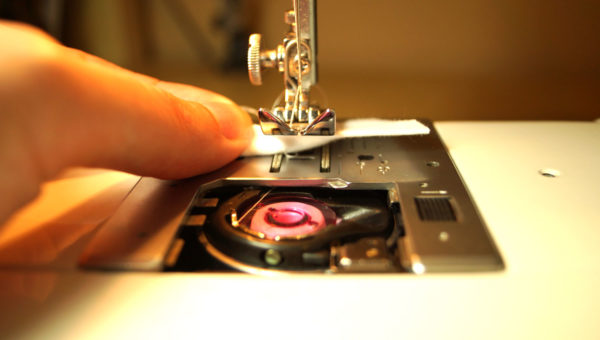
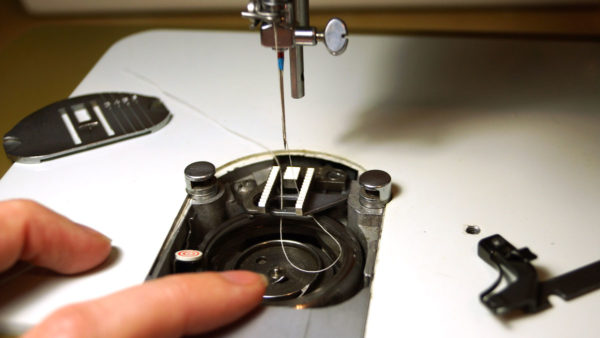
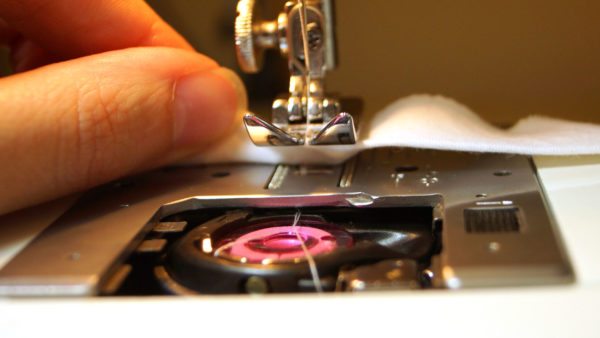
Here is the open bobbin case again, with the bobbin removed, so you can see the relationship between the UPPER thread, the take up lever, and the bobbin:
#1 Beginner error is not taking up that lever ALL THE WAY when you want to stop and pull out your fabric. The thread must finish the revolution around the bobbin, which is missing in this photo so you can see the UPPER thread doing all the work.
Here the UPPER thread popped off the rotary because I took out a few parts, but you can see, the needle is coming up, but NOT up all the way – the UPPER thread is not done:
This is where the lever is positioned at this time:
If you try to take out your fabric at this point as I did MANY times when learning to sew, you will get this…and this is difficult to capture on my camera, but if you see 4 threads coming out the bottom of your fabric, and you can’t quite pull your fabric away…this is why:
The needle is UP and above the raised sewing foot! BUT it is not up ALL THE WAY. See the UPPER thread still wrapped around the bobbin? It’s a bit blurry, but see there looks to be 4 threads under the fabric? See the threads still wrapped around the bottom of the bobbin?
This is user error. This is probably #1 user error. If you don’t make this error, pat yourself on the back. Really. I’ve had countless phone calls and emails with frustrated new sewists and this is the most common issue.
Alternatively, get a machine with a needle up/down button for a price. This error is why the up/down button exists.
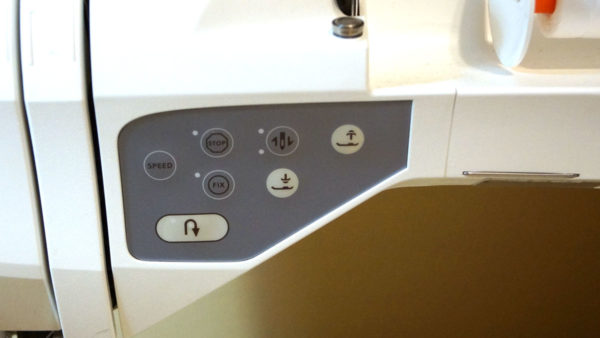
Easy Buttons
When I bought my Viking, I had already experienced the older, mechanical version, and the $$$ fancy computerized version. I just wanted to sew, and I knew I was committed to sewing, but I was NOT committed at the time to learning the mechanics of a sewing machine.
For a price, I opted for a few EASY BUTTONS.
I’ve got auto foot pressure, needle AND foot up/down buttons, temporary reverse options, speed options, knot-the-thread-for-me options…because I hated messing with the #1 Error above, and these were the things I wanted after using my mom’s fancy machine. The needle up/down removes #1 Error possibility.
What I didn’t get/couldn’t afford were: Auto-tension, bobbin sensors/cutters, ultra speed, heavy duty, super embroidery, etc. BUT I could just get to sewing cool things quickly and easily.
So, in the car analogy from PART 1, I got a entry model Acura. Once I learned how to drive and drive very well on my Acura, then I branched out and got some old Fords to tinker on. See what I mean? Much like how an entry level Acura isn’t going to go 4×4 driving, my Viking or my mom’s Janome will not sew leather, 4 layers of denim, waxed canvas to leather, and those Sew Sweetness bags I told you about in PART 1? That was an adventure. The computer in high-end machines will shut down your machine if you try to push the motor too hard.
Tension
A quick word about tension. Sigh. And “timing” for that matter. Yes, timing can get off – the photos above of the UPPER thread making the revolution with the needle – that CAN get out of sync. Tension disks CAN “freeze up,” BUT in all the machines I’ve cleaned, repaired, tinkered with… I’ve adjusted 1 bobbin tension screw. Ever. I have good reason to suspect the previous owner lowered the tension on the bobbin for free motion quilting on a machine that wan’t necessarily built for free motion quilting – and that is a more advanced option when you’re ready.
I’ve “flossed” the tension disks on the GUNKIEST ancient machines that smelled of the worst smells…and have yet to find a “frozen” set. “Tension” and “timing” are often the knee-jerk reactions to simpler user-errors. I’ve had skipped stitches from the needle not being all the way up in the needle-clamp, or the bobbin thread not properly through the tension spring, but never because of timing or actual tension problems.
I’ve never worked on a modern $100-$200 big box store Singer or Brother. Maybe this is where the mysterious tension and timing issues pop up? I don’t know, and I don’t want to know. I want to sew.
Bias
Yes, I have bias from my experience, as you will from yours. This is my 2 cents. I’m not a pro machine tech, nor do I want to be. I want to know enough to make this more approachable for you and enjoyable for me. I read dusty old books, tear apart gross old machines, read up on the latest embroidery software releases, and sew my heart out both for my love of it all and to be a helpful friend to other sewists. Every option has perks and caveats. Like with a car, mobile phone, laptop…anything. Pick what will make you LOVE sewing the most.
Any other questions, or details you want me to get into? Please, let me know. Both of these posts got far longer than I intended, and I’m afraid it’s a sea of word vomit…
You’re tired of clothes not fitting / looking like everyone else / being cheaply made
Welcome to the tribe. We get you.
Now, you’re ready to buy a sewing machine. This is like buying your first car. Do you want easy to drive? Do you want cheap? Do you want cheap to repair? Do you never want repairs? Do you want high resale value? Do you want sturdy? Do you want speedy? Bells and whistles? Just like with a car, these are rarely all the same machine.
You search online for what machine to buy, just like with a car. On Reddit, Facebook, and other social platforms you’ll get 5 people telling you to buy a $100 Brother machine, 2 people telling you to buy a $25 garage sale “all metal machine that will last forever and sew through anything,” and usually 1 person telling you they love their $5 million dollar Bernina. Sound familiar? 5 people telling you to buy a Honda Civic, 2 people telling you to buy an old Ford with a manual transmission, and one person telling you they love their Land Rover.
You just want to make something cool. What do you do? Let’s go through the usual recommended options above, THEN I want to show you something that, unless you have a hands-on mentor, will help you really decide.
OMG they’re beautiful and they really do sew very nicely.
Dealer support/sales/deals – and Bernina dealers are ONLY Bernina dealers.
Metal inside, Swiss engineering, some metal bodies. You can go from a $250 basic mechanical Bernette to full on free arm quilting and embroidery machines that cost more than a down payment on a house.
I never see them in thrift shops or garage sales for $25…I never see ancient basic models for less than $500 AKA they keep their value
If you get a bad one, repairs are $$$
Accessories are $$$
Tune ups are $$$
The Bernina tribe is strong and LOYAL. Just read comments anywhere and you’ll see what I mean.
Some Berninas recently had a software update….ABOVE a price point, while the machines below said price point did not get an update. Not hatin’ just statin.’ When you’re looking at a pretty high beginner buy-in point…it’s something you should know. This is unlikely to be different in any brand, and frankly, we’re not getting into embroidery machines right now, are we? No. So take it or leave it.
***EDITED perk I totally forgot! Dealers will throw in free lessons with a machine – so they’ll train you to use it and maybe even a beginner sewing class too! Work out a deal with them!
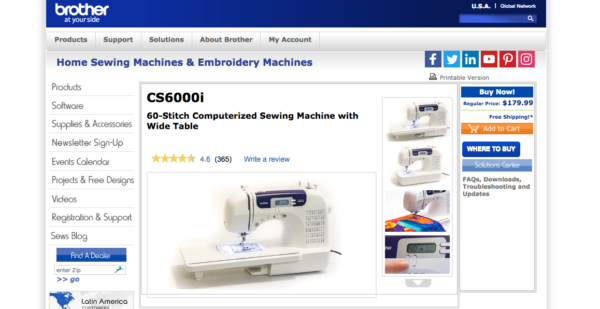
Amazon reviews. Read them. Brother makes killer industrial/semi-industrial machines…you’re not buying one of those or even one made on the same planet.
I generally don’t talk about Singers made after 1960…that said, I’ve read from a mechanic that the Heavy Duty model would be a reliable home sewing machine. Not my words; not an endorsement; not an affiliate link.
$100 or so is a great starting price point
Plastic on the outside and inside – this means plastic gears that will eventually break. Maybe in a month, maybe in 100 years. The Singer in the top photo? Metal gears. Plastic cams (decorative stitch thingies)
Fairly universal and economical accessories
No dealer guarantees, no discounted service, no free tune-ups for a year
Anecdote: Told a friend to buy a Brother to start. Friend made a few quilts and curtains. Friend upgraded from $150 Brother to a $350 metal, mechanical Janome after 3 years. Friend couldn’t BELIEVE the difference in quality and sturdiness and fell in love with sewing again. Friend even got a serger, they got so into it after the Janome.
That said, Sew Sweetness started a huge business making bags on a basic Brother machine. Bags are tough to sew, and if she can make a mini empire on one, who’s to judge? I have bought, seriously, a half dozen or more of her patterns before she upgraded her machine.
Higher entry point than Brother, but not as high as Bernina
Dealer support/sales/deals and warranty options
Tons of variations in styles and reliability – read reviews. Ask the dealer pointblank: which machine gets returned/serviced the most?
Also in variations, some metal bodies, some plastic housing with metal inside in various amounts. For example, Janome has ~3 price levels and 3 different countries of manufacture for those levels.
Test drive them all even if it’s just because you can. They’re each so different and have their fans. I love Viking, Janome, and Juki. I know plenty of sewists that will fight to the death for their Pfaff. I have no experience with Pfaff or Babylock…I can’t know what I don’t know.
Accessories and parts are $$ and often brand-specific.
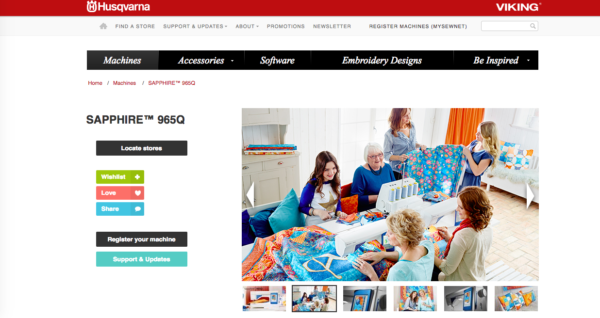
I have a 2012 Viking Sapphire 835. After an initial buy-in of +$1000, I have purchased:
invisible zipper foot
a quilting foot-set (see also: walking foot / differential feed foot, 1/4″ foot, AND darning foot)
ruffling foot
My Viking is hydraulic, which means no oil but also means I don’t work on it myself at this time. A single tune up is $180. It also means it does not like to ‘hand crank’ over tough spots.
extra Viking bobbins
***EDITED perk I totally forgot! Dealers will throw in free lessons with a machine – so they’ll train you to use it and maybe even a beginner sewing class too! Work out a deal with them!
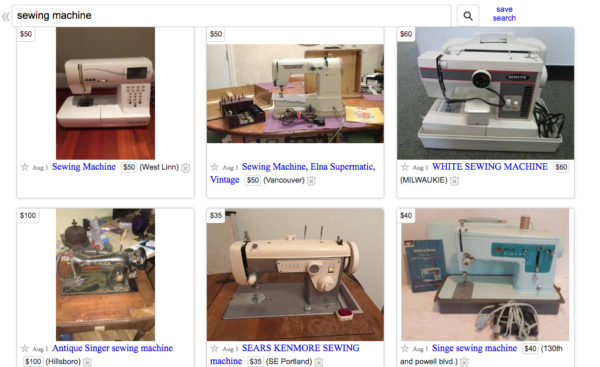
Garage Sale, Thrift Store, Hand-Me-Downs, or Craigslist
Do you know enough to look at it and know why it is for sale? If the power comes on, and the wheel turns freely by hand (toward you only, please), look at the bobbin area. In my experience, 90% of the issues are there, and 90% of THOSE are user-errors, but if you’re a beginner…those may soon be your errors.
$25 used sale price adds up if you’re wrong
Tune-up or a basic service to clean it is still likely to be $80-100, and that’s if you’re not wrong about why it’s for sale
Sometimes parts/accessories can be had cheaply on eBay, sometimes not so cheaply
***edited*** you can find certified, warrantied machines at a dealer – if you do this, I highly recommend you negotiate an hour or more in classes/how to use said machine.
I say all of this, HOWEVER, in addition to my Viking and at the time of writing this, I have 9 used and/or vintage machines. 3 work flawlessly, 1 works mostly flawlessly, 5 are in various stages. 2 of the flawless, I bought working flawlessly (read: more than $25), the rest I’ve worked on/am working on. That said… 1 is a Janome and has 3 feet I’ve wanted but didn’t want to spend the money on for my Viking. I just got the 3 feet I wanted, on a 10+ year-old working Janome for $25, with a bit of elbow grease, and $10 for new bobbins. Those feet would have cost me at least $100 for my Viking.
BUT it did not start out that way. I am able to work and sew on old, mechanical sewing machines now because some years ago, my mom’s computerized, super-schmancy Janome (current comparable model is in the Memory Craft line) just let me sew something cool….AFTER I got frustrated on her 1970s Kenmore. Mom’s Kenmore is a 158 series – a machine you’re likely to find in the thrift stores and now one of my favorites. But then, I really just wanted to sew something cool and didn’t get that I needed to pay attention to a few mechanical details.
This post first appeared on Britex Fabrics blog July 25, 2017.
Double welt pockets look so scary. There’s little dots, little triangles, blind sewing, to bias or not to bias, more blind sewing with the lining….and the worst part? You’re cutting a hole smack in the middle of fabric. There’s no going back after you cut that hole. Worse? Half the time they’re this unusable, shallow size.
I don’t like fiddley or inefficiency. I think it’s time we knocked double welts off their pedestal. I’ve made a very photo-detailed tutorial with the help of Britex Fabrics, and you’ll be whipping these out in no time.
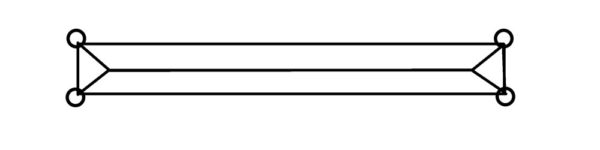
Normally, you see something like this on your pattern piece with some other rectangle pieces with dots you’re supposed to match up:
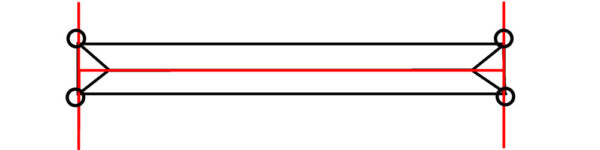
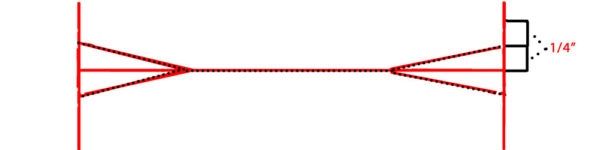
I’m going to tell you to ignore everything but the redlines below, and throw out the other pieces:
Trust me. Practice these steps once, maybe twice on some practice fabric, and you’ll never be scared of welt pockets again.
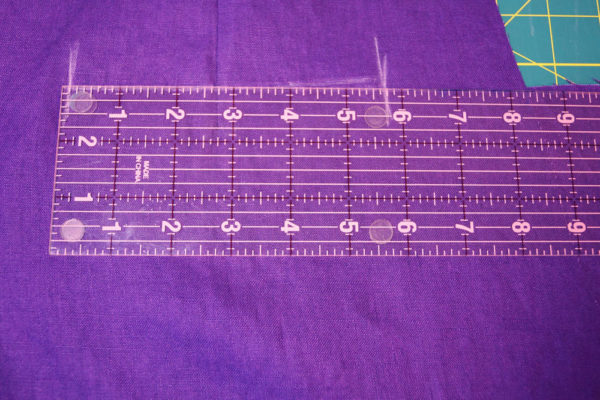
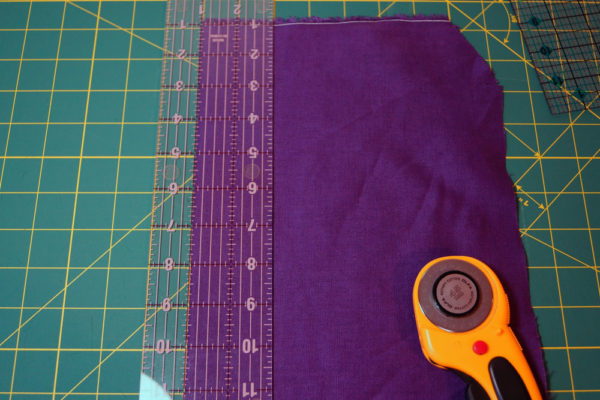
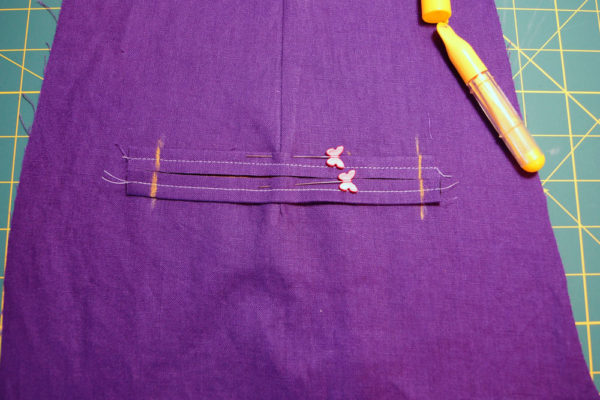
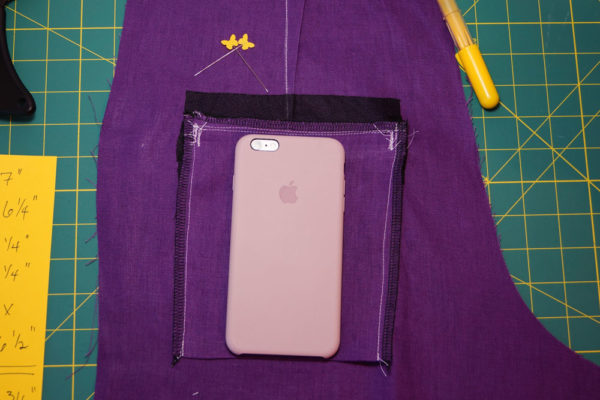
Mark the redlines as shown above. They should look something like this (below) on your fabric. If you’re replacing a patch pocket like I am, your horizontal line is the top of your pocket, and you draw perpendicular lines where there are corner/edge dots. Often in patterns, double welts go through a dart. Re-true your line to horizontal if you’ve got a dart like I have here:
Measure the length of your horizontal line, add 1 inch total to length, and that is the length of your welt pieces. Cut 4, on grain, 2 inches wide, and stabilize with your favorite stabilizer fabric.
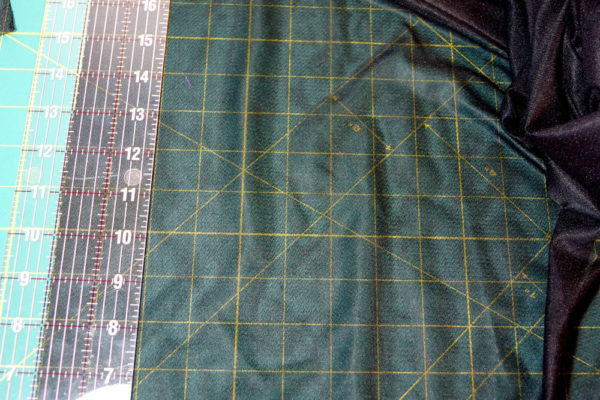
Stabilize the wrong side of your pocket. If you’re not sure what stabilizer to use, call Britex customer service, or go to the 4th floor, and ask someone to help you. I’m using a light knit version just to re-enforce my linen fabric, but not so heavy that it leaves an obvious delineation where the stabilizer starts and stops.
Why are we doing all of this, Becky? Because I actually USE my pockets for my phone, keys, random toys I trip on, granola bar wrappers, and other things throughout the course of a given day. If you cut your welt pieces on the bias as some instructions advise, or don’t stabilize the fabric, you’re more likely to get a warped opening that bags out after time. Also, you can see I’m going to cut right through a dart. That dart is going to create an area no longer on-grain, and I want to stabilize that area.
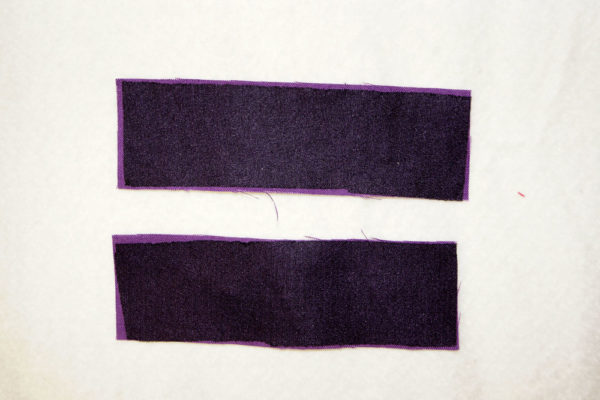
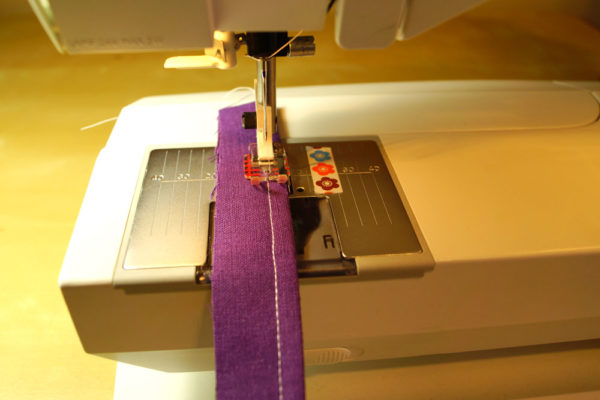
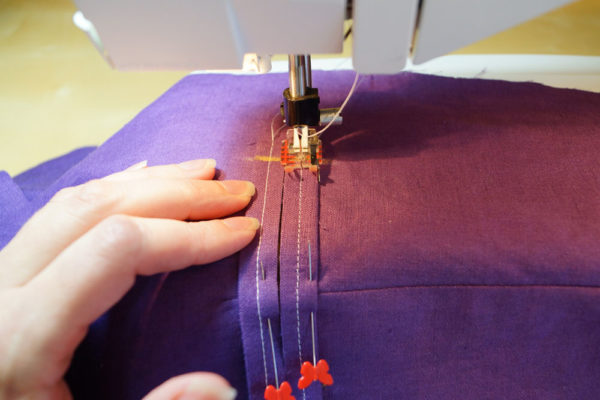
Fold each welt piece on the length in half, wrong sides together, press, and stitch ¼” from the fold.
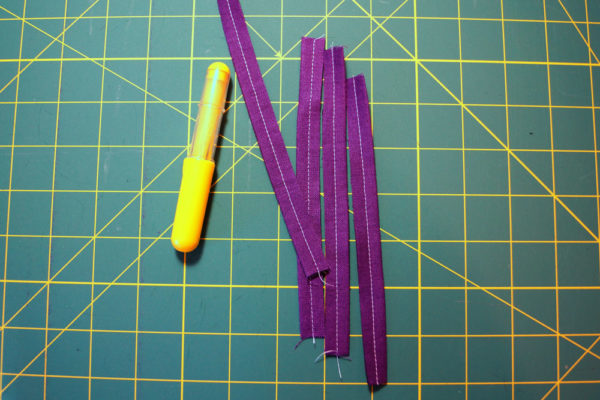
Trim all 4 welt pieces to a ¼” after the seam for a total of ½” wide.
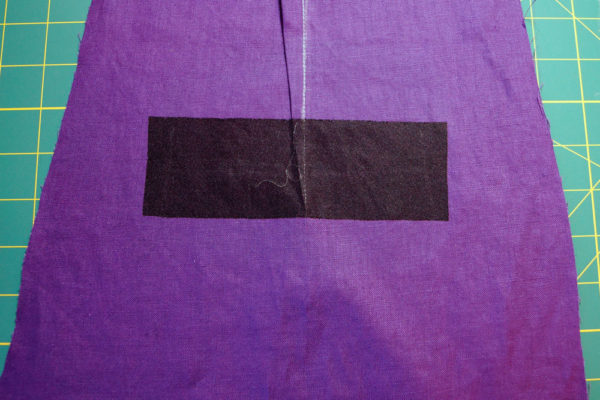
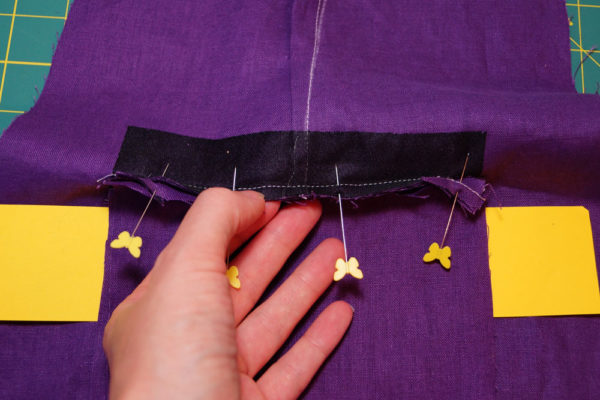
Match up the raw edges of your welt pieces to the horizontal line on your pattern, with an equal amount of overhang on each side:
Pin and remark perpendicular lines on top of your welt pieces. These are now your stop lines.
Sew on top of your previous ¼” seam, stopping and back-stitching at your stop lines.
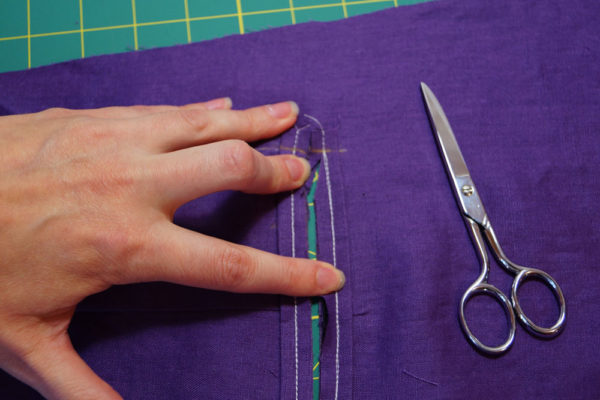
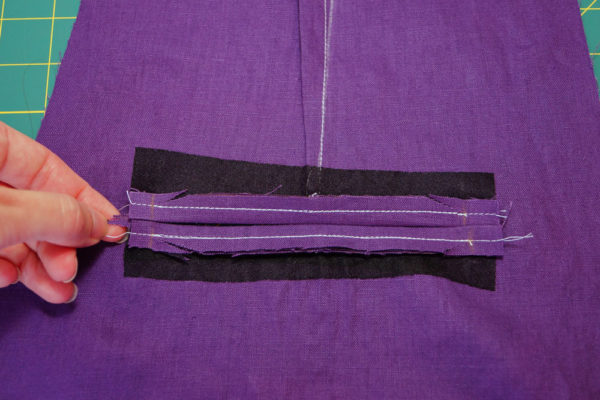
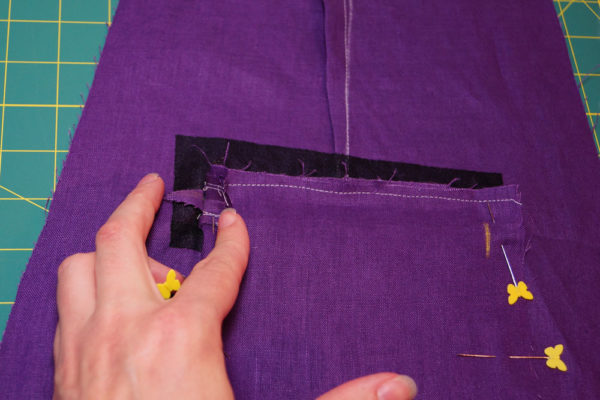
Now, we’re going to cut. Forget those tiny triangles on your original pattern. The dotted lines are your new cutting lines on this image. Cut down the center, and cut nice, long triangles to the stop lines.
Your fabric should look like this:
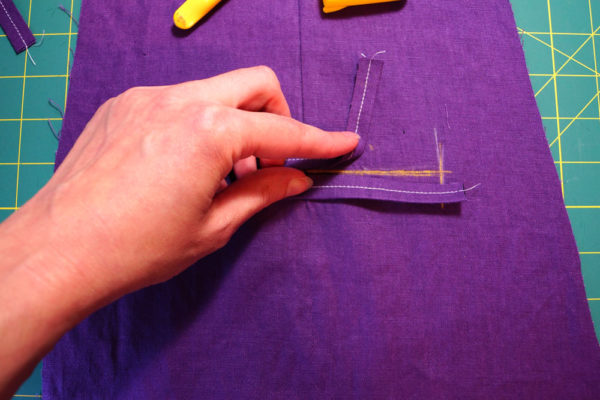
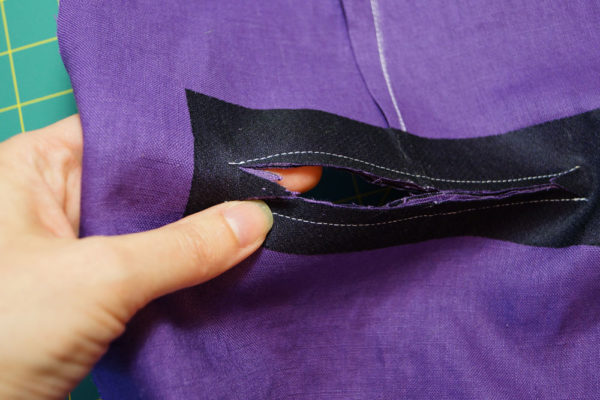
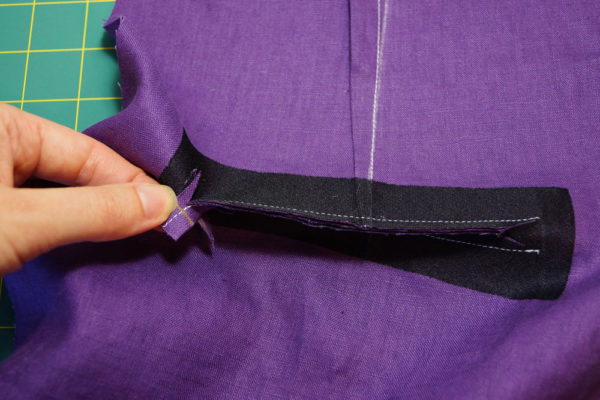
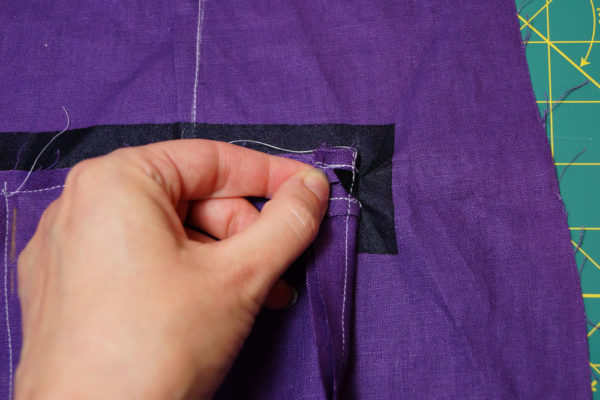
Take the end “tabs” of your welts, and flip your welts to the wrong side:
Press, making sure you brought the cut “triangles” to the wrong side:
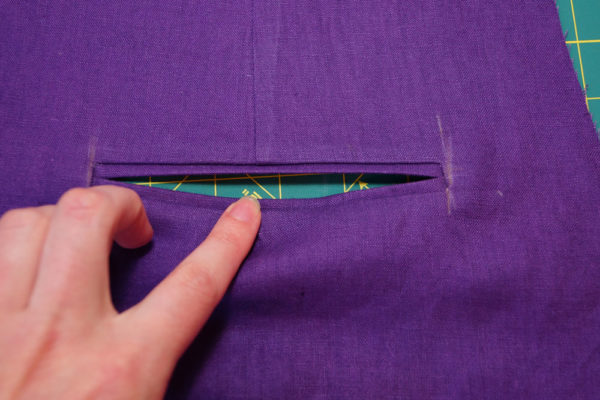
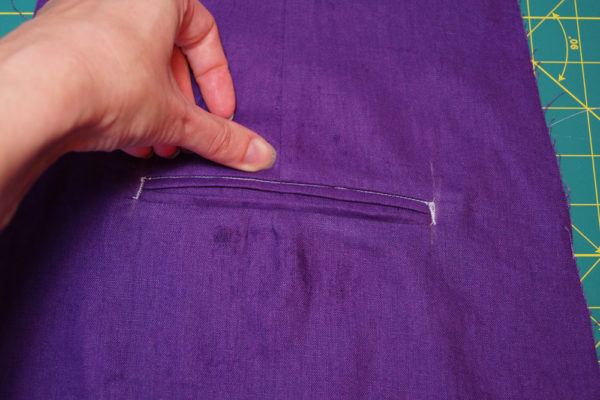
Your front should look flat. If you have any puckers, you have not cut all the way to the end of your stitch lines.
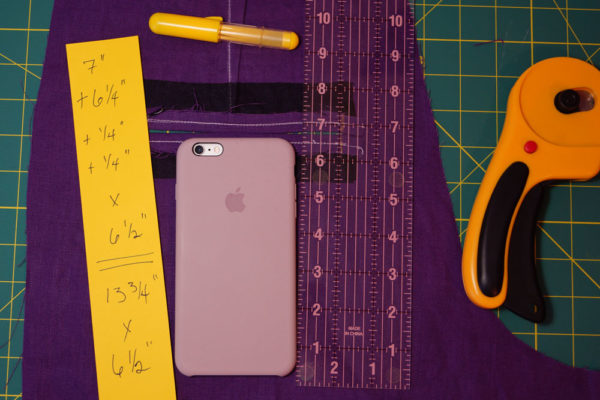
Measure for your pocket. I want my back pockets to fit my phone. I measure from the stitch line of the top welt, to the base of my phone, plus the length from the bottom welt stitch line to the base of my phone, add ¼” seam allowance for both, and the width of my welts. No need to add width seam allowance as I want to capture the edge of the welt sides.
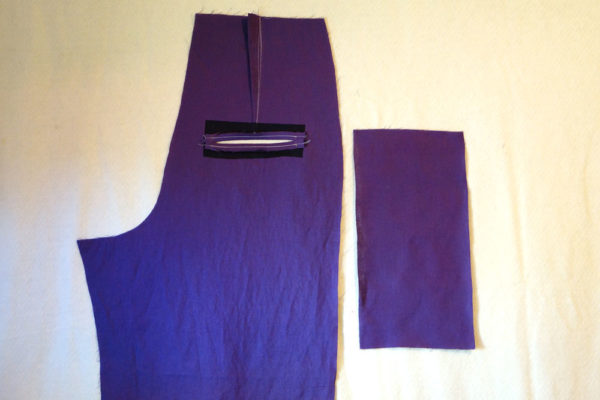
Next to each other, this is my pocket and my pant leg:
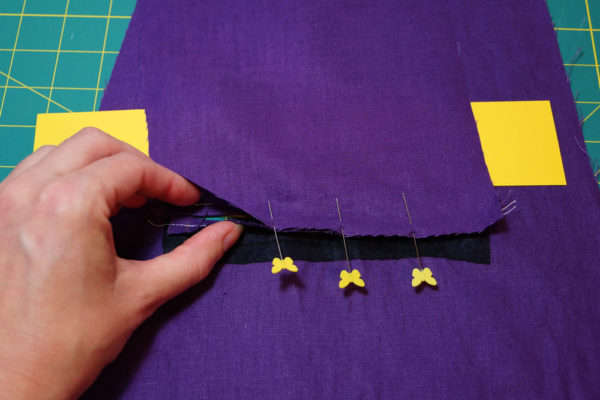
Pin the pocket upside down to the bottom welt. It will look like this:
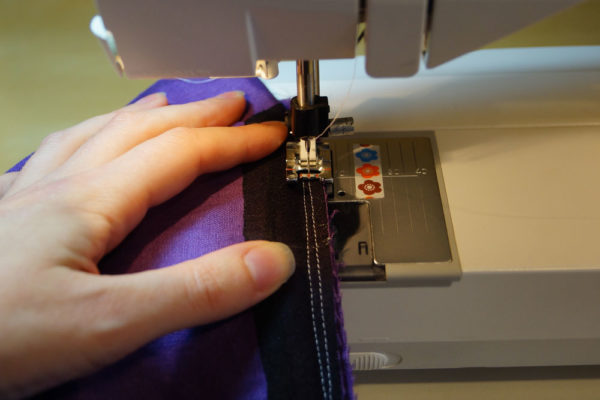
Sew as close as you can to the welt stitch:
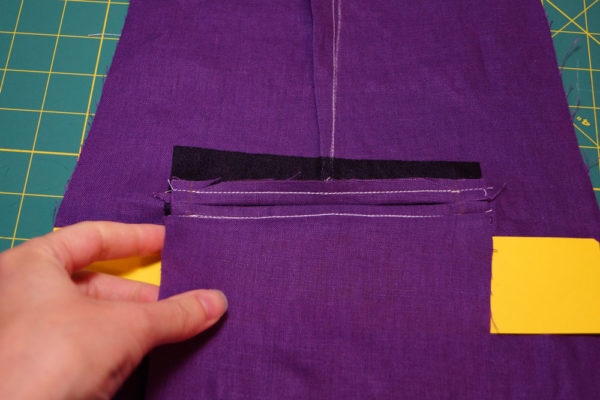
Press down:
Sew top of pocket to top welt in the same manner:
Pin pocket sides, being mindful to pin those triangles (aren’t you glad you made them bigger?):
Stitch, again making sure you get as close as you can to nab those triangles:
I like to go in at this point and bar-tack down the sides, and “stitch in the ditch” along the top because I’m hard on my pockets. Note your thread will likely be matching, so this will not be so obvious. Some people like to edge-stitch all the way around the welt before attaching the pocket. You choose what you prefer on your garment.
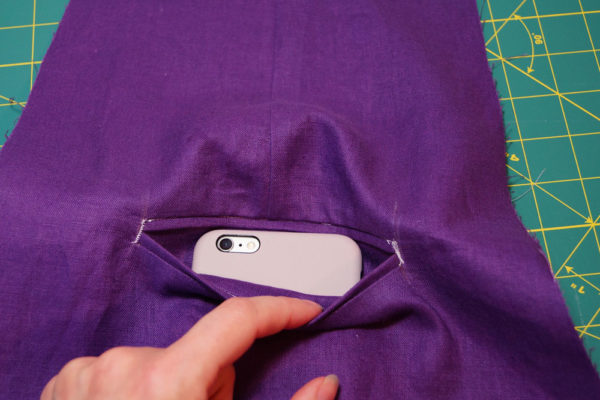
Finish the edges how you like, and stand back to look at your work.
Wasn’t that so much less scary? No dots. No blind sewing. No too-shallow-to-use pockets! Just in time for fall sewing.
This post was written by me, Becky Johnson of sewbeckyjo.com, for Britex Fabrics. Fabric was provided as compensation, however all opinions, photos, and intellectual content contained herein is my own. The pattern used is my own purchase, and this is not an endorsement, nor was I compensated in using the pattern.
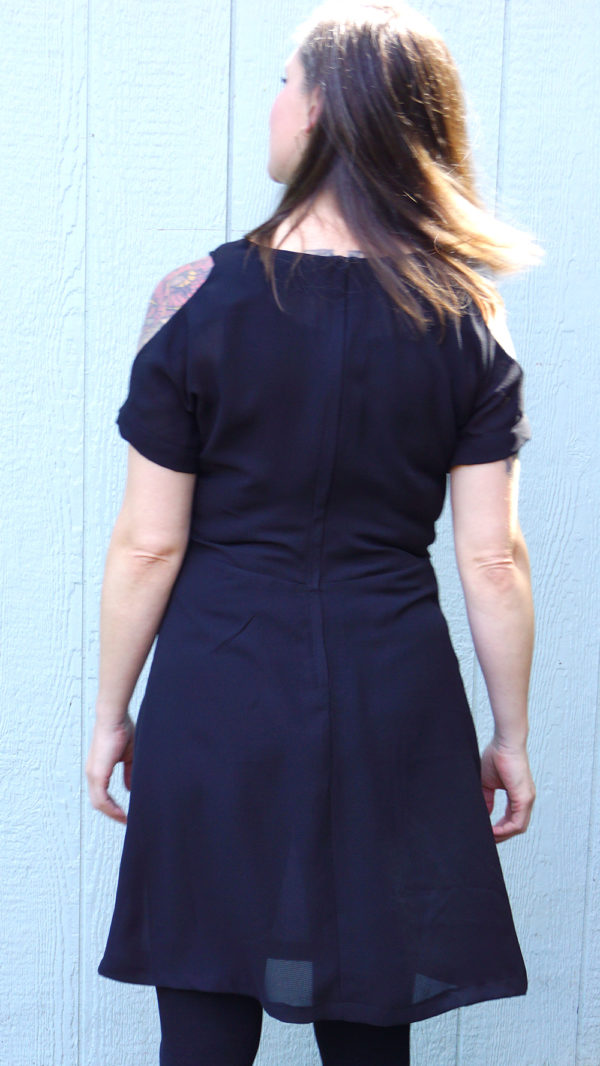
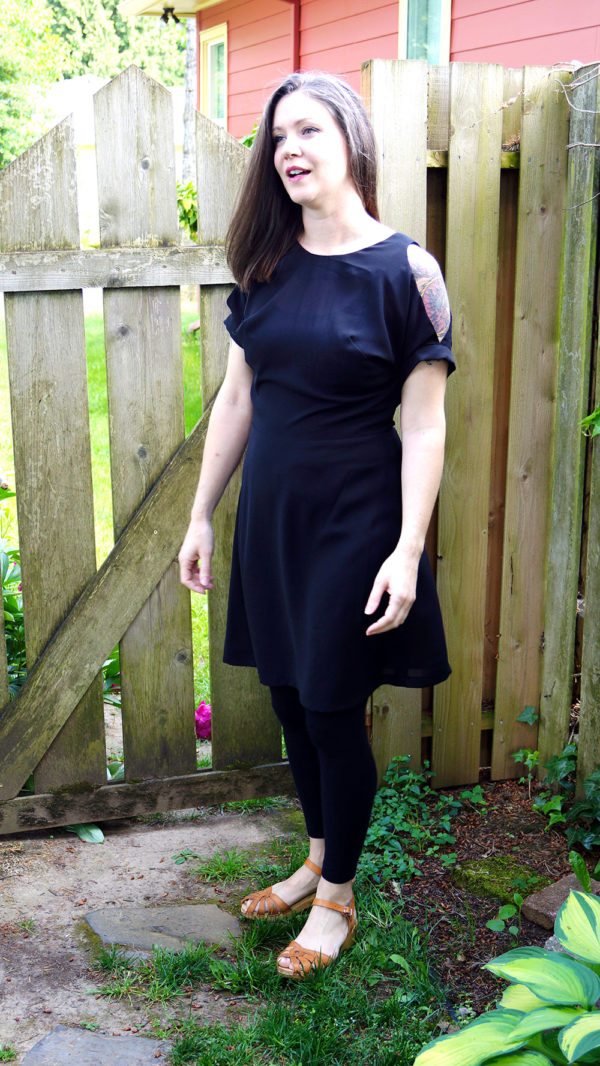
This dress is the culmination of a number of things falling into place perfectly.
My BFF Betsy cleaned out her stash and gave me 2 yards of this sheer-black-poly-chiffon-something-or-other.
#MeMadeMay2017 showed some glaring holes in my wardrobe, one being a LBD. I’ve been able to go without an LBD for quite sometime because I go nowhere and do nothing, but now that the older kids are closer to babysitting age, I needed a new LBD.
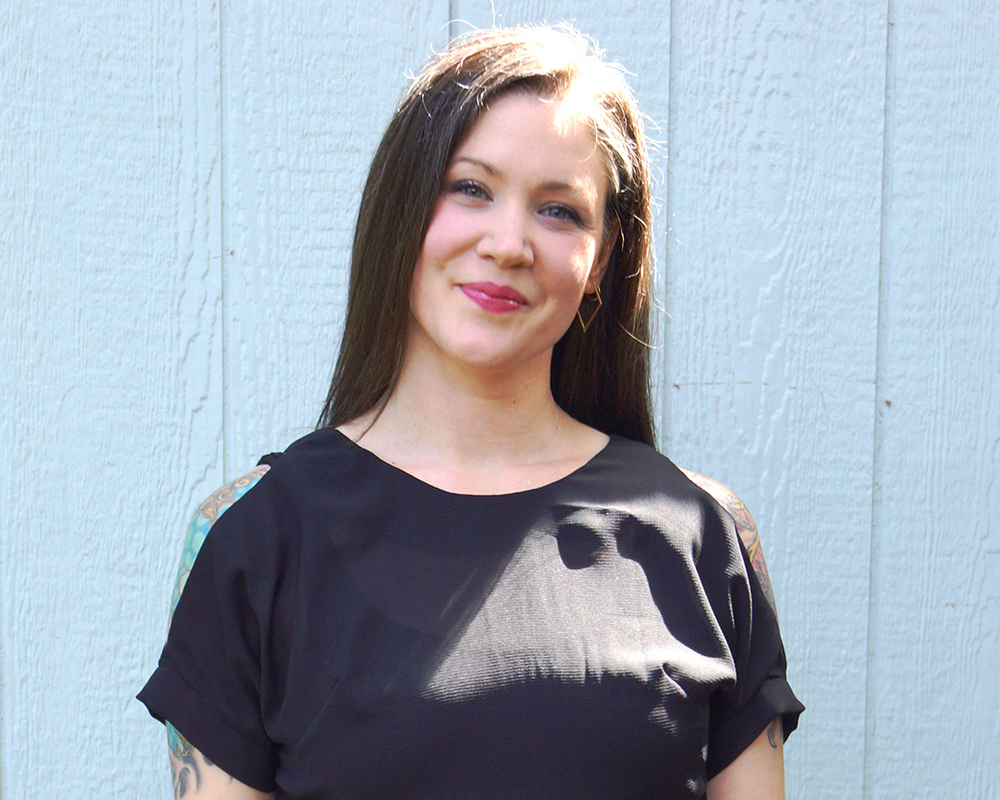
I wanted to do a cold-shoulder, but not with ruffles. Every cold shoulder I see has ruffles, so when I got the pattern tester notice from Kennis for Itch to Stitch’s new Beausoleil Top & Dress pattern and saw how clean it is – You’ve never seen anyone email so fast: PICK ME!!!
About the pattern:
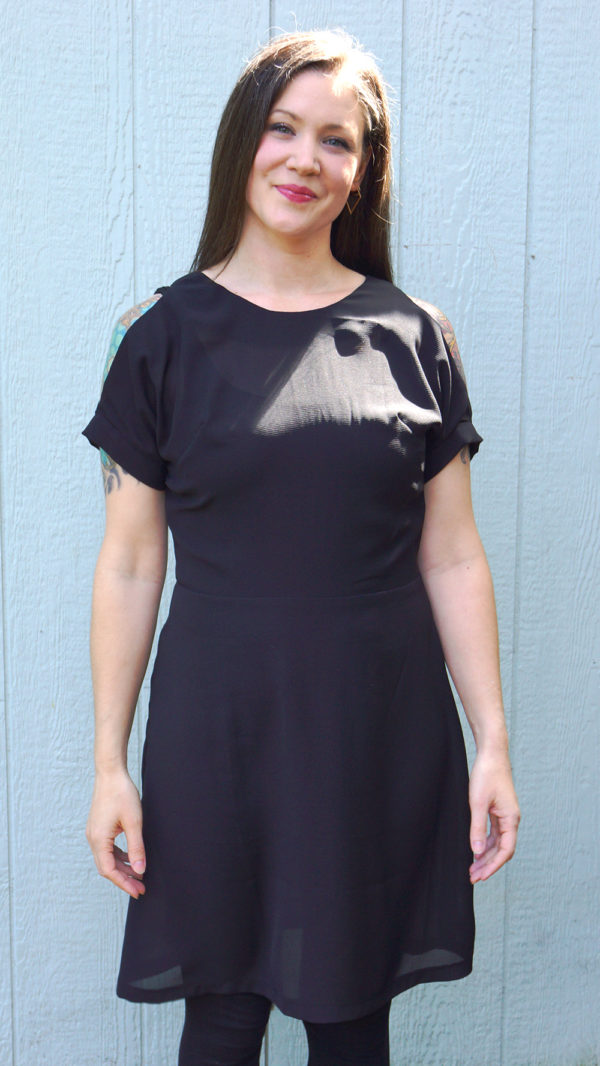
Dress or blouse options, with a lapped zipper. I obvi made the dress, sans optional patch pockets.
Kennis made this really cool tutorial to go with the lapped zipper + facings instructions so that you don’t have to do the mental gymnastics.
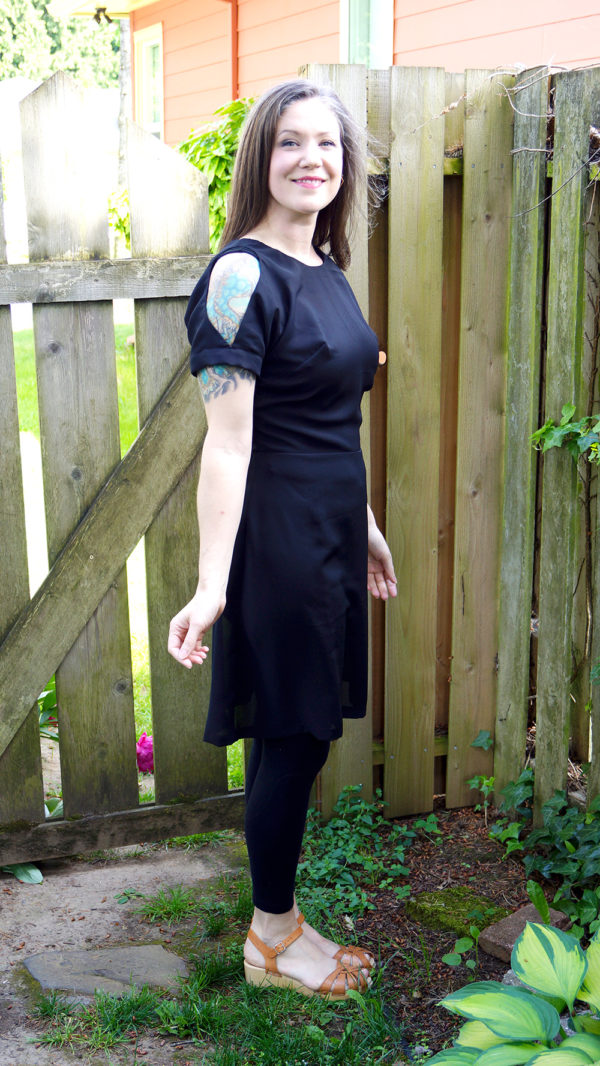
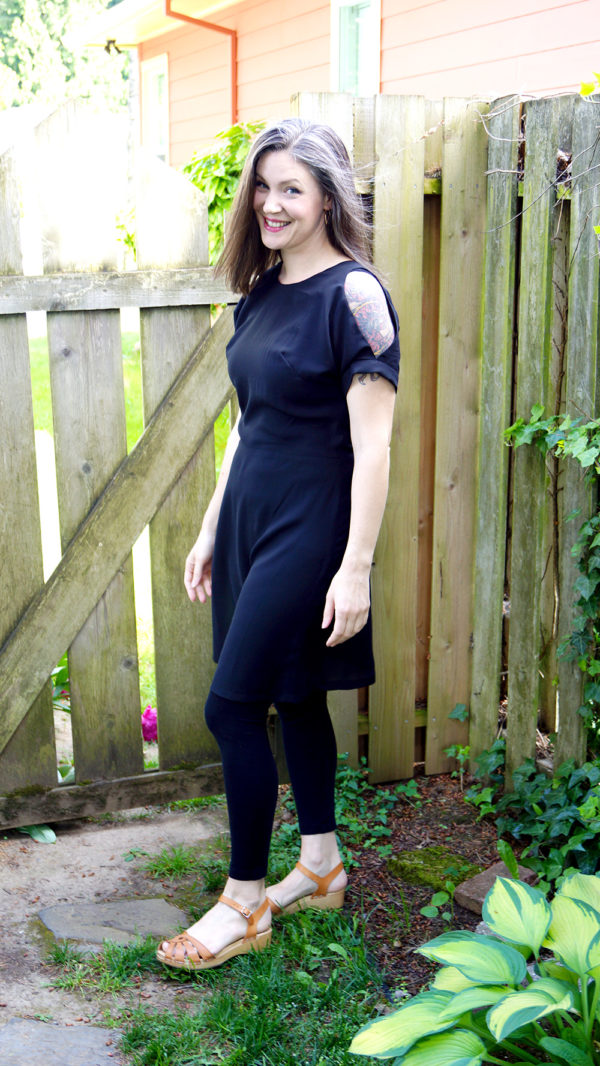
dress is an A-line shape
It goes from size 00 to 20, with cup sizes from A to DD.
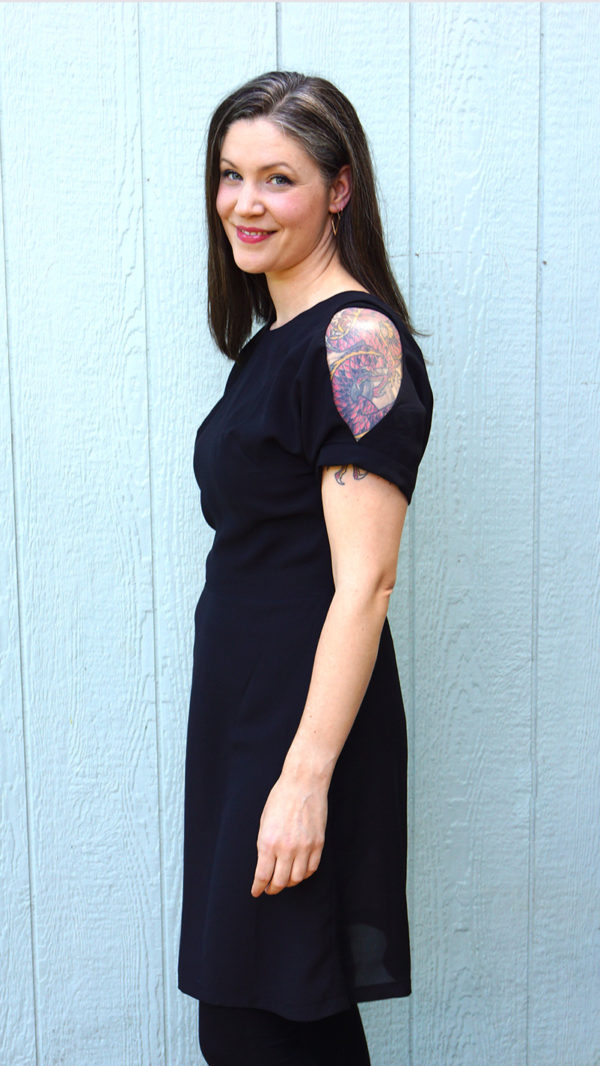
Cold shoulder, kimono-styled sleeves
top+sleeves pattern is 1 piece, 2 for back, then sleeve cuffs added=easy sew. You then choose to attach blouse or dress length bottom, add zip, hem, done.
Detailed instructions with illustrations. As mentioned above, tutorials for things needing more details.
At first I cut a straight 8DD to muslin with 1″ added to bodice for height, which is pretty normal for me being in the 5’9″-range. Final dress is a 4DD graded to a 6 waist and an 8 hip, with the 1″ still added to the bodice.
I probably could have dropped the bust darts down 1-2 inches now that I really look at these….
What do you do?
I squeezed this out of 2 yards of 45 inch fabric, but the dress really does need closer to 2.5 yards of 45, or 2 1/4 of 60 inch… I was doing some tetris you just don’t want to do if you don’t have to…and there may be a bit of selvedge in a seam or two.
I’m kinda meh with this make. Part of that is me. I just don’t see myself wearing it. Part of it is I should have followed my instincts when making/sizing the pattern.
This was my first time sewing a garment with cup sizes and there are some lessons here. Changing out the cup size but leaving other sizes as is, or grading between, does not necessarily take into account height changes…so a 4 with a DD cup…means the height for a 4…and I really should have added height above the darts…yeah.
I discussed my muslin with the designer before going this route and did what she suggested, but really I know my body better, so I take some of the blame for that…. I should really trust my skill and worth better. I had never made an Itch-to-Stitch pattern before, nor did I know of how they work as a group. Live and learn.
Shout out to the husbeast for taking photos of me this time, and for making me talk and make weird faces! 😀
Disclosure: pattern was given to me to test, however, all opinions are my own.
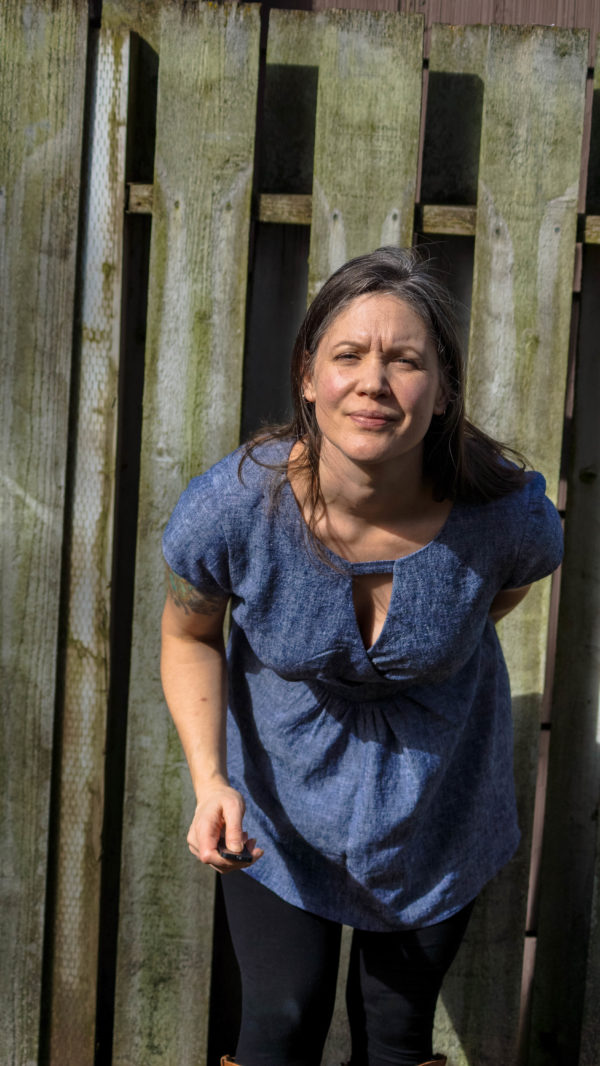
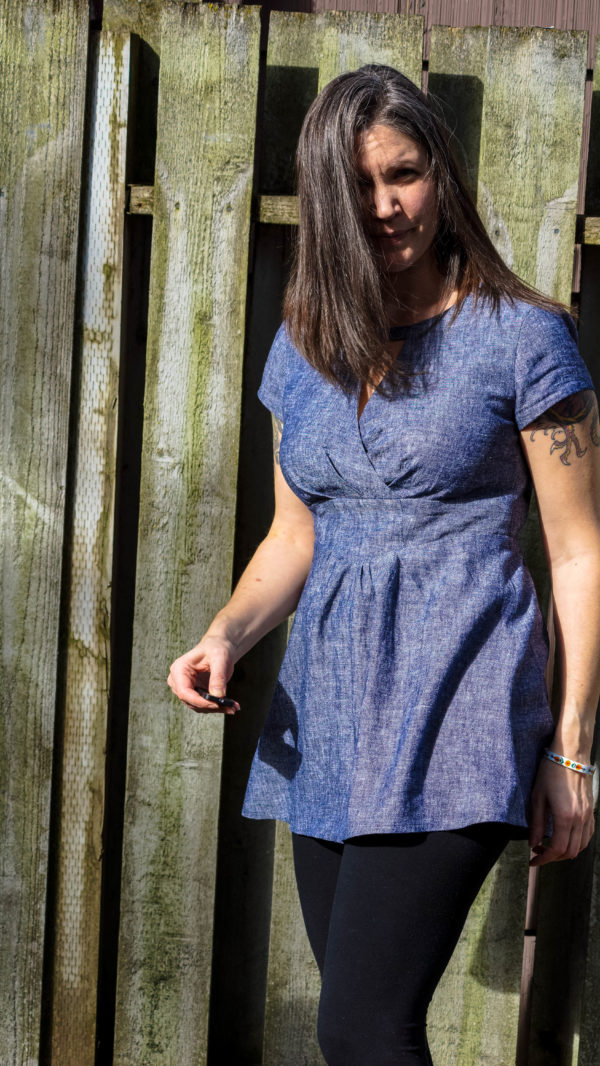
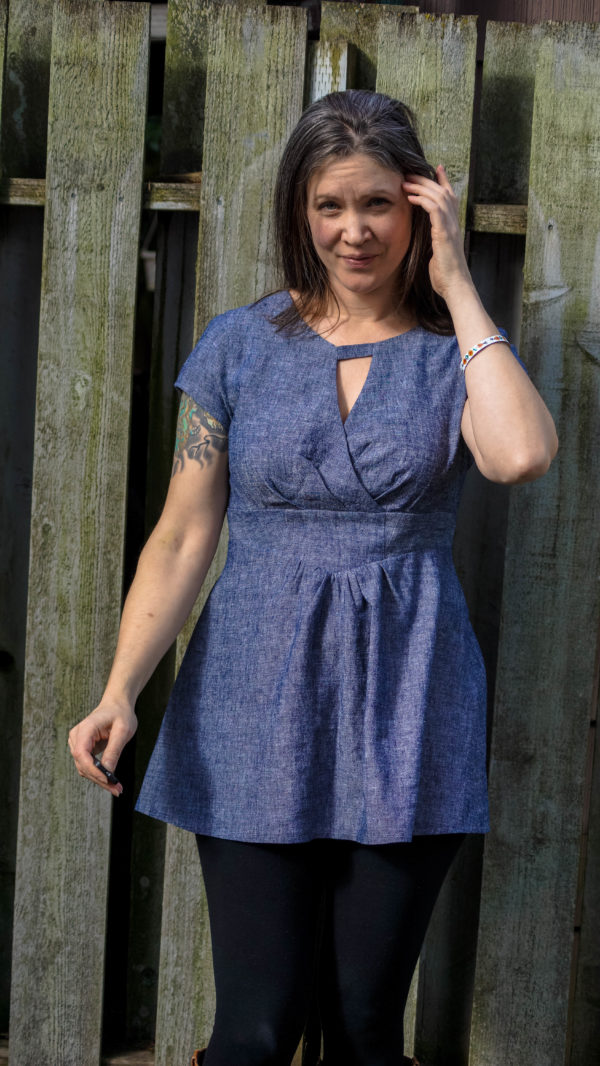
I made myself something! OK, honestly I’ve made a few things but I haven’t taken photos. Let’s blame the (PNW) rain.
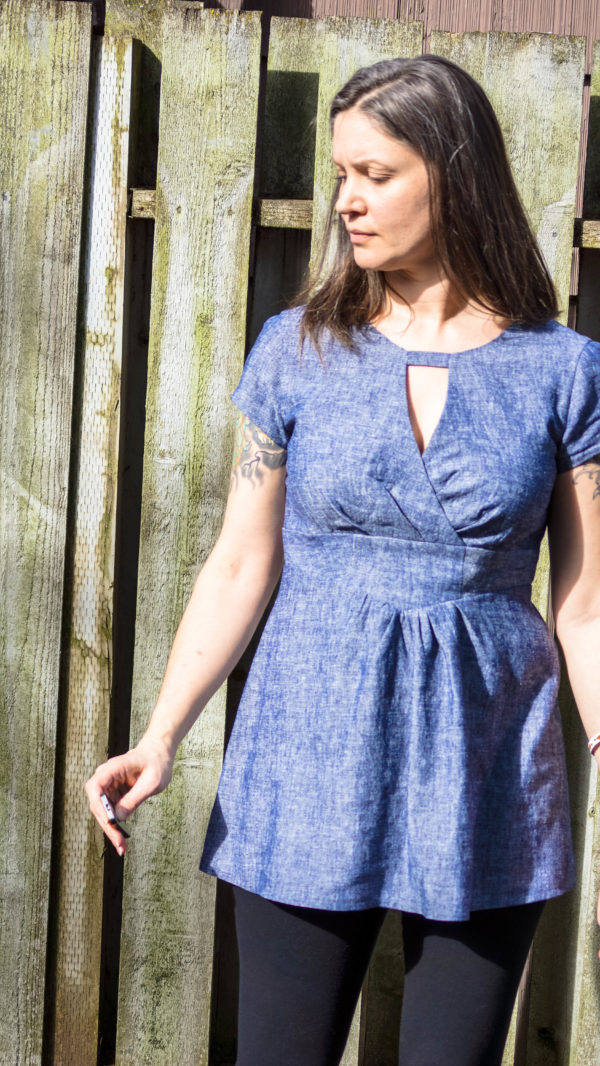
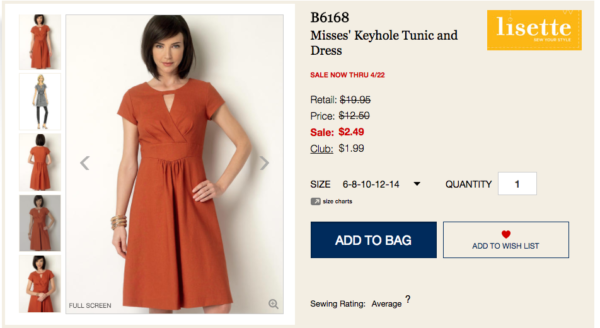
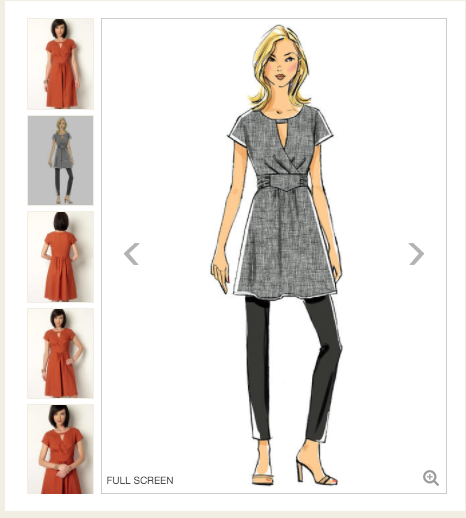
This is a Lisette pattern, and it’s only like…2 years old or something (the pattern, not the make), so if you haven’t bought it but want to, I’d hop to it. It will probably be discontinued soon. It’s often on sale.
There’s only 4 patterns now listed on Butterick for Lisette – that seems odd. But then, that’s symptomatic of a brand dilution problem IMO.
Anywho – funny story. I picked up some Robert Kaufman Essex linen from Modern Domestic in what I THOUGHT was the color I needed to finish up kitty blocks for my Elizabeth Hartman quilt. If you haven’t seen her animal quilt designs, I have no idea where you put the rock you’ve been under, but they’re adorbs. So OF COURSE I didn’t take a swatch with me, because I’m such a pro, right? LOLZ. Essex comes in like a million variations on just blue alone, so I ended up with the wrong color. Happy accident!
I had just enough (not really) to make the short tunic version, but NOT enough to make the waist ties as well.
Note to self: next time get enough for the waist ties OR resize the waist down….waist ties are easier.
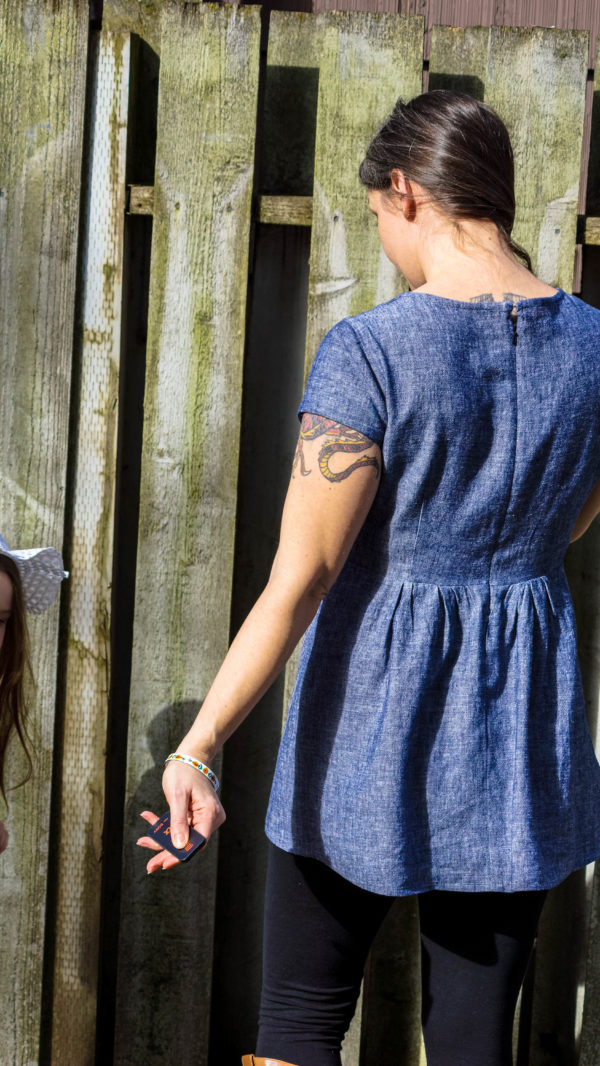
It was a surprisingly easy make. Oh, and tooting my own horn: I will usually still look up tutorials for things like welt pockets or invisible zippers just for hand holding, but I was too lazy to look up an invisible zip tute this time, and GUESS WHO INSTALLED IT PERFECTLY THE FIRST TIME ANYWAY? That’s right. I’m freakin’ BOSS. (totally jinxed myself right there.) The zips I had on hand were shorter than called for, so I am sure it’s a comedic sight to watch me try to wiggle this dress over my shoulders and bust, and there’s a good 1.5″ gap at the top where I put in a hook/eye, but whatevs. Benefit of having skillz: make it work.
I think my camera remote battery is dying….or the sensor was up too high….but ignore the weird faces, k? k.
What I like about the tunic/dress thing:
Easy over leggings outfit! yay.
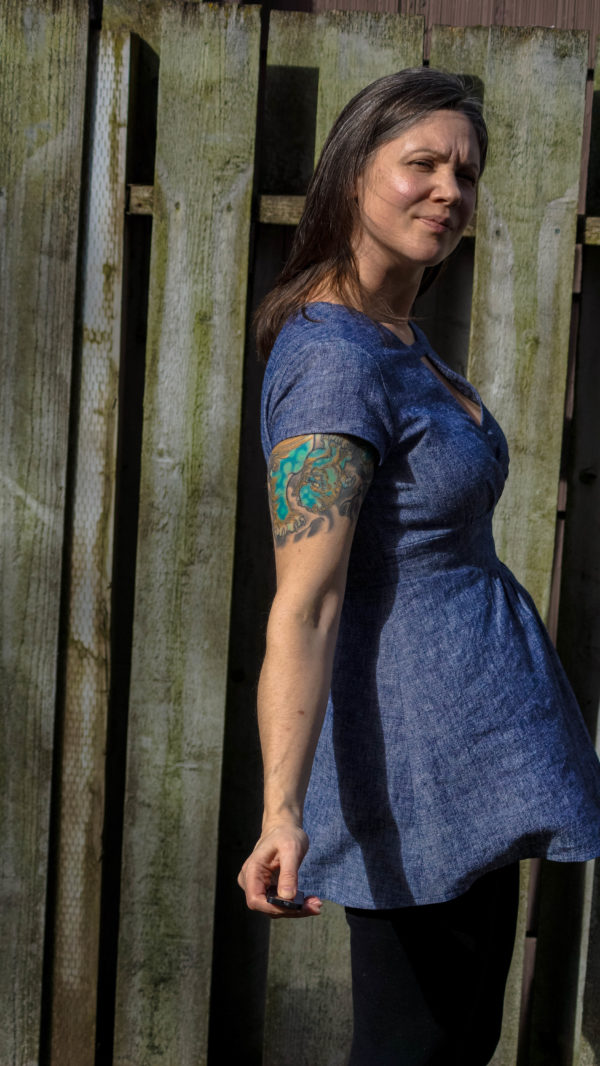
2. Great/easy construction…although I don’t like the facing on the front, but bias facing on the back. That makes for some awkward shoulder seams – the bias back has 1 more layer than the front, not including pressing the seam when done. That could be designed so much better….like just facing for both, really.
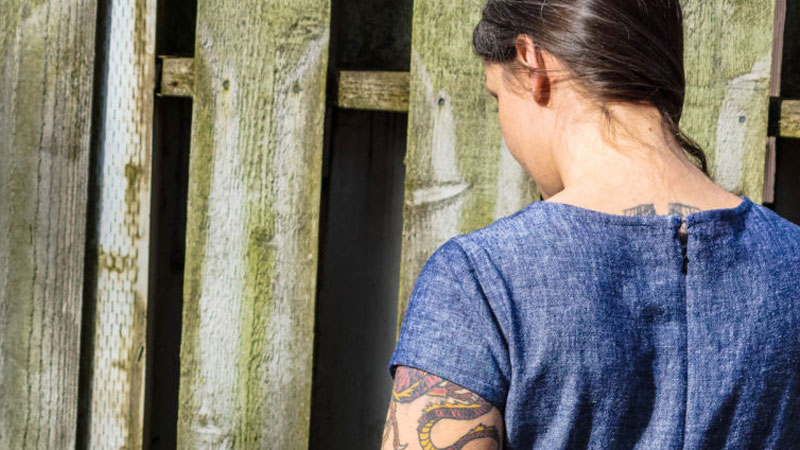
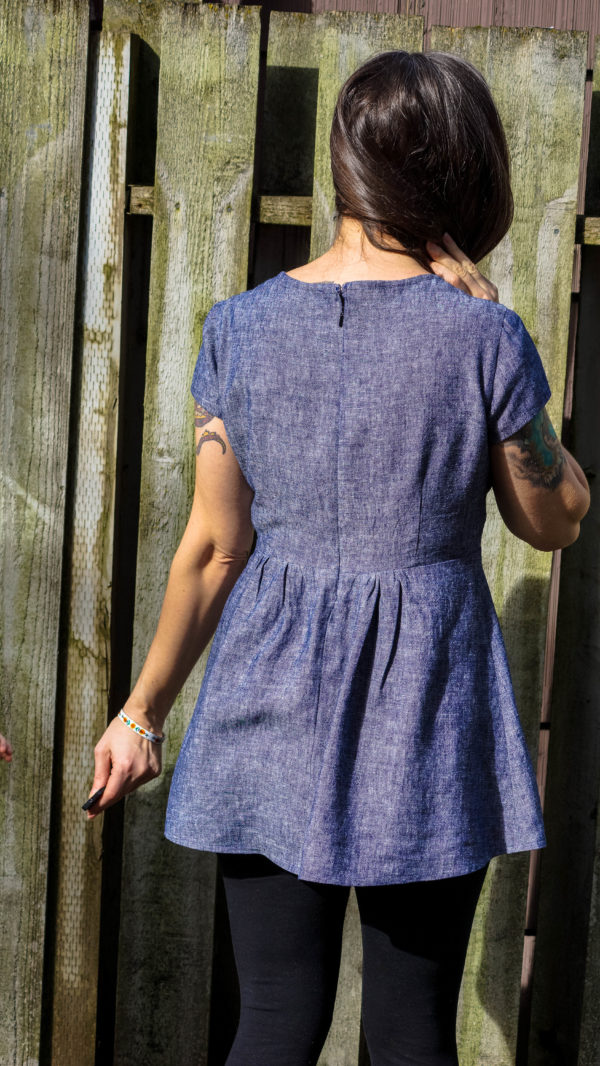
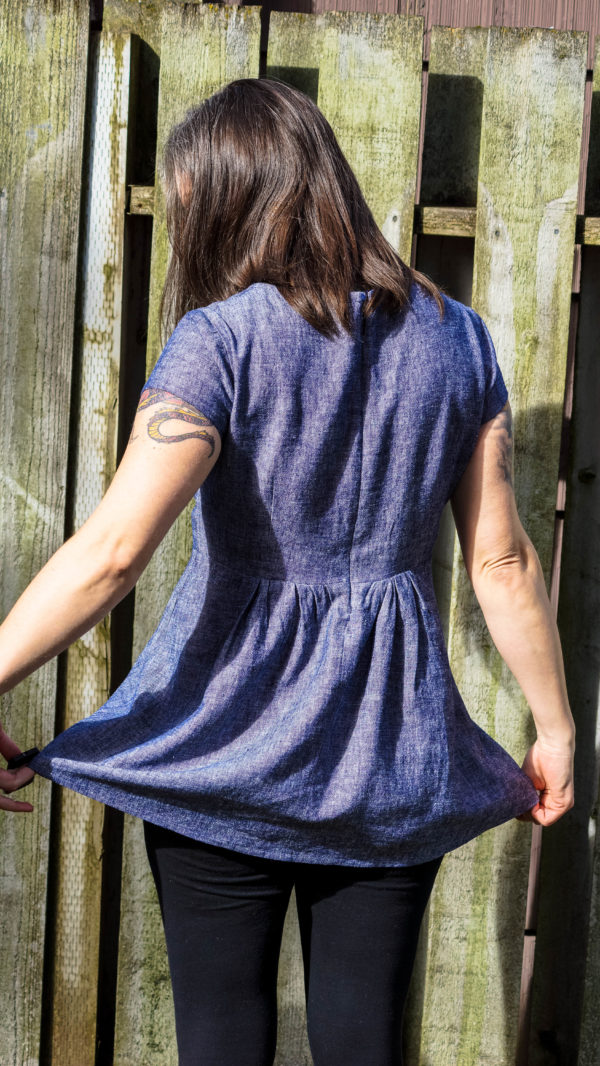
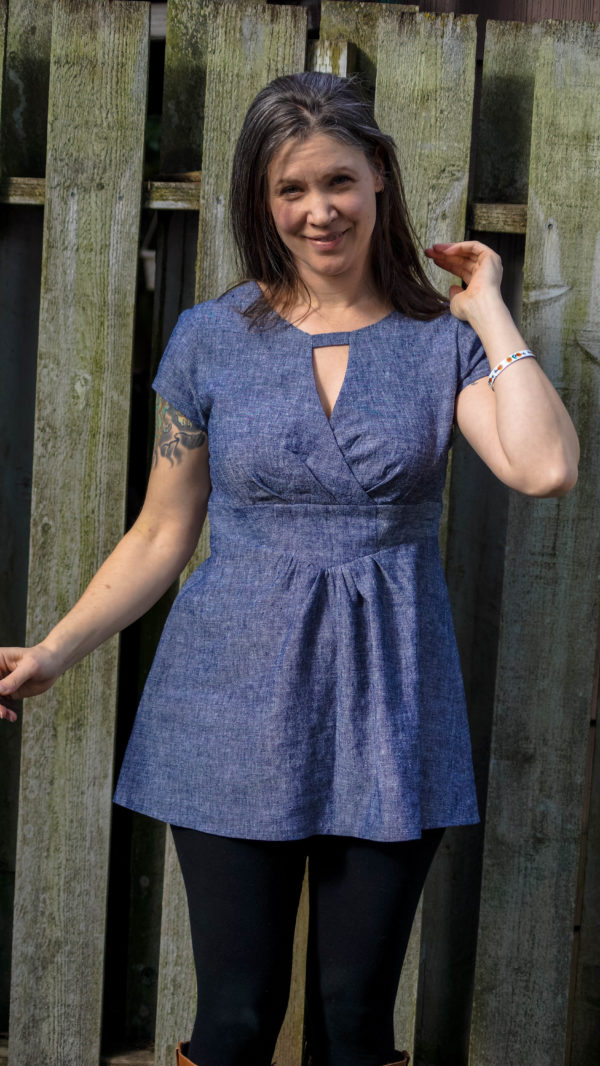
3. The back is cute….it lays flat without the ties added on.
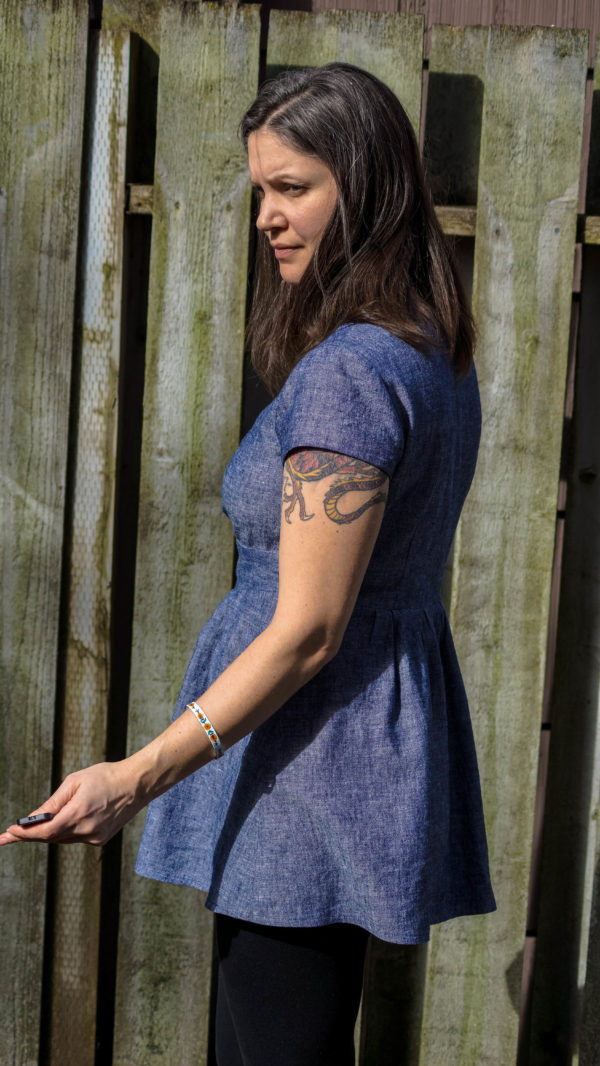
4. The bust gappage-flashing isn’t as bad as you might think. See – me testing it. SO SEXY. snort. There’s some boob gappage below… I guess it’s ok. But I’m not going to bike in it, you know?
What I don’t like:
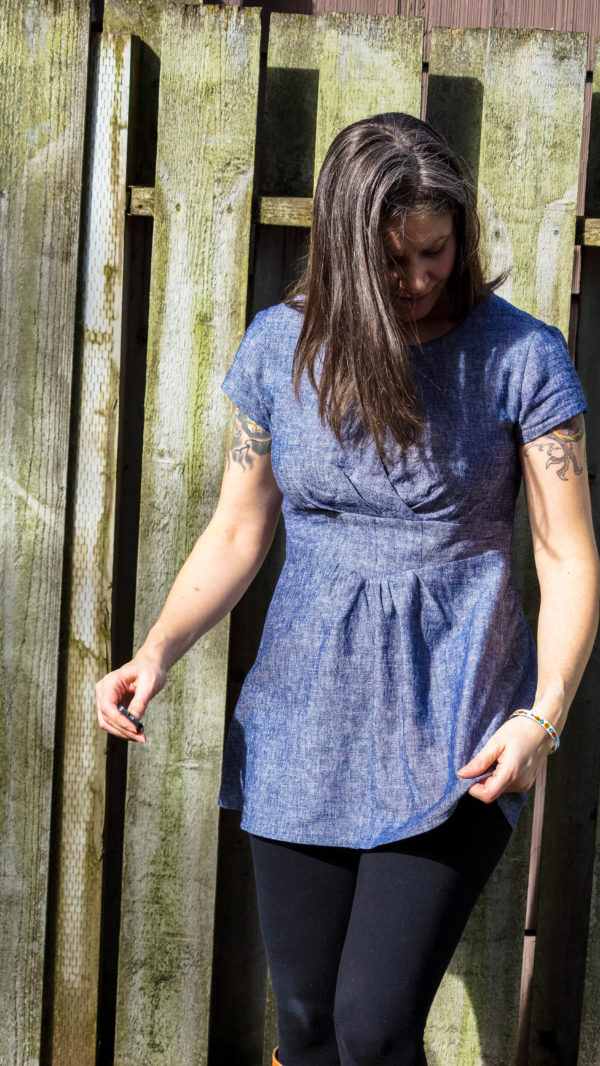
1. Sometimes, I look freakin’ preggo. No likey. The front doesn’t lie as flat with all the top cross over and gathering. It really needs those ties to go flat again under the bust, or, I could possibly see maybe the weight of a full skirt, but I really don’t think that would be enough not to look preggo after my bust…
2. and no pockets….I really wish I added inseam pockets. because dress+leggings and mom-life…yeah. need pockets.
3. that weird shoulder seam with the facing to bias facing construction…
4. and I think…while the sleeve insertion went perfectly, they’re double layered AND sorta cap sleeves…I think they should be more….flowy dainty or something. Essex linen is NOT a crisp fabric like a shirting…anything thicker and it would look really weird. I don’t know. maybe a tulip sleeve would be cuter here or something longer?
Sometimes it doesn’t look that bad…but every photo of me on Easter looked … well. Not my favorite.
Not sure what I was doing here, but …hey, look at that hem. I let it hang overnight but there was nothing to trim the next day. And that perfect zip! Looks like sometimes I get a bit of a gap at the top of the back…not enough to take it out though if you see other photos.
I love RK Essex linen. I’d make everything in it and just roll around in it. It’s so yummy.
Trying out new photo spots at the new house with the waning winter sun. Maybe not the best location/time of day. Need to suss that out a but more. BUT lip balm and cheek color/highlighter made by ME. All the rest of the make up is Make Up For Ever. I splurged a bit as I was out and am happy I did. I like it so much better than MAC’s versions of same stuff. It was a good test run in these shots.
Still futzing with remote, but see how the waist band is kind of…well, it has too much ease there? That’s not how my body goes…it is not straight from armpit down, but it creates this illusion of straight down and then the skirt poofs out. I think the ties would have helped with that a lot.
Overall it’s cute. I don’t know if I’m so in love with it that I’ll make it again. That kind of bums me out. I have the Made By Rae Washi dress plus expansion pack, and I’m still all excited about the giant bow+sleeves version, but I really don’t want maternity wear… I’m going to have to think on that some more. I love the idea of dresses I can bike in during the summer. Maybe it’s all in my head?
The prinCESS turned 5 and needed birthday dresses, so I got to sewing more Made By Rae Geranium dresses, this time without the sweetheart modifications like these. These photos are a bit old…March-ish, but that does not diminish the cute factor.
These are both French-seamed, with sewn down pockets (ever see a kid get frustrated trying to find a sleeve or pocket? yeah. that.) The modeling is ALL HER. She is all about fashion, sewing, posing, purple, pink, and rainbows. Both are Alexander Henry fabrics and if you love them, buy them. They’re selling out everywhere. I picked mine up locally at Modern Domestic, but they do sell online and just got in the kitty version with black and white colorway! I would look fabulous in that fabric.
Creepy eye thing going on – but the pocket shot had to be done:
She picked out these buttons herself. They have butterflies on them. <3
Surprisingly, she’s been favoring the cat versions. They remind me of some oversized sweatshirts I had in the 80s, so of course I love them. And I’m totally a cat person. She also picked out the purple flower buttons.
I really love the neckline options of the geranium dress, but when trying to showcase a unicorn or giant cat head, I couldn’t justify cutting out a notch.
You can’t handle this cute. Really. She does this all on her own.
I think I saw a rumor that Rae is drafting sleeves and extras for these dresses, so I’m excited about that. I’m sure I could do it myself, but, meh. Time is precious with this one. I’d rather take more photos of her.
This is going to be a photo-heavy post on the WHY you might want to modify the Sweetheart dress patternwith the Geranium dress pattern, and HOW or WHAT changes you will want to make. I’ve now made 6 original Sweetheart dresses (3 of the original 6 above), 2 Geraniums, and 1 Sweetheart/Geranium hybrid.
AHA moment
I literally got the lightbulb moment while making both dresses at once for upcoming birthday gifts – learn from my scribbles and bad iPhone photo.
loop to shank button option
Above you can see an almost 4-year old girl in the original Sweetheart 6T dress. Granted, we run tall/big/90th percentile in my family, but you can see some of the common issues here with the pattern. Now that said, girl is going to be 5 in a month, the issues are even more glaring. They’ve become fussy special occasion/church dresses.
So, without further ado, here’s my list:
Broad shoulders/swayback don’t work with a loop-button option. A shank button (or add a shank knot to a regular button) and a button hole works better for us. Your mileage and patience may vary.
The width from shoulder to waist opening isn’t large enough to get both shoulders in/out without struggling and tears parental help.
Armscye is too short – this doesn’t help with getting it on, and it’s almost armpit rubbing….and IS if wearing a shirt under it.
I hate gathers. They’re so much more of a pain than just putting in measured out pleats. Gathers seem easier and lazier, but really after you put in your basting rows, spend forever making your gathers even, do whatever your preferred way of keeping them in place is…you could have measured out and divided pleats. Bah.
No pockets.
Too long. Trying to get her to pull down her tights/leggings/underwear AND hold up a dress while she shimmies on to the pot? And you KNOW she waited until last minute to go to the bathroom… The struggle is real. Avoid it.
The whole finishing the armhole after the fact is just a fiddly, wonky mess. No likey.
Disclaimer: I know, I know, some of y’all really hate criticism of any kind and think it’s all negative. This is my opinion, I mean it in the nicest way, and all that jazz. Shannon did a great job, I still love her heart-template and commend all her work. I still recommend buying Shannon’s pattern as she did all of the heavy lifting already. I’m looking at the Sweetheart pattern now as more of a Geranium-add-on option. ok? ok. moving on.
Here’s the HOW.
detail of opened up back
The biggest problem is getting that darn thing over the head/shoulders. I used the Geranium split-back skirt with pleats and pockets, and split the heart all the way down the bottom. It was like sewing the Geranium back, but instead of straight down, i sewed around half-hearts shapes on both sides, cut out and clipped, clipped, clipped curves FOREVER, pulled right side out through the shoulders and the back was nice, neat and complete. No more finishing from the shoulders on the outside.
larger over the head span
Compare the photo above with the diagonal line showing the NEW over-the-head ease compared to what you can see from the girl-in-the-dress photo – WAY more room, amirite?
armscye increase
I cut an inch off the armscye directly on the pattern, and it made all the difference in the world.
alteration lines
So far, this is where we are at, and you can compare the original on the right, with the modified on the left.
Original Waist
Now, the original gathered waist and the length are optional flavors. Here’s the original above, and….
modified waist
…with pleats and pockets.
modified waist with marks
Because I didn’t use contrasting fabrics, here’s some marks above to show pleats, pockets, and other alterations.
clean insides
And last, but not least, are the finish changes. French seams, as before in my case, because little girls don’t like anything itchy or pokey. I added inseam pockets, THEN I sewed them down. If you’ve ever seen those tumblrs like Reasons Why My Son Is Crying, you know that if the kid can’t find their pocket because it floated to the back, it will end up being a meltdown.
Also, not photographed, there is a tack-stitch at the top of the skirt split…because you know they’ll yank that thing on and off, and it will split. AND I’ve started shortening the original 6, but I’m not likely to go in and split the backs after-the fact. I think I’m going to just ship them to a younger, smaller niece and move on. Lessons learned.
Slow Fashion October is happening and I’m just sliding in under the Intro deadline.
Not that I have a massive audience, but here goes.
I’m a woman. I am fallible. A mom. A wife-unit. An ex-office monkey, primarily in the marketing/graphics field. I’m a sewist/quilter/crocheter/embroiderer/wannabe knitter. I’m a feminist. I’m a wannabe Catholic (still pending Catechism.) I cook and garden and clean and mom some more. I like to tinker and read and obsess. I love science and the how and why.
Slow fashion, sustainability, recycling, environmentalism – we are flawed beings. We are going to be hypocritical. You can’t avoid it. To me, it means making the best decisions I can for my family and for me. The very best thing I can do is not pretend I’m infallible. Inclusivity of the slow fashion movement depends on support of everyone doing what they can at what point in their life they can do it. I can’t be militant to the detriment of exclusion, or possible all out rejection. In Portland, OR, that is far too predominant a side effect. You’re not recycling the RIGHT way. You’re not sustainable ENOUGH. All while texting on an iPhone that has parts more detrimental to the earth and people than the harvesting of diamonds. KNOW you are going to be hypocritical in your choices. Know the car you drive or the bus you take off-gases more pollutants from its interior vinyl alone than any Kleen Kanteen is going to fix. The metal in antiperspirant is negligible to the rust in your pipes. The VOCs from your Sherwin-Williams is nothing compared to what happens when the sun heats up the pavement outside.
So, for ME, it is picking and choosing, and failing at times. I LOVE LOVE LOVE madebycarolyn and when I feel fast fashion tempting me, I’ll spend some time going through her makes and remembering I don’t need all the things any faster than I can make them. At times, I will fail.
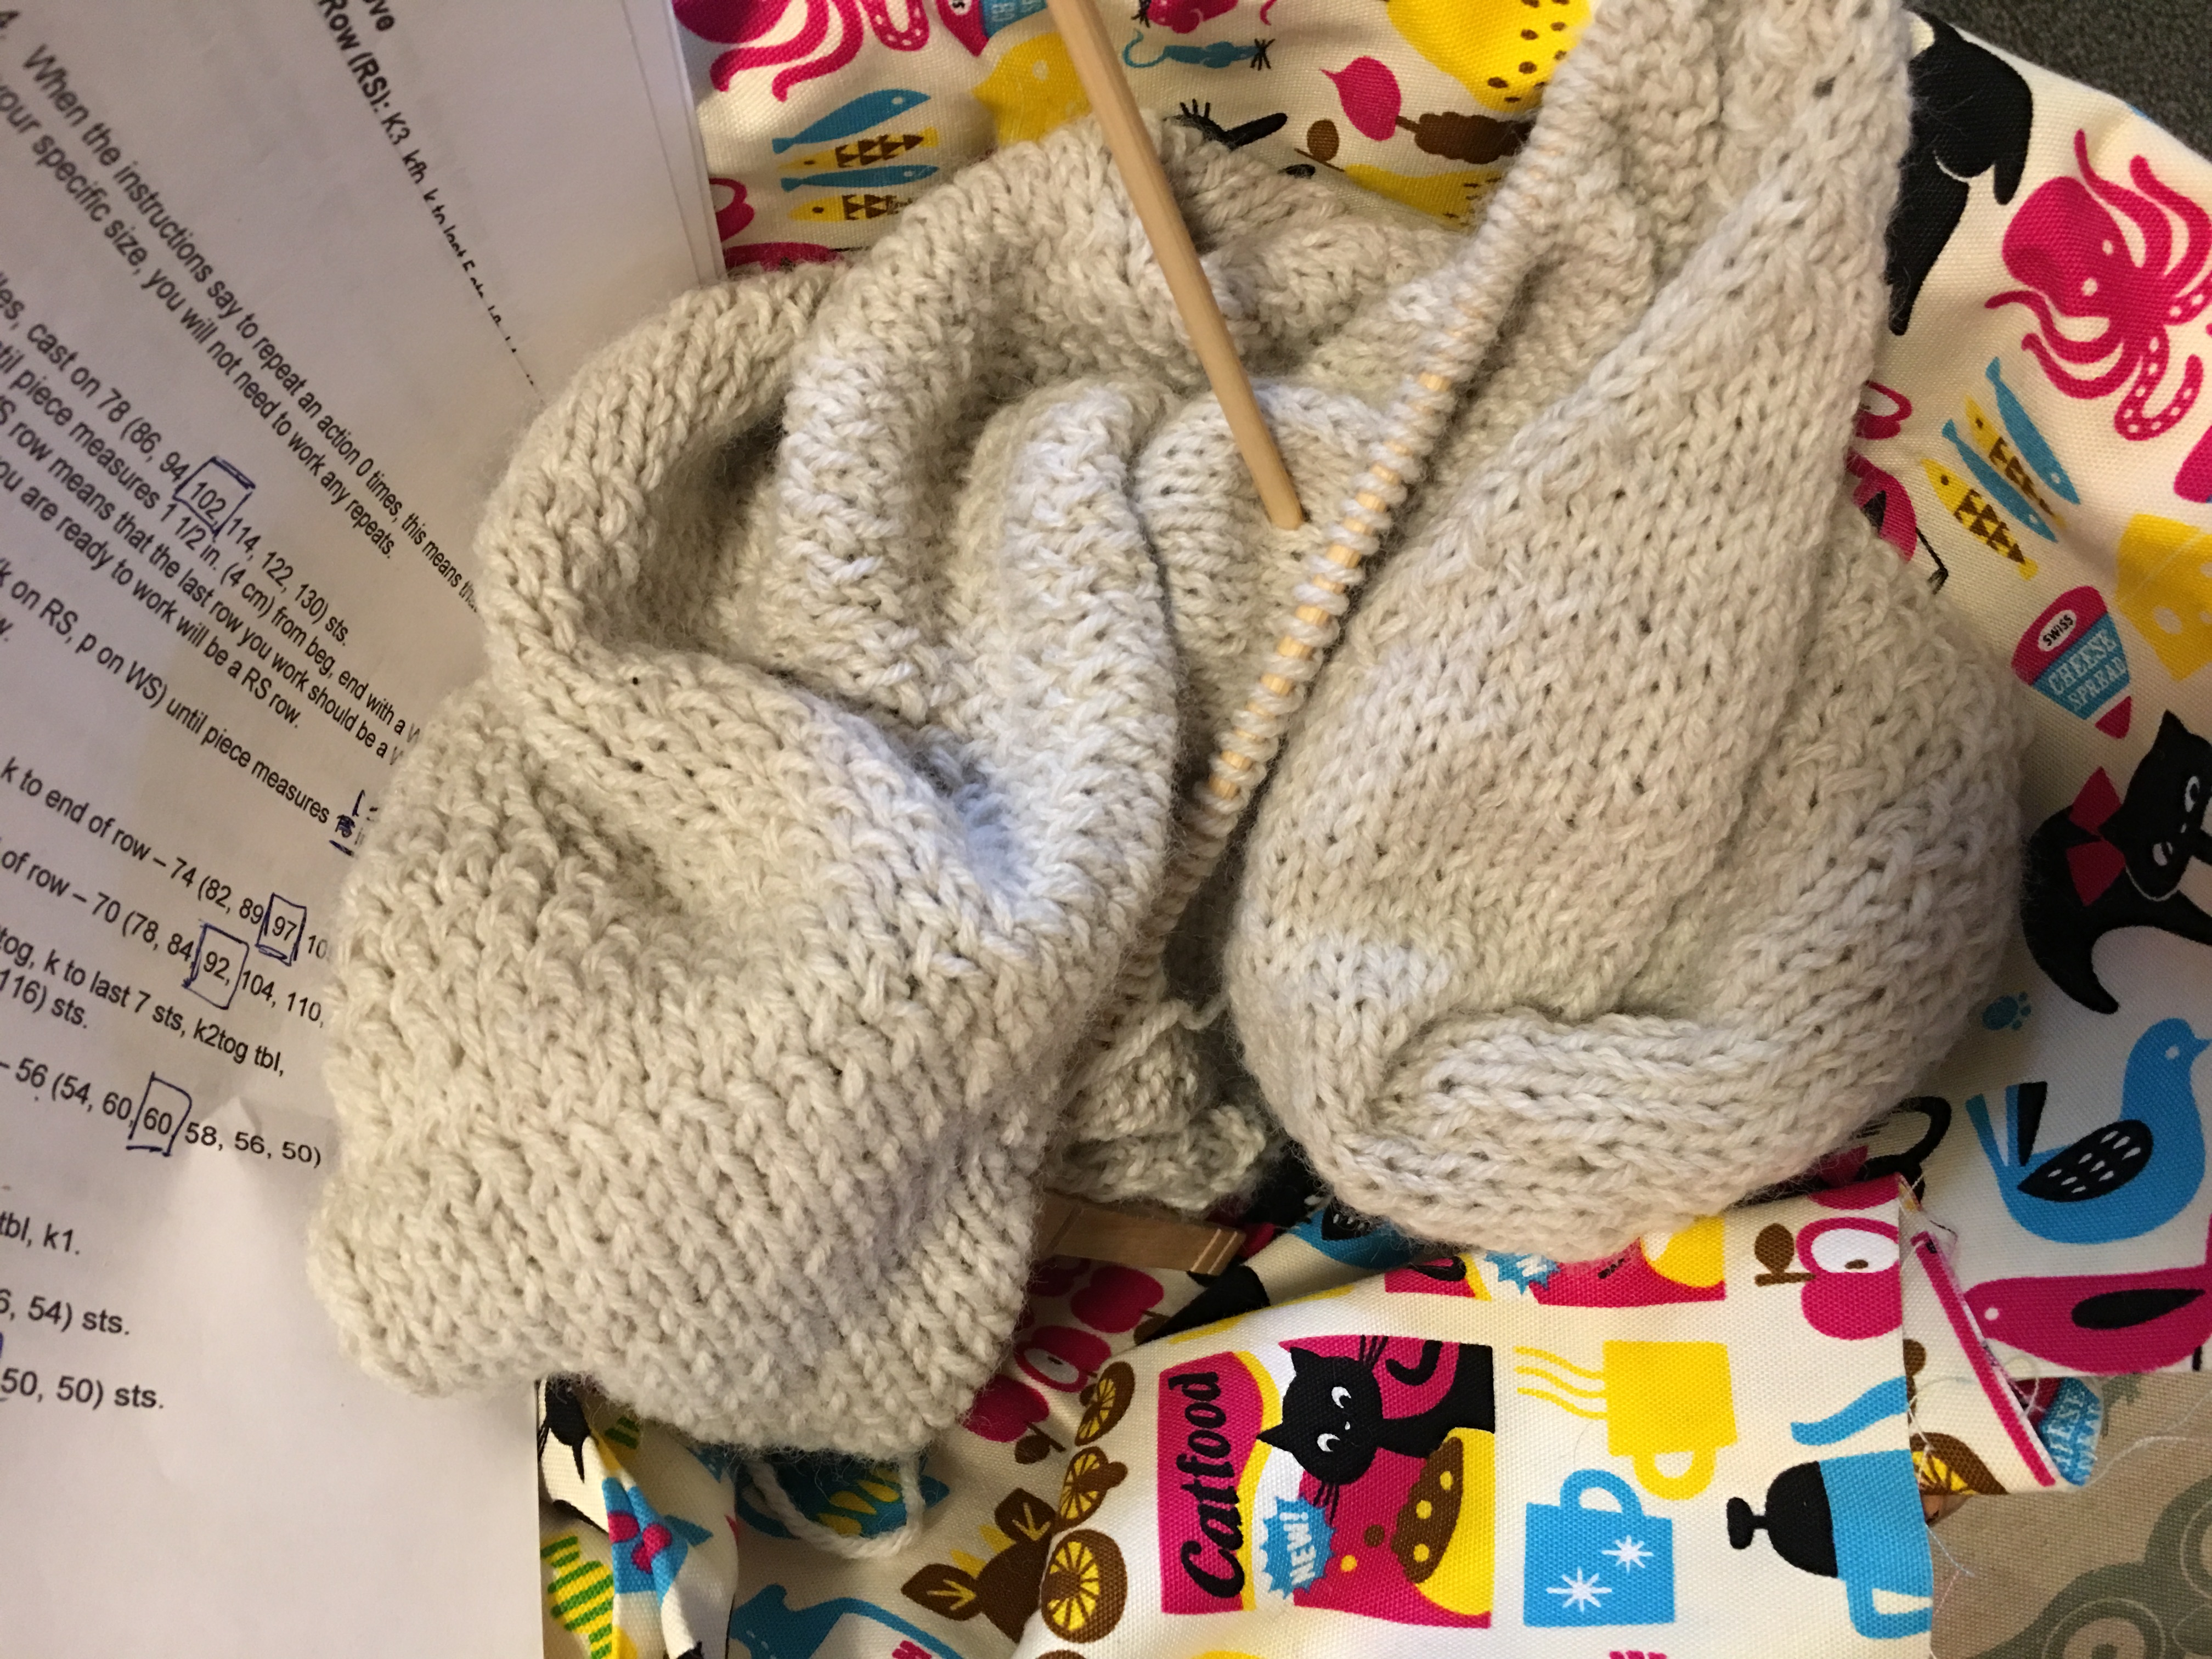
Alternatively, I’ve been producing fewer garments lately because I’ve SLOWED down tremendously and have been focusing on technique. The knitting at the top is the same knitting I started over a year ago. I started twisting my stitches, plus after years and years of graphic design, my right wrist and arm all the way to my shoulder are shot, so I completely relearned how to knit continental style with Craftsy. I’m just NOW finishing the back piece, piece 1, of the entire sweater. But I am also knitting so much better.
I’ve been studying couture techniques so I can better ease in those gussets, sleeves, zippers, and perfect fittings. It’s so funny. When you first start sewing, you go slow because you have to…now I go slow because I WANT to.
Recent fabric gifts have been from Pendleton, upcyling/regifting mom’s stuff, and Hell Gate Fabrics. Fabric purchases tend to be wools, cottons, or linens, unless specifically for cycling or other sport.
What I’m hoping to get out of it….is….I hope to feel better about my knitting than I currently do:
Ha.
And I hope to gain the confidence to be more like handmadebycarolyn. Confidence? Resolve? Probably both. Her skills exceed mine, that’s for certain, but resolve also helps propel one to hit that next skill level, no? So, let’s say resolve. A yearly Slow Fashion month is an excellent time to re-examine where I am, and where I’m going, and to re-instill goals and ethics.
This is a decidedly anti-glamour post. This is real life 70% of my waking time. The Mom Uniform – worn way too often if I’m honest. See me out at Trader Joe’s or in the school pick-up line? This is what you’re going to see. I’m blessed enough to work-from-home a lot of the time, so my office attire section of the closet is dwindling in favor of “Athleisure” attire. Everything must be washable and preferably multi-functional. I’m ok with this…at least the washable part…but this fall/winter season will see the introduction of more feminine yet versatile pieces…much like that Butterick shirt and I’m going to tackle trousers in earnest.
Anyway, future plans aside, this is actually my 4th pair of Papercut Anima pants….5th if you count a pair of shorts. I’ve made 2 pairs of knee length, a pair of shorts out of a woven Pendelton cotton by adding in ease, and a pair of pants made from a Girl Charlee knit that had no stretch so ended up going to my Tween. She doesn’t have full-blown hips yet and can wear them without busting the seams. I wish ALL pants were so easy as these.
I love my knickers and shorts versions, but I do tend to show some plumber’s crack when I bent over. I had sort of a “duh” moment when altering my Papercut Coppelia pattern, and decided to add 2 inches to the crotch length, right below the pocket, but above the crotch curve, more or less. See, these are a size Medium, and I didn’t want to add any ease…but I didn’t want to be x-rated either if I bent over to pick up a rogue Lego.
Ta-da! Full mom butt/muffin-top coverage! These are so comfy…I think I’ll toss my old ones…or give to the tween, and make some new ones for me….I spotted some blue French Terry when I was at Mood that I dig, but I’m really dreaming of velvet. shhhh!
I was out of twill tape, so used some Moda Fabrics fat quarter stack twill ribbon! lolz. Also…I’m digging the control and finesse of using my Viking on the knits more than my serger lately. Ah, how the pendulum swings, no?
This is leftover fabric from the Coppelia, and it is so very comfy. The ever so hilarious husband-unit made me promise that I won’t wear them together.
The pockets on this pattern are superb, but what’s the deal with faux-fly? For reals. I’m putting a faux-fly on knit pants…..that have an obvi drawstring ON TOP of elastic and elasticized ankles. Who am I trying to fool here? That’s an extra 10 minutes or so of sewing and fiddling …to be a dork and have a faux-fly on knit pants? WORSE: why have I not questioned it until now?
And future pants…I think I’m not ready to re-tackle my Clover pattern. I seriously remade those things 4 times and STILL split the ass wide open while at Costco. Not even joking. There’s some sort of life-lesson-symbolism there I’m sure.
I’ve got a McCalls pattern which I LOVE the envelope styling but I fear Big 4 sizing/directions/QC, I’ve been devouring the pants classes on Craftsy in addition to the Sandra/Vogue patterns that came with, but I’m thinking about buying the Thurlow pattern…I’m just really shell-shocked from mooning all of Costco. I’m leaning towards the McCalls pattern – I wouldn’t sew the welt pockets on the Thurlow anyway, and if I screw it up, I can just buy the Thurlow.
Oh, Papercut Patterns. When will I learn to just always add 2 inches? I thought I could just whip this up from some leftover fabric after this Vogue skirt, on the serger and it would be easypeasy. I even went up a size to a large. All the LOLZ.
I stopped before adding the cuff and just gave it a quick hem to finish it at 3/4 length. A cuff would have been even more ridiculous.
Seriously, WTF did I do to that neck band? Yeah, I can’t blame that on being taller than the Papercut sloper.
My waist is just under my boobs, according to this hot mess.
These are high waisted GAP jeans. If I lift my arms any higher, you’re going to see 4 kids’ worth of stretch marks. No thank you.
So….that’s the last we’re ever going to see of that. Let’s all scrub our brains and go to version 2, ok? ok.
Ah, that’s better. Added 2 inches to the sleeves and to the body.
Unfortunately I added the 2 inches under the waist curve. argh. So, next time I’ll move that above the curve and give The Ladies a bit more room.
Shoulders are good. Sleeves are good. Wouldn’t mind a better fit in the waist…but it’s hard to tell if I need to grade down a size there until I move the waist to my waist.
No more scary neck band. Better fabric quality as well, so that might help. 😀 AND I skipped the serger and used the Viking on the whole thing. More control.
No American Horror Story scarring.
Perhaps stronger evidence that I need to move that waist line down- the bunching after the raising of the arms.
AND good boob coverage. Overall, wearable, comfy version. That pull from behind in the mock wrap right there…not sure what to do about that. Again, I’ll wait to see if dropping the waist down under my 2 inch extension helps…unless someone else out there has some better insight. Meanwhile, I’m going to burn version one, and put this one on now to pick up the kids. Cheers!
I bought this Butterick B5526 pattern during a sale, then I realized I did that thing again where I bought it absent minded, and based on my RTW size. DERP. THAT envelope only goes up to size 12, so I gave it to a more petite friend, and bought it again, determined to make this damn shirt. I’ve been watching lladybird.com make it a bazillion times, and after looking at all the indie button-up shirt options, I decided I really just wanted the Butterick version – all my issues with Big 4 sizing/instructions BE DAMNED.
Me looking loaded in this photo aside, I love this shirt. I’m so glad I bought it. Again. It has already been worn, tucked in, untucked, hung up, worn again, etc. before this photo….so it’s a smidge disheveled, but holds up great. This is mystery basement box fabric and I love it’s Florence Henderson vibe. Makes me want olive appliances. The burn test proved cotton, so yay!
I may want to take in the waist area a bit, but the lengths and shoulders are awesome. I’m so glad I went up in size. I ended up cutting a size 16.
Check out that shoulder – so nice not to feel like I’m in a straight-jacket.
The sleeve caps have a LOT of ease. In fact, the sleeves in generally could probably lose about an inch from shoulder to cuff.
I think sewing in sleeves in the round is bullshit. I put in my basting-ease stitches in the cap, lined up my notches and sewed it flat. Not only did I get the same result without being driven to tequila, I also was able to top -stitch/mock flat felled seam everything. Mock meaning I pinked my seams and stitched them down flat. Worked out great.
This was my first collar stand. I was kinda surprised. I went through everything I’ve made – of which maybe 50% is cataloged here….and nope. No collar stands! So of course I put it on wrong. Then I graded/notched seams BEFORE I realized what I did – you can see the left side of the photo, the collar stand is smaller. Yeah. Whoops. So, it’s a bit wonky. Also my first button plackets and somehow I got one of those wrong as you can sorta see from that stitching down the middle. Whatevs. The shoulders and sleeves fit!! All my princess seaming and the length and waist point – happy with that. I’m calling it a win.
The only change I made is the pattern calls for the sleeve placket strip to be cut on grain – that must be a typo, but that’s CRAZY. If just doing a strip-placket….cut that on the bias! This pattern looks circa late 70s; I’m surprised that piece has been left on grain. That has to be wrong – that one I have done before both bias strip versions and proper placket and knew better. The cuffs were pretty easy and not new to me either. Hem was easypeasy.
I may tinker with grading the body down a size, and slimming the sleeves, but really, it’s all good. I think my next version I’ll make sleeveless, and see where I go with the body and the armscye. Does that seem like a reasonable place to start? Will probably be easier to tinker without the sleeves for a few versions? Then work the sleeves back to fit?