Freezer paper crafts are all over the internet and that’s all well and good, but what do you do when you didn’t buy the freezer paper when you saw it, and couldn’t find it the next time you went? You buy a ginormous roll of plain white contact paper for $5!!! It will last me well past the adhesive turning to a gummy, sticky mess inside the roll. Uh…that part might not be a bonus.
Anyway, Joann Fabrics and Crafts will have a sale on t-shirts at least every other month or so when they run about $3 a pop. You’re, like, losing money if you don’t buy them for your kids. Kids grow so fast and ruin things so fast that at $3 each, there is no better deal. That, and you can afford to get a $5 pack of fabric paint and some freezer (contact) paper. Honestly, I don’t remember how much the pack of fabric paint was, but here they are at Michael’s Craft Store. Paint pens are really silly when you think about it….they’re impossible to write with…they just make big globs. Anyway, I’m getting ahead of myself.
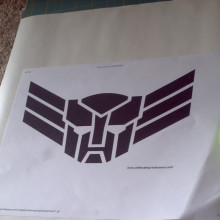
I printed a few options for the kids to choose from in making their stencils. Hazel did the Autobots Transformers symbol, Alex did a spider and I sorta winged a shot at Totoro. I just did some Google searches in images, tweaked some in PhotoShop to get make them cleaner and black/white, and the spider was actually just a stock Adobe image.

Tape them to the contact paper at the sides. I used a box knife to cut the pattern out, but if you have an X-ACTO set, that might be a lot easier. Obviously, this is a grown-up job. I did it on a self-healing Olfa mat, but, again, cardboard is great. It may not be pretty, but that is what tape is for.

Peel the backing off the contact paper, and stick it to the shirt. Use tape to fix any cutting errors on the contact paper. The paint will bleed through the fabric, so put something between the layers of front and back, or you’ll have the front glued to the back with the paint that leaked through. I had some plastic wrapped canvas stored for more painting projects from another sale, so I slid those in between. Cardboard would work fine or even a plastic bag flattened out.


Now it’s time to paint. Like I said, the name “paint pens” is sort of a misnomer in my opinion. You can’t really write with them, however, they do allow for controlled amounts of paint which is a good thing. We each put out a glob of the color we wanted, and used our fingers to smear around in the area to be painted. This works well – just keep in mind, big globs left behind leave big, hard, plasticky dried paint spots. When smeared to a light, but saturated, coating, it dries pretty nicely and is flexible with the fabric.

In my experience with this and other stencils, you want to leave the stencil until the paint is still tacky, but not dry. If you wait until it dries, you run the risk of the stencil being glued to the shirt by the paint. If you do it while it’s too wet, there can be smearing or leaking/running paint. We did this on a fairly dry day outside (in Oregon, that’s saying something), and the paint was tacky in an hour. I left some of the detail bits in the Totoro stencil too long and had to pick them off with tweezers and a bit more force, but nor harm/foul assuming I never wanted to use the stencil again. I think one homemade Totoro t-shirt is plenty for me.
Will I do this again? Yes – but I admit I’ll probably try real freezer paper next time to see if it’s a little more wieldy and easier to cut. But the fabric pens were great – really easy, fun to use and what a fun, cheap day.
I dig a fun, cheap day.