Velvet Ginger Jeans

Ugh. Christmas cookies. You know you’re testing the strength of your seams and fabric if you make skinny Ginger jeans after the holidays. After making a batch of pecan tassies and pretty much eating them all by myself…yeah, I did it. Do these cookies make me look fat? Don’t answer that… I already know. My usual hourglass shape is now more of a keg shape. Whatever. This Fitbit will fix that in no time…

I cut the same as my first denim pair, with a bit more smoothing out in the back yoke, and this time did not grade out to a 14 at the hips as I found that bags out a bit in the last pair too much.

I’ve already been wearing these for a few hours before shooting these photos and they hold up nicely. VPLs be damned. I’m into my giant granny underwear right now. See above about cookies. I’m packing at least 5 lbs more than usual.

No regrets.

These are made from Italian midweight stretch velveteen from Britex. As of this post, there’s still some left. It’s holding up to my abuse (cookies) really well. I’m pleasantly surprised. I’m not sure why…with Britex you get what you pay for…sure, they cost a bit more, but the quality is aces. I haven’t been disappointed yet with any of their fabric.

I think I bought 2 yards, pre-washed and dried, and easily got a pair of Gingers out of it, keeping the nap going the same way. It’s a messy fabric to cut…little velvet nap bits everywhere, and it frays quite a bit, but I was gonna serge it all anyway, so that’s no big deal. It feels amazing. Cotton, so while velvet, not overly warm.

I paid better attention to the instructions this time, and actually got the zip in right. Lol. I’ve only used a 7” zip…the instructions for a 12 say to go up to an 8” but I haven’t found that to be necessary. I’ve got a 1/2” of zip to spare with the 7”.

I hemmed them this time – two turns at a 1/2” each, and this is the length on me. No adjustments to pattern length.

Wearing with my puffy sleeved TATB Agnes. Gotta keep with the 80s theme.


I’m calling this a TAT (tried and true) pattern. I’ve got two more cut in Cone Mills denim, ready to go. There’s something about having a pants pattern that just comes out perfectly that is really….refreshing. I didn’t even baste and try these on as I went. They came together really quickly this time, and just fit. So refreshing.

A pretty happy finish to the first sewn garment of 2018…now to go work off these cookies.


A Refashion and A Scrap Bust

Two nightgowns based on the Seamwork Savannah pattern, more or less. I’ve been tinkering with the arm/bust area and have narrowed it by about an inch at the top on both sides to prevent the gaping I was getting. I also paid more attention at keeping the bias tape facing taut as I sewed. I added 4 inches to length with some leftover Britex linen I experimented with over-dying.

I also have been getting more comfortable with the knew-to-me rolled hem foot.

I don’t quite have it perfected. This time I hemmed before I put in the French seams – the foot does not like to have bulk of any kind roll through it. It worked a bit better, but I’m not quite there. I’ve got a few warbly spots, and a couple spots where it has rolled back on itself, and at the side seams it’s not quite right. For my 2nd time, I’m pretty happy with it, but will need to practice much more.

Linen & wrinkles. Like peanut butter and chocolate. Not my best dye job either… I over-dyed the Burnside Bibs too after this, learning from this blotchy mess, and they came out almost perfect. I used Rit black, a cup of salt, hot water, and was much more patient with the bibs.

The second is a refashion. My mom loved this nightgown for over 10 years and asked if I could salvage some of it. It really is a very soft cotton. I’m not sure how long it’s going to live after the refashion, but some is better than none.

I started with my Savannah-turned-nightgown pattern. Since it was originally a very full henley nightgown I didn’t think to take in much ease, but that proved to be a mistake. There was a huge gap at the back, even with crisscrossing the straps.

I had already put on the binding. Whoops. In hindsight, I should have made a figure 8 with the binding and straps…Live and learn. HOWEVER. I have an excellent jumping off point to re-draft this as an original design from scratch.

Crappy iPhone photos showing gap-mishap. It was was WAY worse on. Dress form linen is a bit sticky, not slinky, and grip the fabric.

I went with the crisscross straps, then I took my rotary cutter and cut an 8 inch wedge down to zero at the hem, and ran it through the serger.

It’s a little slap-dash, but I feel it has a lot of potential. I really like the back. I’m going to start from scratch next time, but I think I’ve got something here. You can probably visualize better here the figure 8 that the binding and straps should be making, and they’d just cover the back and front binding ends so neatly.

I left the original hem on the knit gown.

I had to cut the binding from the sleeves, so technically the stretch is in the wrong direction, but it turned out great. Really flat and solid.

Overall, I’m happy with my double wearable muslins.

Sewing and Stabilizing Knit Garments

This post first appeared on Britex Fabrics.

It’s almost my favorite time of year: autumn layering time! I looked through the beautiful woven wool fabrics at Britex, but when I saw this raw umber viscose & wool knit, it was love at first sight. I’m not exaggerating when I tell you, if you want it, buy it now. Mark my words, it will sell out.

I know a lot of sewists are scared of knit fabrics. Maybe you think you need a special machine, or special stitches, or some pro-level techniques and materials. I’m here to tell you that all you need is a zig-zag stitch and an iron. I’ve sewn knits on a pre-WWII era machine, and on a modern computerized machine. Knits are easy. For this instructional post, I’ve this easy Aomori Papercut pattern, which also happens to be a perfect transitional fall piece.

I know what you’re thinking, “But Becky, that pattern isn’t listed as easy!” The pattern’s sleeveless version is made for wovens or knits. The sleeved version isn’t even a “set-in” sleeve.

Lesson 1: Put a piece of masking tape on the wrong-side of your cut pieces, and you’ll instantly make this an easy pattern.

Lesson 2: Let’s talk stretch percentage really quickly. This pattern doesn’t list a recommended stretch percentage, it’s that easy, but my advice is 30-50% would be best for the sleeve cuffs and binding. How do you know percentage? Just like anything else, you have the difference in ratio, and multiply by 100. So, if I take 10 inches of the Britex viscose/wool knit, put it next to a ruler, and I can stretch it to 15 inches, my formula is [(15-10)/10)]x100=50%. A=original measurement. B=stretch measurement. B-A to get the difference. Difference of B-A divided by A. Bounce the decimal point to the right twice, AKA multiply by 100. [(B-A)/A]x100=%

Here we have the top in two different fabrics. The Britex viscose/wool (left) and a rayon I had in my stash to make the muslin. You can see how two fabrics make a very different top.

Lesson 3: Stabilize your shoulders. There are a million opinions on what to use to do this and I’m going to tell you to use what you have. I’m not a fan of using clear plastic elastic in my shoulders; I think clear plastic elastic is for swimsuits and occasionally lingerie, but you do you, just stabilize your shoulders. The entire weight of the garment is being held on your shoulders.

Here are 4 stabilizer options, with both an overlocker stitch and a basic zig-zag stitch, and what they look like pressed from the right-side. As you can see, stitch doesn’t change anything drastically, nor does stabilizer preference.

From top to bottom: rayon hem tape, twill tape, clear elastic, light iron-on stabilizer

Pin the stabilizer of your choice on the shoulder seam and sew on together.

Lesson 4: Press and steam with your iron. Do you know any knitters? You know how they “block” their pieces after they’re done? Same idea. You’re creating new fiber-memory for the fabric so that it stays in your new shape. The fabric has been flat on a bolt, and you’re asking it to be 3-dimensional. You need to re-block it. Use steam and an ironing cloth. I use a scrap piece of voile, but Britex has some affordable silk organza that is even better.

When necessary, use a pressing ham. Let each part you press cool in-place before going to the next section to reset the fiber-memory.

If you’re in doubt at all, before pressing the binding on a curve:

After pressing the binding:

If anything, Britex high-quality fabric makes a bigger difference than any technique or equipment used. Get some of the wool/viscose (before I go back and buy the rest of it), and get on to making!

This post was written by me, Becky Johnson of sewbeckyjo.com, for Britex Fabrics. Fabric was provided as compensation, however all opinions, photos, and intellectual content contained herein is my own. The pattern used is my own purchase, and this is not an endorsement, nor was I compensated in using the pattern.

Easy Double Welt Pockets; Tutorial for Britex Fabrics

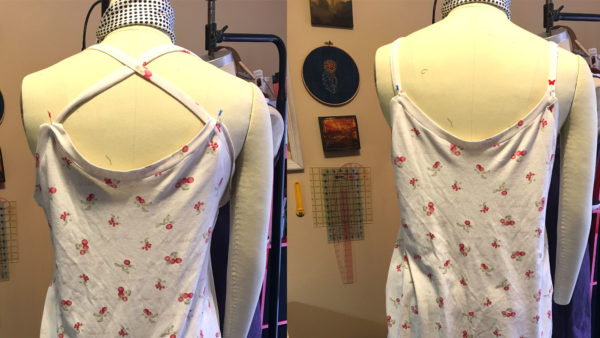
This post first appeared on Britex Fabrics blog July 25, 2017. 

Double welt pockets look so scary. There’s little dots, little triangles, blind sewing, to bias or not to bias, more blind sewing with the lining….and the worst part? You’re cutting a hole smack in the middle of fabric. There’s no going back after you cut that hole. Worse? Half the time they’re this unusable, shallow size.

I don’t like fiddley or inefficiency. I think it’s time we knocked double welts off their pedestal. I’ve made a very photo-detailed tutorial with the help of Britex Fabrics, and you’ll be whipping these out in no time.

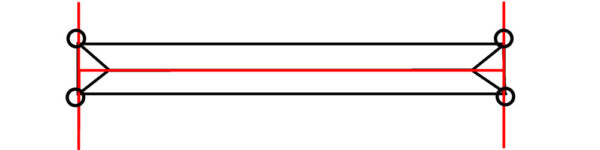
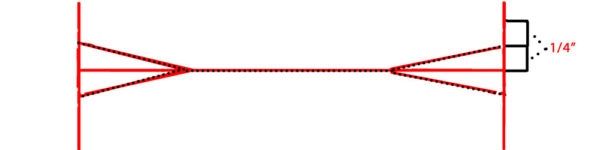
Normally, you see something like this on your pattern piece with some other rectangle pieces with dots you’re supposed to match up:

I’m going to tell you to ignore everything but the redlines below, and throw out the other pieces:

Trust me. Practice these steps once, maybe twice on some practice fabric, and you’ll never be scared of welt pockets again.

I’m going to show you on a pair of Burnside Bibs from Sew House 7 in some YUMMY mid-weight linen from Britex Fabrics. I’ll be using contrast thread to make it easy to see, but by all means, please use matching thread.

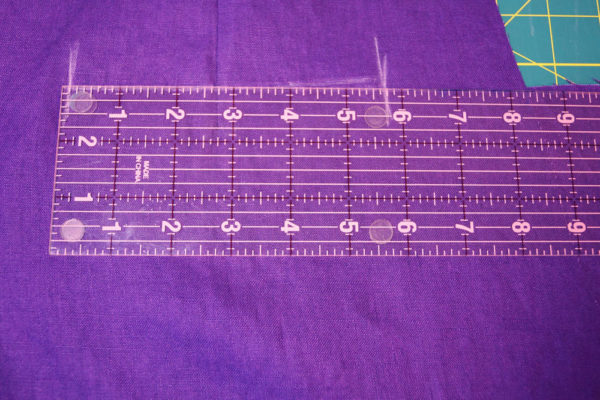
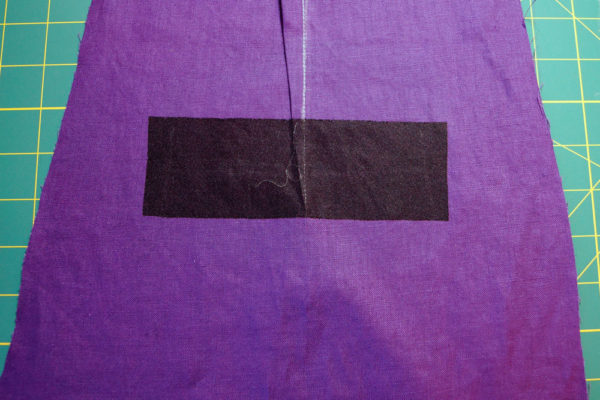
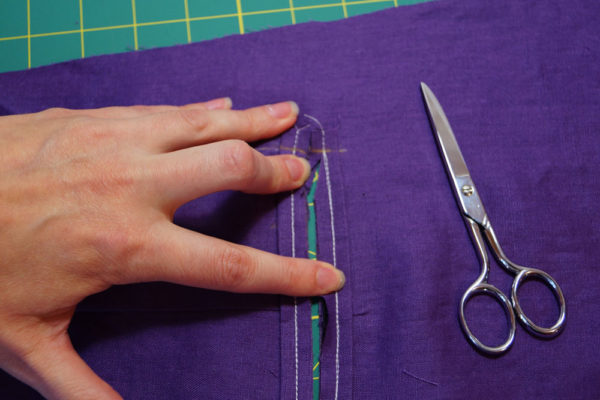
Mark the redlines as shown above. They should look something like this (below) on your fabric. If you’re replacing a patch pocket like I am, your horizontal line is the top of your pocket, and you draw perpendicular lines where there are corner/edge dots. Often in patterns, double welts go through a dart. Re-true your line to horizontal if you’ve got a dart like I have here:

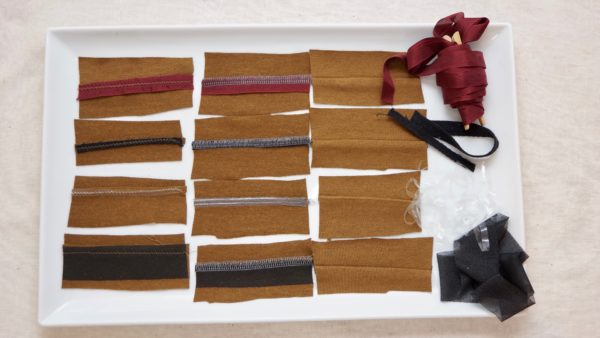
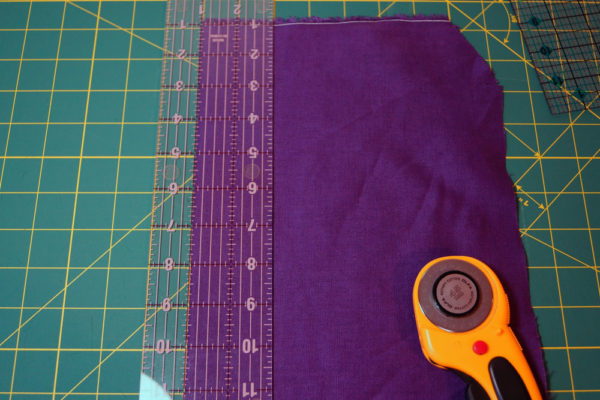
Measure the length of your horizontal line, add 1 inch total to length, and that is the length of your welt pieces. Cut 4, on grain, 2 inches wide, and stabilize with your favorite stabilizer fabric.


Stabilize the wrong side of your pocket. If you’re not sure what stabilizer to use, call Britex customer service, or go to the 4th floor, and ask someone to help you. I’m using a light knit version just to re-enforce my linen fabric, but not so heavy that it leaves an obvious delineation where the stabilizer starts and stops.

Why are we doing all of this, Becky? Because I actually USE my pockets for my phone, keys, random toys I trip on, granola bar wrappers, and other things throughout the course of a given day. If you cut your welt pieces on the bias as some instructions advise, or don’t stabilize the fabric, you’re more likely to get a warped opening that bags out after time. Also, you can see I’m going to cut right through a dart. That dart is going to create an area no longer on-grain, and I want to stabilize that area.

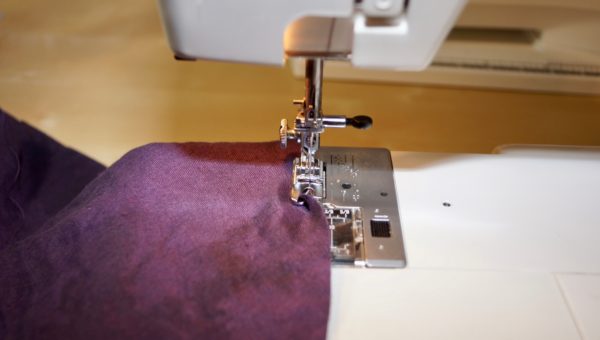
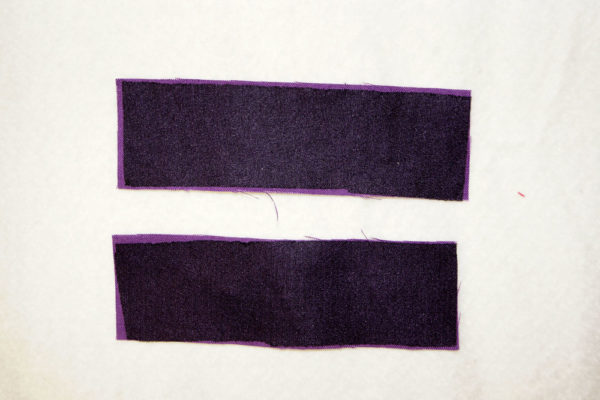
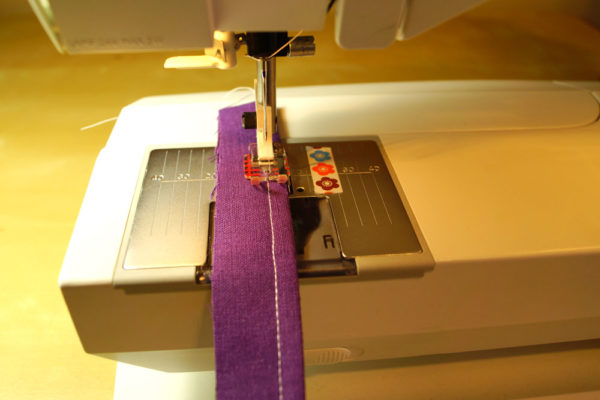
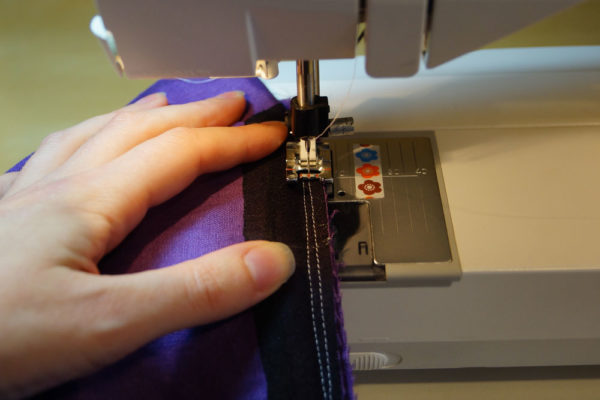
Fold each welt piece on the length in half, wrong sides together, press, and stitch ¼” from the fold.

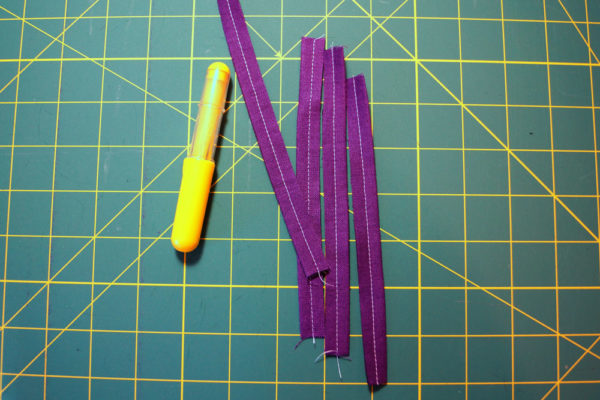
Trim all 4 welt pieces to a ¼” after the seam for a total of ½” wide.

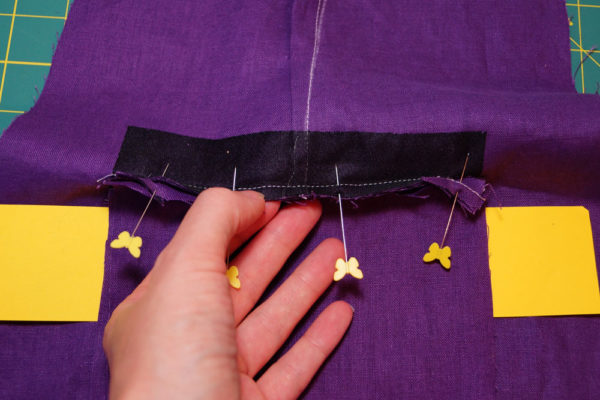
Match up the raw edges of your welt pieces to the horizontal line on your pattern, with an equal amount of overhang on each side:


Pin and remark perpendicular lines on top of your welt pieces. These are now your stop lines.

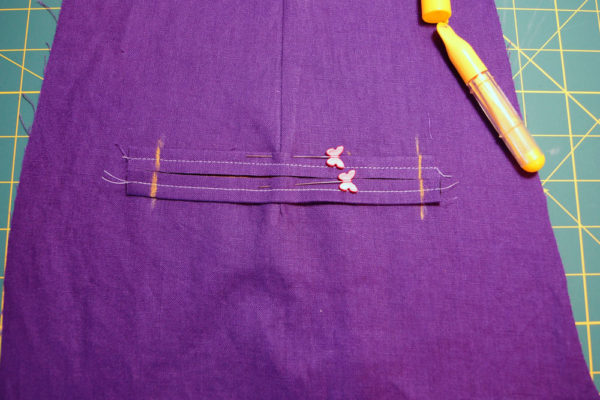
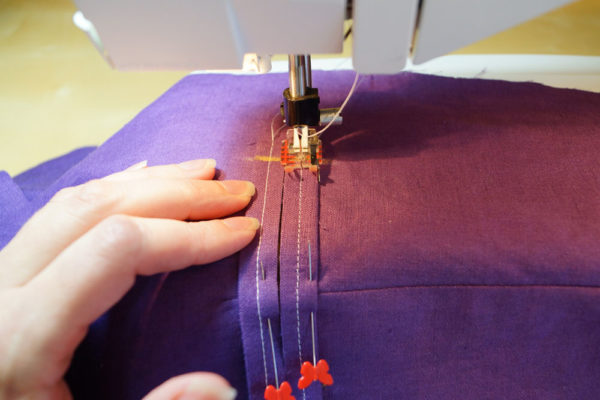
Sew on top of your previous ¼” seam, stopping and back-stitching at your stop lines.

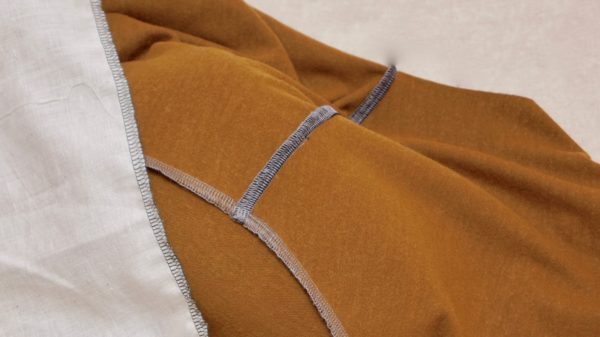
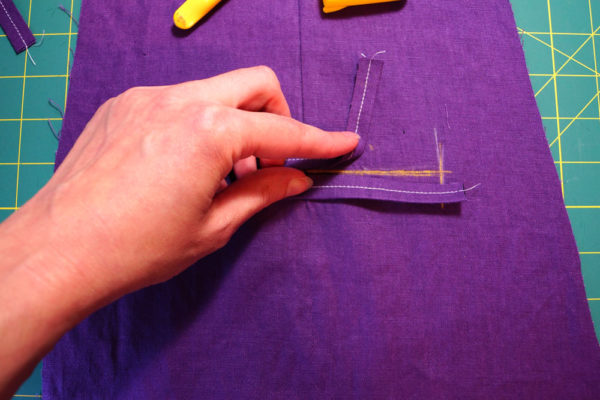
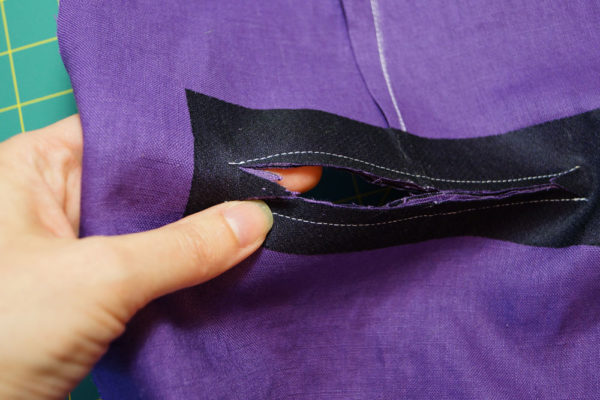
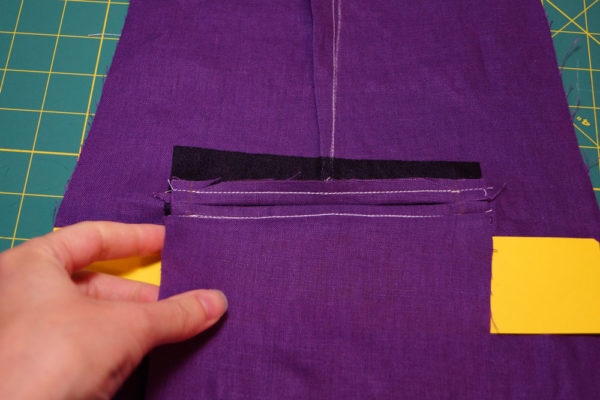
Now, we’re going to cut. Forget those tiny triangles on your original pattern. The dotted lines are your new cutting lines on this image. Cut down the center, and cut nice, long triangles to the stop lines.

Your fabric should look like this:


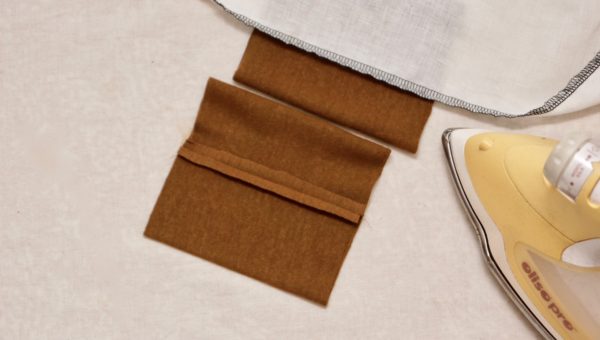
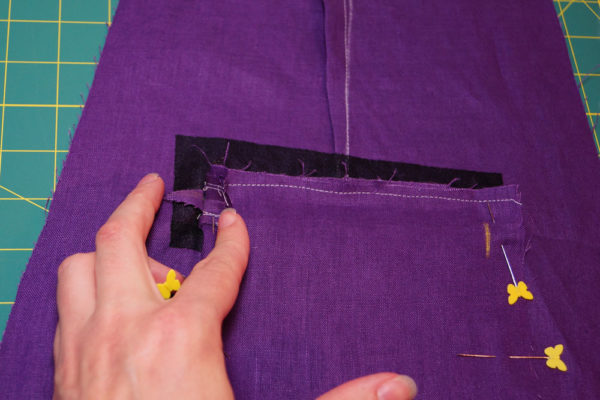
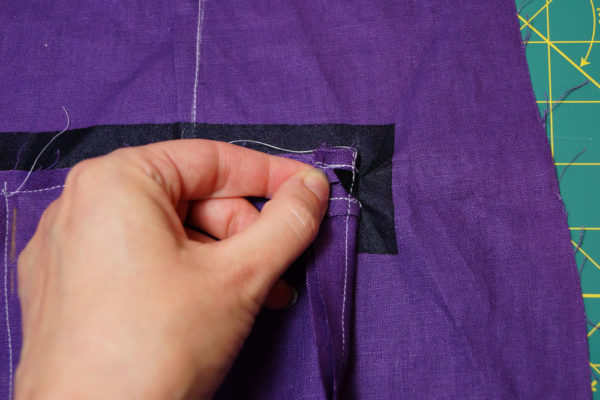
Take the end “tabs” of your welts, and flip your welts to the wrong side:


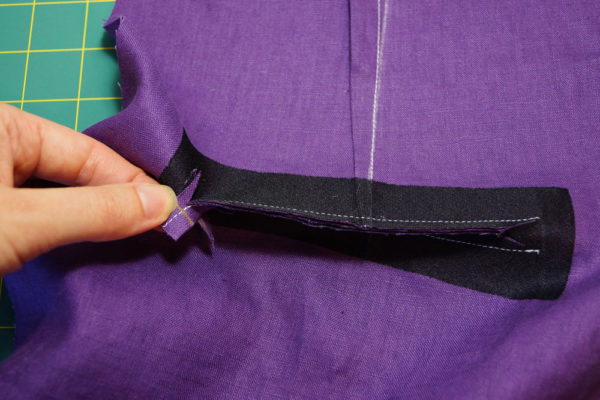
Press, making sure you brought the cut “triangles” to the wrong side:

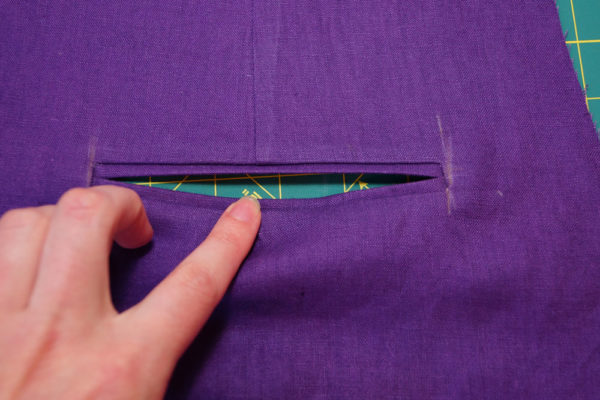
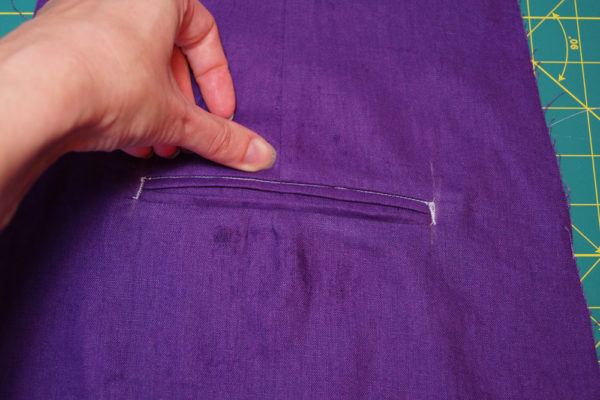
Your front should look flat. If you have any puckers, you have not cut all the way to the end of your stitch lines.

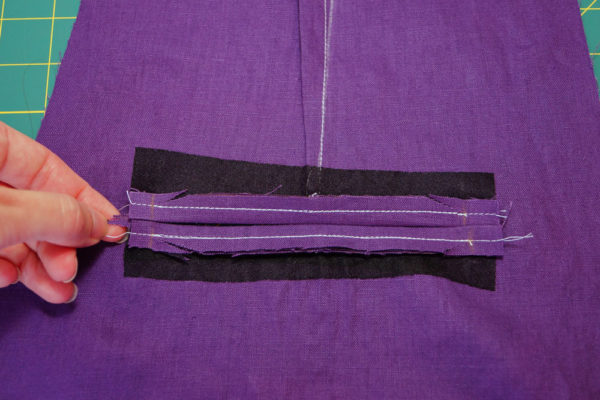
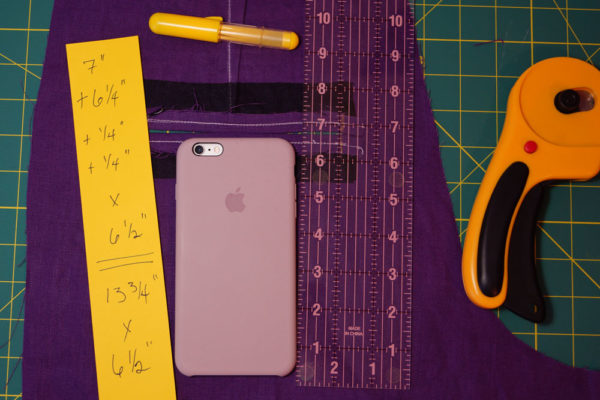
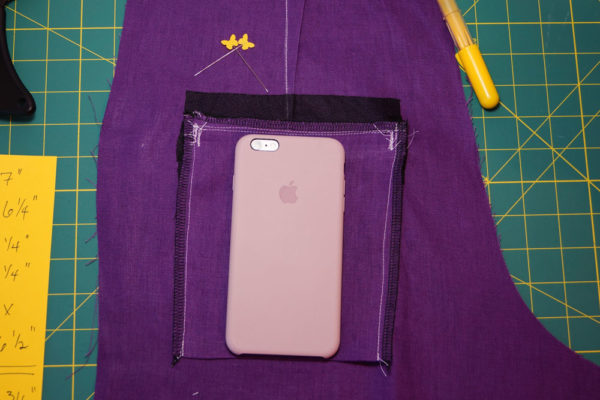
Measure for your pocket. I want my back pockets to fit my phone. I measure from the stitch line of the top welt, to the base of my phone, plus the length from the bottom welt stitch line to the base of my phone, add ¼” seam allowance for both, and the width of my welts. No need to add width seam allowance as I want to capture the edge of the welt sides.

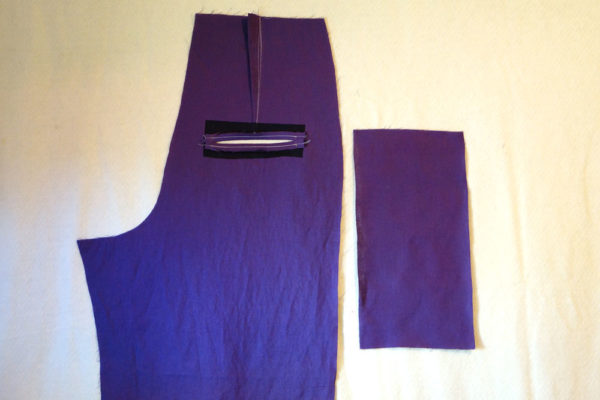
Next to each other, this is my pocket and my pant leg:

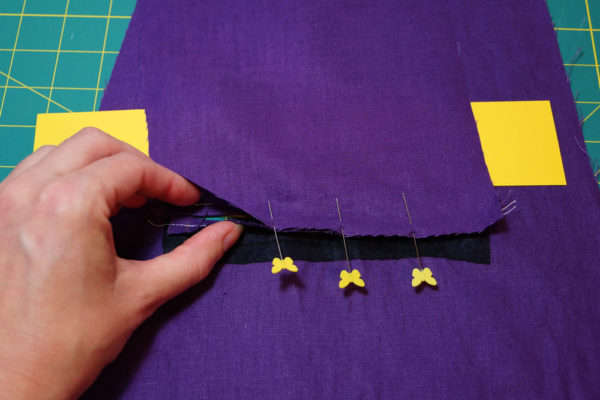
Pin the pocket upside down to the bottom welt. It will look like this:

Sew as close as you can to the welt stitch:

Press down:

Sew top of pocket to top welt in the same manner:

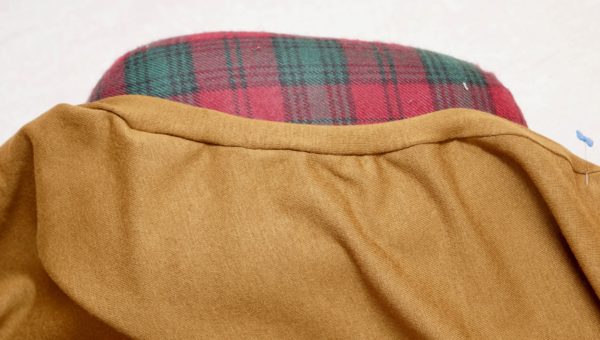
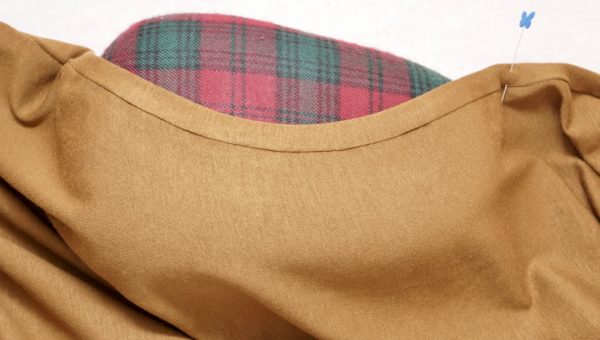
Pin pocket sides, being mindful to pin those triangles (aren’t you glad you made them bigger?):

Stitch, again making sure you get as close as you can to nab those triangles:

I like to go in at this point and bar-tack down the sides, and “stitch in the ditch” along the top because I’m hard on my pockets. Note your thread will likely be matching, so this will not be so obvious. Some people like to edge-stitch all the way around the welt before attaching the pocket. You choose what you prefer on your garment.

Finish the edges how you like, and stand back to look at your work.


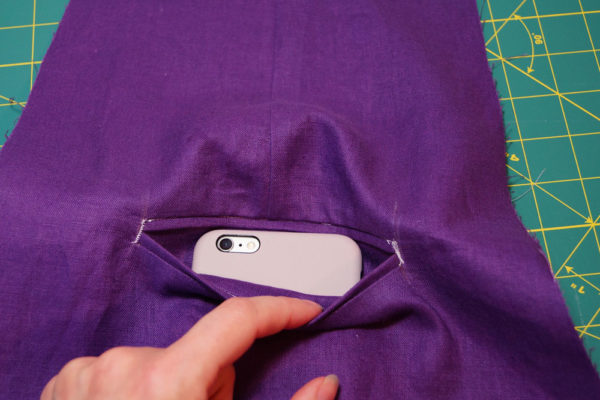
Wasn’t that so much less scary? No dots. No blind sewing. No too-shallow-to-use pockets! Just in time for fall sewing.


This post was written by me, Becky Johnson of sewbeckyjo.com, for Britex Fabrics. Fabric was provided as compensation, however all opinions, photos, and intellectual content contained herein is my own. The pattern used is my own purchase, and this is not an endorsement, nor was I compensated in using the pattern.