Fashion Sketches: Continuing Education

In the name of all that is Stephen Covey and “Sharpen the Saw,” I do try to make myself take time and learn more, refresh what I know, update my tech/knowledge, and make myself a better, more well-rounded person.

Honestly, it’s my ever-supportive husband that is keeping me updated in the tech department, and so I find myself with an iPad Pro & pencil, perfectly timed for my need (want) to update my Adobe skills. Again. This time, my Illustrator and hand-drawing.

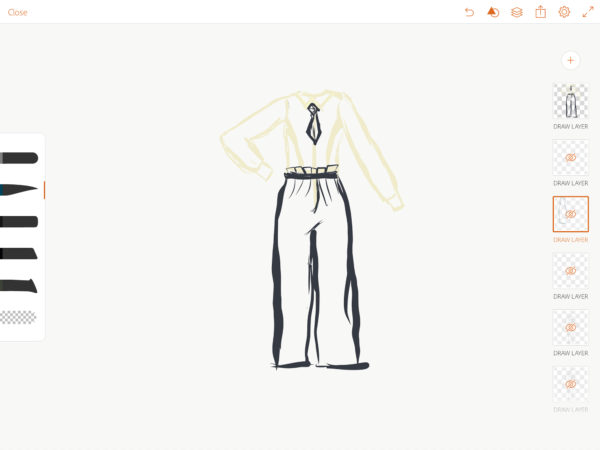
Here’s where I’m at NOW:

I’ve never been a hand-drawer. I’ve always relied on CAD, whether CorelDraw or Adobe Illustrator, or heck, you used to be able to break apart Microsoft clipart and manipulate it if you tinkered with it long enough (can you still do that?)… What I’m saying is I’m a dinosaur completely reliant on a mouse. I’ve got mad control with a trackball and the tendinitis to prove it. lol

This is a new series to get where I want to be and:

  1. keep me accountable
  2. get any advice from the inter webs you may want to share
  3. share what I have found as I go along
  4. I’ve got some hand-drawn patterns and a few ideas up my sleeve. I want to get to the point I can share them.

Now that you know my goals at this juncture, let’s begin.

I signed up for the Craftsy Drawing Fashion Flats class from Laura Volpintesta. I also put out a “help” call on Instagram, and found Laura is not only on Instagram, but she’s sharing really great information there, has a full line of classes, and has a HUGE YouTube playlist.

I’m already learning tons from Linda’s class, but to find out she’s super generous with her knowledge, and very body-positive and diversity-positive, is just the cherry on the sundae.


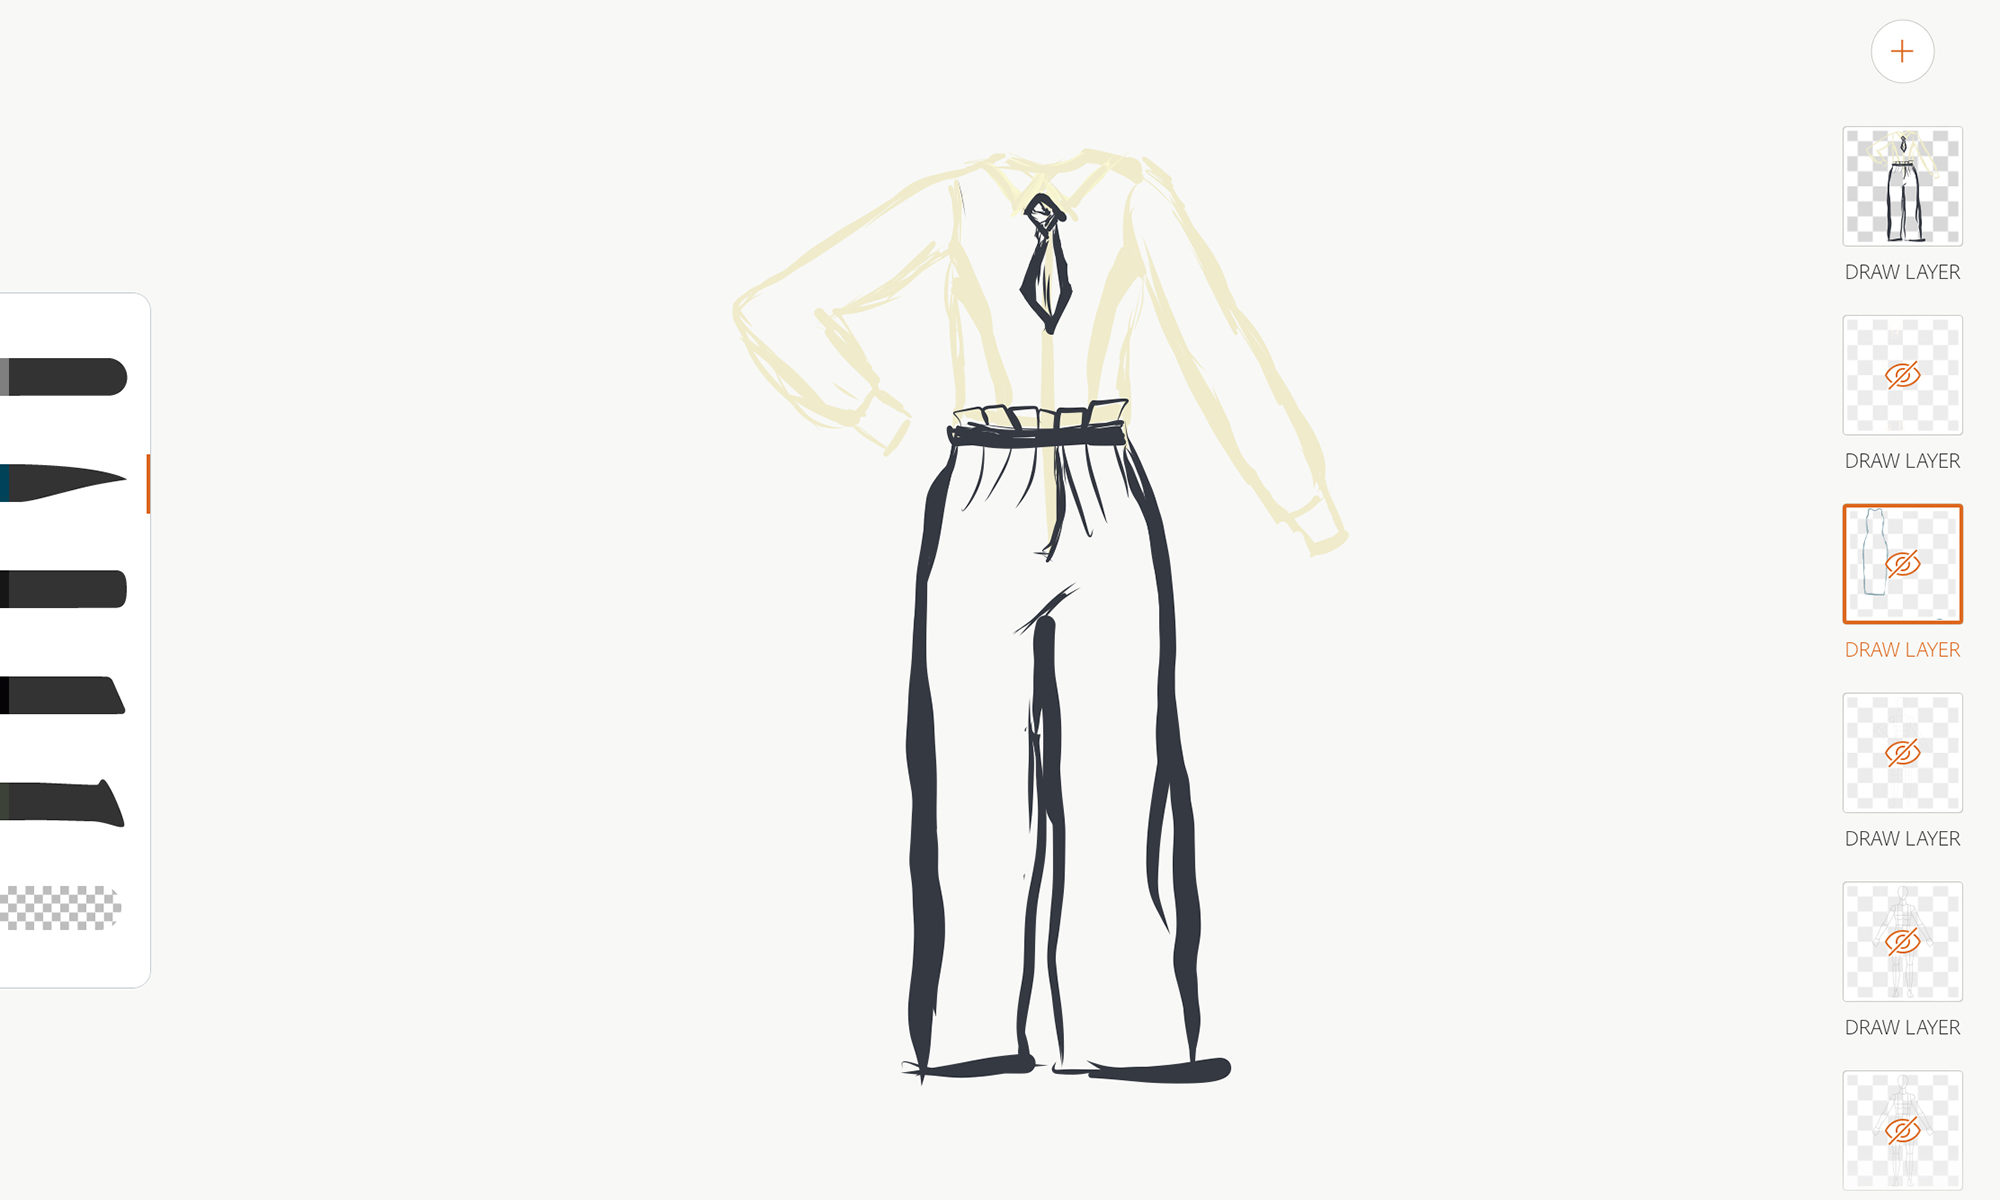
Above is Linda’s croquis imported into the Adobe Draw app on iPad Pro.

This is my first attempt at drawing over Linda’s croquis. I’m hoping to get better – because wow. That’s bad.

Pros of Adobe Draw: I can upload the croquis (or anything) to a library in Adobe Capture, then from that library, put the croquis in a layer to draw over and make visible/invisible as I need. Also, layers. Also, Adobe Draw exports to “real” Adobe Illustrator on my Mac. Ecosystems are a good thing – or at least good relationships between ecosystems. Apple Pencil response is good.

Cons: Brushes are pretty meh and all really the same. Gotta have Adobe Capture (this may or may not be an issue – if you’re used to Adobe, you know there’s always a Suite to anything you want to do…you can never have just one thing.)

This is an app called Paper – just the free version so far. I love the watercolor brush although I can’t help but think it’s hit trendy-status. This is without a croquis and using Linda’s techniques. This is also after a month of (very lackadaisical) practice.

Pros: Apple pencil handles very nicely. Watercolor brush is BOMB, and possibly soon to be as dated as using the word BOMB.

Cons: No upload ability. In fact, I don’t see any import/export capability…other than taking a screenshot. This does not bode well for my continued use. And no layers. AAAAAAAAhhhhhhh. I can’t deal.

This is Adobe Sketch. I just started playing with it last night…so be gentle on my little oil figure.

Pros: That oil brush is fun. I can import/export – see Linda’s croquis underneath my oil girl. Layers, OMG I love layers. I didn’t realize how much I loved layers until I tried to go without them. I like that I can easily change my tools to a series of 5 brushes that I want to use….I think Draw does this too.

Cons: The watercolor brush isn’t as fun or trendy as Paper’s watercolor brush, BUT it has this cool “fan” icon button that you push when you want the water color bleed to stop. So, that’s neat…for 10 minutes (ok, I’m lying, I played with it for like an hour.)

So, what’s next?

That’s only 3 apps. I get it. It’s only February. What should I try next? I see a lot of pros/cons out there for Procreate. Mostly that people not used to, say, the Adobe CC Suite think it’s too complicated, and those used to the Adobe CC Suite think too many tools are being taken away for non-pro usage. Keep in mind, Paper is too…basic for me. Basic? Yeah, I’m sticking with basic. It’s fun, but not fitting my need, how about that? Maybe I’ve already hit what I need in Adobe and need to buckle down on muscle memory/do the work?

Thoughts? Comments? Art critiques?

2018 Make Nine Picks

If you sew and/or are on Instagram, then you know of Lucky Lucille and her yearly Make Nine prompt. If not….I want to know what rock you hide under, and is it on AirBnB?

Seriously though, I’ve not participated until this year because…I generally sew as my needs and whims dictate. But this year, I have some real, intentional goals. I also have some lofty whims that may change. I’m sharing them here to hold myself accountable, and so that I may revisit during the year to keep myself on track, and at end of year for review.

First off, my nine is not a literal 9. Sure, I cobbled a collage of nine like all the interwebs, but really, my goals are bigger and open to evolution.

1. My dearest husband-unit spoils me and bought me an iPad Pro with all the bells and whistles for Christmas. I’m putting the pencil to immediate use and working on my own design ideas and croquis. As a die-hard CAD user and not a hand-drawer, this is a learning curve. I hope to see marked improvement by end of year.

2. I have all 9 of Suzy Furrer’s sloper/block/drafting classes. Whatever you want to call them. I want to have them complete by end of year with projects to show. I want to document my learning process. This will leave me very open and vulnerable to the world, but if I’m going to tear apart other’s work, I should be able to put my own ass on the line. Consider this my declaration of putting my own ass on the line. After I absorb Suzy’s classes, I will look to find other teachers, classes, books, etc. Sewing, like software, cooking, and so many other things, has more than one way to get from point A to point B, and I don’t like being myopic in focus.

My end goal is to make my own designs into reality. The market is already saturated with indie pattern makers, so I’m not sure I need to throw my hat in that pool, but this is where I’ll keep the goal open ended. No one needs another sloppy pattern maker, and I would not release anything that wasn’t up to my standards.

3. I’m in the 2018 RTW Fast. I’m number 136 of over a thousand. That’s not a huge reach for me, but I do have a weakness for purchasing my workout/athleisure wear. I have WAY too many Fehr Trade patterns to be doing this, so the Knot-maste outfit is high on my list.

4. I need to quit making dresses I don’t wear and realize I DO wear maxi dresses/skirts. So, whether I buy the Named Kielo dress or draft my own, this is high on my list. Sarah on Wanderstitch is my muse for this revelation. Seeing her Kielo was like a much-needed smack upside the head. DERP.

5. Le sigh. I own too many Megan Neilsen patterns, also unmade. The Flint being at the top of my list to make. Sigh. I’m a bad pattern hoarder.

6. More hoarding. I have both the skirt and the vest to this….I will be making the vest. The skirt….let’s say is inspiration.

7. This Yaya Han coat is another Sarah/Wanderstitch inspiration. I reserve the right to switch this to a possible capelet design, like this Papercut version, or possible self-drafted, but regardless, my winter coat is looking haggard and I need a new one.

So, while I’ve only typed to number 7, I’m WAY past 9. The husband-unit also would look damn sexy in some men’s Hudson pants…so, I’ve added that to my mental list, a few more Seamwork Savannahs, I may also try a swimsuit again, probably some Sewcialists challenges in there, and whatever my little cosplay teen comes up with – I’m hoping she’ll also give me some fresh artwork to engineer designs.

Woohoo, bring on 2018!

How-To: My Pattern Organization

Time To Organize

I dunno….admin work puts a sneer on my face….even if it’s for myself. The idea of “filing” patterns makes me just want to burn my bra.

That, and I need to SEE what I have….just the other day I was cruising the inter webs, going to finally buy a Renfrew and a Miette pattern, when I was positive I needed a knit-wrap-dress pattern too. I opened up my binder of patterns, and there was a Vogue knit-wrap-dress pattern staring indignantly at me. I already have one! (I have to come up with another reason to get a Cake pattern now….)

Which brings me to…well, I use binders.

The Binders
The Binders

Specifically, BIG white view binders in low-VOC and D-rings if I can get them.

I use sheet covers and tabs.

Tabs
Tabs

Tabs not because I’m going to actually number and collate and make a table of contents…oh hell no. hahahaha. NO. Just to have a place to mark between patterns.

It came time again to take the piles of patterns I had been accumulating and stashing around, and add them to the binders…so I took a few shots.

Time To Organize
Time To Organize

If this idea helps you, great. If not, eh. It’s just an idea. Filing works for some people, just not me.

Here’s an example of a store bought Burda pattern. I use the crap out of this pattern–specifically the pants.

I put the envelope and unused portion in one sleeve.

Burda Kids Envelope
Burda Kids Envelope

And the cut part and instructions in another…with any notes I may have. This pile happens to also be in a plastic bag.

Burda Kids Bag
Burda Kids Bag

My beloved Colette patterns get traced. I keep the booklet and original patterns in one sleeve and the traced patterns in another.

Laurel Booklet
Laurel Booklet
Laurel Traced Pattern

PDF patterns are similar. Instructions in one, cut patterns in another.

Peek A Boo Sun Hats
Peek A Boo Sun Hats

The inside pockets can hold wonky, oversized patterns.

Oversized Patterns
Oversized Patterns

I use the view portions to hold receipts, mostly so I can remember the fabric types, a ballpark of costs and what ever miscellaneous items I’m too lazy to find a place for…

View Binders FTW
View Binders FTW

After this cleaning, I can see I need new binders for quilt patterns and bag patterns as they’re growing to that point.

Need Another Binder
Need Another Binder

So…the pros are that I can leaf through them like a magazine. I can get an instant view of what I already have vs. what I might need. I also have no problem storing multiple traced sizes or versions to one set of instructions.

Cons are storage for the binders…they could, after this, still go down in a large drawer if you wanted, but mine sit on a shelf. Also, I’ve yet to decide how to handle traced patterns out of Ottobre or books. My traced patterns are very well labeled, but the visual of the finish photo would help. I’m not into printing more than I have to…so we’ll see. For example, I’ve printed the Miette pattern recently without printing the instructions, and I have some Craftsy patterns I haven’t printed yet…more decisions. My Burda book patterns, which I have the book on iBook, are ok because of the instruction covers.

I need to make a decision there soon because I totally forgot about the Craftsy patterns! Whoopsie! I may not have needed that Renfrew after all….oh, who are we kidding, sure I did!

Chevron Pattern Baby Quilt

Quilt the Quilt

My most fabulous and talented man is from Seattle, and the Seattle cousins are having babies! There are 2 due this spring. We ventured up this weekend for a bit of Zoe’s first birthday, a bit of VIP special delivery, and I took up a baby quilt for Robert’s cousin’s baby shower that we could not attend, but I could not resist making a little something.

I saw this glowing Tiffany blue argyle pattern from the Denyse Schmidt Fancy Free line.

Denyse Schmidt Fancy Free

It has the silkiest feel to it and is really nice to work with…it’s also never going to make it into my ‘cheap and easy’ category as it’s certainly not cheap, but is sooo very worth it. Besides, when we’re talking a quilt for a family baby, we don’t want cheap to enter into the equation unless it’s happenstance, right? Right. It was 30% off when I bought it, so, for giggles, you’re looking at about 4 yards at around $10 each, and I have a yard leftover…not too bad before batting and all.

I got a 9.5″ square ruler by Omnigrid to make my life a bit easier. I knew I wanted it to be a big, chunky chevron pattern and that I would be repeating the pattern later with the large Disney Cars print, so it was a good buy.

Omnigrid 9.5x9.5
Omnigrid 9.5×9.5

My batting was a baby quilt size 60″x60″ – which gave me plenty of room to work with. When all is said and done, I have 6 half-square triangles (HST) across and down that are 8.25″ once sewn together (6×8.25=49.5″) and that’s plenty of wiggle room.

Cut, Centered & Stacked

Enter the batch sewing. I borrowed this technique from my Craftsy Block of the Month class. My quilting experience hasn’t always resulted in the best end product, but I have been working on it. While apparel remains my more natural mode, I must grow! hahaha. Okay, seriously. Take your stacks of squares, I’m using a Kona white as my contrast, mark the lighter fabric down the center on all of them, stack them all right sides together (not gonna matter with a solid), and get ready to sew, sew, sew.

First Run of Chain
First Run of Chain

My first run of stitching 1/4″ down one side of the center marked line.

Needle Adjustment for Viking

On my machine, I move the needle to the right 1.8 points to make the edge of my foot 1/4″ – your machine or foot may make that unnecessary, but this is what I choose to do.

Second Run Chain Piecing

Without even cutting anything apart, I stitched the opposite side of each block’s center line next.

Set, Slice, Press & Stack

Alright! Does anyone reading this have any experience with the LEAN manufacturing theories? I always giggle when I’m in this batch-sewing mode and think of that. Anywho, set all of your sewn lines at the same time, cut them all apart, slice along your marked line, and press all of them open. For me, giggling about LEAN and getting it all done in like-batches is easier.

Directional Pattern
Directional Pattern

Now, this fabric has a directional pattern. Keep this in mind when selecting your fabric – it adds a bit of time to your assembly if you need to make sure the patterns are all going the same way.

Chevron Block
Chevron Block

This is where I leave the Craftsy BOM class instructions and move to something simpler. This is more like the Missouri Quilt Company YouTube tutorial idea. I know, I know, I can’t just stick with one thing; I have to mix and match and make my own. I personally don’t love the Missouri Quilt’s version of making HSTs because they’re too wiggly on the bias afterwards for me and honestly, adding wiggly to geometry doesn’t work for me at this time. Maybe when I get better at it.

Sew It All Up
Sew It All Up

Sew it all up! I use the more classic quilt construction by making quadrants of blocks that get sewn together, but if you can sew in strips of blocks, more power to you. I tend to get some extra wonkiness when I do that, so I stick to what works best for me. Less wonky works best for me.

Quilt Top
Quilt Top

My fabulous and talented man can also hold up quilt tops with ease! Aw, he’s so sweet. Hold on a second while I go give him a kiss.

Okay, I’m back.

Now, you baste your top to your batting and backing fabric. Baste as you like…I use spray baste. To each their own. My usual Warm and Natural batting was out of stock, so I tried a new kind.

Nature-Fil Batting
Nature-Fil Batting

It’s like buttah, I tell ya. It is Nature-Fil which is 50% bamboo rayon and 50% organic cotton. It’s a bit more pricey than my usual, but damn was it easy to quilt. Vikings are great machines…better at some things than others, and she can be a persnickety one at times, but she didn’t blink an eye at this batting.

Quilt the Quilt
Quilt the Quilt

Purred like a kitten right through it all, and didn’t even need a walking foot. I just traced the patterned chevron on the white for quilting – kept it simple and fast.

Trimming For Binding

I’m a big fan of the backing wrap-around binding – especially if I’m going to have mitered corners. I trimmed down to 2 inches after quilting. If your quilt is wonky and didn’t stay square after quilting, this may not work as well, but I did minimal quilting and it stayed square.

Sew Down Binding
Sew Down Binding

I wrapped the raw edge of the binding edge in itself, and pinned it down. Again, Ms. Viking had no problems at all purring through through it.

Front Finished
Front Finished

Here’s the front, all finished and pretty.

Baby Quilt Back Finished

Here’s the back. I had some blocks leftover that I incorporated. I think it looks a little nautical, which is fitting for Pacific NW families.

Altogether, it only took about….10-12 hours I’d guess, including the extra fussing needed for the fabric directional pattern. If you’re curious, with getting some of the fabric and the batting on sale, you’re looking at about $60-70 dollars for this finished baby quilt, not including labor :). I think that’s pretty good. Sure, you can get 3 or 4 blankets at Target for that, but they won’t be nearly as nice or have that special family love sewn in. And like I said, while this may not fall into the cheap category, it was certainly easy.

I’m definitely glad I found a way to make this pattern work for me, and I’m definitely going to do it again. I’m not quite pro yet….here’s leaving you with a close up of a block that did get wonky…

Wonky
Wonky