Pattern Make: Lisette B6168

I made myself something! OK, honestly I’ve made a few things but I haven’t taken photos. Let’s blame the (PNW) rain.

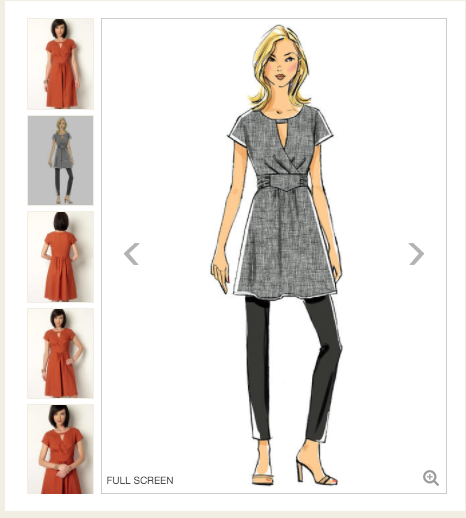
This is a Lisette pattern, and it’s only like…2 years old or something (the pattern, not the make), so if you haven’t bought it but want to, I’d hop to it. It will probably be discontinued soon. It’s often on sale.

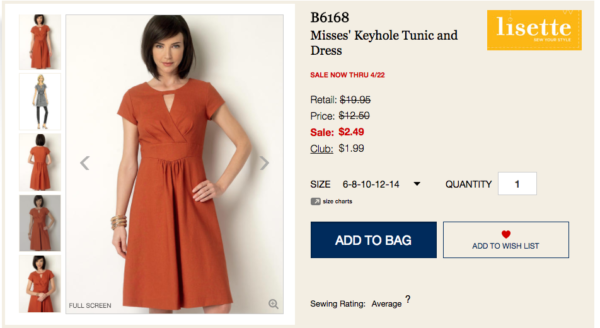
There’s only 4 patterns now listed on Butterick for Lisette – that seems odd. But then, that’s symptomatic of a brand dilution problem IMO.

Anywho – funny story. I picked up some Robert Kaufman Essex linen from Modern Domestic in what I THOUGHT was the color I needed to finish up kitty blocks for my Elizabeth Hartman quilt. If you haven’t seen her animal quilt designs, I have no idea where you put the rock you’ve been under, but they’re adorbs. So OF COURSE I didn’t take a swatch with me, because I’m such a pro, right? LOLZ. Essex comes in like a million variations on just blue alone, so I ended up with the wrong color. Happy accident!

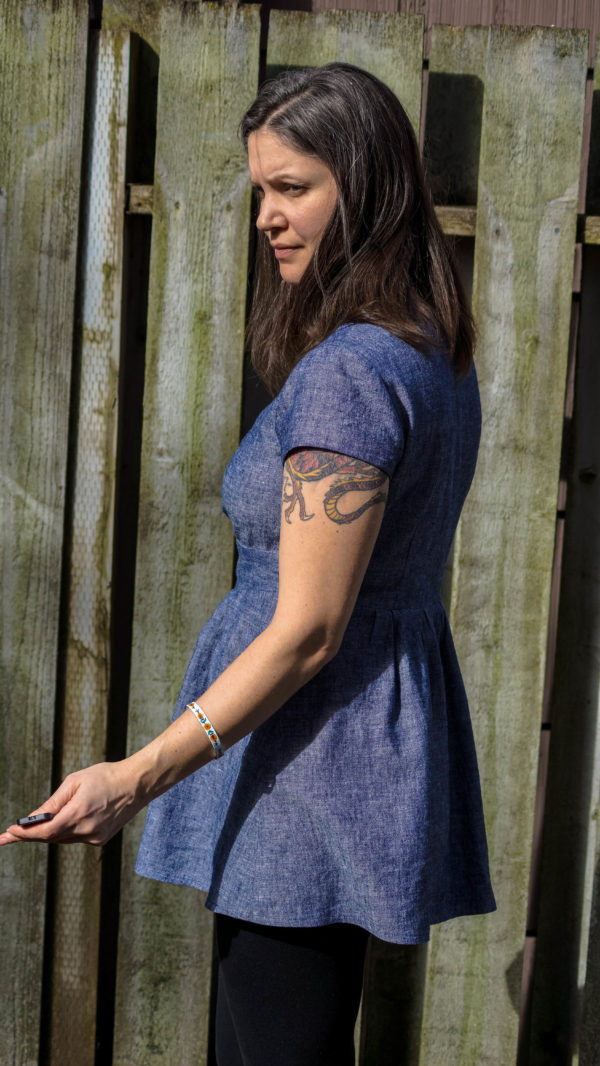
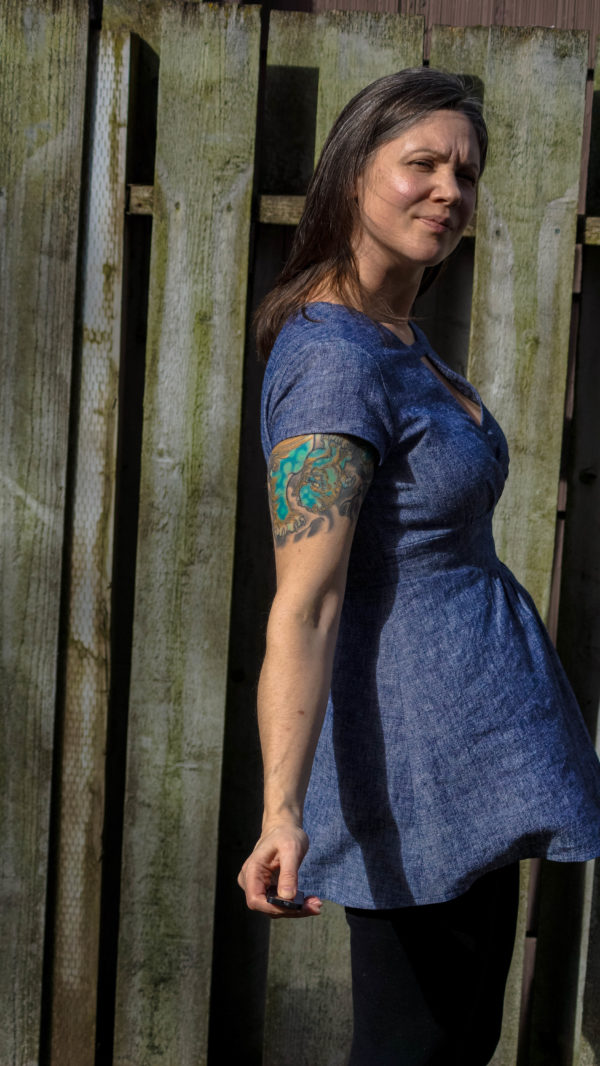
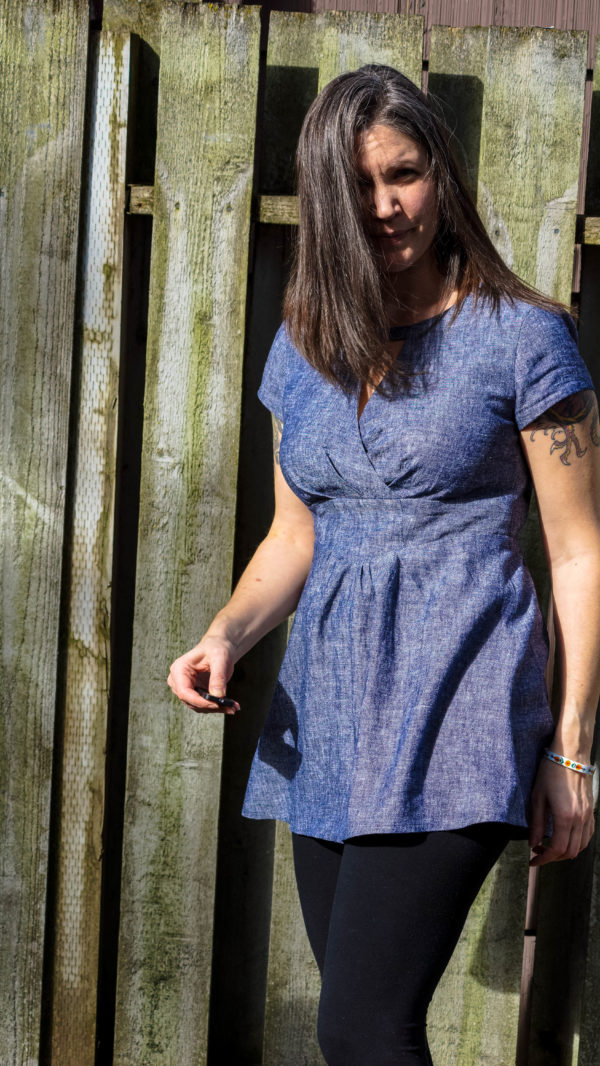
I had just enough (not really) to make the short tunic version, but NOT enough to make the waist ties as well.

Note to self: next time get enough for the waist ties OR resize the waist down….waist ties are easier.

It was a surprisingly easy make. Oh, and tooting my own horn: I will usually still look up tutorials for things like welt pockets or invisible zippers just for hand holding, but I was too lazy to look up an invisible zip tute this time, and GUESS WHO INSTALLED IT PERFECTLY THE FIRST TIME ANYWAY? That’s right. I’m freakin’ BOSS. (totally jinxed myself right there.) The zips I had on hand were shorter than called for, so I am sure it’s a comedic sight to watch me try to wiggle this dress over my shoulders and bust, and there’s a good 1.5″ gap at the top where I put in a hook/eye, but whatevs. Benefit of having skillz: make it work.

I think my camera remote battery is dying….or the sensor was up too high….but ignore the weird faces, k? k.

What I like about the tunic/dress thing:

  1. Easy over leggings outfit! yay.

2. Great/easy construction…although I don’t like the facing on the front, but bias facing on the back. That makes for some awkward shoulder seams – the bias back has 1 more layer than the front, not including pressing the seam when done. That could be designed so much better….like just facing for both, really.

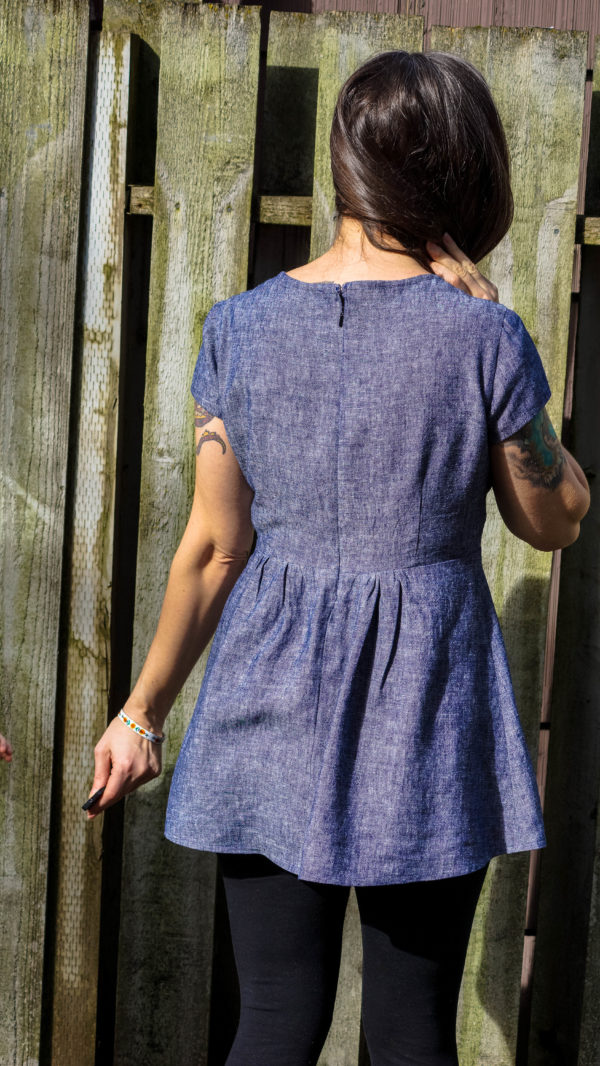
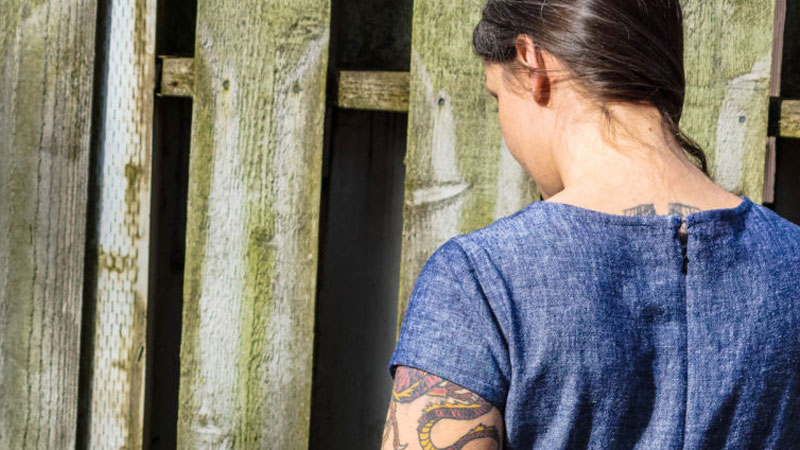
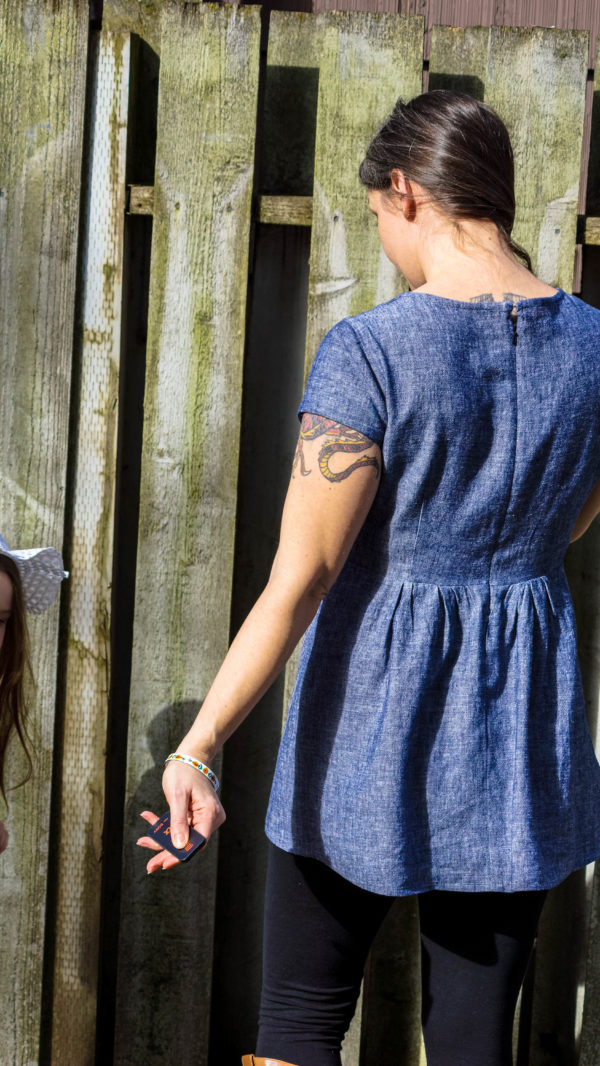
3. The back is cute….it lays flat without the ties added on.

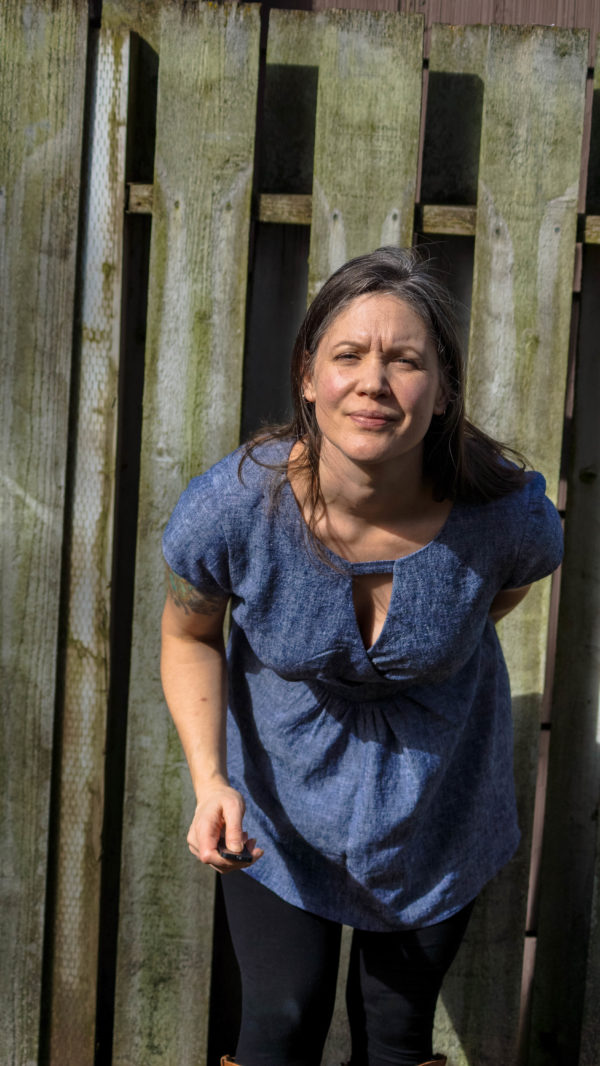
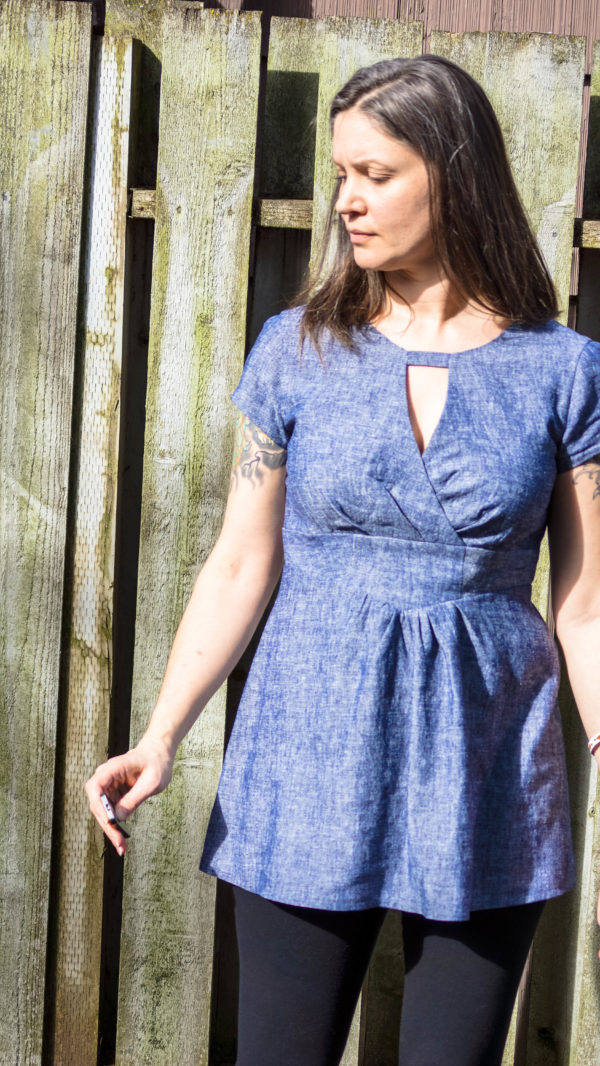
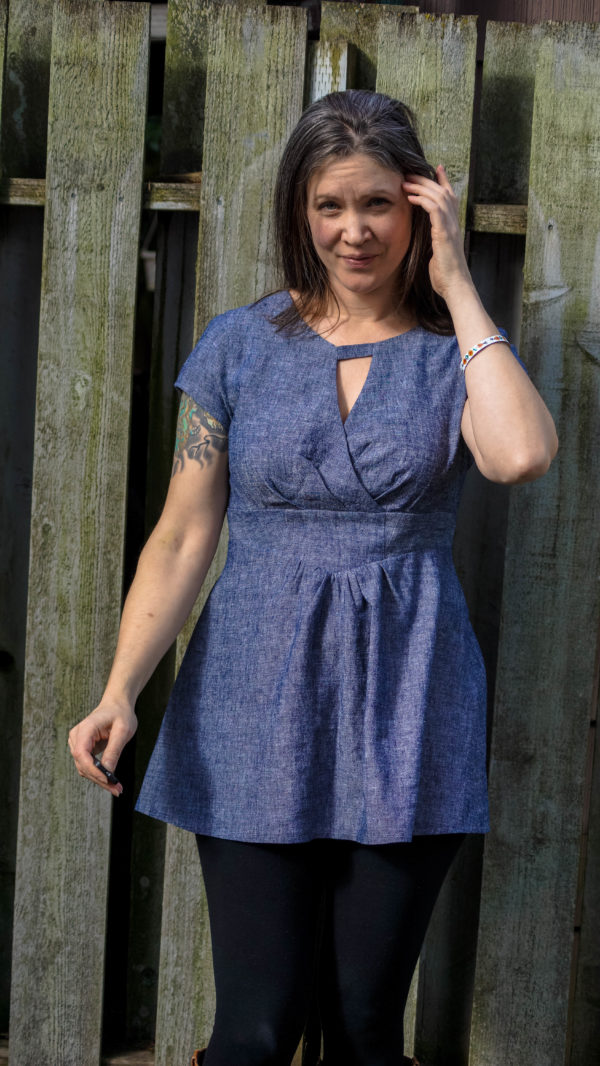
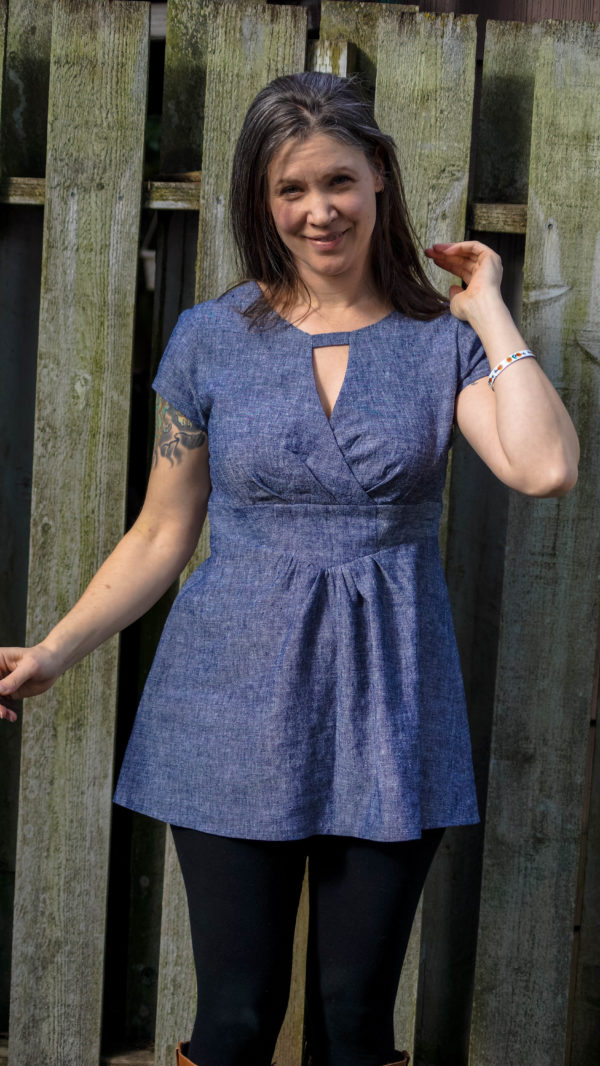
4. The bust gappage-flashing isn’t as bad as you might think. See – me testing it. SO SEXY. snort. There’s some boob gappage below… I guess it’s ok. But I’m not going to bike in it, you know?

What I don’t like:

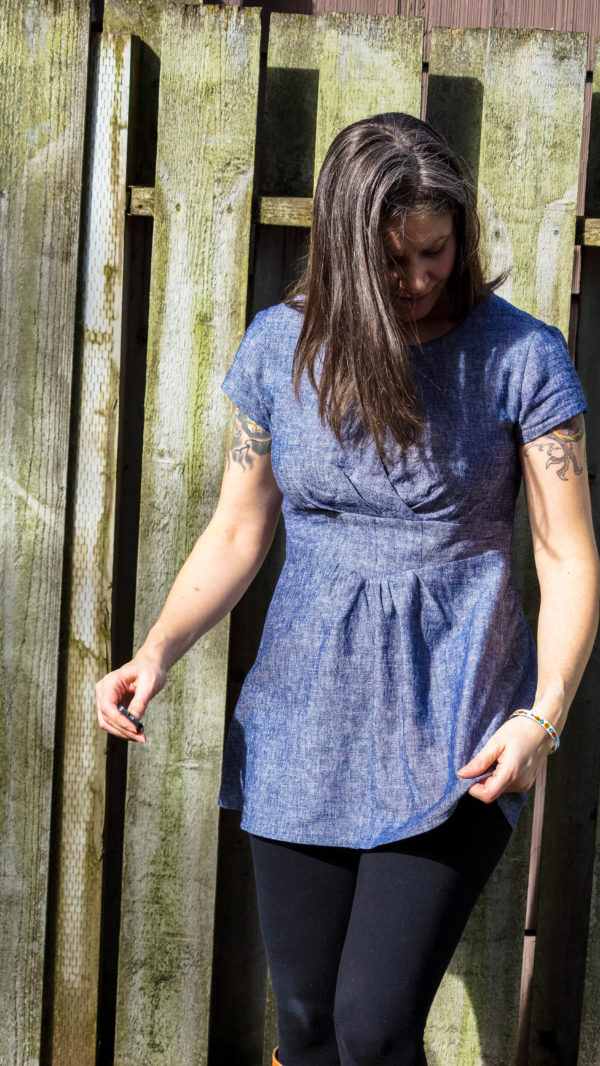
1. Sometimes, I look freakin’ preggo. No likey. The front doesn’t lie as flat with all the top cross over and gathering. It really needs those ties to go flat again under the bust, or, I could possibly see maybe the weight of a full skirt, but I really don’t think that would be enough not to look preggo after my bust…

2. and no pockets….I really wish I added inseam pockets. because dress+leggings and mom-life…yeah. need pockets.

3. that weird shoulder seam with the facing to bias facing construction…

4. and I think…while the sleeve insertion went perfectly, they’re double layered AND sorta cap sleeves…I think they should be more….flowy dainty or something. Essex linen is NOT a crisp fabric like a shirting…anything thicker and it would look really weird. I don’t know. maybe a tulip sleeve would be cuter here or something longer?

Sometimes it doesn’t look that bad…but every photo of me on Easter looked … well. Not my favorite.

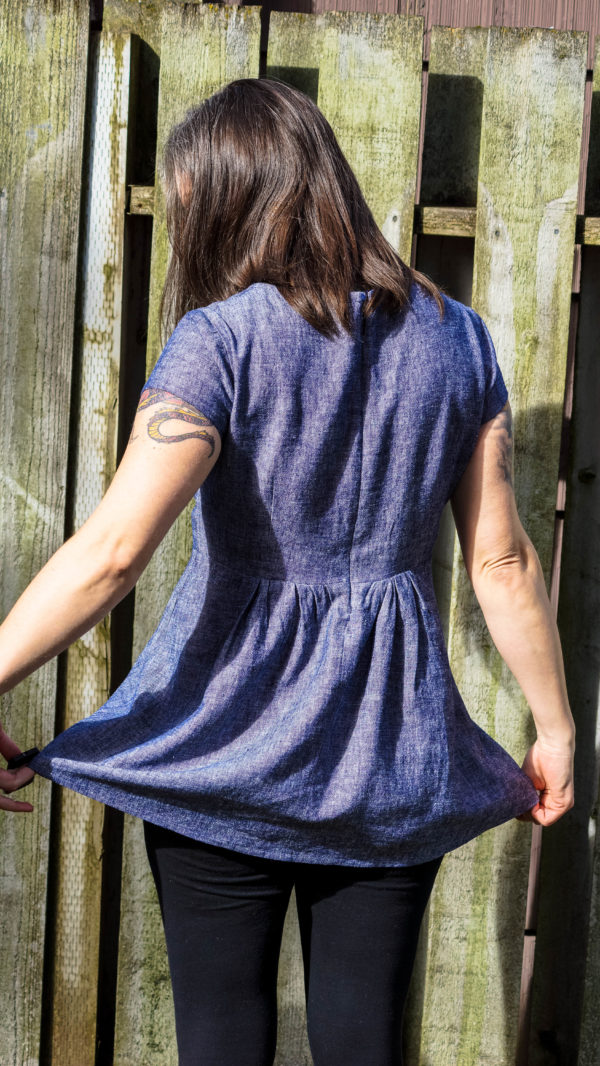
Not sure what I was doing here, but …hey, look at that hem. I let it hang overnight but there was nothing to trim the next day. And that perfect zip! Looks like sometimes I get a bit of a gap at the top of the back…not enough to take it out though if you see other photos.

I love RK Essex linen. I’d make everything in it and just roll around in it. It’s so yummy.

Trying out new photo spots at the new house with the waning winter sun. Maybe not the best location/time of day. Need to suss that out a but more. BUT lip balm and cheek color/highlighter made by ME. All the rest of the make up is Make Up For Ever. I splurged a bit as I was out and am happy I did. I like it so much better than MAC’s versions of same stuff. It was a good test run in these shots.

Still futzing with remote, but see how the waist band is kind of…well, it has too much ease there? That’s not how my body goes…it is not straight from armpit down, but it creates this illusion of straight down and then the skirt poofs out. I think the ties would have helped with that a lot.

Overall it’s cute. I don’t know if I’m so in love with it that I’ll make it again. That kind of bums me out. I have the Made By Rae Washi dress plus expansion pack, and I’m still all excited about the giant bow+sleeves version, but I really don’t want maternity wear… I’m going to have to think on that some more. I love the idea of dresses I can bike in during the summer. Maybe it’s all in my head?

Flat Iron Cozy

'burberry'

Sometimes I get a bug up my ass and want to make something, perfect it, and that will be that.

I decided that I wanted to make a flat iron cozy so I could throw my flat iron back in my gym bag without melting my yoga pants. But I needed to practice and figure it out. I wasn’t thrilled with the options on Pinterest, nor did I find any real google epiphanies, so I just decided to wing it. I asked around my Corporate Soul Sucking Job if the ladies would be interested in being guinea pigs as I worked out the pattern…I’d include a matching zip pouches (using seemingly discontinued Elizabeth Hartman pattern.) The girls were all good sports, told me their color/style preference and off to work I went.

cozy cozy
cozy cozy

I measured the length of my flat iron, and the circumference around it (thickness.) I added seam allowances plus an inch for batting and the iron-safe insulating fabric. The measurements for the inside fabric and batting, I dropped a 1/4″ to allow for thickness. That inch of ease I added proved to be way too much (see top photo with huge Burberry-esque version.) I dropped it down to just 3/8″ plus seam allowance and that seemed to be better. The length goes past the flat iron, and the ties, about 7 inches long, tie the cord to the outside safely while also cinching up the bag, as it were. Easy peasy.

flat iron cozies
flat iron cozies

I kept a few for me and sent the rest out to coworkers and their daughters. Overall, I’m really happy with it. Easy use of scrap fabric and scrap batting – bonus! Plus, how cute is that Riley Blake neon fabric with the Essex linen? I kept the purple 80’s paint splatter versions for myself – I picked it up in Ballard at Dry Goods and it’s MINE ALL MINE cuz I’m totally in love with Ballard and I’m going to move in to Dry Goods. They’ll never notice.

Plus, Bonus! No melted yoga pants!

sewn friends presents

Make A Quilting Sampler!

Center Block
new quilting sampler

I finished it! “It” being the Anna Maria Horner feather blocks I started what seems like forever ago. I started them as practice piecing without any real direction with what to do with them. I do that FAR too often…I’ll just tinker with this here and eventually I’ll figure out what to do with it….It makes for a great process with lots of learning, but a very LOOOOONG process.

But they’re done now and they turned out so purty, I couldn’t justify the upcycled canvas backing I started with and leave them relegated to a corner somewhere. I started quilting them, again for practice, individually, so they had to be pieced back together in a QAYG (quilt as you go) method. This is my first time assembling QAYG blocks and I’m pretty happy with it. I re-covered the back with Robert Kaufman Essex linen yarn dyed in Flax, and used the same for binding and top-quilting the pieces together.

Close Up QAYG
Close Up QAYG

I used each block as an excuse to try out different quilting methods in sort of a quilting sampler. I love how each block gets its own personality simply from different quilting.

My first block was a free motion pebble pattern. I’m comfortable with this pattern; it comes pretty easily to me as I’ve probably practiced it the most.

Pebble Block
Pebble Block

Then I got a little crazy and tried to free motion some wood grain around top-stitched feathers. I need some more practice on that one! That did not come as easily and will need much more practice than the few minutes I gave it prior to the block!

Wood Grain
Wood Grain

Using a walking foot, I did the next three. First, an intense 1/4″ V, in line with the feathers’ angles. Quilting so close completely changes the drape of the quilt – it’s much more stiff. On a bed or back of a sofa, it would never look disheveled!

Quarter Inch
Quarter Inch

Continuing with the walking foot, I wanted to stick with the straight-line, but lose the rigidity and went for fractured quilting. Although the distance between the lines isn’t any more than 1.5″ at its greatest, the final block is very pliable and flexible compared to the 1/4″ quilting. This drape would be a cuddler’s dream…especially if that cuddler was feline.

Fractured Quilting
Fractured Quilting

Then, in the center, to tie it all together, I went with top-to-bottom wavy lines, this time in contrasting thread, or the thread in the lightest color element in the block as some may refer to it. Interestingly, as it looks, the drape is something between the 1/4″ straight-line and the fractured quilting. While they’re fairly close, they’re not cross-grain like the 1/4″ and the wave gives it a lot of flex, but not as much as the fractured quilting – at least not across the width.

Center Block
Center Block

I like the idea of having a quilting sampler to review when deciding how to quilt in the future. A tangible reference to see and feel how the quilting I choose will effect the final quilt is exciting. It’s also a great way to see how a straight line can look just as good as a curved or FMQ option, as good, but different. It’s also a good excuse, if you’re like me, to break out of a rut! I honestly don’t have a favorite now that it’s all said and done – they’re all good, just different.

The back, if you’re interested, is simple and does not reflect the mix of quilting that happened on the front since the QAYG method was used. You only see the quilting on each binding piece. Not that anyone will see it, but if they were to look, it’s nice and clean.

Robert Kaufman Linen in Flax

Thank you for viewing! Don’t look too closely at my hand-stitching on the binding…I can certainly use a LOT of improvement there! Seriously, I appreciate the audience and this medium to share my work.

Oh, quick credit where credit is due! The Anna Maria Horner feather pattern is all hers, but lucky for you (and me), is free here.

Pattern Test: Aztec Vest

My Darling Boy

One of my fave blogs to keep up on is See Kate Sew – she has a an aesthetic I can get with…it’s clean and casual with attention to detail…if you read her blog you’ll know what I mean. She’ll make patterns, do a review, make a tutorial – whatever it is…it will be simple but there are little points or details that make it special. Kate is the reason I got the binding foot I chose AND when I accidentally got a ruffler foot…I kept it.

Enter an opportunity to test her new Aztec Vest. I got the email, it had a tight deadline…I took it. I made it. It’s awesome.

The PDF printed great – it was very easy to line up and tape together. No weird pre-trimming either like I’ve had to do with others…it just went together. As an ex-print designer….I can dig it.

assembling pattern
assembling pattern

I know the original was in a knit, and I love working with knits, but I was really envisioning a linen, Patagonia-esque thing. I prewashed and dried the bejezzus out of this Essex Linen in Jungle Green so it would work as a kid garment and could be abused later. BTW, Gutermann has a thread that matches the Jungle Green perfectly.

Jungle Green
Jungle Green

Alex insisted on picking out brand new flannel (as if I don’t have enough) for the lining. You just can’t argue with his choice…

Snakes On A Plane
Snakes On A Plane

I opted for the welt pocket and about 80% of the top-stitching. Again, it’s Kate’s details that make things more than homemade…they’re custom.

Pocket
Pocket

Alex LOVES it. He had to wear it to school the first chance he had.

Satisfied
Satisfied

I got him on a sunny day to model for me…

My Darling Boy
My Darling Boy

I used a metal, reversible zipper. Kids love the option of reversible even if they never use it. At first, I really wanted to find a vinyl zipper but I’m actually glad I couldn’t get my hands on one. The metal one is, as my man says, very substantial. It’s super quality and goes great with the linen.

Zipper Detail
Zipper Detail

I love the pockets. Everything should have pockets.

<3 Pockets

Here he is, hood up with it zipped.

Hood Up w Zip
Hood Up w Zip

And hood up, zipper down.

Pensive
Pensive

I probably should have thought ahead a bit more and added a few inches to the waist area since I chose a woven instead of a knit…it’s a smidge snug…instead of draping flat, he has to pull it up to zip it…

woven fabric
woven fabric

He doesn’t care at all though…

Zipped Up
Zipped Up

He’s very proud of his lining fabric…

Lining
Lining

The back has more top-stitching – it’s subtle but that it’s that extra something…

Back Side
Back Side

Most importantly…it wears like a boy needs clothes to wear….

Action Vest
Action Vest

It’s his new favorite piece of clothing and he says, “I love it so much!” I secretly really do too, but truly it’s his opinion that matters and it’s definatly a winner.