Star Wars, Disney’s Cars and Other Stuff In Motion

Cars Fabric

I was reading this sewing blog I quasi-follow and read the opinion by the owner that she likes to sew because her kids then don’t have to wear ‘commercial prints’……uh, ok. That’s cool. Whatevs. To each their own.

I’m not sure if ‘commercial prints’ meant not mass production, because then…you have to turn down those Moda fat quarter prints that you got comped, hon. Yeah. Does it mean not advertising for Disney? Pshaw. I’m the first person to say I’ll never carry a Coach bag – it’s just not my thing….but this is for kids and fun and…well, it’s about them and not imposing some false sense of anti-establishment BS. I remember my mom making Teen Age Mutant Ninja Turtle sets for my brothers’ beds and I still have somewhere these photos of them just beaming with joy on those beds. I’ll post it some day to be a horrible big sister.

AND I have this nephew…. in Seattle…. that looks at me with these giant eyes, calls me Aunt B, and LOVES the Disney Cars movies. He asked for some Cars pants.

So I bought all the Disney Cars fabric. I didn’t leave any for you.

Cars Fabric
Cars Fabric

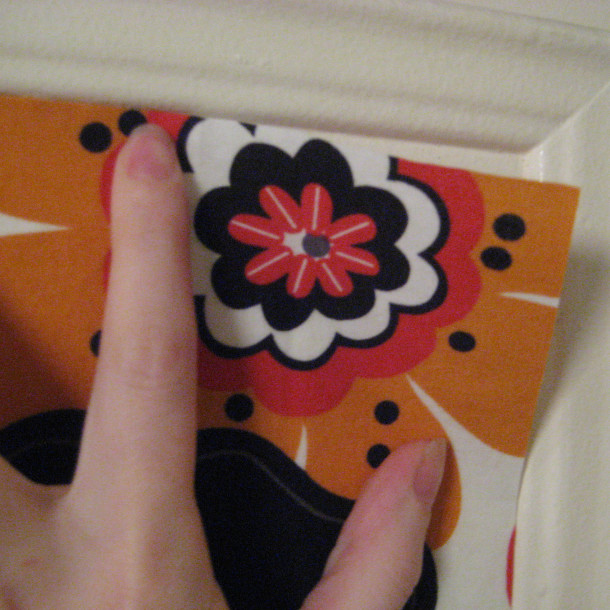
OKOKOK, just one of those is fleece for pj pants. The others are cottons for a quilt. I’m thinking a chunky chevron pattern (these prints are huge) with a solid to break up the crazy print. We shall see how it goes, but I just know I can’t deny the boy.

And you know what? Star Wars is rad. And so is Star Trek. Especially in fabric form.

Star Wars Schematic Fabric

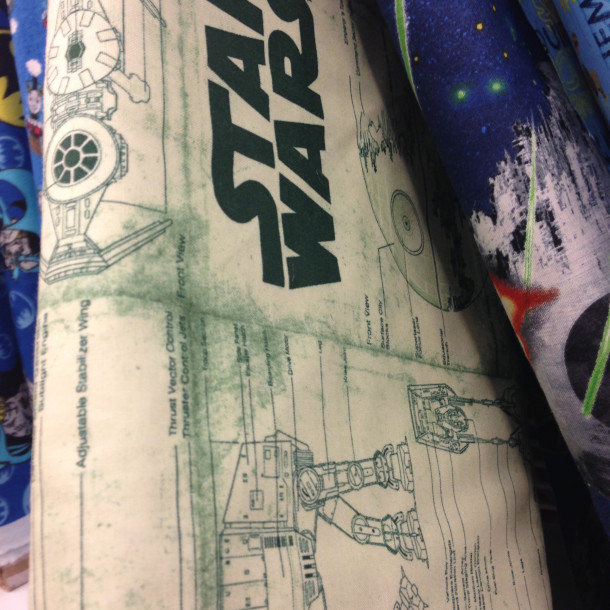
I love this green Star Wars fabric so hard. I need it. I KNOW I’m not the only one that takes photos of fabric that needs to be bought….and I may need some of the old school Star Trek fleece.

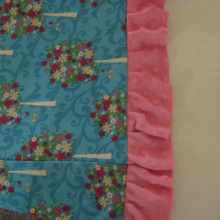
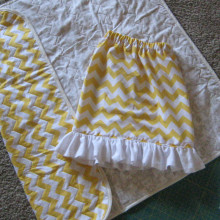
There’s also 2 Seattle family babies due this spring. I’m thinking a trip to the local Cool Cottons quilt store is in order for that one. This is one of my most favorite baby sets for my friend Rose: blanket for baby, skirt for big sister…I’m thinking I can make something like that before we head up. It’s super simple, clean and not-fussy. I FMQ’ed the zig-zag instead of pivoting on the needle…it’s a bit more wiggly but I dig it. We’ll see how much time I can squeeze in sewing.

Elliott's Blanket
Elliott’s Blanket

And a few MORE things still. I still have more Cheap Baby Clothes (and Big Kids) on the horizon. I have a kimono blouse to do a pattern trace and recreate with. There’s a top secret post coming out this month someplace else that I’m super excited about.

The big kids and I have Anansi The Spider AND Stinky Cheese Man lined up for the theatre (!!!!).

I’m hoping to do some salt dough crafts this spring….that keeps on moving on to the next month’s list…as does the kimono shirt.

And finally, I’ve been tinkering with this pattern.

Burda 9562
Burda 9562

While it is an ‘easy’ pattern, I’d say it’s more on the top end of easy. It shouldn’t be anyone’s beginner pattern. The front cover must have been created before final pattern adjustments because it doesn’t show the top is lined. Which is awesome, just not super beginner if that’s what you need.

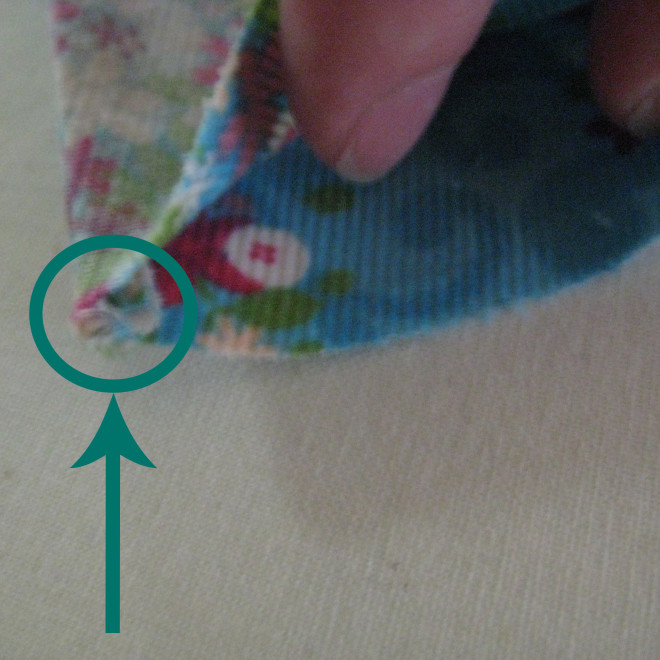
To test it I used a fabric I have a LOT of just in case I needed to tweak it.

Jumper 1st Set
Jumper 1st Set

It got a little squirrelly when I sewed the bodice to the pants and was blind-sewing….no, of course I didn’t pin it. Yes, I realize that’s my problem. I’m thinking some cute ribbon to cover it up and also break up the dots? Or even lace ribbon?

Squirrelly Seam
Squirrelly Seam

Here it sits….still on a hanger. I think it’s cute and I want to make more….but….

Burda Jumper
Burda Jumper

The pattern has 2 snaps for the top of each strap. I can’t decide if I like that or not. Or if I want to invest in the whole snap-punch thing. Do I just put on cute buttons instead? There’s barely enough length for that….I would alter that for future patterns to have more strap-double up for buttons. Definitely NOT ties or anything complicated as this is still in diaper-wearing age range but does not have an open-crotch area. This pattern is roomy enough for cloth diaper users and is versatile enough for alterations into a dress or a boy version.

Hmmm. Thoughts? Buttons or snaps?

DIY Cheap Baby Clothes Series – Joann’s Fabric Store

Sparkle Motion Set

This set is going to deviate a little bit in that I’m adding in a pair of pants for my 8 year old girl, Hazel…my very tall 8 year old girl, that I used a modified size 10/12 same as in the end of this post. So, this is really Cheap Baby Clothes and Big Sister Pants. I have to do this while they still let me make them matchy stuff.

I used only half of my left over knit binding from the previous set:

Roll of Binding
Roll of Binding

and 2 yards of this glittery green business…I still have about 1/2 yard left…but I’m going to $0 it out for later.

Sparkle Motion
Sparkle Motion

I used the same patterns for the baby that I did in the first two sets of the series. For the girl, I re-used the Burda Kids 9482 pants. I know I got it on sale, because who pays retail when they can avoid it? But I’ve also already used it, so I’m going to $0 it out. In fact, I’ve used it quite a few times. It’s a great basic pattern and beyond easy, not to mention knit fabric and serger friendly.

It was genius, genius I tell you, to get that roll of binding done. I cut my patterns, pinned and sewed them all at once. Easy peasy. Ignore my pinning – I hate pinning unless I have to…and then it’s obvious I’m severely right-handed.

Sleeves With Heart Trim

As you can see…it’s a reverse of the Mill End set.

Sparkle Motion Set
Sparkle Motion Set

I really think I *may* have made one of those sets that will embarrass them some day. I’m going to hold on to it so I can be sure to get a group shot. I still have some of this dance-troop fabric left…I think I can make Hazel a matching shirt. I’ve already got some gray pants under way for Alex too….oh, they will hate me during the teen angst years. Bwahahaha.

OK, nuts and bolts. This was a bit more at $9 a yard on sale, plus that’s 2 elastic waist bands at $1 each = 3 items at the magic number $6.66 each. Coincidence?

To lighten up THAT little bomb, here’s a photo of my blurry angel in the Mill End set.

Action Shot
Action Shot

And here she is still….but obviously ready for a nap…

Zoe
Zoe

She had enough of me combing her hair…she took both of the combs away.

DIY Cheap Baby Clothes Series – A Little Upcycle

Baby Outfit w Upcycle

People who sew are packrats. We save old clothes and you can’t throw those shredded jeans out and I can use that nasty old single sock for something and…ok, maybe not that last one in my house but I’ve seen it happen.

In this lovely pile are a few things that are 4 years old or more. In it is also a decent quality kids’ pattern knit remnant I picked up at Joann’s. I always scan the remnant bins at Joann’s for fusibles, muslins, knits, ridiculously impractical flowy things for dress up bins and to practice on…because each remnant is 50% off current price. I say decent quality because it has a pretty good thickness/sturdiness to it.

Fruits N Flowers
Fruits N Flowers

I don’t recall exactly how much I got it for, but it was only a 3/4 yard, and the fabric is called Fruits N Flowers still at Joann’s…so the MAX I could have paid was $4.86 ((3/4 of 12.99) / 50%).

I sliced up an old nightgown of Hazel’s from a few years ago for the 2″ binding that I would need. The nightgown was from Old Navy and held up pretty well but more importantly it’s really cute cut at an angle and serged with a cream thread.

Hazel"s Old PJs
Hazel’s Old PJs

So, there you go, I “upcycled” an old cheap nightgown! Haha. See, there’s a good reason we’re packrats….eventually.

Finally, I used all the same patterns and steps from the last DIY baby clothes post and voila! Cuteness!

Baby Outfit w Upcycle

Here is the outfit in action at Hopworks Urban Brewery for a lunch date with other ladies and their babies.

Zoe at HUB
Zoe at HUB

Then after lunch, drinking a bottle before nap-time, doing her best Kanye impression…

I'ma Letchu Finish
I’ma Letchu Finish

Now, here’s a little secret. I actually made this one first….it’s true. It was my test run. On the previous post with the next sets…I adjusted the neckline a bit to tighten it up and lengthened to cover the tummy area for these times when the Kanye urge strikes. All the rest will be in order.

Ok, money. I forgot in my last post about elastic for waistbands. I buy my elastic in bulk from Dove. I use about 20″ at a time for the baby and about 24″ at a time for the bigger kids…so 12 yards = 432 inches. I don’t recall, but even if it was $20 total with shipping, $20/432< $0.05 per inch. I’d say it averages out to about an extra $1 per pants/skirt. Obviously does not apply to shirts.

This was 2 garments at $4.86+$1=$2.93 each.

Next up….that leftover fabric from first post made into binding…and some fabric that reminds me of Sparkle Motion….

Roll of Binding
Roll of Binding

DIY Cheap Baby Clothes Series – Mill End Store

Final Amount

I want to prove that I can do better for less than even clearance clothes. I picked up some knit pants and a shirt for Zoe in size 18 months at Fred Meyers (aka Krogers) for the clearance price of $4.97 each…let’s round and say $5. It doesn’t get much cheaper than that and they look it – we’re talking hot pink velour and leopard print, hey-oh!

So I pulled out a pile of knits fabric and scraps including a 1 yard remnant at the Mill End Store for $4.99…again, rounding to $5.

Pile of Knits
Pile of Knits

I took an old onesie in the 9 month size to take apart and make an upsized pattern. Now this part is not an original post, per se, nor is saving money without sacrificing quality. I can’t improve on Dana…I don’t really think anyone can…she is the master of the deconstruction process, and my shirt pattern is based off of her pattern tracing and her 90-minute shirt that she posted almost 5 years ago! So, yeah. This is partially inspired by Dana’s hard work and you can either follow her tutorial or buy a pattern. The pants pattern I already have been using for about 9 months.

An added bonus of working with knits is that the bolts are ~59 inches wide…so a yard is almost 5 feet by 3 feet! Yatzy! On my first cut, I fit 1 baby shirt and 1 pair of pants.

Max Fabric Usage
Max Fabric Usage

Note I folded in the pants on the side seems as I only need 1/4″ seem allowance – your mileage may vary. I’m also using a serger for most of my knit construction which makes using a 1/4″ seem allowance a LOT easier. On my second cut, I got another full shirt pattern and approximately 5 yards of 2-inch binding strips which I’ll get back to later.

Max Fabric Usage
Max Fabric Usage

Now, if you’ve read Dana’s tutorial, you’ll know I’m loosely following her instructions. I only want 2″ binding strips; I believe she used 4″ strips and ribbed….this is partially just aesthetic so do what you will. Regarding direction of stretch fabric and cutting, I just try to remember which way I want it to stretch over the head/butt and cut that way. I don’t want to get bogged down into what Creative Gemini has already discussed better in a video here.

I cut strips from a sparkly greenish fabric from Joann’s and serged the edges in gray. I used 1/4 yard that I got as a remnant for $2.50 when I bought the rest of a bolt.

2 Inch Binding Strips

When I can, I try to sew in what I call “production mode” and sew in groupings such as serge all the binding, sew on all binding, serge all edges that can be serged at once…etc.

Mass Production Binding
Serged Sleeves
Serged Sleeves
Body Pieces
Body Pieces

After constructing the shirt, I did the bottom binding last. I increased it to 3″ and pinned it a bit lower to add a bit more length to keep baby belly covered better. I used a sewing machine to sew on the binding and sew in the sleeves as I know how. I’m only adding in photos of the few things I’ve done a bit differently than Dana, but more or less it’s the same as her tutorial. For the pants, I followed the pattern directions albeit altered for serging.

Bottom Binding
Bottom Binding

For this project, here’s the final grouping.

Final Amount
Final Amount

Keep in mind that there is a lot of 2 inch binding to use which I will $0-out on a later project. My pants pattern was something like $2-3 a dozen pairs of pants ago, so I’m calling that a wash. I made the Dana tutorial shirt pattern which was free (thank you Dana!)

So, fabric total is $7.50 divided between 3 articles of clothing = $2.50 each

Stay tuned, there will be more. I still have 2 yards of that sparkly, “may crock” fabric, a really bad clearance/remnant bin habit and kids that won’t stop growing. I may even throw in some trendy “upcycling” jargon.

Ok, ok, so the thread is negligible when buying in serger-sized bulk, and my serger happened to be a gift from my awesome mom. My sewing machine was not a gift and is in what is called the mid-price range but I can’t really price machines out or their value as that’s up to the individual user.

Sewing Gadgets – Bobbin Winder

Pile'O'Bobbins

Next to my rotary cutters, my bobbin winder is my favorite sewing gadget. I have the Wrights SideWinder I picked up with, you guessed it, a coupon at Joann’s.

I haven’t even figured out how to use the bobbin winder on my Viking – why? This little guy does it fast, easy and I don’t have to rethread my machine, stop a project, change thread colors…and I can do a dozen in a few minutes with no hassle. My Viking has very specific bobbins, but I’ve also used my winder with an old Kenmore and a Janome and it works great on all 3 very different bobbins.

Vikings in particular are very….particular. This is my bobbin.

Viking Bobbin
Viking Bobbin

Most (newer) bobbins have a thread hole you pull the thread through before winding to keep it secure until it has a few rounds of thread in it. My Viking logo has to face down on my winder to get the thread the right direction and depending on your machine, that may not be necessary. My little Swedish bitch is picky, though, and everything has to be name brand.

Empty Bobbin on Winder

I pop the bobbin on, slide the guide to the bobbin – when it reaches thread capacity, it turns the winder off. I lightly hold the string from the hole and let the winding pull it from my fingers – that is my highly technical way of getting the thread started.

Full bobbin
Full bobbin

When it’s done, it stops. I pop off the bobbin, trim the thread, and do it again.

Bobbin Winder
Bobbin Winder

Here is the whole machine in action…again, my fussy Viking likes Gütermann thread or better…so I buy the big spools usually in neutral colors like cream and gray – a trick I learned from mom the quilt master.

That should be capped. Mom The Quilt Master. It’s a reverent title.

Your mileage may vary – just do the thread test: if you can pull on the thread and it snaps easily, it’s going to snap in your machine. That is bad. Save it for basting, or what I like to call, hand-sewing that there’s no way in hell I’m going to do.

Pile'O'Bobbins
Pile’O’Bobbins

This pile makes me happy. I will still scream in pain as if I was bit by Cujo every time my bobbin runs out and I notice after I’ve gone several inches along…but it’s a little less dramatic if I know I have a pile of bobbins waiting to fill it.

Starch Fabric Kitchen Cabinets {Tutorial}

1979 Colander

I don’t know what it is about moving into a new rental, but I always go through the same series of steps:

  1. I don’t do anything to make it “home-y” because it’s temporary.
  2. I get tired of it not being home-y because it’s boring so I do a few things to make it better.
  3. I get really frustrated because I should have just dug in and made it great and now I’m going to put in the effort.

I still will not paint, because I know me…and I know when we leave I’m not going to want to re-paint. I’ve done that and even a little Chinese red guest bathroom is a monumental chore to turn back to white when all you want to do is move on.

These next few months are going to have a lot of ‘fixing the home’ thrown in with my usual sewing/cooking/family adventures.

Today is fabric starching. This is an old, blurry, worn out photo of me in 1979. The wall behind me is not wallpaper, but starched fabric. I’ve mentioned before, my mom is amazing.

1979
1979

First, start with boring, ugly, beat-up cabinets. Give the surface a good wipe down just to make sure your starch will stick.

Boring Cabinets
Boring Cabinets

I went to Target to get starch. I wanted to get the liquid in the jug kind to dip the fabric, but they didn’t have any. These 2 cans of spray starch, little did I know, would be even better. They were priced at 95 cents each and had 55 cent coupons on them, so this was less than a buck. I’ve read tutorials where people used cornstarch but I have a healthy fear of insect infestations. Food-based starch = potentially nasty bugs. No thank you. Your phobias may vary.

starch
starch

I used about 4.5 yards of fabric for a mid-sized apartment kitchen. So, at Joann’s, this Alexander Henry fabric is about $13 a yard, and with a 40% off coupon making 5 yards for $25.

Alexander Henry Kleo fabric

I highly recommend pre-washing your fabric. This will help prevent any color bleeding that may occur and put you back at square one for repainting when you leave. Also, it will help prevent shrinkage as it dries after starching.

Measure once, then measure again. Write it down unless your brain has fewer holes than mine.

measure twice
measure twice

Measure every cabinet. You will be surprised how one is actually a half an inch larger than the one next to it. Superior architecture in apartments and all….my little cabinets over my fridge are a half an inch smaller in width than the little ones over the stove vent. I would have loved to have been at the planning meeting for that one. No, not really.

I didn’t take a photo of me cutting the fabric…I’m pretty sure you can figure out how to cut fabric…I used my mat/rulers/rotary cutter because I’m slick like that, but a pair of scissors and squaring up on a book should do just fine. You’re going to trim the fabric to the cabinet later anyway, so don’t sweat it too much.

Spray the cabinet on the top lightly to ‘tack’ the fabric to it so it will sort of hold…and get ready for your house to smell like “Fresh Laundry Scent” aka turn on a fan.

spray cabinet
spray cabinet

Hold the fabric and spray the sh*t out of it. Really saturate it. Like…dripping off the cabinet kind of wet.

hold fabric
hold fabric
Drippy Mess
Drippy Mess

Smooth fabric out and down as gently as possible. I tried using a sponge, but ended up preferring my fingers to smooth out the bubbles versus the lumpy texture of a million layers of apartment paint. Also, I found the sponge stretched the fabric too much. I did use the sponge to dab the excess starch and catch some of the drips.

Gentle Dabbing
Gentle Dabbing

Like in this fuzzy picture, use your ridiculously long thumb nail or a butter knife to press into the corners if your cabinets are framed like mine. If not, ignore this part.

Press Into Corners
Press Into Corners

You’re going to have some overlap as the fabric gets wet and stretches a bit. This is an easy fix. Depending on the quality of your fabric and whether or not you pre-washed it, it will shrink up some after it dries. The rest is easily taken care of.

Overlap
Overlap

When it’s dry in a couple hours, you are going to take a MF-in’ SHARP box knife and slice the fabric excess. Unless you’re afraid of marring the cabinets…then just pull away slightly and trim. Don’t worry….it’s ok….just wait and see….

SHARP Box Knife
SHARP Box Knife

I went through 2 blades, both sides. The fabric peels away SUPER easily.

Easy Peel
Easy Peel

And whether you pull away and cut or use this method, you’re going to get some fray and peeling. It’s ok. Don’t freak.

Don't Freak
Don’t Freak

You were a genius and got the uber cheap spray starch, right? Right. So just spray that little corner, dab it back down, smooth any threads, and you’re golden.

Check on your adorable helper and make sure they’re doing alright.

Adorable Helper
Adorable Helper

Stand back. Admire your handy work.

Finished Cabinets East
Finished Cabinets West
Finished Drawers
Finished Drawers

And the final touch? My mom’s colander from 1979.

1979 Colander
1979 Colander

This took me a weekend’s time but if you don’t have kids/meals/craziness you would easily get this done in a day and, again, less than $26. You have no excuses. Get off your butt and fix your kitchen!

:::UPDATE!! ONE YEAR LATER HERE!:::

Ruffler Foot Review

broken needle from ruffler foot

I went in a few months after getting my new machine to get a walking foot and a binding foot. The funny part is the lady that helped me sold me a ruffler foot, not a walking foot, and I can’t blame her because I didn’t look closely at the box before I left the store! When I got home I realized the mistake and called the store to find out they’re out of walking foots. Le sigh. So…I found myself making a Big Sister skirt for a baby shower and thought, what the hell, let’s take that ruffler foot for a ride!

Now, a ruffler foot for a Viking is NOT cheap. We’re talking $70-80 not cheap. But on the other hand, I hate hate hate hand sewing unless it’s embroidery. Hate hate hate it. So…yeah, what the hell!

ruffle foot
ruffle foot


Look at it. That’s a beast of a foot. It has adjustable length between ruffle tucks so you can make it a really loose ruffle or super gathered, it had NO problem making ruffles in minky….and frankly I can’t imagine it would have an issue with any fabric…the mechanism with the teeth that pushes the fabric into tucks as you sew….it’s a beast! I admit it. It scared me a little (LOT).

You can see here some practice ruffle:

variations on ruffle

And here’s the ruffle attached to the big girl skirt….super cute if I do say so myself:

big sister skirt
big sister skirt


ruffle sewn on
ruffle sewn on

Now compared to the hand-gathered version:

big sister skirt
big sister skirt

I tend to prefer the ruffler foot and I’m not giving it back. Ever.

Ok, I am a bit scared of it and it is a bitch to put on the machine….and if you don’t do it right….like line up the part that holds on to the needle bolt on the shank and tighten it all down really good, you get this:


broken needle from ruffler foot

A needle breaking is a loud, scary thing….and when I’m on a $$ machine with a $$ foot attached to it and I hear the ruffler foot do its “katchunk” thing and then the “SNAP/BANG” sound of a needle breaking….I make some sounds of my own like “Motherf…..!”

All is fine though, and I’m a lot less ginger tightening those bolts now!

French Seam Beauty

seam sewn down

The beauty in a clean French seam is undeniable, but it’s also so very handy when dealing with fabrics that really like to fray but you don’t want to bother with the serger right that moment.

As usual I was in Joann’s and found a fine wale corduroy in a bright turquoise print that I just had to have 5 yards of…figuring I’d do something with it. It never fails when I do that, the nice lady at the counter asks what I’m going to do with it because who would buy that much fabric without a plan?!?! HAHAHA…me. Always…me. It does fray like crazy though, and while it has been turned into bibs and blankets where the seams are enclosed, I wanted to make Zoe a pair of pants in the fabric.

trusty pants pattern


I’ve made these pants so often, I can just about do it with my eyes closed. It’s the same New Look 6793 pattern I’ve been using for her…just slowly unfolding the hem line down as she gets bigger! I haven’t bothered with the flouncy edge in the pattern or even gotten to the dresses! They’re good, roomy pants though for active babies.

Sewing a French seam is sort of weird at first because you have to sew it together right-side-out so that it will look ‘right’ inside out. You still end up using 5/8″ seam allowance – and much more efficiently in my opinion.

sew wrong sides
sew wrong sides

I sew a 1/4 inch seam and then trim it down to about 1/8 inch.

trim excess
trim excess

Then, when the pants are inside out, you’re ready to go over your seams and enclose them with another 1/4″ and with the fold, will use the majority of the 5/8″ seam allowance:

sewing in the first seam
sew down seams
sew down seams

I think here with my hand and small scissors you can get an idea of scale and how neat and finished the inside seams are:

seam sewn down
seam sewn down

Turned right side out and the finished seam is squared and tight.

turned right side out

Then, if you’re like me, you tinker with whatever you have on hand to make something to go with it….like the pile of onesies!

pile'o'onesies
pile’o’onesies

Snip out a tree…ironed to a light weight stabilizer of course…

onesie cut out
onesie cut out

Stitch to onesie:

stitch to onesie
stitch to onesie

And admire the cute.

The Cute
The Cute


Buy A Serger?

I Heart Flannel

Sergers have gotten a lot less expensive, sure. Brother makes a really well reviewed serger for about $200. Heck, it has the new lay-in thread method where my older Janome/MyLock has knobs….and my Janome, while not even close to top of the line, was a lot more than $200. But some of the advice I’ve read out there to get a serger or not get a serger never quite get to the real dedication one needs to have a serger.

I love my serger. Sergers make fabrics that love to fray like flannel and corduroy much more enjoyable. Try to give a mother of a newborn new flannel pants for her baby and watch her hate you a month later after she’s picked an infinite amount of lint out of her baby’s diaper area….not good.

I Heart Flannel
I Heart Flannel

And as much as I LOVE a good French seam, when you’re doing a dozen pairs of flannel pants for Christmas, the serger is so much faster. Look at this flannel interfacing, enough for 4 coats…takes minutes:

pile of serged flannel interfacing

My issue isn’t with the serger. My issue is you need to respect the serger. That $200 machine is just burning money if you don’t respect the serger. Sergers are the infants of the sewing world. You have to love and baby them often or they throw a tantrum of epic proportions. Doubt me? Call up your local dealer, ask them how often they see frozen up sergers and what the cost is for repair. It’s not pretty. These photos of lint are from the little pile of flannel interfacings above:

inside serger
inside serger
lint under feed dogs
Lint on Serger Foot
Lint on Serger Foot

Of course sewing flannel on anything is going to make a ton of lint. It’s that plus the other maintenance. You should run every sewing machine you have at least once a month to keep it happy and moving. The owner’s manual to my serger reads to oil every 2 weeks. It’s not like a food processor that you can just leave in the cabinet until you take it out once every 6 months. Are you really going to sew with your serger that much? I’ve had a serger freeze up. A friend gave me an old 3-spool that was sitting around, I tinkered with it long enough to have it freeze up. Took it in, and it costs more to fix it than replace it. If I didn’t sew as much as I do, and I’m barely on the cusp of sewing enough, I would not have a serger. Pinking sheers, zig-zag stitch, French seams….there’s plenty of other options for clean seams. A serger not only takes a financial dedication, it takes a hefty time dedication.

That said, there are financial benefits to a serger. I can go into the fabric discount aisle (this was the Mill End Store) and pick out a <1 yard remnant of a knit and use a pattern I’d normally need more than a yard for. I know I’ll only use 1/4 seams on the serger instead of the 5/8 inch seams allotted on the pattern, so I can fudge a fit in a simple leggings design for my daughter:


perk: size-fudging
perk: size-fudging
using all the fabric


less than 1 yard pants

These pants are a size 12ish girls and cost less than $5 with elastic and thread factored in and took less than an hour with the serger doing all the seems and edges. I finished the hem and waist band with the sewing machine.