Zoe is 22 months old and I finally got her baby quilt done! It’s still a baby quilt if she’s under 2 years old, right? It’s been done for a month or 2, but I’m just getting around to sharing.
Cuddles
Zoe wouldn’t let me take the binky out of her mouth for the shots as it really was nap time and she was getting in the mood for some serious napping here…
Sleepy Time
This is Elizabeth Hartman’s Roller Rink pattern from her Modern Patchwork book. I made it baby blanket sized – which made a great excuse to FMQ!!
Clouds
I didn’t follow a pattern for the free motion quilting, per se, but just made a loose design of clouds. Get it? Clouds, rainbow….well, it works for me.
PurplesFMQ CloudsClouds 2
Ms. Hartman has a few different color combos in the book and online, but I really loved the colorful ‘scrappy’ version she has in her book with tan and white boarders, so I stole that idea for my rainbow. I used a Kona white and a RK yarn dyed linen in Flax. I love that linen. It’s the most perfect tan in existence.
Yes, I just got all nerdy over linen. Ugh.
Cuddley Quilt Close Up
I’m really happy with it and so is the baby (because she’s not two yet…)
I did the binding in the linen as well, and Zoe picked out the backing fabric. Yes, really. She loved this crazy fruit fabric from Alex’s quilt, so I gave her a whole back in it.
Back’n’Top
Being that I cut all of these little pieces during the summer when Ms. Viking was in the shop, I have a LOT leftover….and made another quilt to be posted tomorrow!!
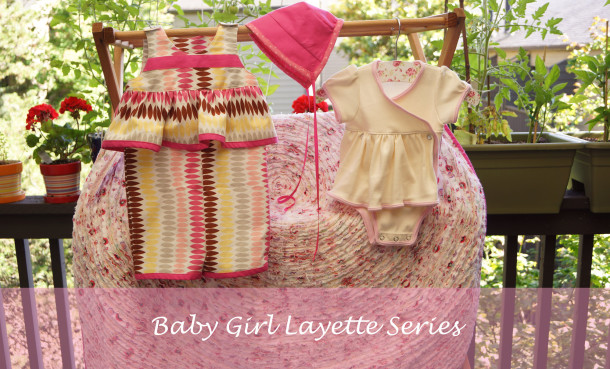
Oh, I’ve been a bit quiet on here but not for lack of material (heh heh). I thought it best to organize the entire Baby Girl Layette Series into something more organized looking which required me to finish the dang thing. Alma, a darling lady in Texas, is having her first baby, Vivian, sometime in the next month so I had to hustle. I was worried I wouldn’t be able to do everything I wanted, but Ottobre FTW! Man, I put in an order for a 1 year subscription plus a few extra back issues and BAM! They shipped fast! Mad love, Ottobre. You are my new favorite.
BUT since I didn’t think I’d get it in time, I started/finished the jumper and ordered the pearl snaps…I really wanted pearl snaps for everything because, hello, Texas! It may be my Pacific NW humor, but I really needed to use pearl snaps.
I had a snap punch and thank GOD I practiced first!
Cracked Snap
No matter how gently I tried to set the snap, it cracked the pearly plastic. Argh.
Not to mention totally smashed the ‘male’ side too…
Smashed Snap
So, I broke down and got one of those snap plier things that I’ve heard nothing but suckage about, but my friend Rena totally loves them, so I went for it. I’m not in love, but it worked.
Texas Snaps
AND OMG, I love the snaps. They’re perfect. The jumper turned out exactly how I envisioned it. It’s modern cutesy. That’s a genre, right?
Jumper
I used a Kona in hot pink instead of the lace in the book, and French seamed the whole thing. I *forgot* to French seam the inside sides of the skirt or even zig-zag/serge the edges so I’m going to have to put some anti-fray crap on them. Argh. Oh well. It’s not exactly newborn size; in fact I think the pattern says 3 months, but it’s just too cute and it matches the rest of the set.
Overall, the pattern wasn’t too brutal. It’s not for super beginners as it takes some leaps. At one point, I just put the book down and assembled it how I saw it going together…which usually works out for me….until I forget to finish the seams under the skirt, ha!
This post is a bit short as it’s late, I’m zzzzzzz, and the next few are much more involved, like another faux chenille blanket! I obviously lost my mind!
The colors in this block are comforting and as a family we decided to keep this one. I told my Robert it’s his.
Boersma’s pinwheel
He makes eggs in the cast iron pan for himself and our youngest on his work-from-home days, so it will be well loved.
Instead of quilting the top to the InsulBright and the bottom to the batting, then combining them, I thought I’d try quilting the whole, squooshy thing together.
The pin basting almost made me give up on that idea. While you can’t tell how mooshy-squooshy it is on the front,
Extra Sandwich Front
you certainly can tell from the back:
Extra Sandwich Back
That scared me.
I put on my walking foot, and kept the same Aurifil 50wt in, I think it’s ‘slate,’ on the machine. It was a bit squirrelly. You can see I marked some lines…but it was still squiggly.
Quilting lines
Here’s the top finished. The shifting wasn’t too bad, but some of those lines are wonky.
Top Quilting
Here’s the back:
Back QuiltedBack Quilting Close Up
I did the self-binding from the back…I probably should have changed thread color here to the purple or used bias tape for a cleaner finish, and if it was going as a gift, I certainly would have redone that part, but for home use, I’m good with it.
Self Binding
Here’s some shots of the Pilot FriXion pen (again) that was brown used on gray Kona to show it ironed out:
Ironed FriXion Markings
I sound like I’m not happy with it. I am…I just know I rushed it and I was tired, you know? It’s very pretty still.
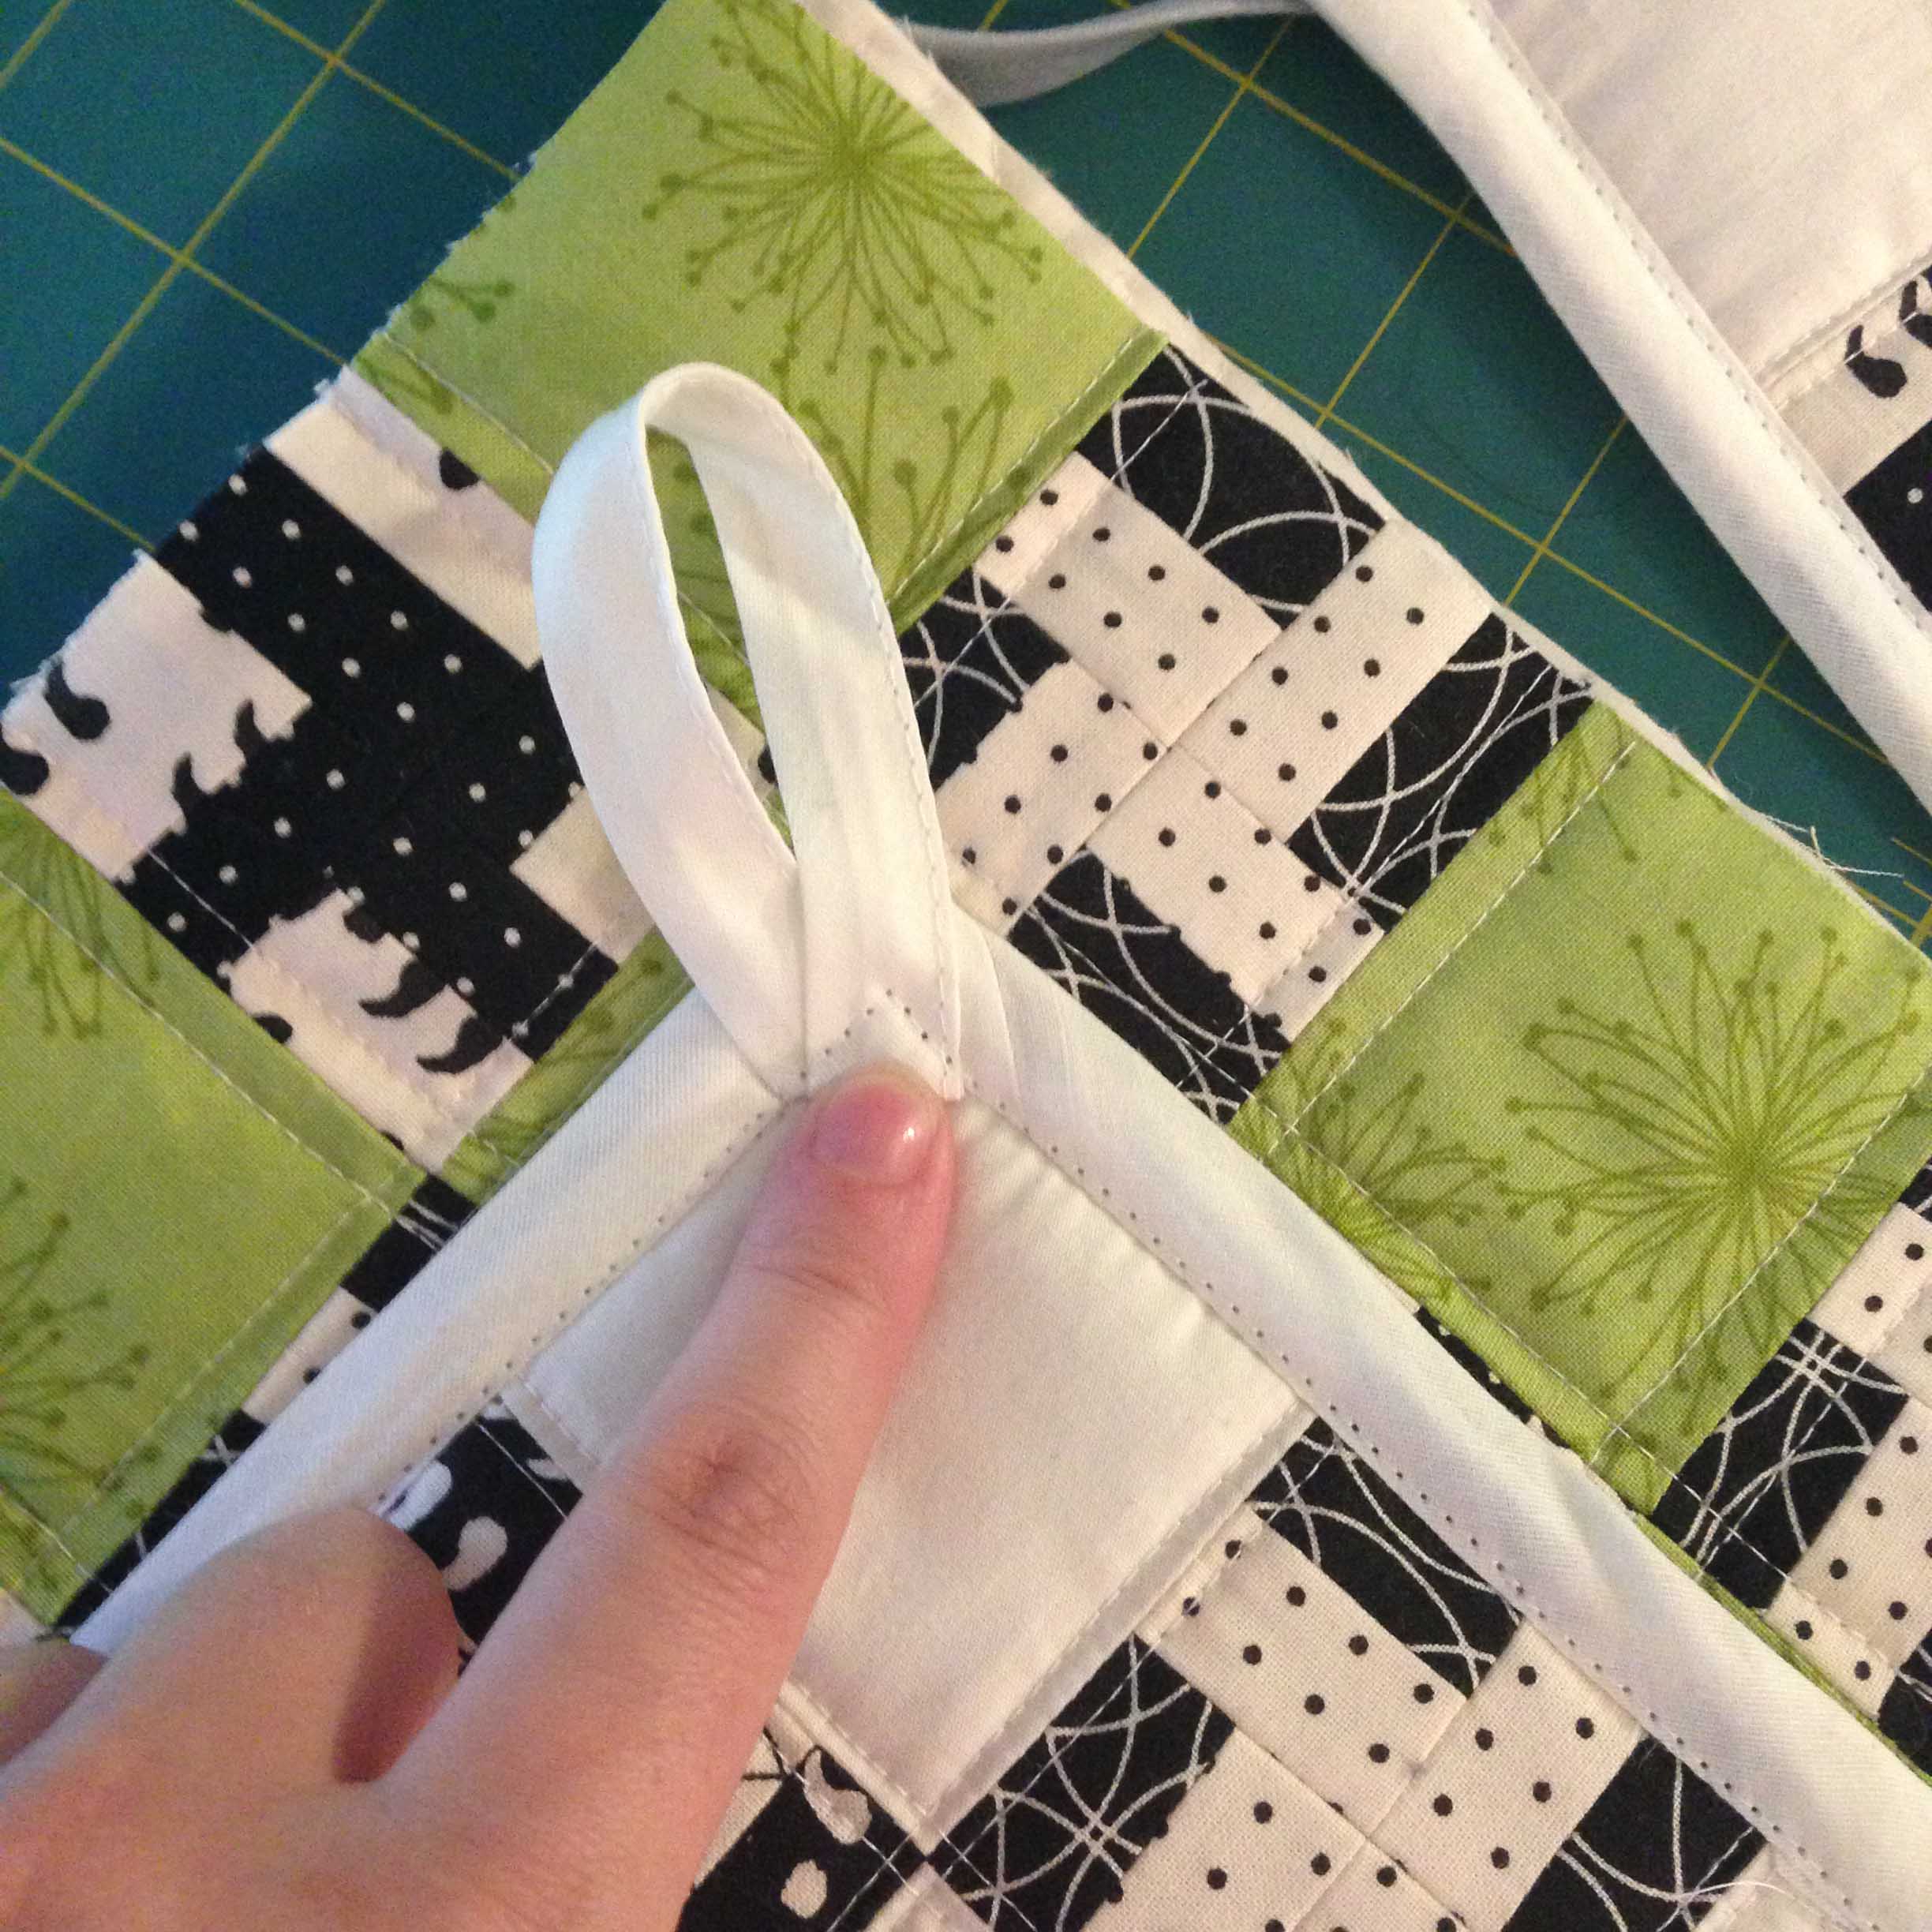
In my frenzy to babble about the potholders yesterday, I totally forgot to tell you that I busted a needle AND overloaded the motor on Ms. Viking 3 times! Her screen pops up with this exclamation point and she just stops short of swearing at me. I used InsulBright, batting, quilted tops, backing and bias tape with loops on the potholders. In the corner for the loop….that makes at least 6 layers of cotton plus the batting (low loft cotton) and the InsulBright. I get it’s thick, but my Swede did NOT like it.
Busted Needle
That cream binding is a purchased poly bias tape which my machine did not like at all with the layers. It still didn’t love the homemade gray Kona bias tape but I didn’t break anything. I was using a Schmetz Quilting needle, 90/14, Aurifil 50wt, the right settings and 3.5 stitch length….
I love my Viking but I think I’m a bit too rough. She makes garments just great, but I’m starting to eyeball Jukis more and more. I have the Elizabeth Hatman sewing circle bag pattern and I just know it’s going to be a rough ride.
The cons of using a serger mid-project are that, if you don’t have the space to keep your serger out, you have to lug it out. You have to thread it if it’s not already threaded in an appropriately blending color (I often use neutrals and rarely color match thread) and you have to make sure it’s de-fuzzed and oiled and set the tension…all that jazz.
The pros – well. A zig-zag or overcast stitch on my sewing machine takes a LOT longer, do you sew it together first, then overcast it together, then press seam to one side or…I just don’t like doing it anymore. The speed of my serger and efficiency has spoiled me. It’s worth the cons for my usage level.
I’ve marked directly on my serger the 1/4, 3/8 and 5/8 inch marks from the knife of the serger. The knife cuts the fabric to the stitch as it goes through.
serger math
So…if I have a 5/8 inch seam allowance from a pattern, and I serge and cut at the same time to the 3/8 mark, that leaves me the width of the serger stitch, 1/4 inch, to finish the garment.
Knife to needle edge is 1/4 inch:
knife
Finished stitch width:
qtr inch
Not only does it give me a finished edge that will be easy to press open once assembled, it gives me a guide to sew the 1/4 inch seams.
I removed any serger ‘tails’ of thread by just clipping them instead of threading them back in because it’s going to get sewn back over and encased in bias tape anyway.
I could have sewn the pieces together at the 5/8 inch mark and just done 2 steps in one, but for this light weight fabric and the assembly, I want the seams to be flat on the inside and more polished looking.
Here it is sewn together and you can see the difference between the cream thread which is my sewing machine’s overcast stitch and the gray of my serger:
Now, it’s time to choose the finishing bias tape colors. I went through all the solid fabrics I had that might work. I pulled in my (secretly) refined man for a second opinion.
binding 1binding 2binding 3, 4, 5binding 6
It was a tough call, but it looks like I’ll be making light gray bias tape. I think it’s called Kona Stone.
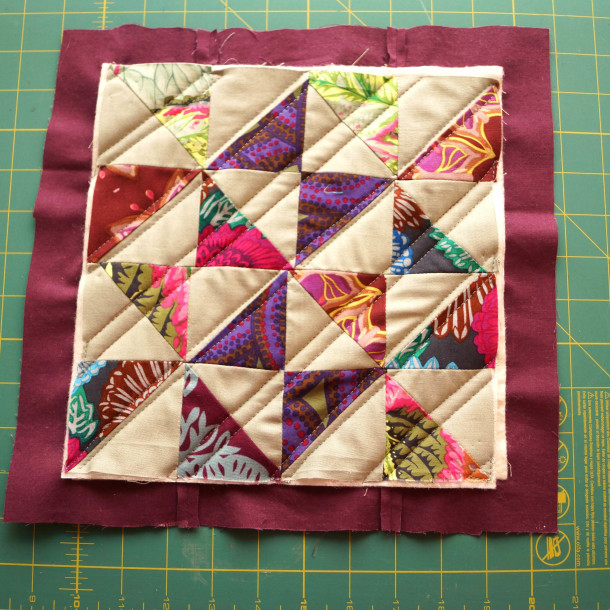
No one can resist the Feather Block by Anna Maria Horner. It’s whimsical and sophisticated at the same time. It can be used for dedicated fabric or to go through leftover fabric. It has a lot of pieces….but it’s pretty simple.
I have some free motion quilting to practice, but I wanted to practice on things that I was going to use and not just muslin or scrap batting sandwiches. Dangerous? Yes. So…I compromised and made practice blocks to practice quilt on. It all makes sense in my head.
Mom went to McMinnville, Oregon with her BFF to go to antique shops and quilting shops, etc. I love McMinnville. It may be my favorite town in all of Oregon. How can you not LOVE a town that has a sexy Ben Franklin statue?
ben baby
Hahahaha. Ew.
Really I do love McMinnville. Mom went to Boersma’s and brought me back a bag of scraps….that doesn’t read nearly as cool as it is…
Boersma’s
Big old bag of really high quality scraps. HAHAHA. She’s going to read this….she knows I love it and that I appreciate it!
Anywho, it was a perfect, already matched up stash to try out the feather block. Most of the fabric was already in perfect width strips for strip-piecing together.
strip piecing
Ms. Horner’s site has the link to the PDF pattern with instructions. Isn’t that SO GENEROUS? I went to FedEx/Kinkos and had them print the pattern pages (2) on 80 lb. card stock so that I’d have a sturdy template for my rotary cutter for a whopping $0.43.
It was really easy, by the way…just walk into Kinkos, ask them their email, email the link from your smart phone, and ask them to print the last two pages on card stock (80 lbs is technically cover stock, if I recall, but whatever – ask for 80 lb weight paper). You can email on their website or whatever, but I find it so much easier to just walk in. No toner/printer/paper fuss. I kept the instructions up on my iPad while I was working. Easy.
pattern
The instructions are for strips of width of fabric as if you’re cutting strips from a fat quarter or what-have-you, but you can finagle scraps just fine. Sorry about low light photo, whoopsie….but see the lines on the pattern Anna put on? That made it super easy to get the ‘feathers’ lined up so when you piece it, they’re at the same angle to the edge.
cutting pattern
So, yeah. I started with a Kona Bone/neutral, and tinkered with a bit of teal. I prefer the teal….but if I was going to do a big scrappy quilt and use up all my mismatched scraps, I’d probably stick to the neutral.
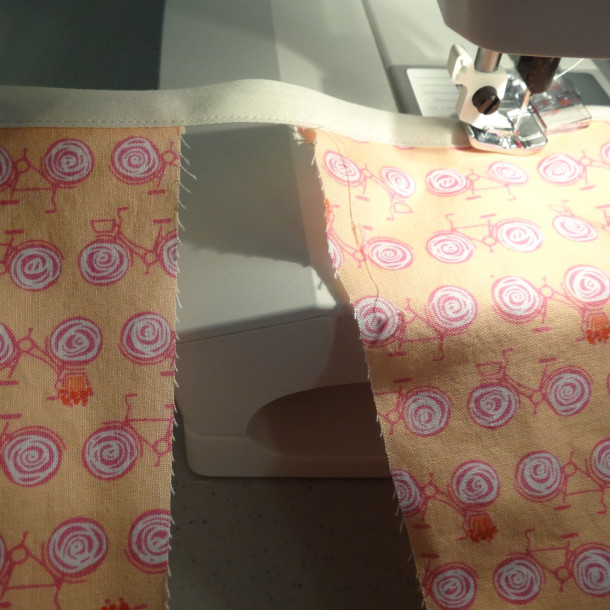
When I grabbed the peachy pinky bicycle fabric and the pink Kona, I just got 2 yards each because it was a spontaneous purchase and wasn’t sure what to do with it. I knew I plenty of other matching fabric anyway. So, after the infinity scarves, I went with this grouping to make 3 more farmer’s market bags.
spring materials
I didn’t quite have enough of each Kona shown to make the bags match and that’s fine. There are 2 bags with the pink bag lining and white pocket lining, and 1 bag with the cream/cream.
What I DID learn this time around is that my binding foot is PERFECT for this project. A little bit of cream bias tape to top the pockets – 3 sets, making 6 total pockets, would appear to be a pain but with magical binding foot it was a breeze.
chain pockets
I just chain-stitched them all together. Once the foot and bias tape was set up, it was just a matter of feeding in each pocket top (after the lining was sewing on of course). It’s kind of like making banners. Or, bunting, I suppose is popular to say now. Thanks a lot Downton Abbey.
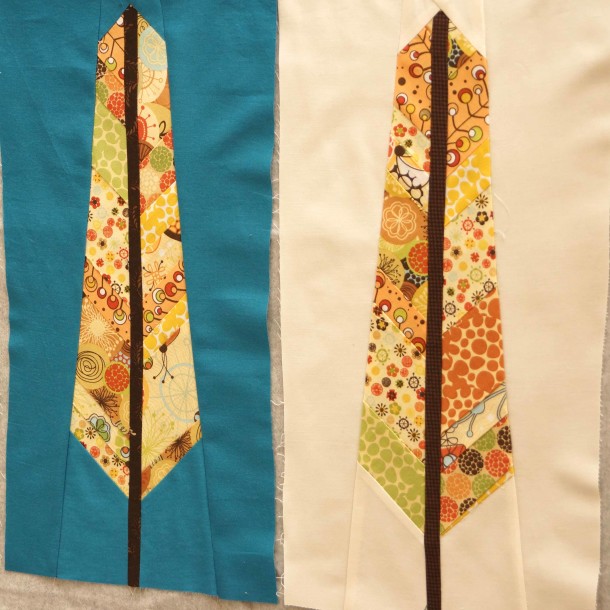
I’ve been thinking for some time about labels for things I sew. I’ve been putting cut-out sock monkey tags in the backs of pants or a piece of grosgrain ribbon…but I need something more…permanent.
While I love the name of my little bloggerverse – it’s very me: a little snarky, a little punny, a little goofy and an acquired taste at times, it’s not necessarily something I want to put on kids’ clothes. So, until I come up with that epiphany (or if you give me some genius idea), it dawned on me that I can embroider custom tags. I have the thread and the machine, as proven. So, theoretically, I can do this.
Enter, Signature Cotton in “Variegated Island Waters.” It’s M18 on this page of Redrock Threads. Kinda blurry there so here’s my photo.
Signature Cotton M18
I am a sucker for Tiffany and tropical blues. No, not that Tiffany, this Tiffany.
I have some Kona Bone that I had already cut into 2″ strips thinking I’d use it for the Pixar pillows, but decided against it….after I cut it (Murphy’s Law), so what a perfect excuse to turn it into tags. I ironed it like I was making open bias-tape…folded the tops to the center to halve it, but did not press in again to quarters.
Then tested the thread…
Thread Test
I thought it turned out really nice and soooooo….
I was in the middle of making two very large gift packages…one for Brody:
Brody RibbonBrody Label
And one large pack for Jack…Jack will continue to get items from me throughout his life, so I made a large roll for Jack:
Jack Roll Pre-Press
That was before I took an iron to it. Here’s the back so you can see the embroidery ‘seals’ the label together.
Back Jack
The tension wasn’t perfect, but it looks fabulous on top so it’s good enough for my purposes.
Here’s Jack’s labels pressed and rolled:
Jack Pressed and Rolled
Pretty cool, huh? How neat would some be tied around a present? Okay, when I have that kind of time, how neat would that be???
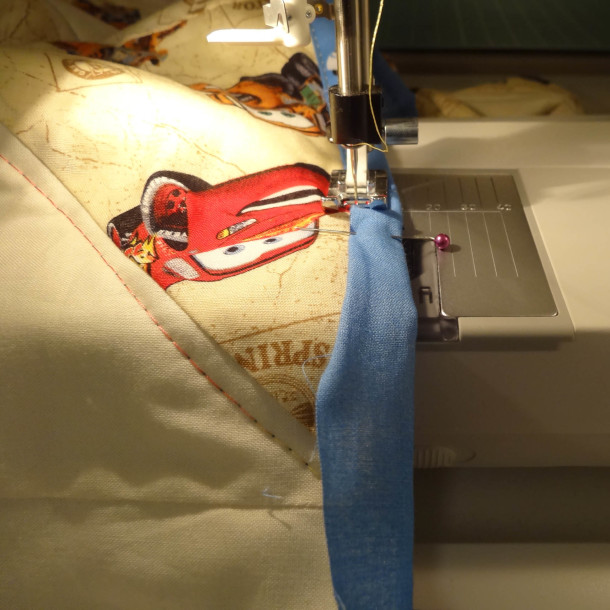
Liam’s Disney Cars themed chevron quilt is finally done and will travel up to Seattle this weekend.
I did the final quilting and binding after the kids went to bed during the week.
I had a little extra batting to trim off of the 90″ length, but not too much. If you do this and you’re using the wrap-around-binding as I’m fond of, be sure you do not stab your scissors through the backing.
Yeah. I did that. Twice. I made a patch. Twice.
Trimming
Then I just trimmed the fabric down to an inch beyond the edge, folded in half and then folded over, put in about 8 pins, and started sewing.
I find that if I pin the whole thing, I feel like I’m in a Hellraiser movie getting poked by needles constantly. Eh, not my thing. If I try to just roll and hold the binding as I go, I’m likely to either get sloppy or pull the bias and it will get stretchy/puckery. So, as I get to the last pin, I pause…
Wrap Binding
…fold and insert 6-8 more pins…
Pin As I Go
and the quilt ends up blood free.
I tried to get final shots with some daylight on the quilt to share. That probably seems like a simple task IF YOU DON’T LIVE IN THE PACIFIC NORTHWEST. It has been gray for so long that I am starting to feel gray. I emote gray. hahahaha.
Here’s the top of the twin quilt laid out on a queen-size bed.
Top In Full
Here’s Zoe’s view:
Top from baby view
It’s all business on the top with its formal pattern, and crazy party patchwork on the back:
Back in Full
I love how the embroidery thread as quilt thread did exactly what I wanted. It contrasts and pops out on the front, and completely blends away on the back.
Oh, sorry, and here’s Zoe’s view of the back:
Embroidery Trick
Again, with this close up, the thread shows up ever so slightly. The shot above probably has the most contrast on the entire quilt back.
Here it is against each of the back colors and in 2 lines to show the variegated thread.
Close Up On BlackClose Up On BlueClose Up On Tan
I really really really love it.
Here are some close ups of the top’s echo stitching to show the variation in contrast.
Close Up BlueClose Up RedClose Up Yellow
And…Against the binding…
Close Up On Binding
Yes indeed. I’m quite happy. I didn’t even go through ONE of those spools of Sulky thread on this….ooopsie, there I go again, buying too much. In fact, if it wasn’t for my testing, I probably could have made it with one bobbin, but I did put on a second bobbin. However I do have very little of the Disney Cars fabric left, so I estimated that just about perfectly.
I have 2 of the Chevron blocks left – and that one I sewed upside down! haha. I don’t want to stall the quilt going up to Seattle, so I’ll have to send along the accessories later. Throw pillows? I was thinking of using the Liam+cars embroidery programming I did in the tester post? Or…wall panel?? I don’t know how much boys are into wall panels or throw pillows for that matter….
Materials, if you’re interested:
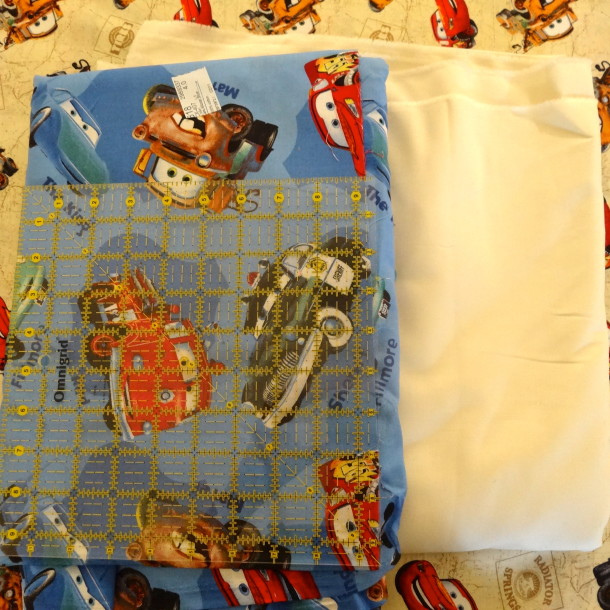
Gutermann thread for piecing; Sulky thread for quilting. I used the same organic bamboo/cotton batting I used on the baby chevron quilt – Ms. Viking really likes sewing through it, it has a great feel and weight and after I coat it with Tailor Basting spray, it’s not nearly as hippy as it once was….heh heh, I crack myself up. I got 4 yards each of the Disney Cars tan and blue fabrics, and 2 yards of the Cars 2 fabric….there’s barely any left – maybe a quarter yard in pieces…a bit more of the blue is left I think. I could use that in the extras? I got the Cars fabric at Fabric.com. For this and the VIP Liam flannel pjs, they had the variety I wanted and I was pleased with the service. I used about 4 yards, give or take, of Kona in Bone. I got that at Joann’s with a 40% off coupon as it’s almost never on sale – which is great, because then it’s always 40% off! Ha! Joann’s does have a tendency to run low on the commonly used Kona cottons, so keep that in mind if you want a lot. I finished off the bolt with that purchase and I think I only got about 7 or 8 yards. They were completely out of most bright whites at the time of that purchase.
Ok! That’s it! Whew! Give me ideas for the Liam accessories if you think of some….meanwhile, I have a list of spring outfits to make!
The Chevron Baby Quilt and headboard piece were so easy and so malleable for my needs, I decided to go ahead with making VIP Nephew Liam a twin size in the same pattern. I bought the fabric already, and just had to commit to how it was going to go together.
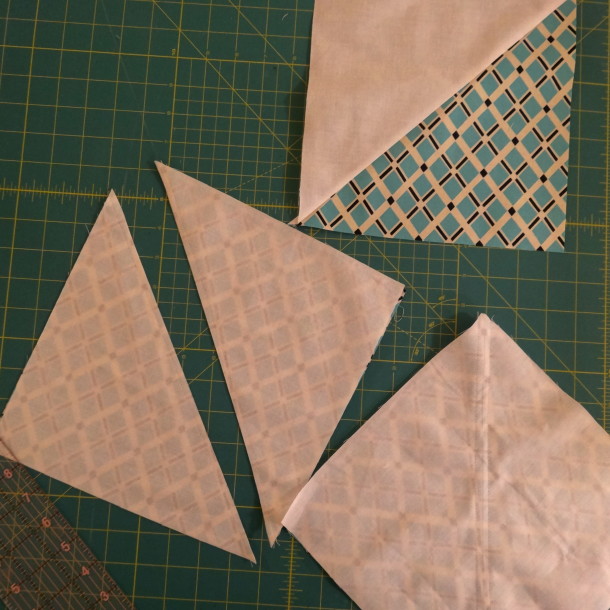
Here are some close ups of the fabric with the 9.5 inch square ruler laying on top.
Liam’s mom mentioned she liked the tan fabric best, and from an “OMG that thing is going to be in my house” stand-point, I gotta agree with her. That’s also some of my reasoning behind the chevron pattern – breaks-up the crazy Disney a bit for the adults and leaves a bit of room-to-grow for Liam.
Tan Cars
That, and the blue cars print is just too big to be cut up. By the time it’s in a 9 inch right triangle, the cars will be too cut up to tell what it is.
Blue Disney Cars Fabric
This will leave me with 4 yards of the blue Cars fabric, and I have 2 yards of Cars 2 fabric. I will use these to make the backing to the quilt. I think it will make for a fun, reversible look.
Black & Blue Cars Prints
For me, it’s easier to do things in batches. I cut aaaalllll the squares from both fabrics first. I pressed and stacked aaaallll the squares. I marked my centerlines on aaaalll my Kona Bone contrast fabric. Is it important to use REAL Kona solids? YES. I promise a rant on that…probably coupled with ‘why you press to the dark side, Luke’ reasoning and all that. But for now: pressing, stacking, marking, matching right sides, pressing, pinning, stacking….
Cut, Pressed, Stacked, Marked, Stacked, Pressed
Pin, pin, pin…stack, stack, stack. This fabric is not prewashed since I knew I would be using it for a quilt, and when you press fabric with the ‘sizing’ still in it, they stick together a smidge which is helpful.
Stacked Squares
See….here it is. My stack of marked and pinned making its first go-through the machine. Sewn 1/4 inch on each side of that line. I just used a #2 pencil that I stole out of the pencil jar off of the big kids’ desk. It’s going to be cut, pressed towards the darker fabric and it’s done with such a light hand it will wash out the first time. No one will ever be the wiser. Except you.
Chain/Batch Sewing
I don’t normally pin, but this is for VIP Liam! I want to minimize the potential wonky quotient a bit and I’m not in a hurry – it’s not like there’s an impending baby as with the last one (I type that like babies don’t cook for 9 months.)
After being sewn, each square is cut apart and pressed open.
Batch Cutting
I cut them all first, then pressed them all. I’m fascinated by this batch method. Growing up (and still), my mom will generally make a few blocks at a time…tinkering with color and so forth. Of course, she’s making things like double wedding rings, bear paws, double Irish chains – I have two separate appliqué quilts from her on my walls alone! So…yeah. I have BIG shoes to fill some day.
Okay, back to topic. Pressed open and ready to make blocks.
Pressed Open
Everyone has their preferred method, but I’m not so hot at doing long strips and piecing the strips together – I prefer the traditional method of increasingly larger blocks. So, I set my squares into the block shape. This is going on a batting that is a 72″x90″ twin – that doesn’t quite divide out into squares so I figure I’ll make an 8×8 large 4-square and have to add top/bottom boarders.
Yes, I figure out the correct math right at this interval. No, I’m not going pro this month.
Sorted Into Blocks
Sewn tops….
Sew Top Together
Sewn bottoms…
Sew Bottoms
Press and stack, press and stack, press and stack…
Okay, now a little time consuming part. This is the point where I attached the top and the bottom and took extra care to nest the seams – making sure they’re perfectly lined up and the seams were going the opposite direction. Yes, I had to visualize this when pressing my stacks to know before hand and press opposite ways.
Nesting the seams
I also took this point to trim all the dog ears or long points from the seams. It seemed inefficient to do it any earlier and to wait any longer would make for yucky chunky wonky nasty seams.
Trim Dog Ears
Stacked, pinned, and ready to make blocks.
Trimmed, Pinned and Stacked
and….REVEAL
Squares complete
Oh yeah. Not bad for a President’s Day afternoon.
AND….here is one of the many reasons I always make extra…I know I’m going to screw up.
I wonder how many quilt blocks were invented this way….
Oh Crap!
I knew I pinned a center with 2 seams going the same way and I assumed I screwed up ironing. Ugh. Luckily, it’s only one and I have something like 5 more extra.
I mean, I meant to do that for a throw pillow. Yeah! That’s it!
I don’t have a problem. Really. Like any good junky would say, I’m fine with my addiction; it’s you that has the problem. I could be doing worse. At least I don’t (fill in the blank) anymore.
My fabric stash reminds me of the Star Trek episode “Trouble With Tribbles.” Am I showing my age? I think I’m actually just showing my weird, nerdy step-dad’s influence.
Trouble With Tribbles
Of course as I was cropping that photo to square, I stopped and marveled at the gold rick rack for 5 minutes.
My fabric just keeps multiplying. It’s not my fault! My friend, Jennifer, said to me, “My mom has som….” and I said, “YES!!!” before she even finished the sentence about her mom’s old fabric. See. She pushed it on me.
70s & 80s Yellow Calico
It’s not my fault…but look how pretty those fabrics are! So easily lends itself to French Provençal, doesn’t it? There’s some mauve and purple calicos that would be ultra modern with some gray or taupe Kona cotton.
That’s my fashion prediction by the way. 80s country drab colors mixed with modern design. Mark my words.
Melons!
Oh, look at that melon color….melon colored tribbles! My mom gave me these in a bag last weekend. I love her. She’s my best dealer. We’re going to the Sew Expo in Puyallup. It will be fine. Really.
Blues
Blues….blues are my weakness.
Kid Projects
And kids. Kids are my weakness.
MOAR!
Um…and…um, ok. You got me.
No one send me any more sales or coupons or mom’s stashes (except that last one, you can still give me free fabric) because I’m not buying anymore!
Except some Kona solids…because THAT is a LOT of pattern!
And maybe except at the Sew Expo…I’ll need a souvenir!
My most fabulous and talented man is from Seattle, and the Seattle cousins are having babies! There are 2 due this spring. We ventured up this weekend for a bit of Zoe’s first birthday, a bit of VIP special delivery, and I took up a baby quilt for Robert’s cousin’s baby shower that we could not attend, but I could not resist making a little something.
It has the silkiest feel to it and is really nice to work with…it’s also never going to make it into my ‘cheap and easy’ category as it’s certainly not cheap, but is sooo very worth it. Besides, when we’re talking a quilt for a family baby, we don’t want cheap to enter into the equation unless it’s happenstance, right? Right. It was 30% off when I bought it, so, for giggles, you’re looking at about 4 yards at around $10 each, and I have a yard leftover…not too bad before batting and all.
I got a 9.5″ square ruler by Omnigrid to make my life a bit easier. I knew I wanted it to be a big, chunky chevron pattern and that I would be repeating the pattern later with the large Disney Cars print, so it was a good buy.
Omnigrid 9.5×9.5
My batting was a baby quilt size 60″x60″ – which gave me plenty of room to work with. When all is said and done, I have 6 half-square triangles (HST) across and down that are 8.25″ once sewn together (6×8.25=49.5″) and that’s plenty of wiggle room.
Cut, Centered & Stacked
Enter the batch sewing. I borrowed this technique from my Craftsy Block of the Month class. My quilting experience hasn’t always resulted in the best end product, but I have been working on it. While apparel remains my more natural mode, I must grow! hahaha. Okay, seriously. Take your stacks of squares, I’m using a Kona white as my contrast, mark the lighter fabric down the center on all of them, stack them all right sides together (not gonna matter with a solid), and get ready to sew, sew, sew.
First Run of Chain
My first run of stitching 1/4″ down one side of the center marked line.
Needle Adjustment for Viking
On my machine, I move the needle to the right 1.8 points to make the edge of my foot 1/4″ – your machine or foot may make that unnecessary, but this is what I choose to do.
Second Run Chain Piecing
Without even cutting anything apart, I stitched the opposite side of each block’s center line next.
Set, Slice, Press & Stack
Alright! Does anyone reading this have any experience with the LEAN manufacturing theories? I always giggle when I’m in this batch-sewing mode and think of that. Anywho, set all of your sewn lines at the same time, cut them all apart, slice along your marked line, and press all of them open. For me, giggling about LEAN and getting it all done in like-batches is easier.
Directional Pattern
Now, this fabric has a directional pattern. Keep this in mind when selecting your fabric – it adds a bit of time to your assembly if you need to make sure the patterns are all going the same way.
Chevron Block
This is where I leave the Craftsy BOM class instructions and move to something simpler. This is more like the Missouri Quilt Company YouTube tutorial idea. I know, I know, I can’t just stick with one thing; I have to mix and match and make my own. I personally don’t love the Missouri Quilt’s version of making HSTs because they’re too wiggly on the bias afterwards for me and honestly, adding wiggly to geometry doesn’t work for me at this time. Maybe when I get better at it.
Sew It All Up
Sew it all up! I use the more classic quilt construction by making quadrants of blocks that get sewn together, but if you can sew in strips of blocks, more power to you. I tend to get some extra wonkiness when I do that, so I stick to what works best for me. Less wonky works best for me.
Quilt Top
My fabulous and talented man can also hold up quilt tops with ease! Aw, he’s so sweet. Hold on a second while I go give him a kiss.
Okay, I’m back.
Now, you baste your top to your batting and backing fabric. Baste as you like…I use spray baste. To each their own. My usual Warm and Natural batting was out of stock, so I tried a new kind.
Nature-Fil Batting
It’s like buttah, I tell ya. It is Nature-Fil which is 50% bamboo rayon and 50% organic cotton. It’s a bit more pricey than my usual, but damn was it easy to quilt. Vikings are great machines…better at some things than others, and she can be a persnickety one at times, but she didn’t blink an eye at this batting.
Quilt the Quilt
Purred like a kitten right through it all, and didn’t even need a walking foot. I just traced the patterned chevron on the white for quilting – kept it simple and fast.
Trimming For Binding
I’m a big fan of the backing wrap-around binding – especially if I’m going to have mitered corners. I trimmed down to 2 inches after quilting. If your quilt is wonky and didn’t stay square after quilting, this may not work as well, but I did minimal quilting and it stayed square.
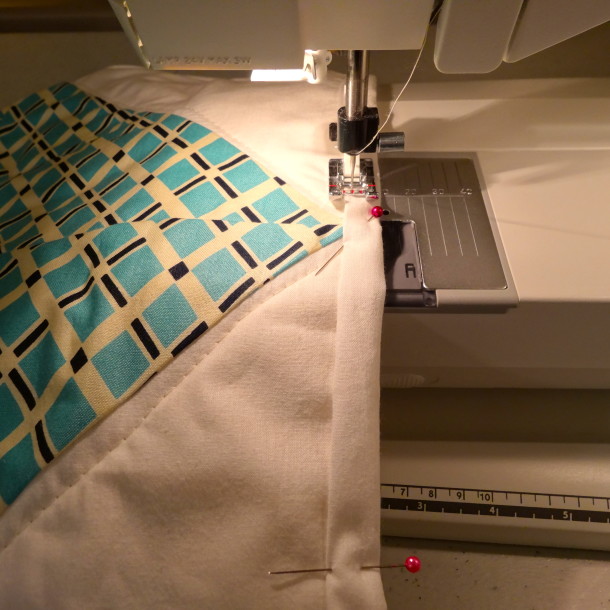
Sew Down Binding
I wrapped the raw edge of the binding edge in itself, and pinned it down. Again, Ms. Viking had no problems at all purring through through it.
Front Finished
Here’s the front, all finished and pretty.
Baby Quilt Back Finished
Here’s the back. I had some blocks leftover that I incorporated. I think it looks a little nautical, which is fitting for Pacific NW families.
Altogether, it only took about….10-12 hours I’d guess, including the extra fussing needed for the fabric directional pattern. If you’re curious, with getting some of the fabric and the batting on sale, you’re looking at about $60-70 dollars for this finished baby quilt, not including labor :). I think that’s pretty good. Sure, you can get 3 or 4 blankets at Target for that, but they won’t be nearly as nice or have that special family love sewn in. And like I said, while this may not fall into the cheap category, it was certainly easy.
I’m definitely glad I found a way to make this pattern work for me, and I’m definitely going to do it again. I’m not quite pro yet….here’s leaving you with a close up of a block that did get wonky…