Tunics generally aren’t my thing….they’re a little too….maternity circa 1985 for my taste. At least that is how I feel about them on my body. I have boobs. Anything without darts or shaping goes to the boobs, and tents out from there. My waist is still a good 10 inches smaller than my bust, at least, and I don’t like swimming in my clothes.
front linen cotton tunic
That aside, it has been Phoenix-level-hot in Oregon this summer, and this linen/cotton blend was a steal at <$5 a yard, so tunic it is.
Ottobre Woman 5/2013
I used an Ottobre pattern from 2013.
Ottobre 2013 Women’s Tunic
I made it a bit more complicated than the pattern calls for…
Ottobre Tunic Destructions
I opted to not have a contrast fabric, but instead split the front placket and cut each side on the opposing bias.
Derp Face
I also opted to split and bias the yoke. It does have a self-enclosed yoke, so that’s nice. Like a dork, I split and biased the inside too – I got so focused on doing it, I added work for myself. lol. Ain’t that how it goes. I French seamed the sleeve insets, decided I didn’t like how it futzed with the gathers, etc., so just pinked the remaining side seams. It’s hardly noticeable – the futzing of the gathers, esp since it’s a casual, wrinkly shirt, but I notice it.
Split and Biased Yoke
It has one of those bias-tape plackets on the sleeves – and the cuffs are so wide, it’s really just décor. I don’t unbutton to put it on – could have skipped the button hole!
sleeve button
Autofocus fail but you get the idea.
Anywho, I wear it all the time. It’s super comfy and yummy. I wish it was a dress. Almost. A big muu-muu dress. I don’t love wearing it out of the house – it’s kinda frumpy…but comfy. I think I need to use this fabric in a more fitted version. Of course this was an end-of-bolt clearance, but I love the linen-cotton blend. It’s dreamy – even on our 90-100 degree days, it’s been dreamy. At just around 2 yards, so $10, not bad. Not bad at all.
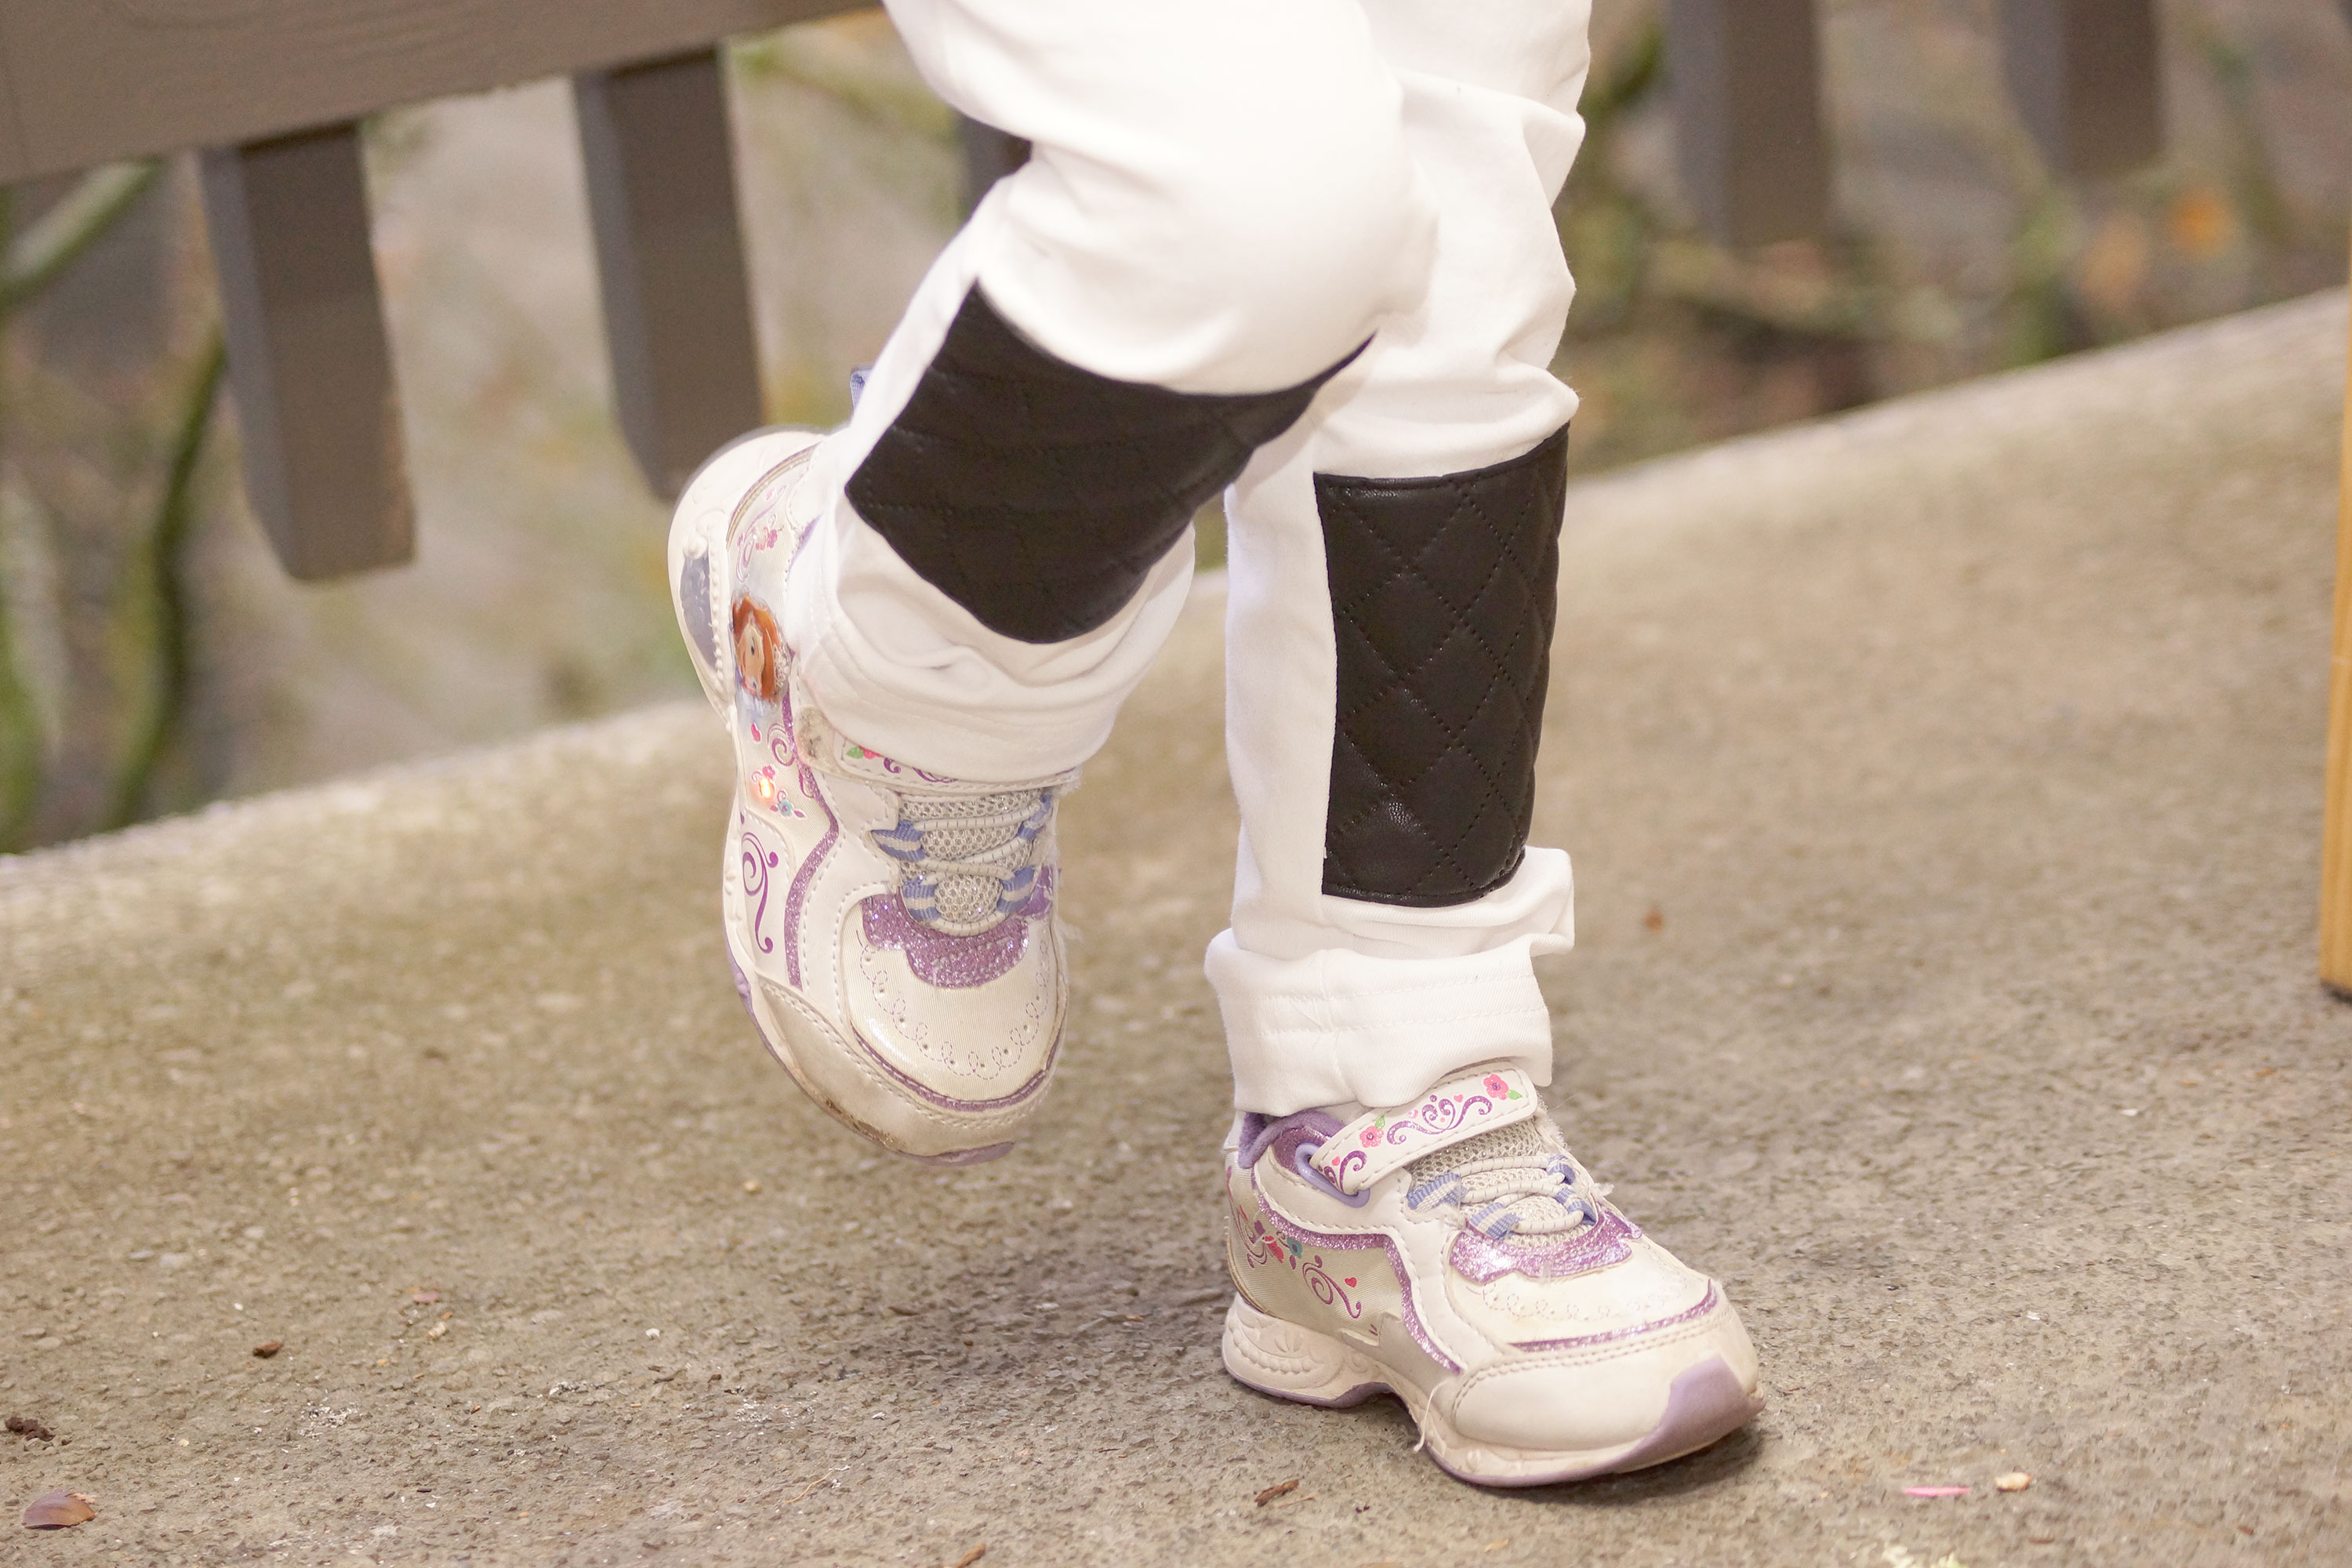
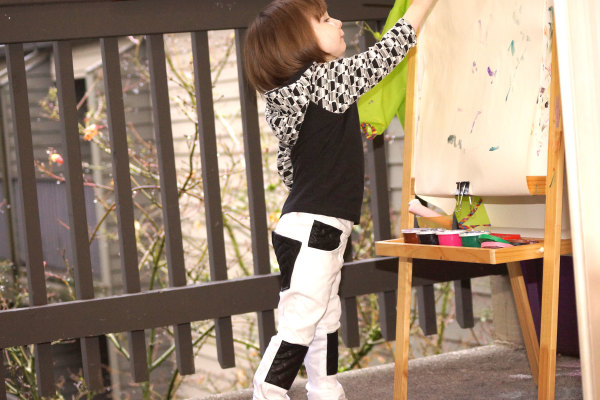
While I was working on the cool recess raglan shirt, I also wanted to play with some pleather and denim. Again, practice on the kid so I can have some skillz for myself. That’s what they’re for, right?
Enter remnant bin, again. I bought 2 <1 yard remnants of denim and pleather to play with.
I got out the old trusty Ottobre and traced a pair of jeans with an elastic waist – no sense in getting too fancy with a real fly.
I ALWAYS add my seam allowance as I trace out the Ottobre patterns, except for this one time. I have no idea why. It worked out though – I just pinked the seams instead of serging and it worked out. Still – kicking myself. Since I made 2 pairs, that’s just more of a pain in the ass than I wanted. I measured and added the ‘knee patches’ and just picked the pockets to make into pleather.
I made a green and tan pair. Getting the creases out of the pleather: not so easy.
OMG – topstitched baby butt!!!! so cute!! I used my Teflon foot for the whole thing. worked GREAT. a 90 denim needle on the whole thing too. EASY. I had no issues at all. Go Viking! DO experiment with samples of your vinyl/pleather….this tan one liked to ‘pop’ and crack more…it had a tighter knit backing and was thinner overall. I really expected this one to hold up better, but surprisingly did not. It’s not super noticeable, but I’m not going to buy more of it.
This pleather took the stitching much better. It was thicker – almost like upholstery-foamy-knit on the back side – not really thick, but thicker than the tan version. I love it more – it’s Chanel-meets-Queen. I blew out the exposure on these so you can see the stitching on the black.
goofy-artist
freddy-mercury-pants
Ok, so I may have ventured a bit more into the Freddie Mercury category than the Coco Chanel, but I love it.
I’m loving getting the Ottobre subscription. The last pattern I did for the babies was a knit and a bit more on the intermediate side. These Bermuda style shorts are on the super-duper easy side.
They’re from the 3/2011 issue (you get a free back issue if you order a subscription) and they’re soooo customizable.
Destructions
The kids and I sat down with the photo from the magazine and decided how they wanted them to function. Long, short, pockets, etc.
Design Team Notes
They only wanted front pockets, and this round we’re doing walking short length for Alex and almost clam-digger length for Hazel.
Hazel’s are a gifted fabric that feels like it’s probably linen or a linen blend.
Hazel Bermudas
They’re very light weight and breezy. She had her pick of the fabrics and made a good choice!
I took some pink grosgrain ribbon to trim the bottoms and the pockets.
grosgrain detail
The pockets are lined and sewn on top of the shorts making that much easier!
They have a cute mock-fly on the front.
Mock Fly
It would be super easy to fold that part of the pattern under if you wanted to skip the fly.
Here’s a side shot after she wore them all day…
Hazel Left
And there’s plenty of room for the buns…
Hazel Back
The obligatory little sister matching outfit is just a onesie with a zig-zag stitched Z for Zoe and an elastic waistband skirt with pink Kona binding.
Super Z
Alex’s shorts were made with some leftover Robert Kaufman linen-cotton denim from my Miette skirt.
Alex Bermudas
I used the same variegated blue thread for stitching as well…
Alex Hem
I lined the pockets with a cute black and cream gingham.
Alex Pocket
However, after just a few hours of wear, the seams started splitting.
Alex Pocket 2
Really splitting…
Butt-Oh
Really, really splitting…
Damn Son
Lesson learned…while the RK linen/cotton is a great fabric, I should have made another Colette Sorbetto with the leftovers or maybe something with more give like:
Better Pattern for RK
Regardless, I’m really glad I found this out before I used it in a quilted bag or something. The linen-cotton does not hold up to any stress on it whatsoever. Even if I were to restitch the seams, or re-enforce the seams, the stress on the fabric is the problem. I suppose I could line them, but at this point, when they’re made just to fit…I’m going to have to call them a loss. It may not be the blend so much as how it’s done. The Aztec vest was made in a RK linen and is holding up great, and I have some yarn dyed Essex that many quilters use and is thicker feeling than the cotton-linen.
Point is, if you’re looking to use one of the linens, I suggest sticking to the Essex or the straight up linen if you need to sew something with stress points aka structure. My Miette skirt went through the wash this week and held up great, therefore, in a garment with more drape, the linen-cotton is a wonderful option.
I dunno….admin work puts a sneer on my face….even if it’s for myself. The idea of “filing” patterns makes me just want to burn my bra.
That, and I need to SEE what I have….just the other day I was cruising the inter webs, going to finally buy a Renfrew and a Miette pattern, when I was positive I needed a knit-wrap-dress pattern too. I opened up my binder of patterns, and there was a Vogue knit-wrap-dress pattern staring indignantly at me. I already have one! (I have to come up with another reason to get a Cake pattern now….)
Which brings me to…well, I use binders.
The Binders
Specifically, BIG white view binders in low-VOC and D-rings if I can get them.
I use sheet covers and tabs.
Tabs
Tabs not because I’m going to actually number and collate and make a table of contents…oh hell no. hahahaha. NO. Just to have a place to mark between patterns.
It came time again to take the piles of patterns I had been accumulating and stashing around, and add them to the binders…so I took a few shots.
Time To Organize
If this idea helps you, great. If not, eh. It’s just an idea. Filing works for some people, just not me.
Here’s an example of a store bought Burda pattern. I use the crap out of this pattern–specifically the pants.
I put the envelope and unused portion in one sleeve.
Burda Kids Envelope
And the cut part and instructions in another…with any notes I may have. This pile happens to also be in a plastic bag.
Burda Kids Bag
My beloved Colette patterns get traced. I keep the booklet and original patterns in one sleeve and the traced patterns in another.
Laurel BookletLaurel Traced Pattern
PDF patterns are similar. Instructions in one, cut patterns in another.
Peek A Boo Sun Hats
The inside pockets can hold wonky, oversized patterns.
Oversized Patterns
I use the view portions to hold receipts, mostly so I can remember the fabric types, a ballpark of costs and what ever miscellaneous items I’m too lazy to find a place for…
View Binders FTW
After this cleaning, I can see I need new binders for quilt patterns and bag patterns as they’re growing to that point.
Need Another Binder
So…the pros are that I can leaf through them like a magazine. I can get an instant view of what I already have vs. what I might need. I also have no problem storing multiple traced sizes or versions to one set of instructions.
Cons are storage for the binders…they could, after this, still go down in a large drawer if you wanted, but mine sit on a shelf. Also, I’ve yet to decide how to handle traced patterns out of Ottobre or books. My traced patterns are very well labeled, but the visual of the finish photo would help. I’m not into printing more than I have to…so we’ll see. For example, I’ve printed the Miette pattern recently without printing the instructions, and I have some Craftsy patterns I haven’t printed yet…more decisions. My Burda book patterns, which I have the book on iBook, are ok because of the instruction covers.
I need to make a decision there soon because I totally forgot about the Craftsy patterns! Whoopsie! I may not have needed that Renfrew after all….oh, who are we kidding, sure I did!
I have 4 kids and a really great group of friends with families too. My unscientific study shows that most parents, especially those of newborns, would like to very much avoid putting garments over-the-head….at least until about 3 months of age. You really want the kimono-wrap style as often as you can get it.
Now, finding the right wrap-style pattern which I found infuriating. I know I’ve had Tea and Zutano baby clothes over the years that were exactly what I was envisioning but the only place I could find the exact styles I wanted were in Ottobre and since I didn’t have the back issue from 3/2011 I wanted, I decided to tell Alma to just hold the baby in for longer so I can get the issue shipped to me.
Can you imagine telling a pregnant Texan to hold a baby in longer? In summer?? HAHAHAHA, that cracks me up.
Anywho, Ottobre is so awesome. I got it just in time – here’s the awesomeness:
Ottebre Pattern
It’s perfect. Separate snap crotch is essential, no actual real ties because when they’re screaming and you’re trying to get them dressed, crying over cute little ribbon bow ties is HELL. This is snaps all around, a cute wrap skirt so that in the heat of summer, little baby Vivian can just wear this and look completely dressed. Yes. Perfect.
Ottobre patterns are the bazillion color-coded-on-one piece-of-paper kind that include detailed tailor mark, so you have to trace them thoroughly. This little section is the instructions, so you really rely a LOT on those trace marks:
Ottebre Pattern Instructions
While this pattern isn’t complicated, you do need to know basic garment construction to feel at ease with Ottobre.
I emphasize transferring the pattern markings again; you will rely on those the most.
Ottebre Pattern Prep
And you have to add seam allowance anywhere that is being joined, but not having binding…I marked that on the pattern as I traced the paper, then when I cut the pattern, I used a guide to help me. I’m a die-hard rotary cutter user…
Add Seams
I read the instructions a few times, and then even at some point just put them together on my own. Yes, them.
I made one for Vivian
Newborn Size
and one for Zoe.
Pretty Baby
Zoe measured out to the 80cm size, and I made the 86cm size, thinking ‘room to grow’ which I certainly got. I made the 56cm size for Vivian…it seems a bit big. My babies have all been over 22 inches long at birth, which is 56cm, but I’m 5’9″ and tend to make big 8-9 pound babies; Alma may not necessarily do the same. We shall see.
I used simple snaps for the crotch area – pearl snaps in the crotch seemed a bit chunky.
Here’s Zoe in action, ‘gardening’ in her kimono-wrap, skirted onesie:
Play Dress
We need to re-pot the oregano mom…
GardenerWater Play
The bottom definitely got saggy as she played in the water more. In addition to being a bit big, the thicker, soft knit weighed down as it got wet.
Saggy Bottom Girl
You can see here how soft and thick the knit is in baby hands…even though it’s from Joann’s and I’m really, really not liking Joann’s right now, it turned out great.
So Mad At Joanns
Baby elbow dimple!!!
Elbow Dimple
Overall, it’s a win. I’m very happy with the Ottobre subscription and patterns. They’re worth every cent.
The customer seems satisfied…
86 cm
This was also my first use of a double needle for top-stitching the knit binding. OMG. I am in love. I had to use the 4mm needle; the smaller one did not jive with Ms. Viking, but it is a dream. If you haven’t used one, it does those two parallel top stitches you see at the same time while it hits the bobbin underneath and creates a zig-zag on the bottom. So nice. I’m a convert. It will stay my overlock wanting for awhile.
So, as info, between using the serger on the seams, and the double needle on the binding, they came together pretty quickly. I hand-basted the gathers for the skirt and sleeves – it was just faster than swapping out the double needle for such tiny amounts of basting stitch. I did two in a few days – that included tracing the two patterns for the first time. I imagine future Zoe outfits will be much faster.
You can go online to the Ottobre site, and there’s a page of each issue that shows the patterns and sizes included. You can buy just one if you want, or do a full one year subscription. They also have an Etsy site for one-off purchases, fabric and a few freebies for print. I highly recommend. My friend Rena did the Ottobre free underwear pattern (PDF dropbox link here) and it turned out adorable.
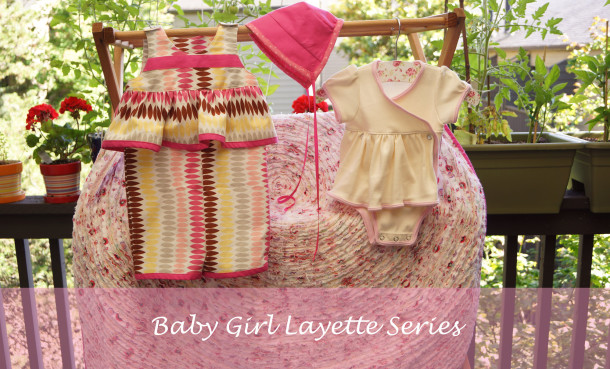
Oh, I’ve been a bit quiet on here but not for lack of material (heh heh). I thought it best to organize the entire Baby Girl Layette Series into something more organized looking which required me to finish the dang thing. Alma, a darling lady in Texas, is having her first baby, Vivian, sometime in the next month so I had to hustle. I was worried I wouldn’t be able to do everything I wanted, but Ottobre FTW! Man, I put in an order for a 1 year subscription plus a few extra back issues and BAM! They shipped fast! Mad love, Ottobre. You are my new favorite.
BUT since I didn’t think I’d get it in time, I started/finished the jumper and ordered the pearl snaps…I really wanted pearl snaps for everything because, hello, Texas! It may be my Pacific NW humor, but I really needed to use pearl snaps.
I had a snap punch and thank GOD I practiced first!
Cracked Snap
No matter how gently I tried to set the snap, it cracked the pearly plastic. Argh.
Not to mention totally smashed the ‘male’ side too…
Smashed Snap
So, I broke down and got one of those snap plier things that I’ve heard nothing but suckage about, but my friend Rena totally loves them, so I went for it. I’m not in love, but it worked.
Texas Snaps
AND OMG, I love the snaps. They’re perfect. The jumper turned out exactly how I envisioned it. It’s modern cutesy. That’s a genre, right?
Jumper
I used a Kona in hot pink instead of the lace in the book, and French seamed the whole thing. I *forgot* to French seam the inside sides of the skirt or even zig-zag/serge the edges so I’m going to have to put some anti-fray crap on them. Argh. Oh well. It’s not exactly newborn size; in fact I think the pattern says 3 months, but it’s just too cute and it matches the rest of the set.
Overall, the pattern wasn’t too brutal. It’s not for super beginners as it takes some leaps. At one point, I just put the book down and assembled it how I saw it going together…which usually works out for me….until I forget to finish the seams under the skirt, ha!
This post is a bit short as it’s late, I’m zzzzzzz, and the next few are much more involved, like another faux chenille blanket! I obviously lost my mind!