PATTERN: Named Patterns Kielo Wrap Dress With Sleeves

The Named Patterns Kielo Wrap Dress came out, when…forever ago? I wanted it from the get-go, but I really wanted it with sleeves…then they released a sleeve pattern hack..and I still waited. That was silly of me.

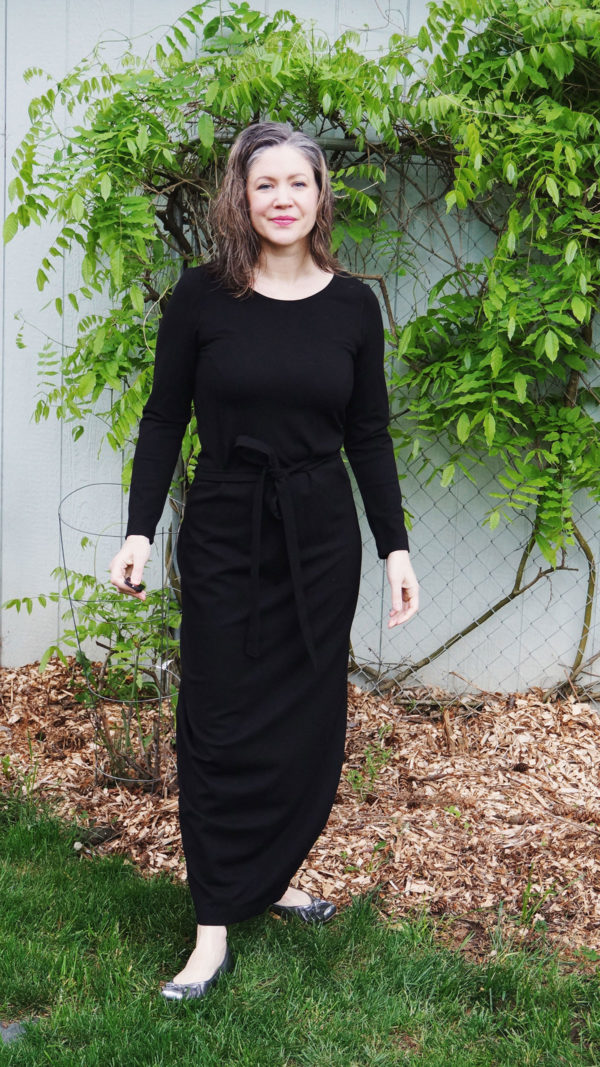
I’m really loving it. My black long version was made on March 8, 2018. I wear it a lot…it’s like a secret snuggie. I’ve been trying to wear my makes a bit before I blog them…like on purpose. lol. I feel I can give a better personal review if I live in my makes a bit.

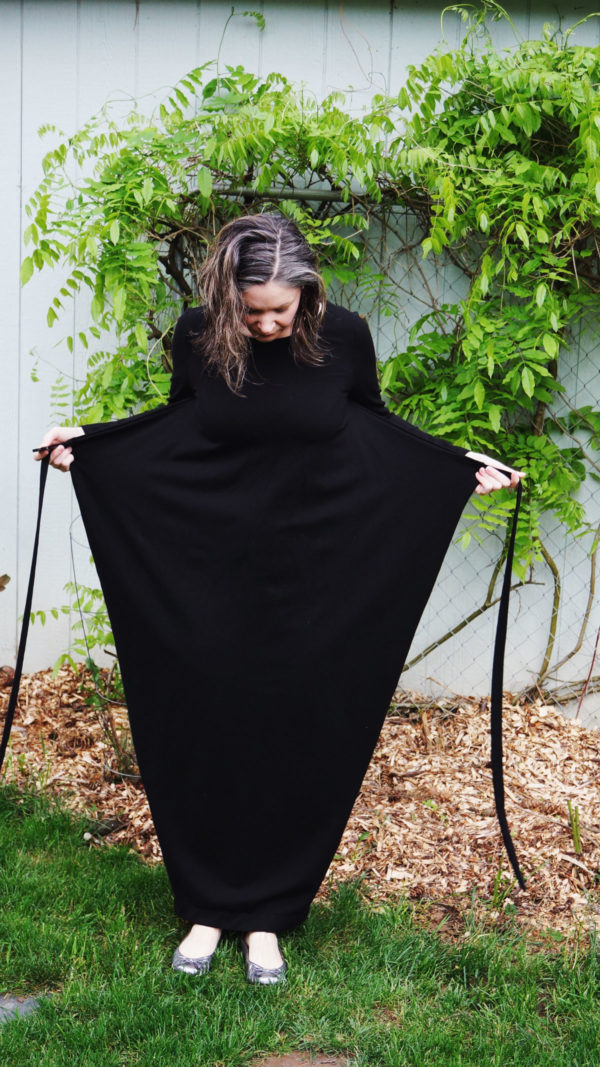
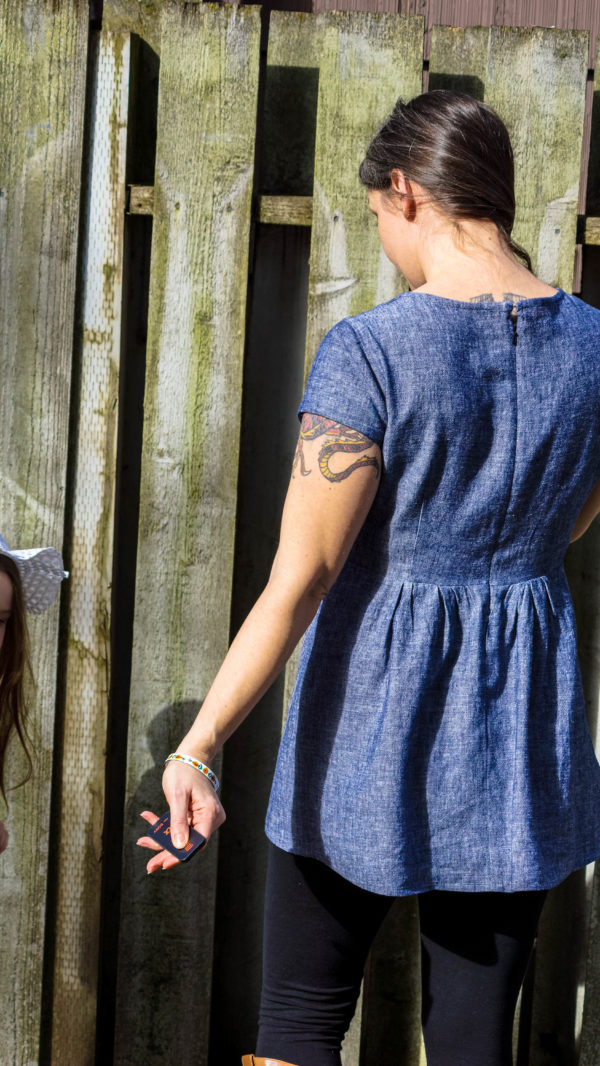
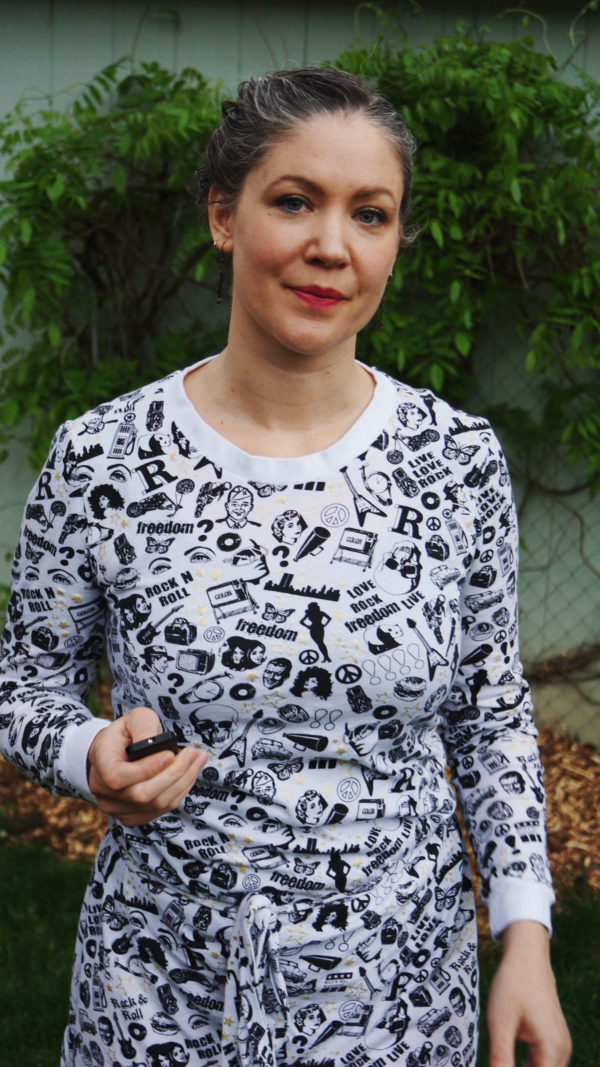
Obligatory flying squirrel shot.

My first version is a heavier weight fabric than recommended. It’s a Robert Kaufman cotton ponte from Modern Domestic – I bought all of what they had but there are some other great knits in the store. I love the fabric for this dress. In the Pacific NW, we have a lot of 60ish degree days with cloud cover, like today, and the Kielo with sleeves in a heavier knit is perfect.

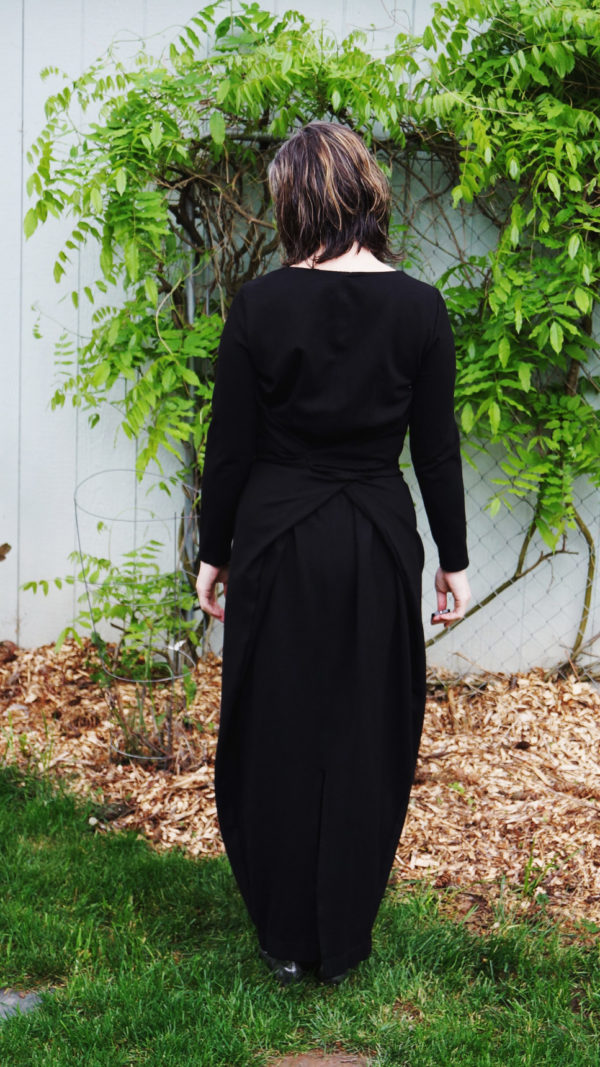
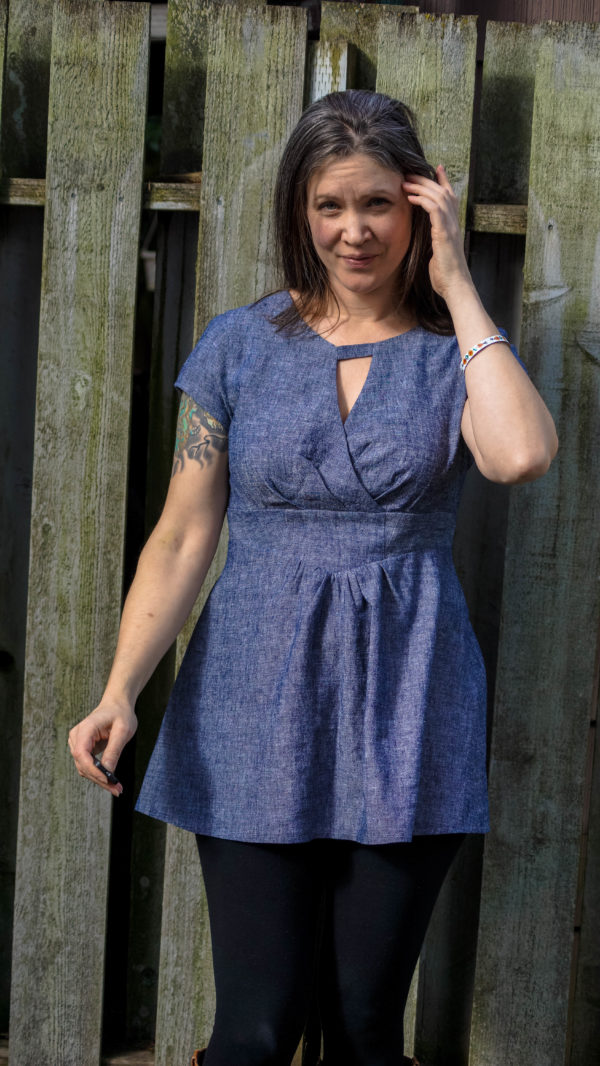
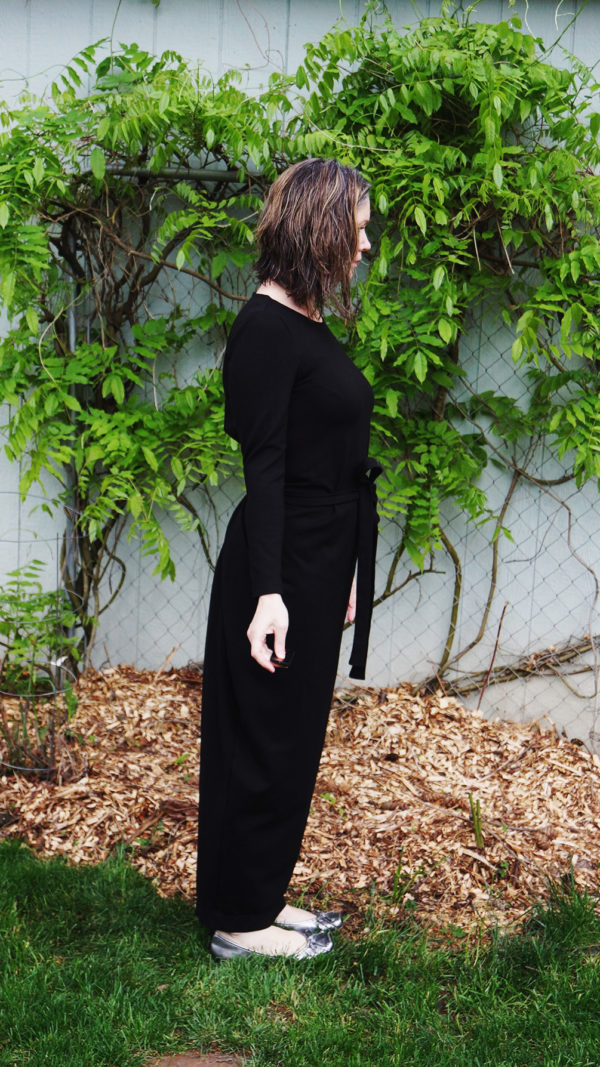
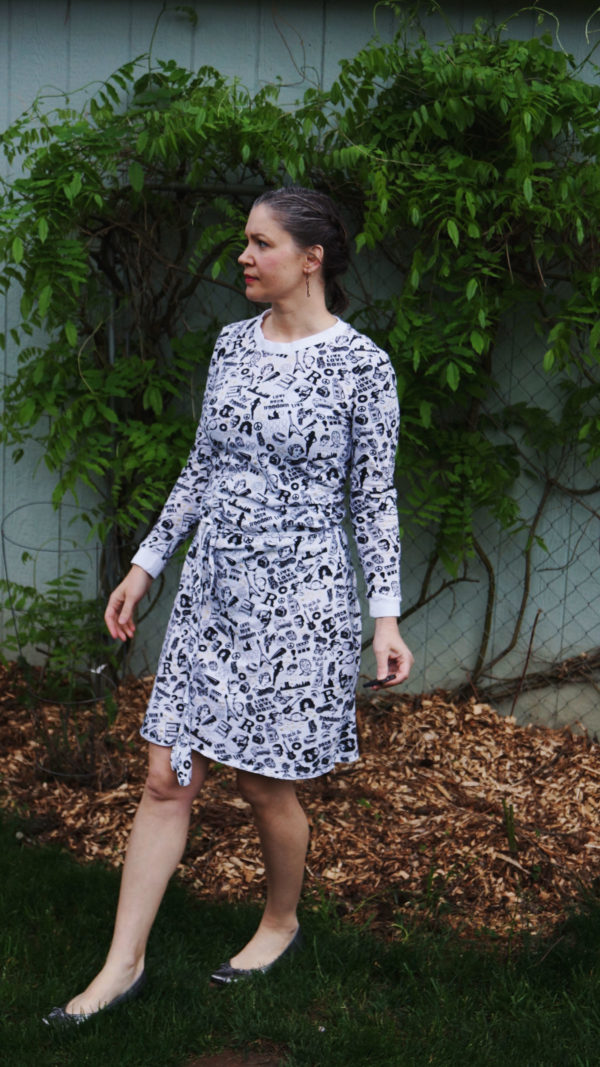
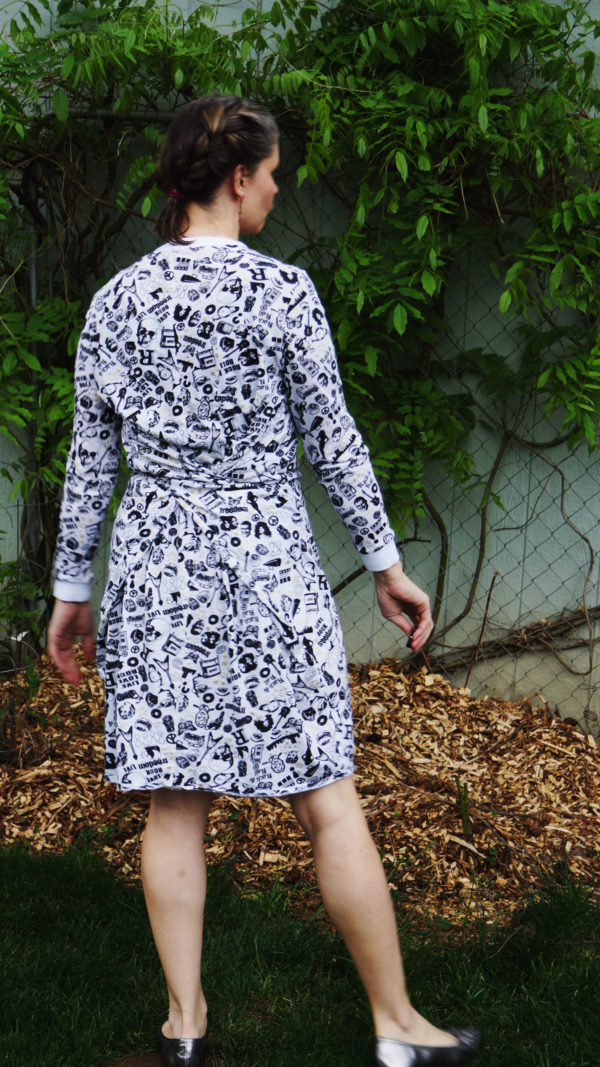
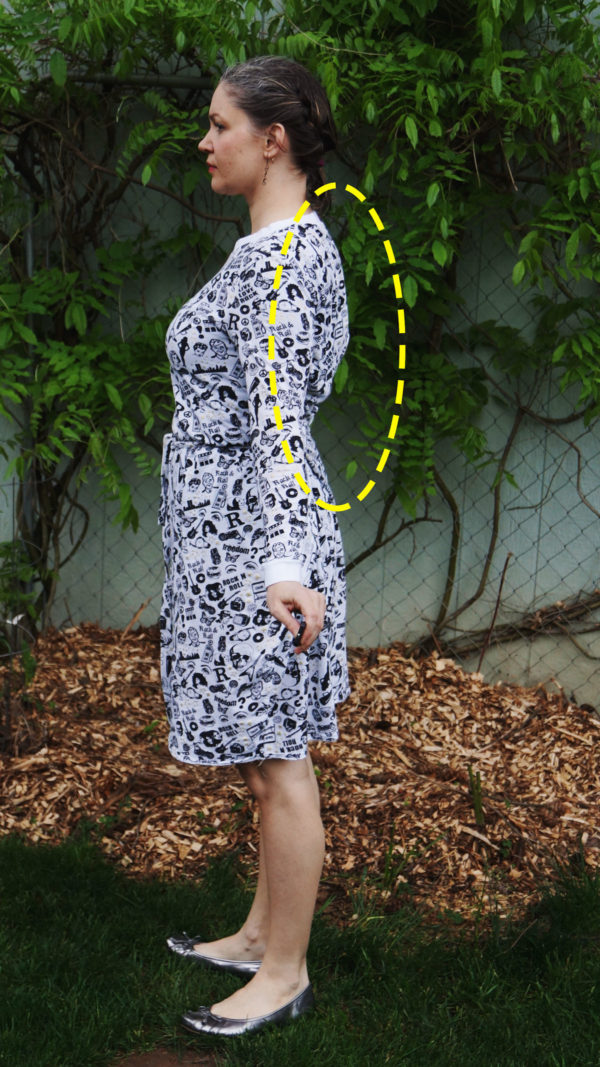
This original make is cut as-is. I don’t recall, I think I cut a straight size US 10. FBAs, swayback adjustment, and height added above waist are my normal adjustments, but being knit and Named has a taller base block, I didn’t make any adjustments. You can see, tied in back above, and tied in front below, I’m getting quite a bit of pooling in the swayback area.

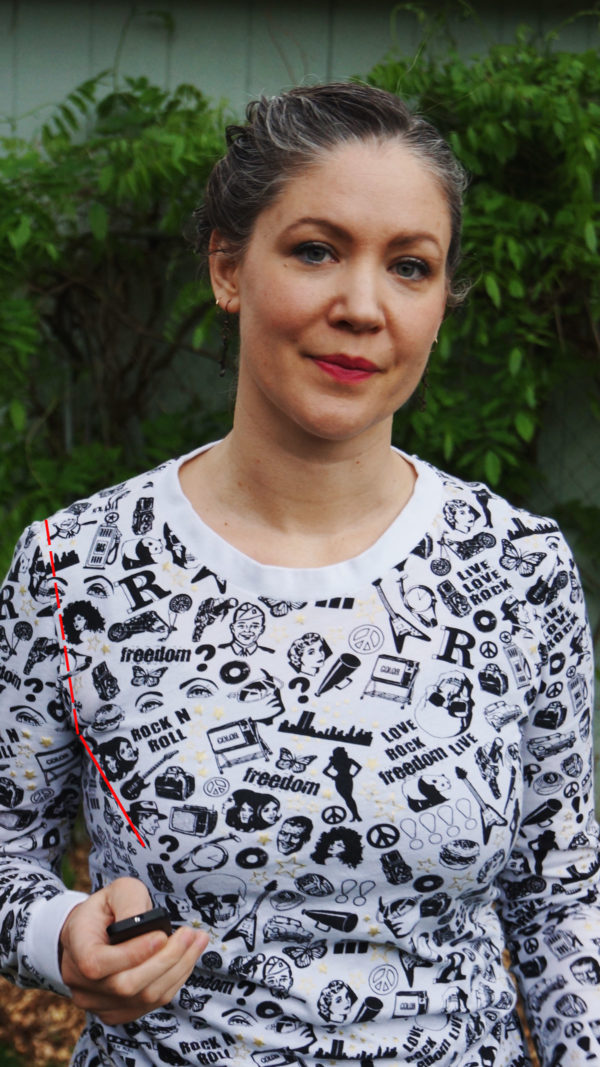
Less so in the tied front, however, in this front shot, you can see I certainly need an FBA, and bust dart adjustment:

and here:

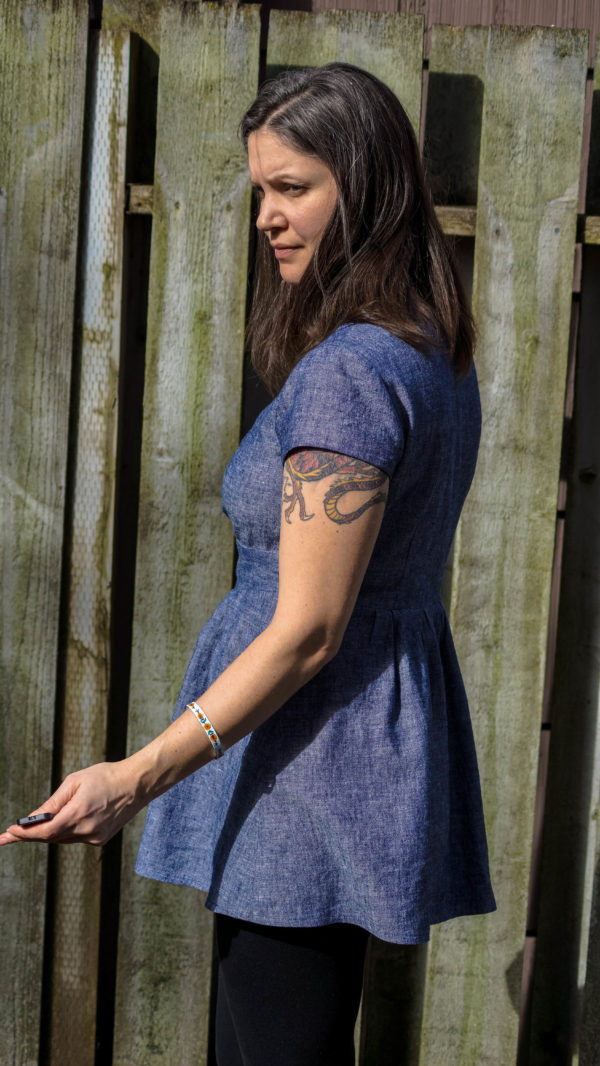
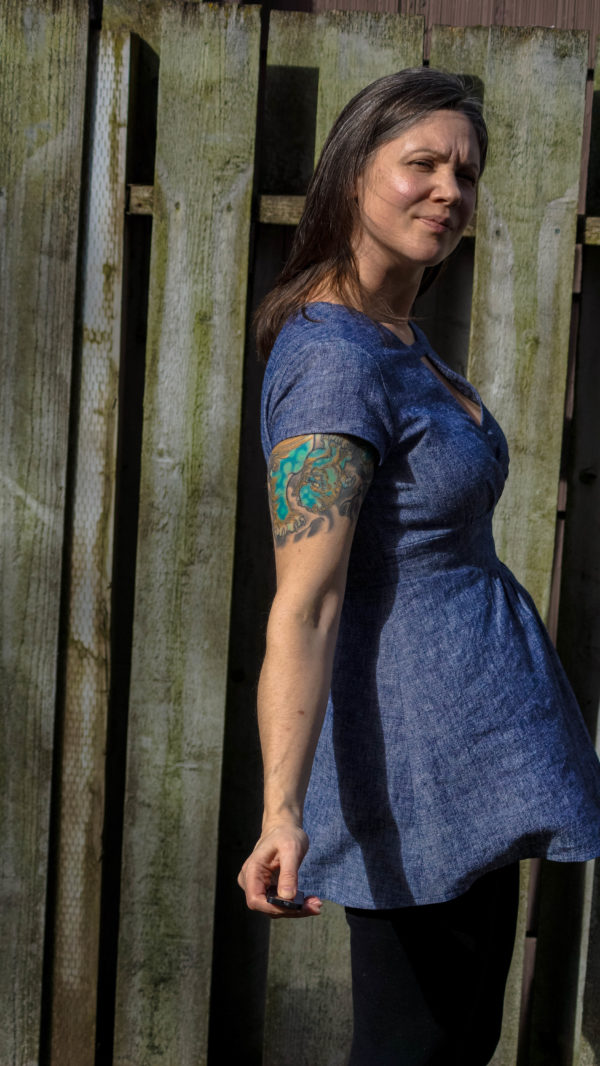
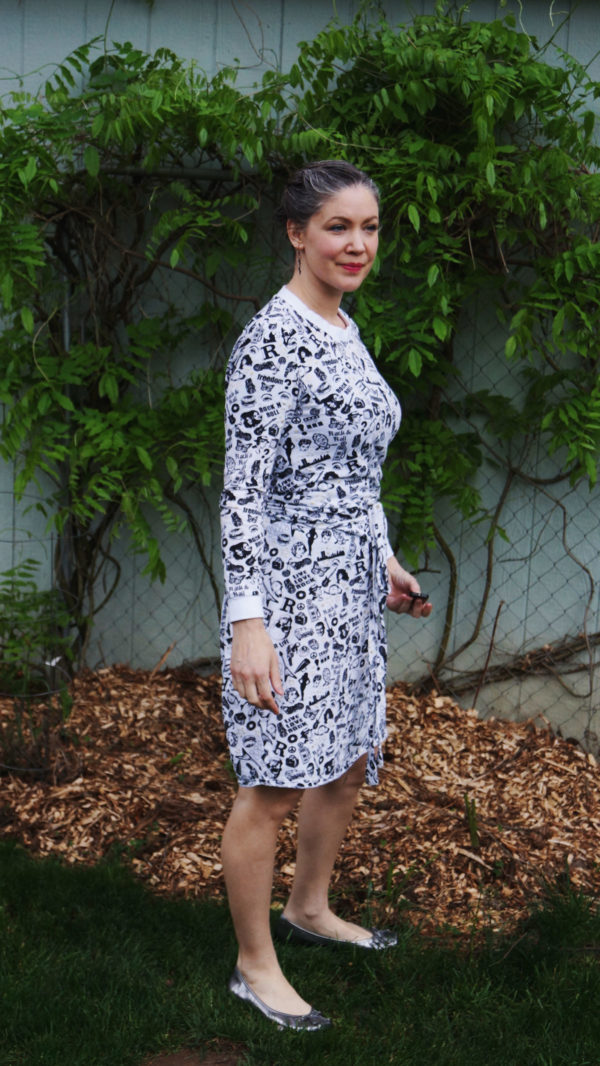
But most obvious here, from the side:

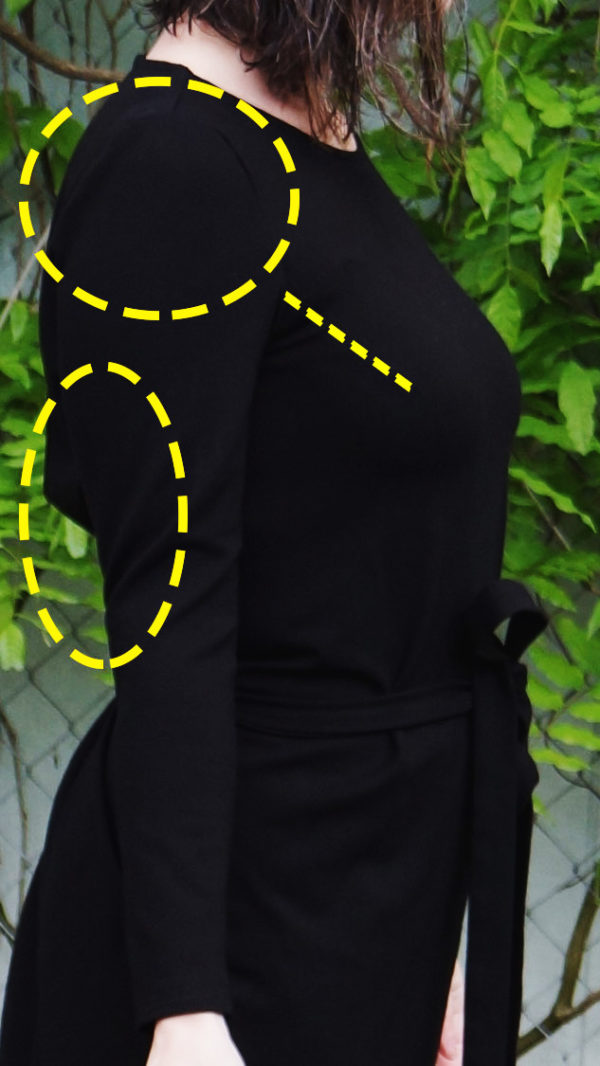
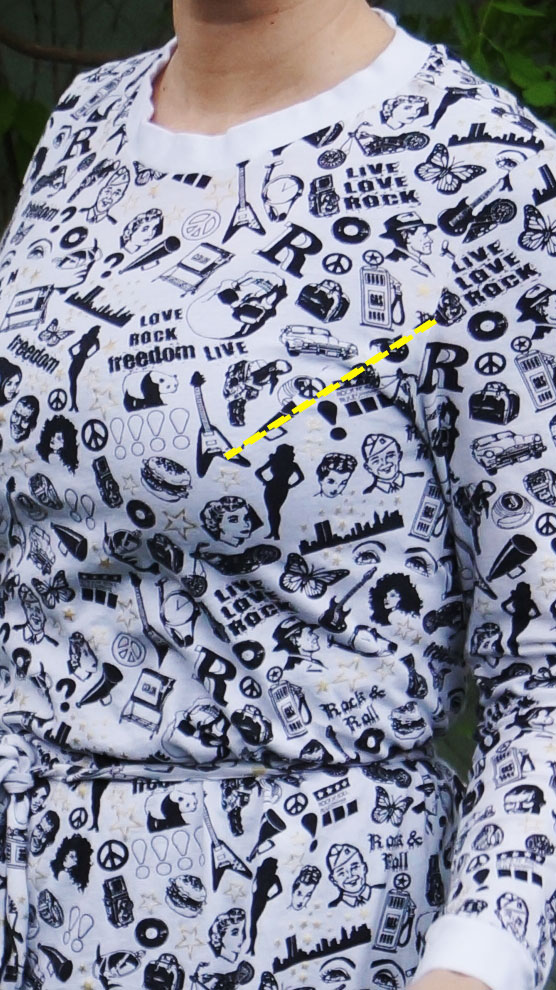
Close up, with lines so you can see on the black:

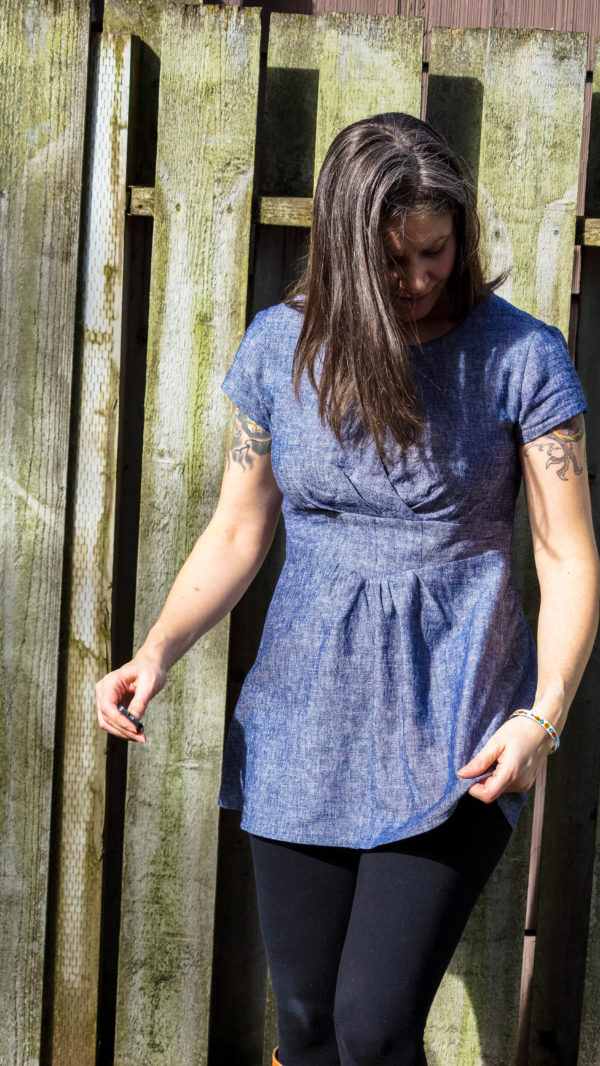
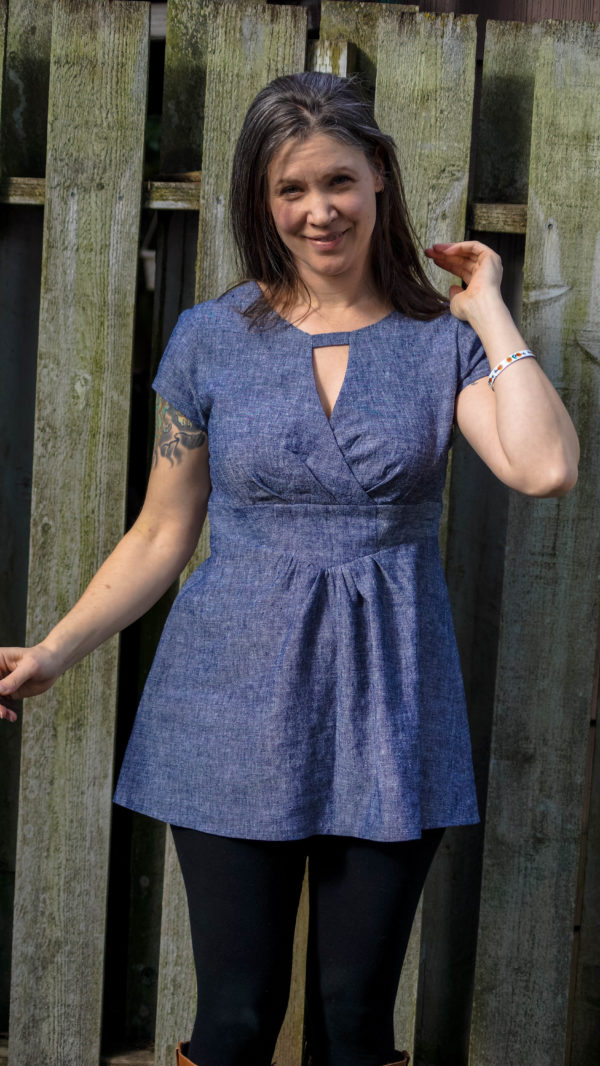
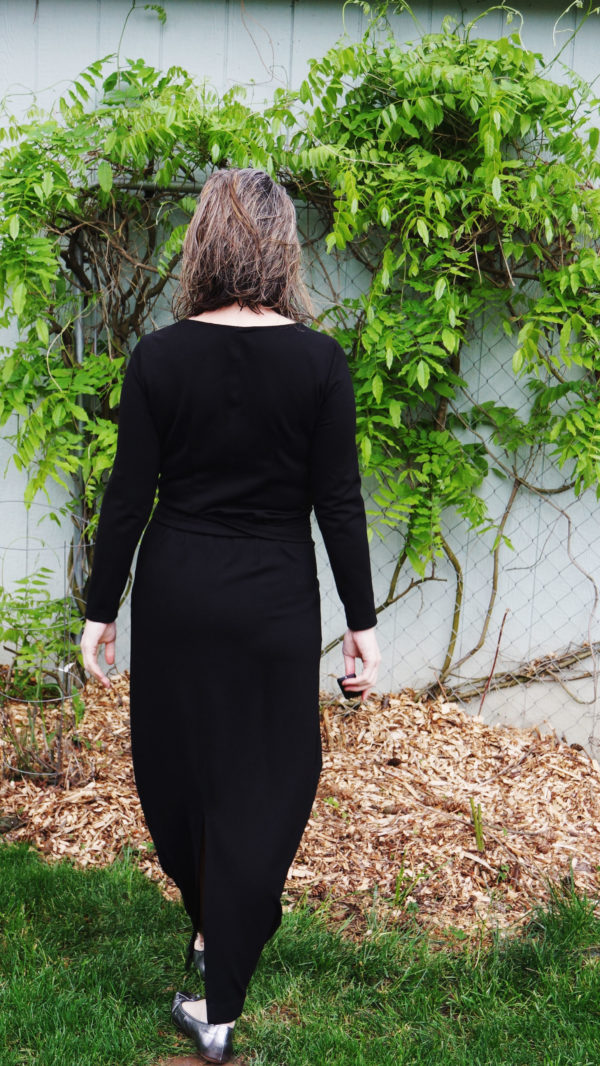
I added in a broad shoulder adjustment too, but probably could have skipped it. I shaved about 2.5 inches total out of the back, made an FBA, and used a lighter weight fabric on the second version.

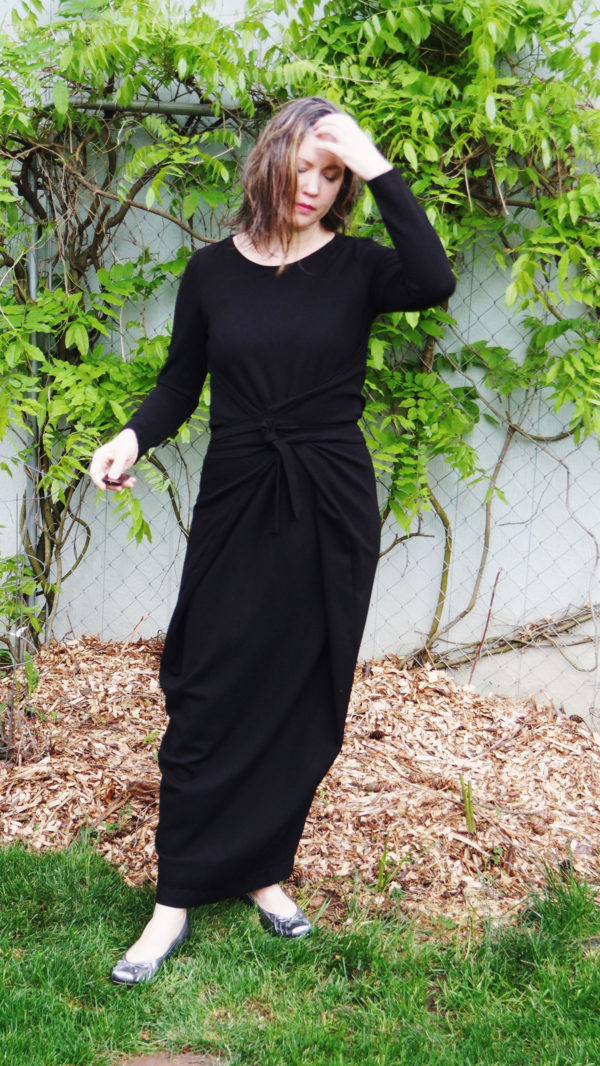
I think I prefer the longer version, but the fit adjustments make the chest feel much better. Note: I normally where this second version with leggings and tennis shoes.

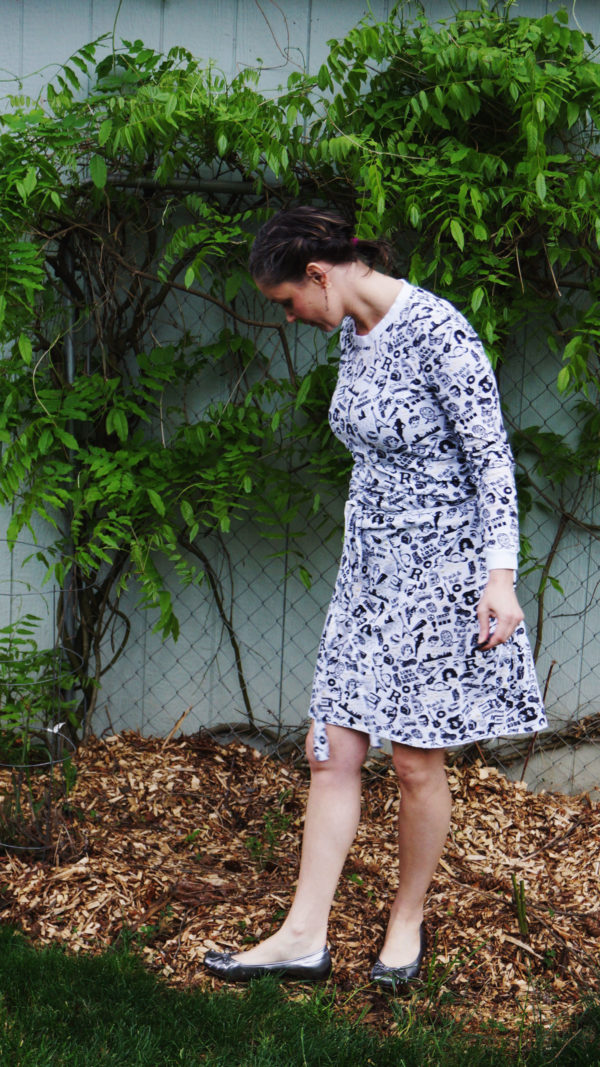
Busier fabric makes it harder to see, but the bust fits much better.

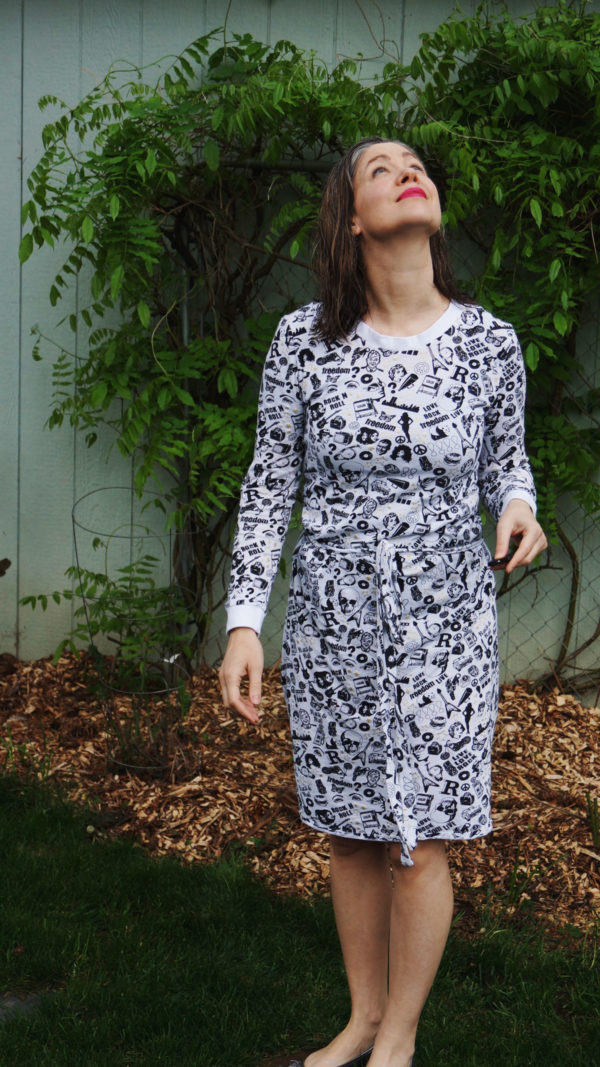
Hoping the crows above in the giant fir tree don’t poop on me….

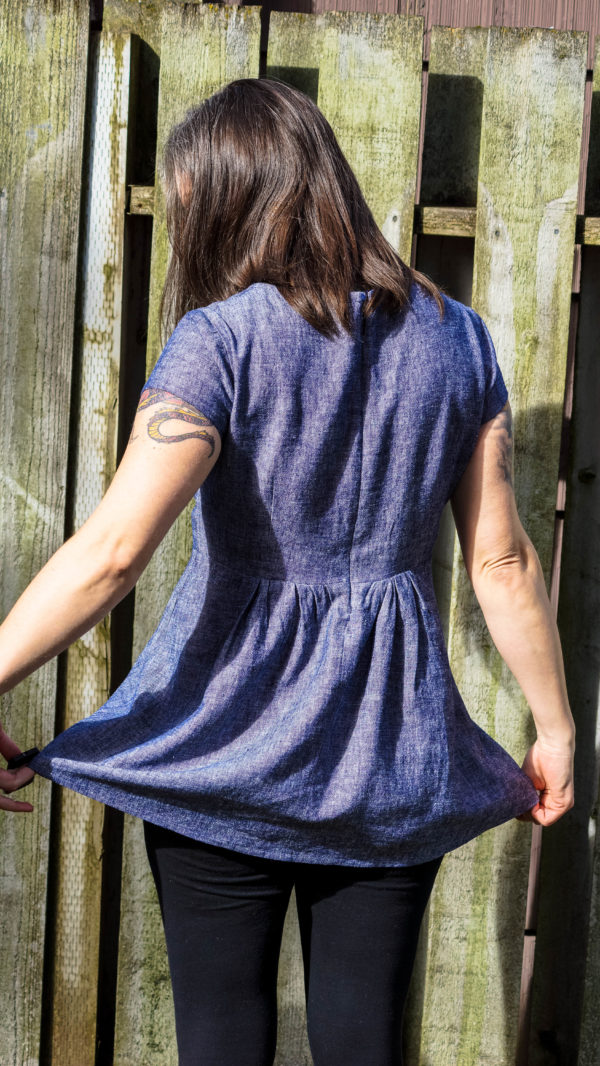
Side shot, tied in back, much less pooling in the swayback area:
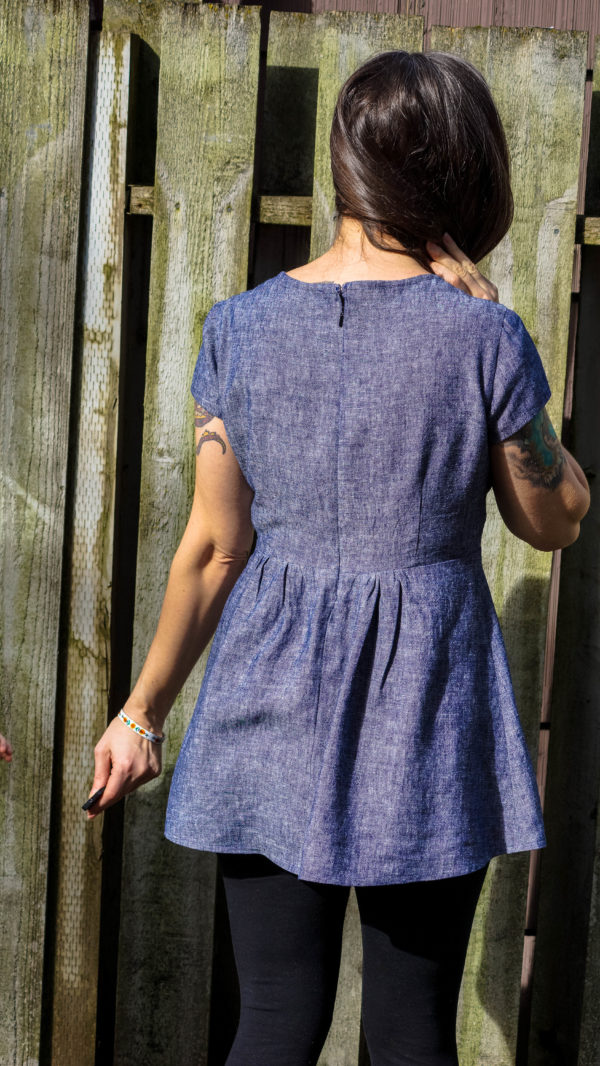
and back:

Some close-ups and lines for visibility:

same shot with lines – you can see here I can shave a half-inch back off of those shoulders:

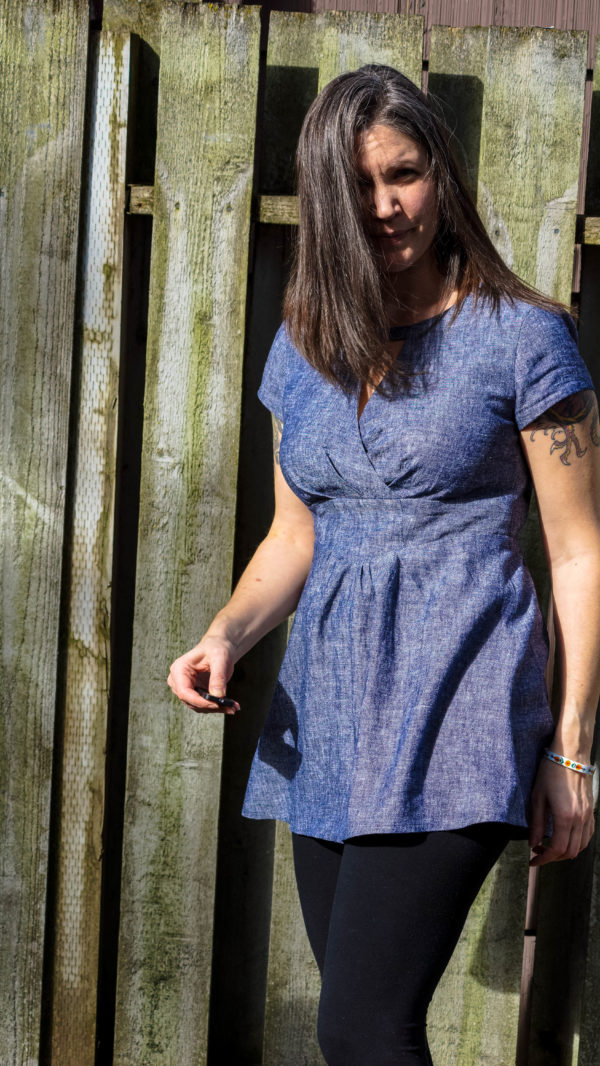
Just a tiny bit of expected volume:

Better shot of moved bust dart and FBA:

That dart was just dropped ever so slightly – larger bust=more area to cover.

This was my first Named Patterns, and being on the tall side of the spectrum, I’m loving my experience. I don’t know what it’s like to have to shorten a pattern, but I will say when Named says this is based on a B-cup, I’d say that’s a bit generous. I’m a large C/small D. I do want to make this pattern in a stretch-woven (as suggested by the pattern), but I’d have to muslin the bust first even with my current adjustments.

Have you made a Kielo or any other Named Patterns? What is your experience with them?

CLOSET CASE PATTERNS: Skinny Ginger Jeans

I DID IT! I’ve had the Closet Case Patterns Skinny Ginger Jeans pattern since June 2015. (sheepish grin)

Now, normally I’m not afraid to sew anything – I’m not really afraid to fail. It’s just fabric, and it’s always a lesson. However… My pants fitting has been on the scale from “Meh” to “I-JUST-BLEW-OUT-THE-ASS-OF-MY-PANTS-AT-COSTCO.” It’s true. Normally I have to scoop out the crotch, or add some hip length – I’m tall with most of it in my torso. Thanks to our amazing sewing community, Bad Mom, Good Mom pointed out on my Colette Juniper pants, most of my fit issues could be fixed with going up a larger backside size than the front. I’ve made about a dozen pairs of pants, but nothing quite like my Colette Clovers that actually split up the backside while picking up a case of water at Costco. That has steered me clear of close-fitting pants for a few years.

I had enough of the fear, and frankly, everyone else and their dog has made Ginger jeans now, so I was bordering on being pathetic.


I picked up a 1.5 yard remnant at Modern Domestic…it wasn’t labeled and it’s not on their site, but knowing MD, I’d says it’s a Robert Kaufman, probably close to this 8.6 oz stretch denim here. I paid about $25, so that’s about right MD would be a bit higher priced than fabric.com as they’re my locally owned fabric store. I would definitely recommend it and use it again.

I was going for a hopefully wearable muslin, as I wasn’t ready to cut into the Cone Mills I’ve been hoarding or the velvet bottom weight I have from Britex, but actual muslin fabric wasn’t going to test correctly, so hell with it, right? Just do it.

I only had a hot pink denim zip in my stash (hee hee), and I FUBARed the placement a bit – it’s about 3/8″ off – I read “line up edge of zip” wrong at the fly. Whatevs. I also have just a regular button on them, and skipped the belt loops – I’m still having top stitch thread issues. In fact, half of the top stitching is popping off a bit, but that’s a technical issue on my end, not the pattern. I tried to do it on the Janome and on the Viking, but I’m going to have to break out one of the vintage machines IF I’m to get that top stitch thread to work – or I may just ditch it. I’m not that in love with it anyway.

What do you think of the pocket placement? Should I move them up a cm? I can’t tell. I’m not a good judge of my own butt. I took a 3 inch wedge out of the back yoke – which I need to blend better on future pairs, but other than that, it’s pretty spot on. I’ve worn these for days, and this is fresh out of the dryer, so they’re a bit “packed sausage” at this point. They will loosen up a smidge, but the denim is really good and there’s no bagging out anywhere. You can see below where the wedge of the yoke meets the back seem of the butt and there’s a little wrinkle where it wasn’t blended well on this version.

For me, the waist is now at 0, the largest point of my butt/hips almost at a 14, and the rest is at 12. I’m fairly hourglass shaped, and gain/lose weight pretty evenly in that hourglass ratio, so this is normal for me.

Here’s the IG post of that wedge – I didn’t get a “good camera” shot of it:

The legs fit perfectly. They’re bunching up a bit because I’m refusing to hem them.

My husband keeps teasing me that he’s going to hem them. I don’t want to….I want to leave them raw. We’ll see. I don’t know what the fashion consensus is on that. This is the full length of the pattern without any removed, as reference if you’re looking to make the pattern.

Sexy pants. LOL. Didn’t the 80s just totally ruin that word? Sexy. Ew. But the pocket stay on the inside?!? Holy crap. It’s like…it’s like a smoothing magic, without the discomfort of actual gross sweaty spanx or something.


Please excuse my mud room – it’s Oregon and we’re in the rain-half of the year.

Post post notes:

I had the pattern printed before the latest updates to the pattern. I think there have been 2 updates, and my version is smack in the middle. Meaning, IF I would have had the latest version, I would have probably scooped the crotch out the cm or so that was put in, and taken more out of the yoke? I think? Regardless, I did baste the sides, and the construction of the pants makes fitting on-the-fly really easy.

Let’s talk drafting for a minute. I’m just now learning pattern drafting and it looks so much easier than it truly is. The base pattern/sloper, or block, must be good before moving on to style, and then eventually grading to different sizes. To have the success of these jeans on the level that Closet Case has had, which is near cult status…well, they have the magical block. Will this fit everyone as easily as me? Well, no. But, again as reference, I fit J Crew/Banana Republic size 8 or 10 off the rack just fine. Sometimes I have broader shoulders/bust and the waist is too big, or whatever, but for the most part, I’m shaped pretty RTW-friendly. So, if that’s you, then this pattern will be GOLD!

If that is NOT you, Cashmerette JUST released the Ames jeans in different body shapes. While I have not sewn any Cashmerette, I have seen the detail work that has gone into their drafting, not to mention their HUGE fan base. Sewists aren’t fans of crap pattern companies. Well, I take that back, Big 4 still exists, but I submit that’s because they’re cheap (read that how you will.) Indie patterns cost more, and must be made better to succeed, and damn if Cashmerette hasn’t succeeded! I can’t wait to see Cashmerette’s jeans all over the Sewscialsphere.

Pattern Make: Lisette B6168

I made myself something! OK, honestly I’ve made a few things but I haven’t taken photos. Let’s blame the (PNW) rain.

This is a Lisette pattern, and it’s only like…2 years old or something (the pattern, not the make), so if you haven’t bought it but want to, I’d hop to it. It will probably be discontinued soon. It’s often on sale.

There’s only 4 patterns now listed on Butterick for Lisette – that seems odd. But then, that’s symptomatic of a brand dilution problem IMO.

Anywho – funny story. I picked up some Robert Kaufman Essex linen from Modern Domestic in what I THOUGHT was the color I needed to finish up kitty blocks for my Elizabeth Hartman quilt. If you haven’t seen her animal quilt designs, I have no idea where you put the rock you’ve been under, but they’re adorbs. So OF COURSE I didn’t take a swatch with me, because I’m such a pro, right? LOLZ. Essex comes in like a million variations on just blue alone, so I ended up with the wrong color. Happy accident!

I had just enough (not really) to make the short tunic version, but NOT enough to make the waist ties as well.

Note to self: next time get enough for the waist ties OR resize the waist down….waist ties are easier.

It was a surprisingly easy make. Oh, and tooting my own horn: I will usually still look up tutorials for things like welt pockets or invisible zippers just for hand holding, but I was too lazy to look up an invisible zip tute this time, and GUESS WHO INSTALLED IT PERFECTLY THE FIRST TIME ANYWAY? That’s right. I’m freakin’ BOSS. (totally jinxed myself right there.) The zips I had on hand were shorter than called for, so I am sure it’s a comedic sight to watch me try to wiggle this dress over my shoulders and bust, and there’s a good 1.5″ gap at the top where I put in a hook/eye, but whatevs. Benefit of having skillz: make it work.

I think my camera remote battery is dying….or the sensor was up too high….but ignore the weird faces, k? k.

What I like about the tunic/dress thing:

  1. Easy over leggings outfit! yay.

2. Great/easy construction…although I don’t like the facing on the front, but bias facing on the back. That makes for some awkward shoulder seams – the bias back has 1 more layer than the front, not including pressing the seam when done. That could be designed so much better….like just facing for both, really.

3. The back is cute….it lays flat without the ties added on.

4. The bust gappage-flashing isn’t as bad as you might think. See – me testing it. SO SEXY. snort. There’s some boob gappage below… I guess it’s ok. But I’m not going to bike in it, you know?

What I don’t like:

1. Sometimes, I look freakin’ preggo. No likey. The front doesn’t lie as flat with all the top cross over and gathering. It really needs those ties to go flat again under the bust, or, I could possibly see maybe the weight of a full skirt, but I really don’t think that would be enough not to look preggo after my bust…

2. and no pockets….I really wish I added inseam pockets. because dress+leggings and mom-life…yeah. need pockets.

3. that weird shoulder seam with the facing to bias facing construction…

4. and I think…while the sleeve insertion went perfectly, they’re double layered AND sorta cap sleeves…I think they should be more….flowy dainty or something. Essex linen is NOT a crisp fabric like a shirting…anything thicker and it would look really weird. I don’t know. maybe a tulip sleeve would be cuter here or something longer?

Sometimes it doesn’t look that bad…but every photo of me on Easter looked … well. Not my favorite.

Not sure what I was doing here, but …hey, look at that hem. I let it hang overnight but there was nothing to trim the next day. And that perfect zip! Looks like sometimes I get a bit of a gap at the top of the back…not enough to take it out though if you see other photos.

I love RK Essex linen. I’d make everything in it and just roll around in it. It’s so yummy.

Trying out new photo spots at the new house with the waning winter sun. Maybe not the best location/time of day. Need to suss that out a but more. BUT lip balm and cheek color/highlighter made by ME. All the rest of the make up is Make Up For Ever. I splurged a bit as I was out and am happy I did. I like it so much better than MAC’s versions of same stuff. It was a good test run in these shots.

Still futzing with remote, but see how the waist band is kind of…well, it has too much ease there? That’s not how my body goes…it is not straight from armpit down, but it creates this illusion of straight down and then the skirt poofs out. I think the ties would have helped with that a lot.

Overall it’s cute. I don’t know if I’m so in love with it that I’ll make it again. That kind of bums me out. I have the Made By Rae Washi dress plus expansion pack, and I’m still all excited about the giant bow+sleeves version, but I really don’t want maternity wear… I’m going to have to think on that some more. I love the idea of dresses I can bike in during the summer. Maybe it’s all in my head?

Rainbow Roller Rink Baby Quilt

Sleepy Time

Zoe is 22 months old and I finally got her baby quilt done! It’s still a baby quilt if she’s under 2 years old, right? It’s been done for a month or 2, but I’m just getting around to sharing.

Cuddles
Cuddles

Zoe wouldn’t let me take the binky out of her mouth for the shots as it really was nap time and she was getting in the mood for some serious napping here…

Sleepy Time
Sleepy Time

This is Elizabeth Hartman’s Roller Rink pattern from her Modern Patchwork book. I made it baby blanket sized – which made a great excuse to FMQ!!

Clouds
Clouds

I didn’t follow a pattern for the free motion quilting, per se, but just made a loose design of clouds. Get it? Clouds, rainbow….well, it works for me.

Purples
Purples
FMQ Clouds
FMQ Clouds
Clouds 2
Clouds 2

Ms. Hartman has a few different color combos in the book and online, but I really loved the colorful ‘scrappy’ version she has in her book with tan and white boarders, so I stole that idea for my rainbow. I used a Kona white and a RK yarn dyed linen in Flax. I love that linen. It’s the most perfect tan in existence.

Yes, I just got all nerdy over linen. Ugh.

Cuddley Quilt Close Up

I’m really happy with it and so is the baby (because she’s not two yet…)

I did the binding in the linen as well, and Zoe picked out the backing fabric. Yes, really. She loved this crazy fruit fabric from Alex’s quilt, so I gave her a whole back in it.

Back'n'Top
Back’n’Top

Being that I cut all of these little pieces during the summer when Ms. Viking was in the shop, I have a LOT leftover….and made another quilt to be posted tomorrow!!

Right now though, nap time….

Nap Time
Nap Time

Make A Quilting Sampler!

Center Block
new quilting sampler

I finished it! “It” being the Anna Maria Horner feather blocks I started what seems like forever ago. I started them as practice piecing without any real direction with what to do with them. I do that FAR too often…I’ll just tinker with this here and eventually I’ll figure out what to do with it….It makes for a great process with lots of learning, but a very LOOOOONG process.

But they’re done now and they turned out so purty, I couldn’t justify the upcycled canvas backing I started with and leave them relegated to a corner somewhere. I started quilting them, again for practice, individually, so they had to be pieced back together in a QAYG (quilt as you go) method. This is my first time assembling QAYG blocks and I’m pretty happy with it. I re-covered the back with Robert Kaufman Essex linen yarn dyed in Flax, and used the same for binding and top-quilting the pieces together.

Close Up QAYG
Close Up QAYG

I used each block as an excuse to try out different quilting methods in sort of a quilting sampler. I love how each block gets its own personality simply from different quilting.

My first block was a free motion pebble pattern. I’m comfortable with this pattern; it comes pretty easily to me as I’ve probably practiced it the most.

Pebble Block
Pebble Block

Then I got a little crazy and tried to free motion some wood grain around top-stitched feathers. I need some more practice on that one! That did not come as easily and will need much more practice than the few minutes I gave it prior to the block!

Wood Grain
Wood Grain

Using a walking foot, I did the next three. First, an intense 1/4″ V, in line with the feathers’ angles. Quilting so close completely changes the drape of the quilt – it’s much more stiff. On a bed or back of a sofa, it would never look disheveled!

Quarter Inch
Quarter Inch

Continuing with the walking foot, I wanted to stick with the straight-line, but lose the rigidity and went for fractured quilting. Although the distance between the lines isn’t any more than 1.5″ at its greatest, the final block is very pliable and flexible compared to the 1/4″ quilting. This drape would be a cuddler’s dream…especially if that cuddler was feline.

Fractured Quilting
Fractured Quilting

Then, in the center, to tie it all together, I went with top-to-bottom wavy lines, this time in contrasting thread, or the thread in the lightest color element in the block as some may refer to it. Interestingly, as it looks, the drape is something between the 1/4″ straight-line and the fractured quilting. While they’re fairly close, they’re not cross-grain like the 1/4″ and the wave gives it a lot of flex, but not as much as the fractured quilting – at least not across the width.

Center Block
Center Block

I like the idea of having a quilting sampler to review when deciding how to quilt in the future. A tangible reference to see and feel how the quilting I choose will effect the final quilt is exciting. It’s also a great way to see how a straight line can look just as good as a curved or FMQ option, as good, but different. It’s also a good excuse, if you’re like me, to break out of a rut! I honestly don’t have a favorite now that it’s all said and done – they’re all good, just different.

The back, if you’re interested, is simple and does not reflect the mix of quilting that happened on the front since the QAYG method was used. You only see the quilting on each binding piece. Not that anyone will see it, but if they were to look, it’s nice and clean.

Robert Kaufman Linen in Flax

Thank you for viewing! Don’t look too closely at my hand-stitching on the binding…I can certainly use a LOT of improvement there! Seriously, I appreciate the audience and this medium to share my work.

Oh, quick credit where credit is due! The Anna Maria Horner feather pattern is all hers, but lucky for you (and me), is free here.

Ottobre Bermuda Shorts

Super Z
Matchy
Matchy

I’m loving getting the Ottobre subscription. The last pattern I did for the babies was a knit and a bit more on the intermediate side. These Bermuda style shorts are on the super-duper easy side.

They’re from the 3/2011 issue (you get a free back issue if you order a subscription) and they’re soooo customizable.

Destructions
Destructions

The kids and I sat down with the photo from the magazine and decided how they wanted them to function. Long, short, pockets, etc.

Design Team Notes
Design Team Notes

They only wanted front pockets, and this round we’re doing walking short length for Alex and almost clam-digger length for Hazel.

Hazel’s are a gifted fabric that feels like it’s probably linen or a linen blend.

Hazel Bermudas
Hazel Bermudas

They’re very light weight and breezy. She had her pick of the fabrics and made a good choice!

I took some pink grosgrain ribbon to trim the bottoms and the pockets.

grosgrain detail
grosgrain detail

The pockets are lined and sewn on top of the shorts making that much easier!

They have a cute mock-fly on the front.

Mock Fly
Mock Fly

It would be super easy to fold that part of the pattern under if you wanted to skip the fly.

Here’s a side shot after she wore them all day…

Hazel Left
Hazel Left

And there’s plenty of room for the buns…

Hazel Back
Hazel Back

The obligatory little sister matching outfit is just a onesie with a zig-zag stitched Z for Zoe and an elastic waistband skirt with pink Kona binding.

Super Z
Super Z

Alex’s shorts were made with some leftover Robert Kaufman linen-cotton denim from my Miette skirt.

Alex Bermudas
Alex Bermudas

I used the same variegated blue thread for stitching as well…

Alex Hem
Alex Hem

I lined the pockets with a cute black and cream gingham.

Alex Pocket
Alex Pocket

However, after just a few hours of wear, the seams started splitting.

Alex Pocket 2
Alex Pocket 2

Really splitting…

Butt-Oh
Butt-Oh

Really, really splitting…

Damn Son
Damn Son

Lesson learned…while the RK linen/cotton is a great fabric, I should have made another Colette Sorbetto with the leftovers or maybe something with more give like:

Better Pattern for RK

Regardless, I’m really glad I found this out before I used it in a quilted bag or something. The linen-cotton does not hold up to any stress on it whatsoever. Even if I were to restitch the seams, or re-enforce the seams, the stress on the fabric is the problem. I suppose I could line them, but at this point, when they’re made just to fit…I’m going to have to call them a loss. It may not be the blend so much as how it’s done. The Aztec vest was made in a RK linen and is holding up great, and I have some yarn dyed Essex that many quilters use and is thicker feeling than the cotton-linen.

Point is, if you’re looking to use one of the linens, I suggest sticking to the Essex or the straight up linen if you need to sew something with stress points aka structure. My Miette skirt went through the wash this week and held up great, therefore, in a garment with more drape, the linen-cotton is a wonderful option.

AND hello, Ottobre FTW again!

Disney Cars Chevron Quilt Part 1

Sorted Into Blocks

The Chevron Baby Quilt and headboard piece were so easy and so malleable for my needs, I decided to go ahead with making VIP Nephew Liam a twin size in the same pattern. I bought the fabric already, and just had to commit to how it was going to go together.

Here are some close ups of the fabric with the 9.5 inch square ruler laying on top.

Liam’s mom mentioned she liked the tan fabric best, and from an “OMG that thing is going to be in my house” stand-point, I gotta agree with her. That’s also some of my reasoning behind the chevron pattern – breaks-up the crazy Disney a bit for the adults and leaves a bit of room-to-grow for Liam.

Tan Cars
Tan Cars

That, and the blue cars print is just too big to be cut up. By the time it’s in a 9 inch right triangle, the cars will be too cut up to tell what it is.

Blue Disney Cars Fabric

This will leave me with 4 yards of the blue Cars fabric, and I have 2 yards of Cars 2 fabric. I will use these to make the backing to the quilt. I think it will make for a fun, reversible look.

Black & Blue Cars Prints

For me, it’s easier to do things in batches. I cut aaaalllll the squares from both fabrics first. I pressed and stacked aaaallll the squares. I marked my centerlines on aaaalll my Kona Bone contrast fabric. Is it important to use REAL Kona solids? YES. I promise a rant on that…probably coupled with ‘why you press to the dark side, Luke’ reasoning and all that. But for now: pressing, stacking, marking, matching right sides, pressing, pinning, stacking….

Cut, Pressed, Stacked, Marked, Stacked, Pressed

Pin, pin, pin…stack, stack, stack. This fabric is not prewashed since I knew I would be using it for a quilt, and when you press fabric with the ‘sizing’ still in it, they stick together a smidge which is helpful.

Stacked Squares
Stacked Squares

See….here it is. My stack of marked and pinned making its first go-through the machine. Sewn 1/4 inch on each side of that line. I just used a #2 pencil that I stole out of the pencil jar off of the big kids’ desk. It’s going to be cut, pressed towards the darker fabric and it’s done with such a light hand it will wash out the first time. No one will ever be the wiser. Except you.

Chain/Batch Sewing
Chain/Batch Sewing

I don’t normally pin, but this is for VIP Liam! I want to minimize the potential wonky quotient a bit and I’m not in a hurry – it’s not like there’s an impending baby as with the last one (I type that like babies don’t cook for 9 months.)

After being sewn, each square is cut apart and pressed open.

Batch Cutting
Batch Cutting

I cut them all first, then pressed them all. I’m fascinated by this batch method. Growing up (and still), my mom will generally make a few blocks at a time…tinkering with color and so forth. Of course, she’s making things like double wedding rings, bear paws, double Irish chains – I have two separate appliqué quilts from her on my walls alone! So…yeah. I have BIG shoes to fill some day.

Okay, back to topic. Pressed open and ready to make blocks.

Pressed Open
Pressed Open

Everyone has their preferred method, but I’m not so hot at doing long strips and piecing the strips together – I prefer the traditional method of increasingly larger blocks. So, I set my squares into the block shape. This is going on a batting that is a 72″x90″ twin – that doesn’t quite divide out into squares so I figure I’ll make an 8×8 large 4-square and have to add top/bottom boarders.

Yes, I figure out the correct math right at this interval. No, I’m not going pro this month.

Sorted Into Blocks
Sorted Into Blocks

Sewn tops….

Sew Top Together
Sew Top Together

Sewn bottoms…

Sew Bottoms
Sew Bottoms

Press and stack, press and stack, press and stack…

Okay, now a little time consuming part. This is the point where I attached the top and the bottom and took extra care to nest the seams – making sure they’re perfectly lined up and the seams were going the opposite direction. Yes, I had to visualize this when pressing my stacks to know before hand and press opposite ways.

Nesting the seams
Nesting the seams

I also took this point to trim all the dog ears or long points from the seams. It seemed inefficient to do it any earlier and to wait any longer would make for yucky chunky wonky nasty seams.

Trim Dog Ears
Trim Dog Ears

Stacked, pinned, and ready to make blocks.

Trimmed, Pinned and Stacked

and….REVEAL

Squares complete
Squares complete

Oh yeah. Not bad for a President’s Day afternoon.

AND….here is one of the many reasons I always make extra…I know I’m going to screw up.

I wonder how many quilt blocks were invented this way….

Oh Crap!
Oh Crap!

I knew I pinned a center with 2 seams going the same way and I assumed I screwed up ironing. Ugh. Luckily, it’s only one and I have something like 5 more extra.

I mean, I meant to do that for a throw pillow. Yeah! That’s it!

To be continued….

Fabric Junky

Trouble With Tribbles

I don’t have a problem. Really. Like any good junky would say, I’m fine with my addiction; it’s you that has the problem. I could be doing worse. At least I don’t (fill in the blank) anymore.

My fabric stash reminds me of the Star Trek episode “Trouble With Tribbles.” Am I showing my age? I think I’m actually just showing my weird, nerdy step-dad’s influence.

Trouble With Tribbles

Of course as I was cropping that photo to square, I stopped and marveled at the gold rick rack for 5 minutes.

My fabric just keeps multiplying. It’s not my fault! My friend, Jennifer, said to me, “My mom has som….” and I said, “YES!!!” before she even finished the sentence about her mom’s old fabric. See. She pushed it on me.

70s & 80s Yellow Calico

It’s not my fault…but look how pretty those fabrics are! So easily lends itself to French Provençal, doesn’t it? There’s some mauve and purple calicos that would be ultra modern with some gray or taupe Kona cotton.

That’s my fashion prediction by the way. 80s country drab colors mixed with modern design. Mark my words.

Melons!
Melons!

Oh, look at that melon color….melon colored tribbles! My mom gave me these in a bag last weekend. I love her. She’s my best dealer. We’re going to the Sew Expo in Puyallup. It will be fine. Really.

Blues
Blues

Blues….blues are my weakness.

Kid Projects
Kid Projects

And kids. Kids are my weakness.

MOAR!
MOAR!

Um…and…um, ok. You got me.

No one send me any more sales or coupons or mom’s stashes (except that last one, you can still give me free fabric) because I’m not buying anymore!

Except some Kona solids…because THAT is a LOT of pattern!

And maybe except at the Sew Expo…I’ll need a souvenir!

And…maybe…if…um…look! Tribbles!