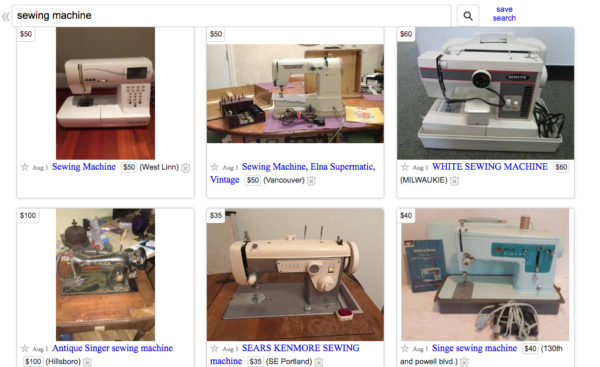
If you follow me on Instagram, you know I have developed a little vintage machine habit. I think I have 10 now, not including my Viking, and I have 3 more on the way. I just can’t leave them to rot in a thrift store, and my husband is more than accommodating, so they come home with me quite often.
I’d like to share the adventure here with anyone curious to follow along with me. There used to be this divide – men would sell the machines and women would sew on them. There’s still some of those residual feelings from those days. Let’s break those down. I don’t care about your gender, if you prefer sewing to mechanics, your flavor of the rainbow – let’s throw all of that out.
I’m not a trained sewing machine mechanic. Actual dealer mechanics have a bit of secret sauce they go off to learn in a special tech class, get all certified, and that is how a dealer can maintain some income. They sell you a machine, the manufacturer shares the service manual, not to be confused with the owner’s manual, and they keep proprietary secrets and charge you for a yearly tune-up.
I get that to a degree. I want my local dealer to thrive, however, even IF I got my hands on the service manual to my Viking Sapphire, I’m not going to crack it open just to see what makes it tick. I’m not willing to risk that kind of investment.
Most importantly, this is more about saving the old girls sent to the boneyard. Many of these are really good machines. We all need a back-up machine, or maybe we only want vintage machines, or even more likely, it’s really cool just to see how things work, amirite?
I wish I had a grandpa that was into sewing machines and repair, but at the same time, I like a little trial by fire, know what I mean? When I was a kid, my parents owned a bowling alley, and my smug-ass thought it wasn’t that hard to be a bowling alley mechanic. Well, now I need to put my money where my mouth is, don’t I? I’m not that smug little brat anymore, but I’ve got some penance owed.
Come on this ride with me. If you know something I don’t, please share. Maybe you’ll have a different experience to share, or a cool memory of one of these machines, or maybe you think I’m off my rocker – that’s cool too.
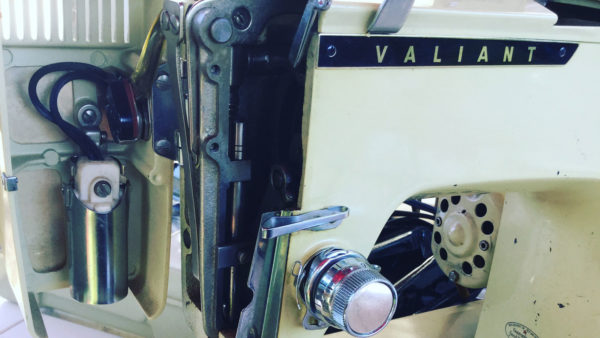
This Brother Valiant is in bad, bad shape. I pulled a 140/22 sized industrial leather needle out of it. I had to use pliers to yank it out. A lot of people take these old machines and think they’re going to do industrial sewing on them, and just trash them when they find out it doesn’t work that way. Many of them are pretty heavy duty, but that isn’t the same as industrial. I’ve got a neighbor that is in handbag production – she has a walking foot industrial Juki. THAT is the right machine for the needle I yanked out.
I’ve got a few others in various stages. I’m going to try to post the insta-videos here and see if that works. I’ll probably switch to another format when I get it a bit more situated, but let me know what you think. Here’s the pick-up day on the Valiant. Really cool machine. Really abused.
And here’s the revelation that I’m going to have to pull off the wheel, lol.
Have you ever seen one of these machines? I’ve run across a few online, but this is the only one I’ve found that has the Brother name hidden only on the bottom. She’s really quite special looking, I think.
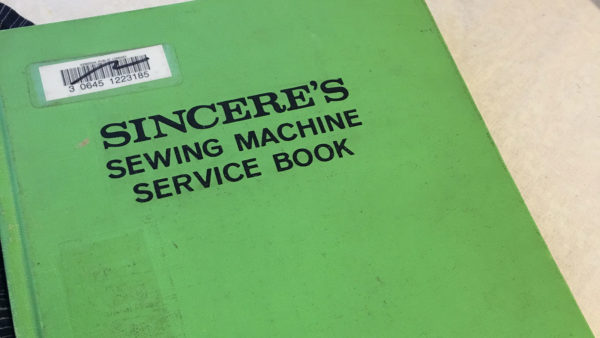
I’d like to give a shout out to Emily Lang. I’ve been collecting and tinkering with these machines awhile now, and she saw I was looking for some pretty specific repair manuals. Emily, out of the blue, offered to help me find them, and sure enough, one of the two is now in my hot little hands. The sewing community, man, can you beat it? So awesome. Thank you, Emily.
PART 1 of this series is information overload, amirite?
If you were to do all the internet searching and talking to all the people, PART 1 is basically what you would find. Now, I’m going to go over some basic issues people have, and the more you pay for a machine, the more of these issues are removed for you, and you can just get to sewing something cool, smooth sailing all the way. The less expensive the machine, the more the tinkering.
In my experience, the biggest frustration people have with their sewing machine, if you ask them, is the tension. Sometimes they’re right…but I find it’s like a catch-all phrase for people to say the tension or the timing is off, which can be an expensive fix if that is really what it is….or at least you’ll get charged for it, take it home, and shocking! You’ll have the same issues!
A few little things.
Thread.
Yes, you gotta use the right thread. You just want to sew something cool, I get it. It seems trivial, doesn’t it?When you’re starting, get 4 spools of Gütermann All Purpose 40wt in light tan, med gray, black, and white. That will blend enough for quite awhile. Worry about the finer details and “correct thread” as you get better.
My cousin called me. She was piecing a quilt and her machine was skipping stitches. Before she went and bought a new machine, she called me to go through everything, inch by inch. The first thing she said was she was using quilting thread. I took that to mean Gütermann, Mettler, or Aurifil 50wt, which is what long time, experienced quilters mean…heh. See my mistake? We then went through everything….and I double checked her thread type and one last time before telling her it was time for a new machine…I asked the BRAND. That’s when she said, “It says ‘quilting thread’ right on it…” OH. A spool of “quilting thread” means a thick, coated, HAND QUILTING thread. I’m not going to reinvent others’ posts on threads and types and whens, but, yeah. It matters.
Just get the 4 to start. That’s like <$8 with a coupon.
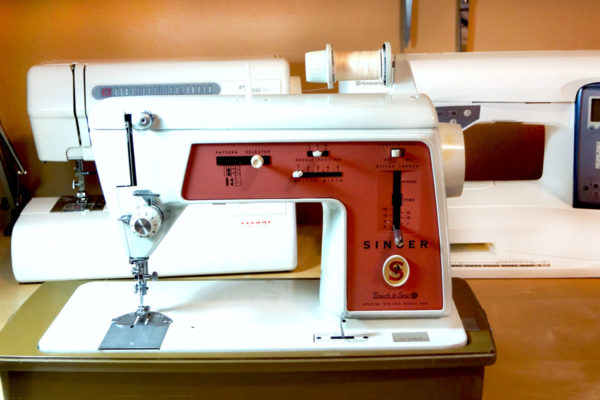
Singer Touch & Sew 626
Needles.
I haven’t seen any modern machine that requires a particular brand, nor have I run across a vintage machine that requires any special needles. I’ve used Singer, Klassé, Schmetz, Organ, Inspira…I don’t see a difference. There used to be different lengths/sizes or “Types”…but not anything you’re going to find without an antique dealer is going to require anything other than a basic Type AA needle. I’ve ripped an industrial needle out of a domestic machine. Don’t let anyone shove in an industrial needle…but industrial needles are specialty and you’re not going to find one easily.
DO make sure your needle shank, or the flat side, is facing the right way for your machine.
DO make sure your needle is all the way UP before you tighten down the clamp. This can cause skipped stitches if it is hanging down too low.
DO use the right type of needle for your fabric. Lots of posts out there about that. Start with a Universal 80 for wovens, and a Stretch 75 for knits; go from there.
Bobbins
Bobbins.
You will need to use the bobbins required by your manufacturer. This isn’t the place to save money. If Juki tells you to buy only Juki bobbins, then buy only Juki bobbins. If someone hands you a bunch of Class 15 metal bobbins and some story about how they’re better because they’re metal, but your machine takes plastic Class 15J, use the plastic ones.
The photo above is an open Janome top-loading bobbin case. I bought this machine for $25, and took out the metal Class 15 bobbin, the nest of thread, the tangles, cleaned it, put in the correct plastic 15J plastic bobbin, and now it runs perfectly.
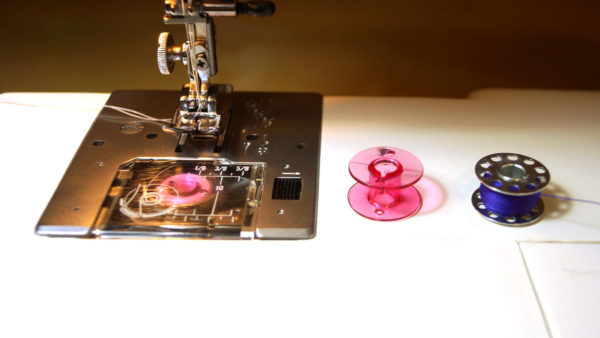
Class 15J and 15
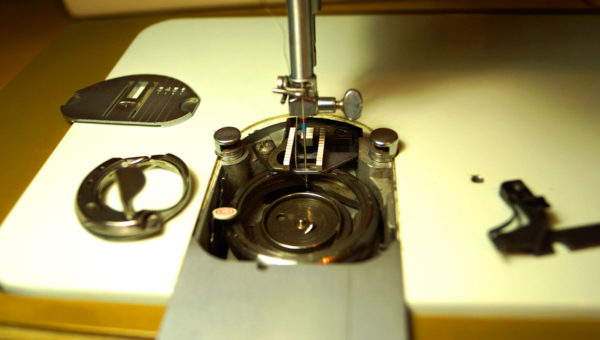
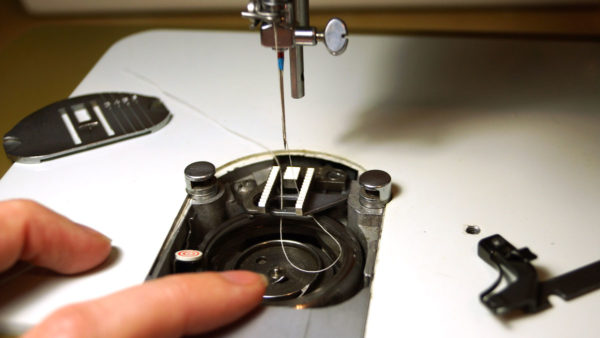
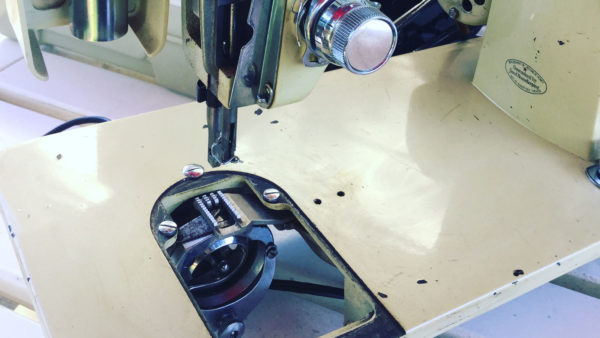
Here I have taken out the bobbin, the bobbin case, and the plate of the 1960s Singer. I want you to see how much of a tight squeeze it is:
The amount of area between the bobbin and the needle is in millimeters. This is how you can have a home sewing machine and not a factory industrial machine. This is also why you want to use the correct bobbin. There’s a millimeter of room between that needle and the outer part of the bobbin rotary mechanism. This goes around at a high speed. Use the correct bobbin.
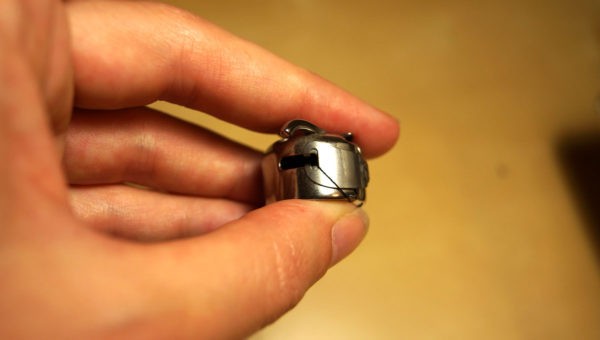
When putting bobbin in your bobbin case, there are directions on where to pull the thread through. When you do this, hold the bobbin and pull the thread through taught. You’re pulling the thread through the tension spring – which do not look like traditional “springs,” and if you don’t pull it through, the sewing-motions of your machine will not always pull it into correct position for you, and you’ll get skipped stitches/bobbin thread nest. In a metal case, which sits perpendicular to the machine bed, the “spring” is that metal flap:
Some bobbins lay flat to the machine bed. My Janome version easily slips through the “channels” while my Viking needs the thread to “snap” into place. I need to give the thread a little tug…these are all idiosynracies of owning a machine. Add another point to dealer classes from PART 1.
You can PAY more for easier bobbin features. There are machines with bobbin sensors, bobbin thread cutters, separate bobbin motors for winding, auto-tension…or you can be more hands-on. How much money do you want to spend?
I’m not going to get into the housing around it, or shuttle vs rotary shuttle. That’s a bit more advanced. We just want to sew something cool at this point. I’m also not going to get into the bobbin tension – when you’re beginning, don’t mess with the bobbin tension, and it won’t get messed up. The point here is how hands-on do you want to be? The bobbin is the #1 user error. Which brings me to:
User Error
Let’s go through some photos of the thread take up lever and the bobbin case.
For the TOP thread to wrap around the BOTTOM thread and make a stitch, the TOP thread goes down with the needle, gets caught by the bobbin “HOOK”, thereby gets wrapped around the BOTTOM thread, and the needle comes up, pulling it tight to make a full TOP thread revolution AROUND the bobbin CASE and completing the stitch.
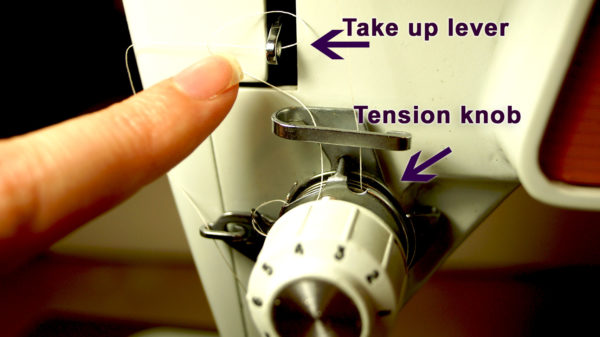
Thread the machine and adjust the tension knob when the sewing foot is UP, when foot is down, it engages the tension disks. There are machines with auto tension if you want to pay more. These take away the possible tension frustrations, for a price, and you can just sew.
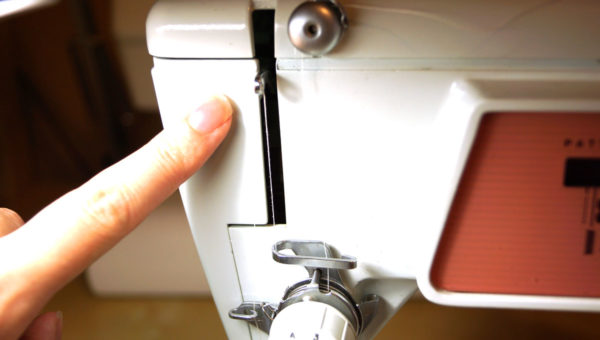
Take Up Lever, and Tension Knob & Disks
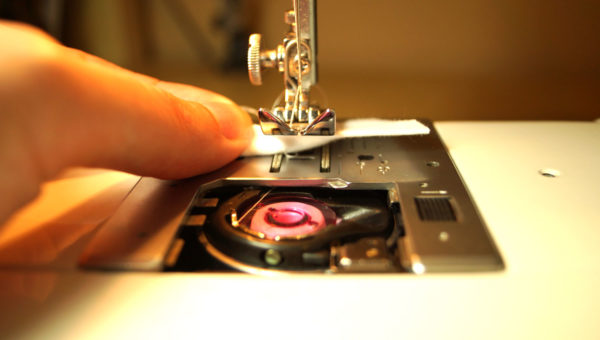
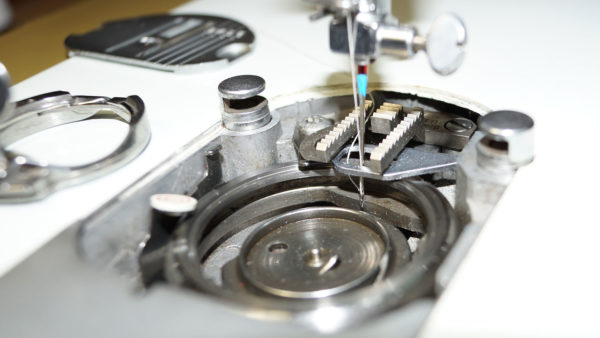
Here is the open bobbin case again, with the bobbin removed, so you can see the relationship between the UPPER thread, the take up lever, and the bobbin:
#1 Beginner error is not taking up that lever ALL THE WAY when you want to stop and pull out your fabric. The thread must finish the revolution around the bobbin, which is missing in this photo so you can see the UPPER thread doing all the work.
Here the UPPER thread popped off the rotary because I took out a few parts, but you can see, the needle is coming up, but NOT up all the way – the UPPER thread is not done:
This is where the lever is positioned at this time:
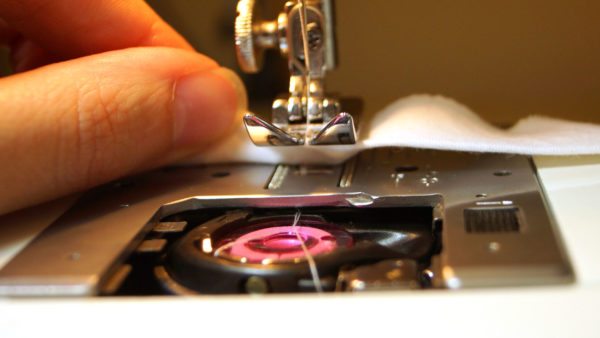
If you try to take out your fabric at this point as I did MANY times when learning to sew, you will get this…and this is difficult to capture on my camera, but if you see 4 threads coming out the bottom of your fabric, and you can’t quite pull your fabric away…this is why:
The needle is UP and above the raised sewing foot! BUT it is not up ALL THE WAY. See the UPPER thread still wrapped around the bobbin? It’s a bit blurry, but see there looks to be 4 threads under the fabric? See the threads still wrapped around the bottom of the bobbin?
This is user error. This is probably #1 user error. If you don’t make this error, pat yourself on the back. Really. I’ve had countless phone calls and emails with frustrated new sewists and this is the most common issue.
Alternatively, get a machine with a needle up/down button for a price. This error is why the up/down button exists.
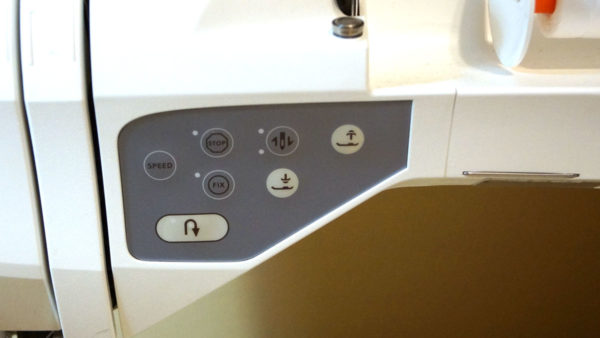
Easy Buttons
When I bought my Viking, I had already experienced the older, mechanical version, and the $$$ fancy computerized version. I just wanted to sew, and I knew I was committed to sewing, but I was NOT committed at the time to learning the mechanics of a sewing machine.
For a price, I opted for a few EASY BUTTONS.
I’ve got auto foot pressure, needle AND foot up/down buttons, temporary reverse options, speed options, knot-the-thread-for-me options…because I hated messing with the #1 Error above, and these were the things I wanted after using my mom’s fancy machine. The needle up/down removes #1 Error possibility.
What I didn’t get/couldn’t afford were: Auto-tension, bobbin sensors/cutters, ultra speed, heavy duty, super embroidery, etc. BUT I could just get to sewing cool things quickly and easily.
So, in the car analogy from PART 1, I got a entry model Acura. Once I learned how to drive and drive very well on my Acura, then I branched out and got some old Fords to tinker on. See what I mean? Much like how an entry level Acura isn’t going to go 4×4 driving, my Viking or my mom’s Janome will not sew leather, 4 layers of denim, waxed canvas to leather, and those Sew Sweetness bags I told you about in PART 1? That was an adventure. The computer in high-end machines will shut down your machine if you try to push the motor too hard.
Tension
A quick word about tension. Sigh. And “timing” for that matter. Yes, timing can get off – the photos above of the UPPER thread making the revolution with the needle – that CAN get out of sync. Tension disks CAN “freeze up,” BUT in all the machines I’ve cleaned, repaired, tinkered with… I’ve adjusted 1 bobbin tension screw. Ever. I have good reason to suspect the previous owner lowered the tension on the bobbin for free motion quilting on a machine that wan’t necessarily built for free motion quilting – and that is a more advanced option when you’re ready.
I’ve “flossed” the tension disks on the GUNKIEST ancient machines that smelled of the worst smells…and have yet to find a “frozen” set. “Tension” and “timing” are often the knee-jerk reactions to simpler user-errors. I’ve had skipped stitches from the needle not being all the way up in the needle-clamp, or the bobbin thread not properly through the tension spring, but never because of timing or actual tension problems.
I’ve never worked on a modern $100-$200 big box store Singer or Brother. Maybe this is where the mysterious tension and timing issues pop up? I don’t know, and I don’t want to know. I want to sew.
Bias
Yes, I have bias from my experience, as you will from yours. This is my 2 cents. I’m not a pro machine tech, nor do I want to be. I want to know enough to make this more approachable for you and enjoyable for me. I read dusty old books, tear apart gross old machines, read up on the latest embroidery software releases, and sew my heart out both for my love of it all and to be a helpful friend to other sewists. Every option has perks and caveats. Like with a car, mobile phone, laptop…anything. Pick what will make you LOVE sewing the most.
Any other questions, or details you want me to get into? Please, let me know. Both of these posts got far longer than I intended, and I’m afraid it’s a sea of word vomit…
You’re tired of clothes not fitting / looking like everyone else / being cheaply made
Welcome to the tribe. We get you.
Now, you’re ready to buy a sewing machine. This is like buying your first car. Do you want easy to drive? Do you want cheap? Do you want cheap to repair? Do you never want repairs? Do you want high resale value? Do you want sturdy? Do you want speedy? Bells and whistles? Just like with a car, these are rarely all the same machine.
You search online for what machine to buy, just like with a car. On Reddit, Facebook, and other social platforms you’ll get 5 people telling you to buy a $100 Brother machine, 2 people telling you to buy a $25 garage sale “all metal machine that will last forever and sew through anything,” and usually 1 person telling you they love their $5 million dollar Bernina. Sound familiar? 5 people telling you to buy a Honda Civic, 2 people telling you to buy an old Ford with a manual transmission, and one person telling you they love their Land Rover.
You just want to make something cool. What do you do? Let’s go through the usual recommended options above, THEN I want to show you something that, unless you have a hands-on mentor, will help you really decide.
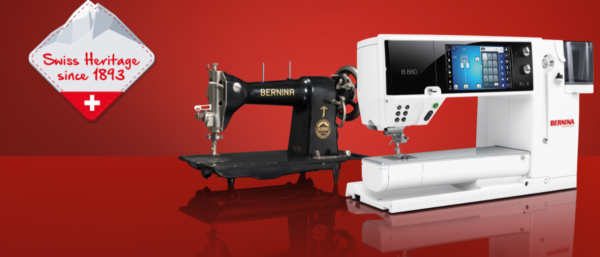
OMG they’re beautiful and they really do sew very nicely.
Dealer support/sales/deals – and Bernina dealers are ONLY Bernina dealers.
Metal inside, Swiss engineering, some metal bodies. You can go from a $250 basic mechanical Bernette to full on free arm quilting and embroidery machines that cost more than a down payment on a house.
I never see them in thrift shops or garage sales for $25…I never see ancient basic models for less than $500 AKA they keep their value
If you get a bad one, repairs are $$$
Accessories are $$$
Tune ups are $$$
The Bernina tribe is strong and LOYAL. Just read comments anywhere and you’ll see what I mean.
Some Berninas recently had a software update….ABOVE a price point, while the machines below said price point did not get an update. Not hatin’ just statin.’ When you’re looking at a pretty high beginner buy-in point…it’s something you should know. This is unlikely to be different in any brand, and frankly, we’re not getting into embroidery machines right now, are we? No. So take it or leave it.
***EDITED perk I totally forgot! Dealers will throw in free lessons with a machine – so they’ll train you to use it and maybe even a beginner sewing class too! Work out a deal with them!
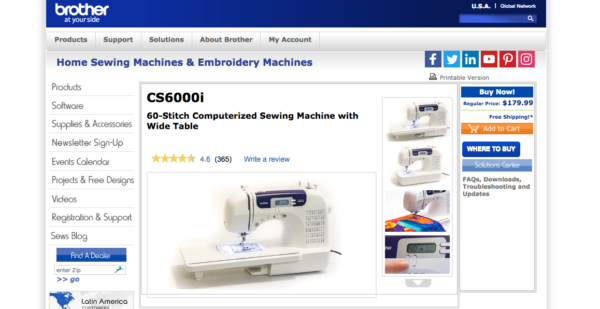
Amazon reviews. Read them. Brother makes killer industrial/semi-industrial machines…you’re not buying one of those or even one made on the same planet.
I generally don’t talk about Singers made after 1960…that said, I’ve read from a mechanic that the Heavy Duty model would be a reliable home sewing machine. Not my words; not an endorsement; not an affiliate link.
$100 or so is a great starting price point
Plastic on the outside and inside – this means plastic gears that will eventually break. Maybe in a month, maybe in 100 years. The Singer in the top photo? Metal gears. Plastic cams (decorative stitch thingies)
Fairly universal and economical accessories
No dealer guarantees, no discounted service, no free tune-ups for a year
Anecdote: Told a friend to buy a Brother to start. Friend made a few quilts and curtains. Friend upgraded from $150 Brother to a $350 metal, mechanical Janome after 3 years. Friend couldn’t BELIEVE the difference in quality and sturdiness and fell in love with sewing again. Friend even got a serger, they got so into it after the Janome.
That said, Sew Sweetness started a huge business making bags on a basic Brother machine. Bags are tough to sew, and if she can make a mini empire on one, who’s to judge? I have bought, seriously, a half dozen or more of her patterns before she upgraded her machine.
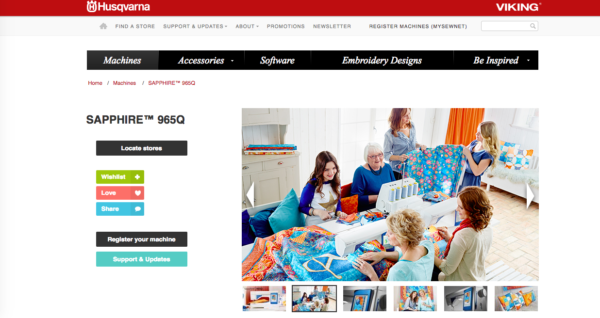
Higher entry point than Brother, but not as high as Bernina
Dealer support/sales/deals and warranty options
Tons of variations in styles and reliability – read reviews. Ask the dealer pointblank: which machine gets returned/serviced the most?
Also in variations, some metal bodies, some plastic housing with metal inside in various amounts. For example, Janome has ~3 price levels and 3 different countries of manufacture for those levels.
Test drive them all even if it’s just because you can. They’re each so different and have their fans. I love Viking, Janome, and Juki. I know plenty of sewists that will fight to the death for their Pfaff. I have no experience with Pfaff or Babylock…I can’t know what I don’t know.
Accessories and parts are $$ and often brand-specific.
I have a 2012 Viking Sapphire 835. After an initial buy-in of +$1000, I have purchased:
invisible zipper foot
a quilting foot-set (see also: walking foot / differential feed foot, 1/4″ foot, AND darning foot)
ruffling foot
My Viking is hydraulic, which means no oil but also means I don’t work on it myself at this time. A single tune up is $180. It also means it does not like to ‘hand crank’ over tough spots.
extra Viking bobbins
***EDITED perk I totally forgot! Dealers will throw in free lessons with a machine – so they’ll train you to use it and maybe even a beginner sewing class too! Work out a deal with them!
Garage Sale, Thrift Store, Hand-Me-Downs, or Craigslist
Do you know enough to look at it and know why it is for sale? If the power comes on, and the wheel turns freely by hand (toward you only, please), look at the bobbin area. In my experience, 90% of the issues are there, and 90% of THOSE are user-errors, but if you’re a beginner…those may soon be your errors.
$25 used sale price adds up if you’re wrong
Tune-up or a basic service to clean it is still likely to be $80-100, and that’s if you’re not wrong about why it’s for sale
Sometimes parts/accessories can be had cheaply on eBay, sometimes not so cheaply
***edited*** you can find certified, warrantied machines at a dealer – if you do this, I highly recommend you negotiate an hour or more in classes/how to use said machine.
I say all of this, HOWEVER, in addition to my Viking and at the time of writing this, I have 9 used and/or vintage machines. 3 work flawlessly, 1 works mostly flawlessly, 5 are in various stages. 2 of the flawless, I bought working flawlessly (read: more than $25), the rest I’ve worked on/am working on. That said… 1 is a Janome and has 3 feet I’ve wanted but didn’t want to spend the money on for my Viking. I just got the 3 feet I wanted, on a 10+ year-old working Janome for $25, with a bit of elbow grease, and $10 for new bobbins. Those feet would have cost me at least $100 for my Viking.
BUT it did not start out that way. I am able to work and sew on old, mechanical sewing machines now because some years ago, my mom’s computerized, super-schmancy Janome (current comparable model is in the Memory Craft line) just let me sew something cool….AFTER I got frustrated on her 1970s Kenmore. Mom’s Kenmore is a 158 series – a machine you’re likely to find in the thrift stores and now one of my favorites. But then, I really just wanted to sew something cool and didn’t get that I needed to pay attention to a few mechanical details.

 If you follow me on Instagram, you know I have developed a little vintage machine habit. I think I have 10 now, not including my Viking, and I have 3 more on the way. I just can’t leave them to rot in a thrift store, and my husband is more than accommodating, so they come home with me quite often.
 I’m not a trained sewing machine mechanic. Actual dealer mechanics have a bit of secret sauce they go off to learn in a special tech class, get all certified, and that is how a dealer can maintain some income. They sell you a machine, the manufacturer shares the service manual, not to be confused with the owner’s manual, and they keep proprietary secrets and charge you for a yearly tune-up.
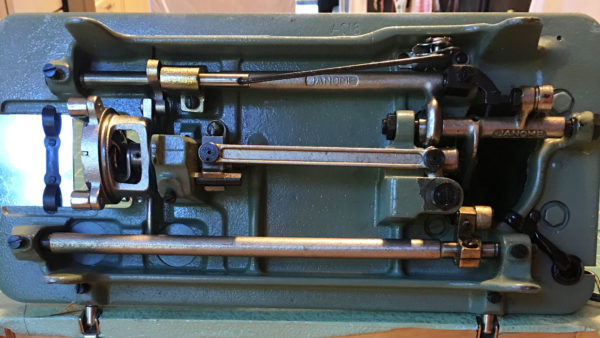 Most importantly, this is more about saving the old girls sent to the boneyard. Many of these are really good machines. We all need a back-up machine, or maybe we only want vintage machines, or even more likely, it’s really cool just to see how things work, amirite?
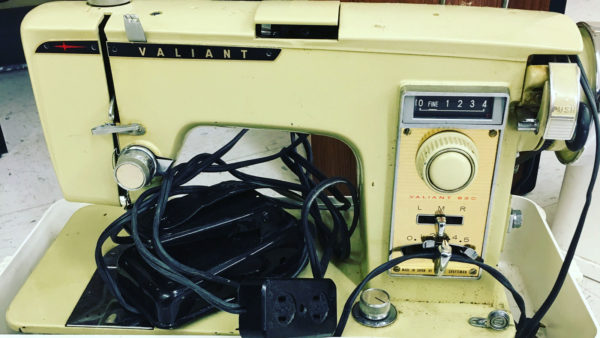
 I’ve got a few others in various stages. I’m going to try to post the insta-videos here and see if that works. I’ll probably switch to another format when I get it a bit more situated, but let me know what you think. Here’s the pick-up day on the Valiant. Really cool machine. Really abused.
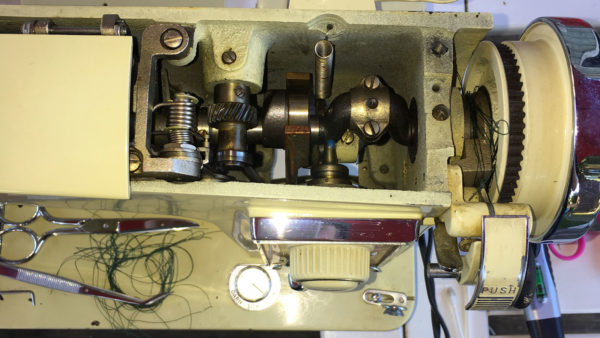 I’d like to give a shout out to Emily Lang. I’ve been collecting and tinkering with these machines awhile now, and she saw I was looking for some pretty specific repair manuals. Emily, out of the blue, offered to help me find them, and sure enough, one of the two is now in my hot little hands. The sewing community, man, can you beat it? So awesome. Thank you, Emily.