Homeschooling Tips for COVID-19

kids around kitchen table homeschooling

Today I got an email from a public school teacher asking for advice. Homeschooling is new to many, and I feel our teachers are really going through some trial by fire here.

kids around kitchen table homeschooling
kids at the dining room table

Being that I’ve homeschooled, here are MY tips for success. As always, your mileage may vary, but I see a need, and I want to help. This is my wheelhouse.

First, throw out the idea of the quiet private cubby of school concentration desk. That’s some throwback Quaker stuff. It makes school seem really punitive and children are social creatures. If you put a child in a cubby, they will squirm and wiggle right out of it. Put them all around the kitchen table or sprinkle them in the living room. Put them where you are, where they are. Earbuds are recommended.

My kids get online by 8:30 am, breakfast done, teeth brushed, water bottles filled and next to them. Just like with work, this gives them time to orientate themselves to the day, check any messages, turn in anything forgotten, and get in the mode before the 10 am check-in time of Portland schools.

Around 10 am, there’s snack set out for grazing. Nuts, grapes, etc. We have realized we are going to be in close-quarters, quarantined together, so are not practicing social distancing within our family. It’s just not possible. More on that later.

By noon we break for a brief, half hour lunch.

making crackers to go with tomato soup

Afternoon, older kids likely still have scheduled classes. They do that until done, then do a physical activity before free time.

Elementary school child does her class assignment of a “Diary of a Whimpy Kid” style journal, then physical activity before free time.

Physical activity options in our house:

      1.  Go for walk or bike ride. Many of your local bike shops are still open by appointment. Get a tune up or a bike. A bike is the perfect length for social distancing and a great grocery store runner. Here’s my favorite shop in PDX.
      2.  Hullabaloo. If you can find one not $124 like this one on Amazon, it is the ultimate sanity saver. I’ve had mine for over 10 years and it’s still going strong. I have friends who’ve made up new spots from fabric in their stash!
      3.  Switch Ring Fit Adventure, Just Dance on Xbox – any number of physical game console options.
      4.  Put on tunes and have a dance party.
      5.  Cosmic Yoga on YouTube. Almost a half million subscribers for a good reason.

Free-time options – Screen-free and Not:

      1.  Have group drawing/art while listening to an Audible book. I recommend the Little House series as it’s perfect for now, great for all ages and genders.
      2. Libby is also a great option for audio books and links with most libraries. Many counties are now allowing people to sign up for a card online to get digital books and audio books. Here’s Multnomah County’s sign up page. 
      3.  Science Kit: This usually involves vinegar, baking soda, and food coloring on a tray. Or making slime, etc.
      4.  Planting a garden is science AND math. I’m a firm believe LIFE is ALGEBRA. You’re always solving for X. For example: How many seeds fit in a line when spaced 5 inches apart?
      5.  Plant a seed in a cup to bring back to class after quarantine! Make it a class project.
      6. Get out the food dehydrator. Make fruit leather & dehydrate nuts. It’s both good quarantine sense and science. There’s all kinds of information about there about why you should soak your nuts, then dehydrate them (phytic acid y’all) and it makes for a great science study. Same with fruit leather – how long do the grapes last vs. how long does grape fruit leather last? (for grown ups, check out Brad’s It’s Alive if you really want to geek out with me.)
      7. Planet Earth. Need I say more?
      8.  We love LOVE BrainPOP Jr. If your school hasn’t opened up the app completely for online learning, MAKE IT HAPPEN. There’s even a section on Coronavirus on BrainPOP now.
      9.  Bill Gates just posted a tweet for Khan Academy being bolstered up for your use. That man never ceases to amaze. Khan Academy, if you don’t know, is the most used online resource by public schools. Your math teachers LOVE it.
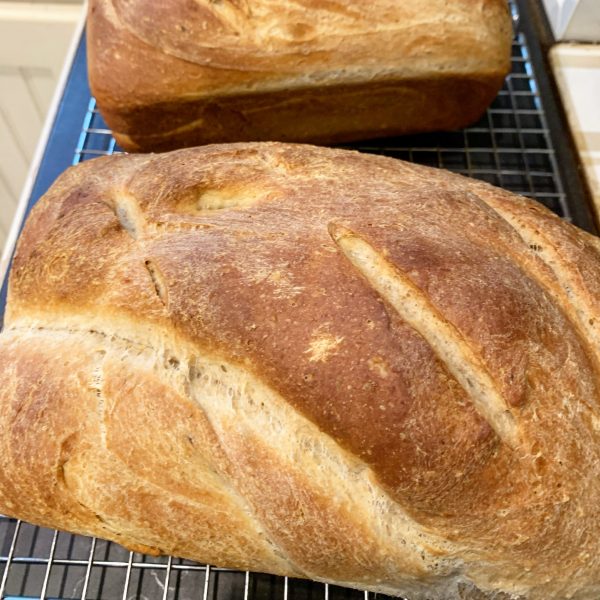
      10. Make a sourdough starter. I love the entire King Arthur website. It’s a practically no-fail place to start.
      11.  Use Ms. Jue’s Diary of a Whimpy kid idea and journal/art through it all. Bonus points for using those gel pens you have drying out, that stash of washi tape you’re “saving” and all those stickers and glitter.
      12. Teach to sew/crochet/knit – math, art, AND functional life skills. Look up the history of encoding messages in knitting. Look up the history of human strife & racial inequality in quilts, and current art and human strife in quilts. (I refuse to call these “politics;” that denotes a choice to make it this way.)

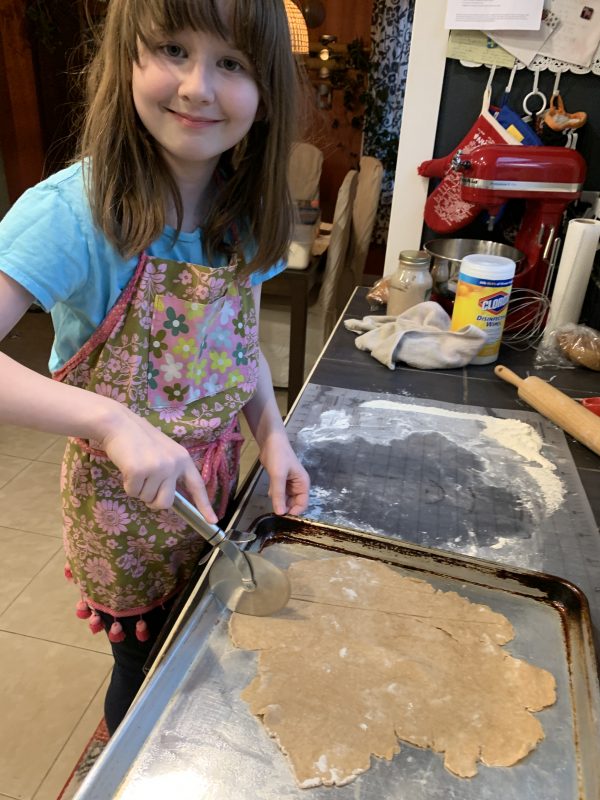
Right, so this seems to lean heavily on STEM/STEAM but I believe they’re all intertwined. There’s no math without music and vice versa. Gradients and vectors are math and art. Ratios of oil paint, drying time of watercolors… it all intersects in my mind. A kid baking cookies is learning math and science. Working out a garden plan with the kids figuring out the size of the planting box is both art and engineering. What is the cubic feet of soil for X sized planting box? This is applied learning. This is how we learn to apply worksheets to life. You got this. And you got me. AMA.

Love to you all.

We bake our sourdough weekly. Make a sourdough starter!


Friday Pattern Company Adrienne Blouse

So maaaayyyybe you’ve heard of the Adrienne Blouse by Friday Pattern Company? I think I’m the last person on earth to have made it. What can I say? I’m a slow adopter.

This isn’t my first FPC pattern – I made the Garamond top and I actually still wear it almost weekly.

I’ve been wanting to make another FPC pattern as she’s come a LONG way since then, and everyone’s Adrienne was giving me serious FOMO, so I bought it. After the last cosplay project and in-between redoing some slopers, I needed an easy-brain-rest project. FPC fills those niches nicely. Her patterns are stylish but not tedious. I like that.

I picked up a rayon-blend sweater knit to make something more “me,” and naturally it’s in black. It was also very prone to shredding and transparent.

I took some tricot in generic-white-person-nude, and underlined it in the bodice only.

Serging it all together before sewing also had the added benefit of keeping it from unraveling/shredding.

However, this did make it even more bulky, so I omitted the neckbands and stitched under to finish the necklines. It ended up being about the same so I didn’t have any sizing issues when attaching the sleeves. I finished the hem the same way, but I will say, I will have to put horizontal fish-eye darts in the tricot to keep it from sagging out the bottom as it tends to sag more than the sweater knit.

Fun fact: I ironed interfacing to my organza press cloth during the last cosplay project. Twice. So, whipped up another press cloth to use to press the synthetic tricot. (I always keep some organza on hand – best press cloths and interfacing when needing a light but stuff interfacing.)

doing my best Courtney Love impression – all chin

I got done with this project, put it on immediately, and immediately said, “NOPE!” and took it back off. It did not feel like me. Or I did not feel like me. I’m not sure. I even messaged my Sewcialists crew and told them I fell for FOMO and made a terrible mistake.

doing my best Stevie Nicks impression – lost in the lens

However, husbeast to the rescue: I put it on and he said he really liked it. Buuuut then he said I looked like a sexy pirate. Fears of tacky Halloween costumes filled my head…however, it did get me thinking. HOW can I make this more me? The fabric is 100% me… the bodice fit is 100% me…what am I missing?

Frick is scared of my doppleganger

So, while I show you the off the shoulder look, that ain’t gonna happen IRL. However, the regular look, with some snazzy pants, I can get behind this.

The scoopy-back, which is a duplicate of the front, makes me feel a bit exposed… but it’s growing on me.

I didn’t make any alterations to the pattern – this is a straight size Medium. I like to live dangerously.

Have you made something, hated it, but then played around until you really started to dig it? Like… I get it. I’m into it. I’m on the hunt for more sweater knit… I don’t think I could do the jersey look…. but I do dig this.

creepin’ up on Jolene, my dress form

Happy Halloween!

Jolene creepin’ back up on me…

Nero from Devil May Cry 5 Custom Cosplay

I’m not a gamer. I can’t even play Frogger to save my life. That also dates me, as that is likely the last video game I’ve ever played, not counting Angry Birds after a pitcher of beer. That aside, I do absolutely love themed clothing, costumes, and above all, editorial styling. When I sew or design something, there’s a full editorial spread in my vision.

My kids don’t always get what I can do…they know their mom sews and can make stuff, but that’s really as far as their understanding goes. I don’t often make complicated things, or tell them about it when I do – I’m just a mom at the end of the day to them. So when my college-age kid, Zane, said his cosplay maker closed up shop, I said, “You know…I can do that…. and it won’t cost you shipping & customs, plus I can make it to fit you exactly.” And that is how this challenge was set.

This was a process. I don’t have a male block, only female blocks I use for Workhorse, and I’m not ready to delve into men’s patterns at the moment, so I used the Colette Albion as a block. It’s a solid unisex coat block, and it let me set in all the style lines I needed, plus already had lining pieces. This likely saved me a good week of work.

From there I raised the yoke up 2.5 inches, added in shoulder/arm yokes to line up and match, added a collar, added in front and back shaping seams that have darts built in, a welt zipper pocket, changed the shapes of the pockets, adjusted sleeve fit to be narrower and have zippers to the elbows, changed the lining to have matching shape, made a broad-back adjustment, changed sleeve lining to be pieced and allow for corduroy cuffs, added in a front zipper, drafted side and front buckles/straps, and added side vents.

Whew! So, while I did use a” premade block,” as you can see, it has been completely re-designed and customized. In addition to all of that, there’s shoulder pads (necessary for structure/weight of coat), rivets, industrial & professional equestrian hardware, underlining, and real leather work.

All in, it still cost upward of $500USD in materials including the rivet and grommet dies, the hardware, the leather, the twill, zippers, etc. So, while he didn’t really save money (quote from custom cosplayer was about the same), there’s no way a long distance coat would have fit as well. We did one muslin/trial fit. Here’s a shot from Instagram I posted:

Being that I’m not a gamer, most of my reference material was what I could glean from screenshots and other cosplay on the internet.

This slideshow requires JavaScript.

Zane told me, as we were shooting in the park, the backstory of Nero, and how shooting in the park was hilarious. Woops. 😀 Pretend it’s a hell park, ok?

There were some new-to-me challenges. Sewing real leather was a first. Thankfully Karleen, owner of the Sewing Studio, had recently sewing similar weight leather and tipped me off to using a 90 Microtex needle. I’m sure she saved me a few hours of crying there. I had to quilt all of the leather, and once you put a hole in leather, it’s there to stay, so mistakes are not optional. That and I was doing precision work lining up the leather yokes across the chest-back-sleeves. OH! Pro-tip. Easing in leather sleeve heads?!?! HAHAHA. Not like anything else. It took me awhile. Normally I can easy in a sleeve head of any size or type – but steam doesn’t work the same on leather. Noooope.

Here’s some close up photos w/o the stylized desaturation so you can see details:

Also new to me: setting in rivets and grommets. I’ve set grommets in lighter materials, but 10 oz twill, in multiple layers? Not the same at all. Plus I was using professional grade tools from Oregon Leather. Entirely different than your Dritz crafty options.

The coat is entirely lined in Bemberg rayon. I didn’t redraft any part of the hood from the Albion. HUGE props to them – the lining fit is spot on. That hood is damn sexy inside and out. TBH, all of the lining was spot on. I bagged out the lining and it was flawless. I transferred my adjustments to the body/sleeve lining pieces but the main drafting there was all Colette. Ditto armscye and, like I said, basic block was all Colette. So credit where credit is due there. You can see some of my pattern and sewing work on Twitch, but I’m just starting to feel my way around Twitch and haven’t started transferring video to YouTube yet. That’s another post. 

Those buckles are made for saddles/horse leather work, and are a bit too heavy for this twill. I may still swap them out. Undecided there. I can’t really put more layers at the area of attachment without using an industrial machine, which I do not have. The sweater was from a thrift store, and we spent about $50 on hair bleach and toner getting the hair just right.

All materials were bought locally at Sewing Studio, Mill End Store, and Oregon Leather. Even the Colette Albion is local!

So, tell me, do you cosplay? Do you sew in editorial? Have you worked with leather? Currently looking for large round slide buckle to make 80s leather belt the bit leftover. I’m also thinking this tie belt from Burda. I think I have enough leftover. What are your favorite leather projects? I’ve got dies I’ve invested in and hundreds of grommets, and discovered Oregon Leather’s scrap bins!

Zane as Zane

Teaching Kids to Sew

Teaching kids to sew is so weird. I started off with the same things I always say, to anyone really, about anything; and that is: You can’t really break it. Not really. There’s always a fix. But there’s so much more when you’re teaching from zero.

Sure, I’ve let the kids sew here and there, but this was different. I got a machine specifically for them to use. I got a very lovely Janome Magnolia 7330. Most of the time when you think the Magnolia line, you think of those mechanical ones…this isn’t one of those. This one is really damn nice and smooth for the price.

Janome Magnolia 7330

So, with the value of this machine being quite the commitment, Hazel and I have been putting in some serious time learning how to use it.

Can I tell you a secret? I am learning SO MUCH.

Teaching someone from zero is…wow. There is a lot to learn! hahaha. No wonder people are so intimidated! In all fairness, I dabbled and quit quite a few times, so I shouldn’t be so surprised, but WOW. I forgot how much there is to know.

Case in point…I told her to press her seams to the back. She asked, “What does press them to the back mean?” I am so used to the language, I actually didn’t even realize how that could be jargon to the completely new. You ever want to be humbled, try teaching children.

Anyway, this post isn’t about me or Janome. This is about Hazel. Look what she did!

Hazel in a blue shirt and black pants

Let’s start where she did, with the pants. These are yet another Sew House 7 Free Range Slacks in View 1. I picked up some of this black rayon twill from the Sewing Studio on sale… It sews really really nicely. The weight is perfect for this pattern, and it has this tiny chevron twill weave that is really cool – as opposed to the usual just diagonal twill weave. I started Hazel on the more complicated pattern, to be honest. She took to it like a champ. Sure, there was some seam ripper work (she stole my favorite seam ripper during this time),  there was some learning why we sew straight (good thing for pattern ease), and there was learning how to put in an elastic waistband.

She also learned the best parts:

  1. No one will ever know any of the mistakes you made, so take them to your grave.
  2.  She got up at one point during the final parts of pants construction and said, “I’m actually really proud of that seam!”
  3.  A serger is your BFF when working with woven seams (and mom will change the thread on that for you still.)

The shirt is a Thread Theory Sayward Raglan made with a bamboo knit and a goofy dance-activewear knit we saw in the remnant bin at Joann’s.

Yes, it is true. We built this entire outfit around rainbow-oil-slick-dance-fabric and we love it!

The SH7 pants are a size 16 and the Thread Theory raglan is a size Men’s Medium. Initially, I was looking for a women’s raglan…something more 70s, but I couldn’t find one that wasn’t boatneck. It’s easier to adjust the Thread Theory sleeves & shape than to redraw a neckline and binding, so I went with Thread Theory…that and I’ve had good luck with Thread Theory patterns.

Hazel has very strong…well, everything, from 8 years of BJJ and last year she was on a dragon boat team…so there honestly wasn’t a lot of altering on the raglan other than lengthening the sleeves and shaving off a 1/4 on all the seams at the waist. I do want to point out the Thread Theory pattern is drafted perfectly. That neckband sizing is SPOT ON. Look at how flat that is! LOOK AT IT!

Sewing the shirt when a LOT faster. And here’s another tidbit about the Janome Magnolia. It doesn’t have a foot pressure adjustment option. SIGH. It has my favorite knit fabric stitch, the lightning stitch… BUT it just sort wants to bunch up the knit under the foot. ARGH. So…I ordered a walking foot. Hopefully that will make knits easier to sew because she REALLY loved zipping all the main seams together on my serger. Hazel did end up unpicking a few serged seams…but that’s ok. Why? Because in the end, you can’t really break it.

Have you taught anyone to sew? How did it go? Do you remember your first lessons?!

Sew House 7 Slacks View 1, Part 2: The Faux Jumpsuit

I can quit sewing these pants any time I want!!! I can!!! Actually…. I may not stop anytime soon… because….

Look at that smile!!! LOOK AT IT. That is a teenager smiling out in the wild. (ok, it’s a park.)

This is a rayon challis from Island Batiks. I’ve also made the main sample for the Ione dress in another Island Batiks rayon challis here. This faux jumpsuit incorporates a Seamwork Gretta tank as the top.

I cut a size 14 for both patterns. The rayon challis sews up great for these patterns. I’d probably not use a cheap rayon challis…you know what I’m talking about? I’ve bought some Big Box store rayon, and it wouldn’t hold up as well. A name brand like Island Batiks is just a tiny bit thicker, washes up nicer, and I’m not afraid will shred in 3 wears, you know?

And yes, I wash and dry everything. Who has time or money for anything else?

She LOVES the pants. She has already requested more pairs. My teen. Requested. More mom-made clothes. That’s a win, people.

Last shot – the rayon doesn’t quite hold the cuff in the pants, so note that if you want cuffs in the View 1 and in rayon, you’re going to have to tack them up. Dearest Daughter prefers the pants down anyway, so I’m not going to sweat it.

Ok, so this is my 3rd SH7 Free Range Pants post. Are you sick of them? What’s the accepted ratio of posting-to-patterns before they get boooorrring?

Cat Lady Art

It’s been a hot minute since I’ve done any house sewing and home revamping. A few years ago I started moving the living room color scheme from beachy whites with blues, to sunset reds, purples, and oranges…but then life got in the way as it does. It’s something I want to finish before end of year.

When I found these panels in the remnant bin at Bolt, I about died. This is from a 2017 Moda Fabrics collection called Catnip by Stacie who owns Gingiber. You can see her original post and colorways here. These are not easy to find anymore, let alone in the dark colorway! They take me back to the Rachel Perry lip gloss art of my childhood. They’ve got a late 70s/early 80s art nouveau vibe I am so very in love with. (If you love these as much as I do, there are some tea towels with this design here on Stacie’s site.)

The first thing I did was order canvases to put these on. These are the canvases I got:

As is the nature of panels and things on bolts, they’re never perfectly printed on grain. It’s just something you learn to work around after buying a few panels or border print fabrics. There was no perfect sized canvas for the cats…especially when the plump cat was factored in, so I went with larger-than-panel size at 16×20 inches. This worked out, because it allowed me to then border the panels with coordinating fabrics for my living room.

I sewed a strip of fabric on the top and bottom, then used a tiny spritz of 505 adhesive to position them on the canvas, before I flipped the canvas over to staple them down.

That’s the actual spray I use, and yes, I know, at $25, that’s really expensive! However, I use it so rarely that one can has lasted me over 5 years. I literally use it in bra making to just keep fiddly pieces still, and at times like this.

I popped some painters tape over the back to keep the staples from scratching the wall too.

Here they all are, close up. We named each one after cats in our lives. This is Frack.

This is Lucy.

This is The Spud.

And this is our beloved Big Boy, Frick.

I’m quite happy with them. Here they all are up in their spot.

It turned out to be quite the nice “palate cleanser” after a crazy couple months of Frocktails and socializing. I think I got the remnant for around $15? $20? I don’t recall as it was well before Frocktails… and the canvases were about $22, the other fabric was in my stash, so about $40for a refresh? Not bad, eh?

Speaking of… I have a few of the Frocktails craft stations embroidery hoops left. I think I’ll finish them up and put them around the living room too.

These are by Aimee Ray, and they’re really cute. Aimee is known for those Doodle Stitching books. I print them on water soluble paper, then the paper sticks just enough to the fabric for you to embroider through it. When you’re done, you wet it and block it as you normally would, and in that process, the paper melts away.

I also revamped my couch cushions and drapes… I may need to do a whole living room reveal….if I ever finish! hahaha. Do you use your sewing for around the home?

(you may have noticed there’s a few aff links. It’s my first time trying them out, so we’ll see how it goes. <3 I really did use these exact items and am happy with them.)

Sew House 7 Free Range Slacks View 2

In addition to sewing View 1 of the Sew House 7 Free Range Slacks, I also made up View 2. It was an accident to be honest…. I grabbed the wrong pattern pieces and cut it out before I realized it! I like to batch sew AND I’m easily distracted which is not always the best combo. I’m not mad I did though – I really love these.

I’m not sure if I had a smudge on my iPhone lens or what on these…sorry about that. I need to check my settings or just learn to always shoot with the big camera.

Anywho…These are different from View 1 in that they’re cropped and have a wide leg. This gives them a bit more of the Elizabeth Suzann aesthetic. Other than that, they are again a size 8 with zero alterations.

These are sewn in a cotton twill. I did all the top stitching and added the back pockets for this pair, as opposed to the previous wool pair which was too squishy for all the top stitching and back pockets.

I say these are not the most “flattering” design on my body, however, I wear them ALL THE TIME because #manrepeller. If something is ridiculously comfortable, we wear it.

I say perhaps not “flattering” because I have flat white girl butt: flat. Wearing loose, wide pants only enhances the flat and wide of me. I really don’t care much about “flattering;” but at the same time one can’t deny colloquialism and the effect of one’s culture and society. I have flat white girl butt.

The tank is self-drafted and from a fun ribbed sweater knit. My husband says the cropped tank with the pants looks funny – like I’m trying too hard. I say Sporty Spice? He says no. Therefore….the tank is not worn. Sometimes I heed my style editor’s advice… he doesn’t like the pants either, but I do wear them anyway. Win some, lose some, right?

What do you think about societal/cultural pressures? What about the word “flattering?” Do we need to dress to look good, or dress to feel good? Is there a middle ground? Am I, yet again, overthinking it?

Full disclosure: Peggy, the owner of Sew House 7 (SH7), is a friend, and I was sent this pattern to proof read the instructions before it went to print, as her usual proof reader was feeling under the weather. I’m not a professional proof reader, but another set of eyes is always a good thing. She did not have me test the pattern nor did she ask I make it, or blog it, or whatever. So…there’s that. Annnnnddd, I’ve made it clear before in other SH7 makes, before I even knew Peggy, I really like her patterns. Her drafting is top notch, she has more experience in her little pinky than she’ll every let on…and she’s the bees knees. 

Sew House 7 Free Range Slacks View 1

What is this? So much posting? I don’t even know! If you follow me on Instagram, you may have already seen these. I made them before Portland Frocktails, but hello! There’s no blogging when there’s Frocktails to plan! The very fact I made these is just nutzolla!

I made View A of the Free Range Slacks from Sew House 7 (SH7)  in a squishy wool blend of mysterious origins. I think my friend Mary gave it to me in a bag or maybe it was Peggy…. I should get better at noting who/what/where fabric. lol. On a burn test it definitely burned but also left that telltale pool of petrol-based synthetic. It breaths magnificently, so I know it’s mostly wool, and it washes up like a dream.

I cut a straight size 8, zero adjustments. I measured the crotch before hand, and even my long-hips and low butt fit into it without any mishaps. All worked out great. If you’re much taller than me…I’m 5’9″ on a good day, but have the torso of my 6′ friend… you may want to double check adding height.

I used the instructions to French seam the bottom 6″ of the pants for a clean roll up look, but to be honest, I’ll likely be lazier on future iterations.

Obligatory pants-sewing butt shot. Super comfy. Seriously. I wear them all time. It’s a month later and I’m wearing a pair right now.

A word about the t-shirt. This is the Hey June Union St T-shirt. This shirt is drafted perfectly – the weirdness you may see is totally my fault. I don’t remember what size I cut, likely a medium…. but I cropped it, and it looked like this:

Which is kinda too baggy for what I wanted. So then I hacked it again at the sides – totally a lazy move. I wanted it tighter…. but see… my ribs under my bust are 31.5″ and my bust apex is 38″ and that makes me, in proper bra sizing, about a DD/E cup. I often get away with a 34D or sometimes a 36C in American sizing…. but honestly they’re not comfortable. I’m better in a 32DD. This means, if I really take down a shirt to the size I need, even in a knit, I need to be doing a proper full bust adjustment (FBA.) The shoulders fit perfectly, the armscye is high and tight with good shaping like I like it… the fit issues are because I didn’t pop in an FBA.  I wear the hell out of it anyway. 

And for fun, here’s the Free Range Slacks with my own Ione in a wool challis. You can see how the pants look with a tucked in shirt, versus an intentionally cropped look.

There are a lot of pizza-friendly pants patterns out now. Have you tried any? I honestly wasn’t sure I’d like the elastic front on these, but am surprised to say I don’t even notice. They’re not drafted with too much ease there so I’m not getting a ton of bunching up in the front. I saw Gillian made the Pietra shorts, and they look really good too. I might need to give those a go…

Full disclosure: Peggy, the owner of Sew House 7 (SH7), is a friend, and I was sent this pattern to proof read the instructions before it went to print, as her usual proof reader was feeling under the weather. I’m not a professional proof reader, but another set of eyes is always a good thing. She did not have me test the pattern nor did she ask I make it, or blog it, or whatever. So…there’s that. Annnnnddd, I’ve made it clear before in other SH7 makes, before I even knew Peggy, I really like her patterns. Her drafting is top notch, she has more experience in her little pinky than she’ll every let on…and she’s the bees knees. 

Portland Frocktails 2019 Notes and Thoughts

Whew! The 2nd annual Portland Frocktails was July 13, 2019 from 7-10 PM, and we sold out again! Now that I’ve had almost a couple weeks to think about it and decompress, I’m ready to share my thoughts.

I was much calmer and relaxed this year. While I have 20 years of event experience, corporate event planning is not like owning an event. My experience gave me the the base-knowledge of event planning and management, but really that is where it stops. The rest of Frocktails is an entirely different animal. Therefore, having one year already under my belt, I was more prepared.

I changed a lot this year. Last year, I charged so little that I ate some of the costs including the EventBrite fees. This year, as requested by the majority, the event was 3 hours long instead of 2 hours, and we added a “drink ticket.” Oregon Liquor laws require I have licensed catering staff, and the catering staff serves food from their Multnomah Health County-approved kitchen. These are details not really understood outside of event planning that create a baseline cost. The added-on changes for this cost more money, and I wasn’t willing to have the financial stresses of last year, so I increased the ticket price and passed on the EventBrite ticket fees. Portland doesn’t exactly have the highest income per capita, so time will tell if this is sustainable.

I used the extra money to pay for 100% gluten free desserts, half also being vegan, extra work from the catering staff (having been in service & bar tending, I’m a FIRM believer in paying them well), crafting stations to help with social awkwardness, and my best decision ever: help. I got a few wonderful volunteers that helped fill swag bags at my house prior to the event, work the registration table, circle the room and help direct guests, and free me up to also make the craft table items & circle the room. We also created more seating this year (more on that later.)

Having help was a huge stress reliever. I’m not a fan of “design by committee” – I don’t like muddled process or inefficiencies. That can translate to me not asking for any help at all. I realize we all have parts to our personalities that when left unchecked can be detrimental, and that one is mine. Luckily my lovely volunteers, Andrea, Fonda, and Mingaile, are very outgoing and were so very wonderful.

Oh, another thing that was different this year! Due to the wonderful fact there are so many Frocktails popping up all over, there is less sponsor support in general. I didn’t get any of my large brand national contacts to call me back this year. I don’t know if that’s employee turnover as well as more Frocktails? Luckily, most of our local sponsors like the Sewing Studio, Josephine’s, Clutch Camera, Seam Divas, Bolt Fabric, and Seamwork all still pitched in a good amount, and between all the smaller donations from around town and worldwide, we still had lovely swag bags. I try not to “tap out” the same sponsors, so I didn’t ask all the same ones that I did the prior year. I’m great at marketing, but a terrible sales person! I’m not pushy, and figure if someone doesn’t call me back or email me back, they’re either too busy or they don’t want to, and I drop it. That and I also realize NO ONE is getting rich in the sewing industry, so I try not to overly financially stress small companies. (that’s my “if I didn’t call you again, it’s because I care, not because I don’t like you” sentence)

I feel anyone who is choosing to not participate as a sponsor is missing out…and there are a few out there that just plain “don’t donate to events” or don’t respond. As we, the collective Frocktails planners, gain our stride and really learn from each other and work on getting more visibility, which translates to our sponsors, the ROI will grow even more. As a long term marketing pro, I’m the first to tell you marketing numbers are always soft and difficult to prove absolutely, but I know this year was really great. You can just feel it in a room when things are ON.

Changes for next year:

My husband, who helps me a LOT with this event, and I come home afterwards, both years now, and immediately go over all the things we think should be fixed for the next year. Anything that also comes back in the after-survey confirms our suspicions.

  1. The most important thing for this year is to keep the Portland Frocktails instagram account going year-round with event information from Sponsors and a few meet up options of our own.
  2. Very likely bumping it back to last weekend in June, and from 6 to 9 pm instead of the 7-10 pm. There was some burnout happening in the room, and we lost good outside selfie lighting. While the inside shots are so very top notch, they’re not instantaneous like shooting outside and uploading right away.
  3. I knew the minute I walked away from ordering the cake this year, it wasn’t going to be stellar. It was not a good ordering experience at all from beginning to end. While the flavor was there, the presentation, in particular at that price point, was really disappointing. I’ll need to either go back to Petunia’s next year or completely start over.
  4. I hear you! The sounds in our space is deafening! The space is just too good – the after photo shots make the price-point ridiculously good. I realize not everyone gets that, but it’s such a great opportunity. While the photo prompts this year were a great idea, it doesn’t do much good if you can’t hear me. I’ll rent carpet next year to deaden the room a bit.
  5. I had a few asks for a “runway.” Enough for me to look into it. I’ll check with the city and see if we can’t block off some of the street…maybe that’s how we do it? Not totally sure…how we’ll work those logistics, but I’m thinking on it.
  6. Also to help with sound, we’ll put 2 speakers up on poles, and put them in front of me..that should help, and should take care of feedback.
  7. This is a big, tough one I really struggle with: Consider more seating still? The point of a social event is to move around and be social…will you still do that if you’re sitting? Furthermore, the seating was for the less able-bodied…. those that get physically exhausted easier. It’s difficult to balance this one. I see a lot of groups that stick to themselves when there’s more seating, and don’t socialize or meet new people. Related: sure I could make the space bigger as well…but then also, are you disinclined to approach a group if you need to walk across the room, exposed? That is exactly the kind of social anxiety that we’re trying to combat by having this event in the first place.

So many things to still ponder. There are other comments that came in, but for every person saying they didn’t like X, there was a person that did like X, so I call those a wash.

Overall, I came away super pumped this year and excited to do more socializing throughout the year. I’m hoping our sister city, Seattle, can host the 6-month counter to ours and we can keep our schedules complimentary of each other. Ours in summer, theirs in winter. I know the lovely Lilly is working hard on getting the next one going. I will be traveling up this year and attending the Seattle event for sure.

So there you have it! Sort of “my notes” on this year’s Frocktails, my ongoing train-of-thought regarding the future, and all that jazz. This is of course in addition to keeping my work with Sewcialists, Workhorse Patterns, cosplay work for close friends and family, etc. No rest for the wicked!

Seamwork Elmira – Shrugigan

I have an awkward relationship with cardigans. I love the comfort of them…but I can feel my posture change in them. A cardigan makes me want to nap, and I don’t always want to feel like I need to nap when I want a sweater-layer.

Enter the ballet wrap. It has all the great elements of a cardigan or shrug – a shrugigan if you will, but without the couch-gravity of a full on sweater.

I cut a straight medium Seamwork Elmira. I know I generally fall in between medium and large Seamwork patterns, and I also know I need to add height… but I broke my own flat-measure, pre-adjust rules to test the fit as-is.

The thing is, while making a straight size, or even if I made my adjustments, for this project I want something special and a little bit harder to fine-tune.

As-is, it works fine as a shrug over a dress…or in this case, over a bra, tank, turtleneck, and dress.

I didn’t use a particularly stretchy knit… this is a high-quality knit scrap from a friend with little stretch. As you can see, with something for the knit to grab on to, it’s tight, but has full coverage.

However, what I want is a spring running cover-up.

This is my basic running uniform. Nothing special. This is a sport bra, tank, compression capris, and a good old running hat.

The shape is pretty good…I like how tight it is…The ties are a bit too thick and maybe not long enough…

Without fabric to hold on to, it starts to hike up a bit too much for running…

So, this is why we do what we do, and how we do it, right? For a close fitting, activewear garment, I need to make each of the adjustments by feeling the garment on and moving in it. If it was just a cardigan, it would have been easier, but this requires a bit more care. Nothing worse than pulling and tugging and chaffing while running.

I’ve made the Coppélia by Papercut, but I made the sweater version, and it wasn’t quite what I wanted. I think I’ll work on the Elmira some more, and then make a proper wrap Coppélia, and compare the two. While I’ve made and do love the Papercut Patterns Aomori, it’s a bit too loose for running or biking.

Do you think this qualifies for Meg’s Twists and Ties challenge? Have you ever turned a garment into an activewear garment?

PS I cut and sewed this up in about an hour. I modified the pattern by leaving out the front lining and knit-bias bound the entire garment’s raw edges. This also helps with any possible front “bagging out” you may have along the wrap area. 😉

WHP Was Launched

I launched Workhorse Patterns with a LOT of help from my family and friends. It took a year from the Ione pattern concept to launch.

DSC04273

The Ione had a few iterations…of which I don’t have photos…lucky you. I bought the Robert Kaufmen “essex yarn dyed metallic rainbow” the second it was available. I’m not sure it’s even available anymore, but I knew I wanted it boxy, I wanted it 80s, and I wanted a square neckline. I’ve worked with a lot of RK’s linens & linen blends, and I know they soften up really easily and get super malleable.

Screen Shot 2019-02-19 at 8.48.03 PM

The lurex in the linen made it so that was not going to happen. This fabric is stiff, and not at all forgiving…and I tried to make a side-cinched dress…think Blondie and way too short. Instead, it looked more like a dryer hose.

Screen Shot 2019-02-19 at 8.39.36 PM.png

Not my best design moment. So, I chopped off the bottom and put it on a pile so I could get to work on Portland Frocktails for a few months. Then I came back to it, and played with the hem line. You won’t believe it, but I drafted that curve the first time I cut it. Kismet.

Then I got busy with the Sewcialists. That is a lot of work. Gillian owns that site, and I’m just an editor, but I don’t know how Gillian did it on her own for so long…it’s so much more work than….yeah. It’s a lot. It’s incredible, and inspiring, and omgtheressomuch. The Instagram account alone is both awesome and…well, it’s the original, real definition of awesome. It’s so big and so fast, slightly chaotic and very time-intensive.

So, that slowed things down a bit but I finally did get it out for testing in the fall. I was thinking “great piece for layering on turtlenecks ala Mary Tyler Moore & Rhoda!” It was even named on my desktop for awhile: RhodaRachelRuth.

Testers were really cool, all very good, and I had a great sampling of the population. Doing a broad size offering and being an unknown made that kind of impressive IMO. (Again, a lot of help from Gillian, Chloe, and the sewing community. Even a few local “big” designers were whispering loads of support from the sidelines.)

Anywho….it’s launched. While it started out with a square neckline, it seemed silly not to add a scoop and a v-neck option as well.

Ione shirt flats

I’m certainly not breaking the bank or moving any mountains at this point…it’s slow going – but honestly, I did this for 2 reasons. 1. To see if I could. I was talking with another designer who asked if I could do this…and I thought, well, theoretically, sure. Technical illustrations for print is my original professional skillset… and 2. I really LOVE the sewing community. So much inspiration and support, it really feeds me to add to the community.

Here she is. The original square.

Ione_Originals

The scoop.

Ione_scoops

And my lovely daughter modeling the v-neck.

Hazel-Ione-V-neck

I’ll have some hacks & illustrated instructions for said hacks soon that will completely change the look of this shirt. I’m also hoping I can get my mom (HI MOM!!!) to model a dress version for me soon (MOM, THAT MEANS YOU. I KNOW YOU’RE READING THIS.) I love the #sewover50 hashtag on IG, the ladies that run the @sewover50 account are so incredibly sweet, and my mom is drop-dead gorgeous. Win-win. Speaking of Instagram, the WorkhorsePatterns account has a few of the tester shots, including these side-by-side size comparison shots:

fullsizeoutput_11e5fullsizeoutput_11e6fullsizeoutput_11e7

3 different bodies, 2 necklines, 2 sizes, 3 different fabrics (lawn, quilting cotton+voile, rayon challis, respectively)

One I haven’t put measurements on yet Chloe’s latest V-neck…she made a size 18 too, but she’s 6 feet tall (granted, she added 2″ length.) Makes for a different look entirely, plus, she made it in silk!

fullsizeoutput_1243

Sigh. It’s nice having such amazing friends.

Speaking of, I’m off to edit another post…but more Workhorse Patterns are on the horizon. What do you think should be next? (MOM, you can answer that one too <3)

Party Dress: Pipe Dream Patterns Anya Dress

I made another dress!  It’s incredible. It’s also the first time I’ve ever used a polyester ITY knit. I had no idea.

Chloe sent it to me all the way from Australia. Sewing friends are the best friends.

I played around with draping it.

It’s really fun to drape. It has 4-way stretch; with 100% x 50% stretch,  holds and rebounds similar to powermesh, but thicker and opaque.

A cotton equivalent would be the Robert Kaufman ponte I made my Named Kielo dress out of…But a cheaper ponte doesn’t compare to this poly’s structure & drape.

It’s also lighter weight than the high quality ponte.

The fabric is sorta textured and feels/looks like it’s black with gold paints stokes.

Can you tell I’m just fascinated? I know polyester isn’t the most eco-friendly thing, but on the either hand, I won’t have to replace this fabric anytime soon! It washes and wears great.

Sorry about the photo format changing but I was having a lot of fun.

The cat is on my side.

I did eventually make a decision. Long after the cat gave up.

Joann has been working on some basics for awhile, and naturally I insisted on making them. In fact, one of them I wanted released before I released my pattern, but that is for another time. This one is for the Pipe Dream Pattern Anya.

Did I mention the fabric is like a powermesh?

The pattern has this great drapey neckline in the front, and a deep scoop in the back.

The Anya is made for a clingy knit and has the perfect amount of negative ease. In fact, I second guessed my size and went up a size like a big dummy…I shouldn’t have some of these wrinkles…

I should have known better. Just don’t do as I did! Joann’s drafting and finished measurements are actually spot on. Trust.

I also added 2 inches under the bust but before the waist line, and again below the hip line because that is where I needed to add my #sewingtall height.

Back in my office-warrior days, I had a number of shirts from Banana Republic and the like with these necklines. This dress is a perfect day-to-night example of a wardrobe staple…but as I don’t office-warrior it anymore…it will just be for night!