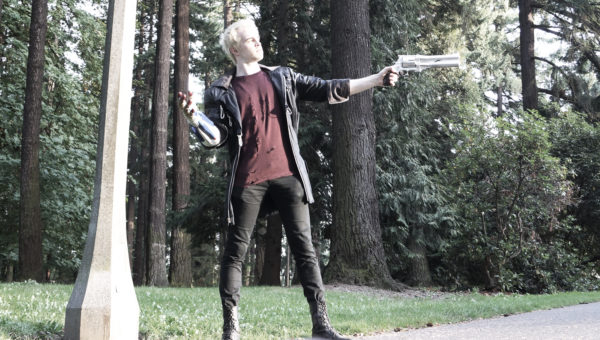
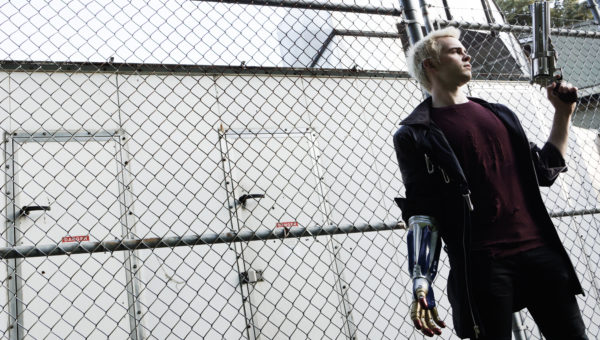
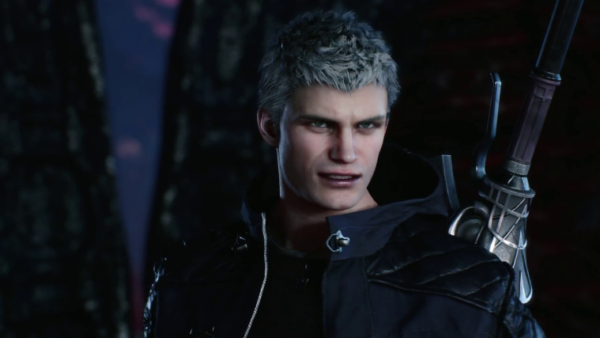
Nero from Devil May Cry 5 Custom Cosplay

I’m not a gamer. I can’t even play Frogger to save my life. That also dates me, as that is likely the last video game I’ve ever played, not counting Angry Birds after a pitcher of beer. That aside, I do absolutely love themed clothing, costumes, and above all, editorial styling. When I sew or design something, there’s a full editorial spread in my vision.

My kids don’t always get what I can do…they know their mom sews and can make stuff, but that’s really as far as their understanding goes. I don’t often make complicated things, or tell them about it when I do – I’m just a mom at the end of the day to them. So when my college-age kid, Zane, said his cosplay maker closed up shop, I said, “You know…I can do that…. and it won’t cost you shipping & customs, plus I can make it to fit you exactly.” And that is how this challenge was set.
This was a process. I don’t have a male block, only female blocks I use for Workhorse, and I’m not ready to delve into men’s patterns at the moment, so I used the Colette Albion as a block. It’s a solid unisex coat block, and it let me set in all the style lines I needed, plus already had lining pieces. This likely saved me a good week of work.

From there I raised the yoke up 2.5 inches, added in shoulder/arm yokes to line up and match, added a collar, added in front and back shaping seams that have darts built in, a welt zipper pocket, changed the shapes of the pockets, adjusted sleeve fit to be narrower and have zippers to the elbows, changed the lining to have matching shape, made a broad-back adjustment, changed sleeve lining to be pieced and allow for corduroy cuffs, added in a front zipper, drafted side and front buckles/straps, and added side vents.
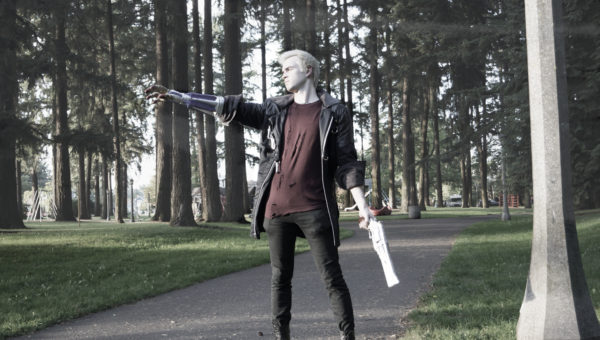
Whew! So, while I did use a” premade block,” as you can see, it has been completely re-designed and customized. In addition to all of that, there’s shoulder pads (necessary for structure/weight of coat), rivets, industrial & professional equestrian hardware, underlining, and real leather work.
All in, it still cost upward of $500USD in materials including the rivet and grommet dies, the hardware, the leather, the twill, zippers, etc. So, while he didn’t really save money (quote from custom cosplayer was about the same), there’s no way a long distance coat would have fit as well. We did one muslin/trial fit. Here’s a shot from Instagram I posted:

Being that I’m not a gamer, most of my reference material was what I could glean from screenshots and other cosplay on the internet.

This slideshow requires JavaScript.

Zane told me, as we were shooting in the park, the backstory of Nero, and how shooting in the park was hilarious. Woops. 😀 Pretend it’s a hell park, ok?
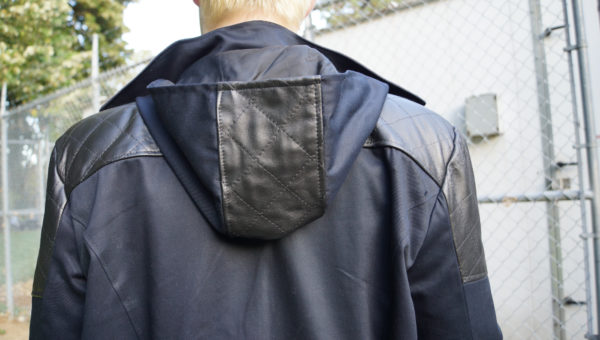
There were some new-to-me challenges. Sewing real leather was a first. Thankfully Karleen, owner of the Sewing Studio, had recently sewing similar weight leather and tipped me off to using a 90 Microtex needle. I’m sure she saved me a few hours of crying there. I had to quilt all of the leather, and once you put a hole in leather, it’s there to stay, so mistakes are not optional. That and I was doing precision work lining up the leather yokes across the chest-back-sleeves. OH! Pro-tip. Easing in leather sleeve heads?!?! HAHAHA. Not like anything else. It took me awhile. Normally I can easy in a sleeve head of any size or type – but steam doesn’t work the same on leather. Noooope.

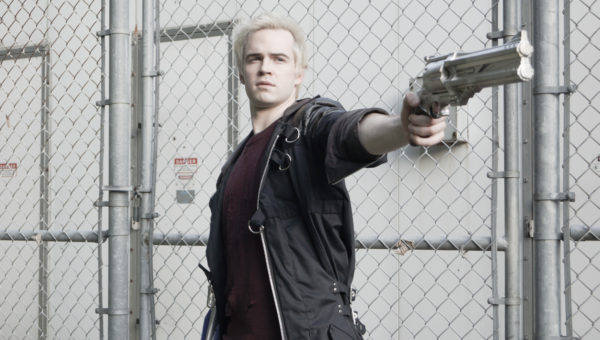
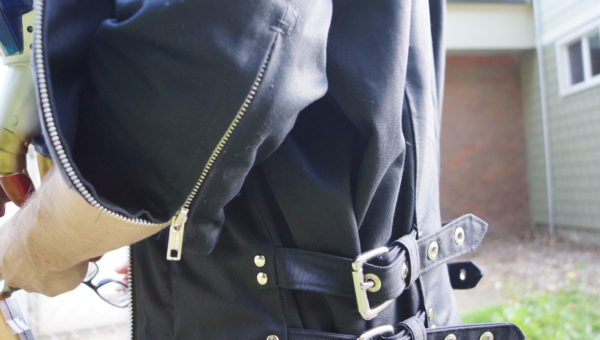
Here’s some close up photos w/o the stylized desaturation so you can see details:
Also new to me: setting in rivets and grommets. I’ve set grommets in lighter materials, but 10 oz twill, in multiple layers? Not the same at all. Plus I was using professional grade tools from Oregon Leather. Entirely different than your Dritz crafty options.
The coat is entirely lined in Bemberg rayon. I didn’t redraft any part of the hood from the Albion. HUGE props to them – the lining fit is spot on. That hood is damn sexy inside and out. TBH, all of the lining was spot on. I bagged out the lining and it was flawless. I transferred my adjustments to the body/sleeve lining pieces but the main drafting there was all Colette. Ditto armscye and, like I said, basic block was all Colette. So credit where credit is due there. You can see some of my pattern and sewing work on Twitch, but I’m just starting to feel my way around Twitch and haven’t started transferring video to YouTube yet. That’s another post. 
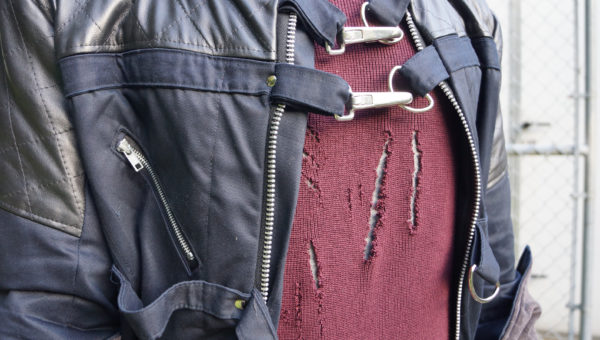
Those buckles are made for saddles/horse leather work, and are a bit too heavy for this twill. I may still swap them out. Undecided there. I can’t really put more layers at the area of attachment without using an industrial machine, which I do not have. The sweater was from a thrift store, and we spent about $50 on hair bleach and toner getting the hair just right.
All materials were bought locally at Sewing Studio, Mill End Store, and Oregon Leather. Even the Colette Albion is local!

So, tell me, do you cosplay? Do you sew in editorial? Have you worked with leather? Currently looking for large round slide buckle to make 80s leather belt the bit leftover. I’m also thinking this tie belt from Burda. I think I have enough leftover. What are your favorite leather projects? I’ve got dies I’ve invested in and hundreds of grommets, and discovered Oregon Leather’s scrap bins!
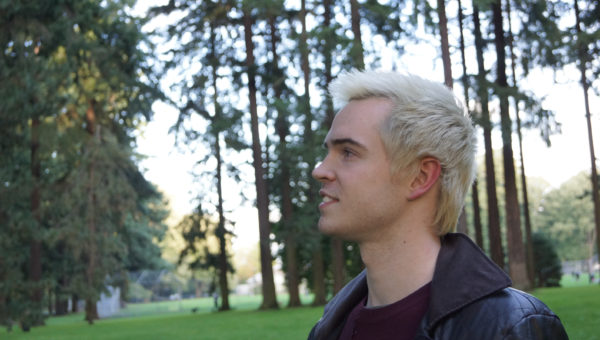
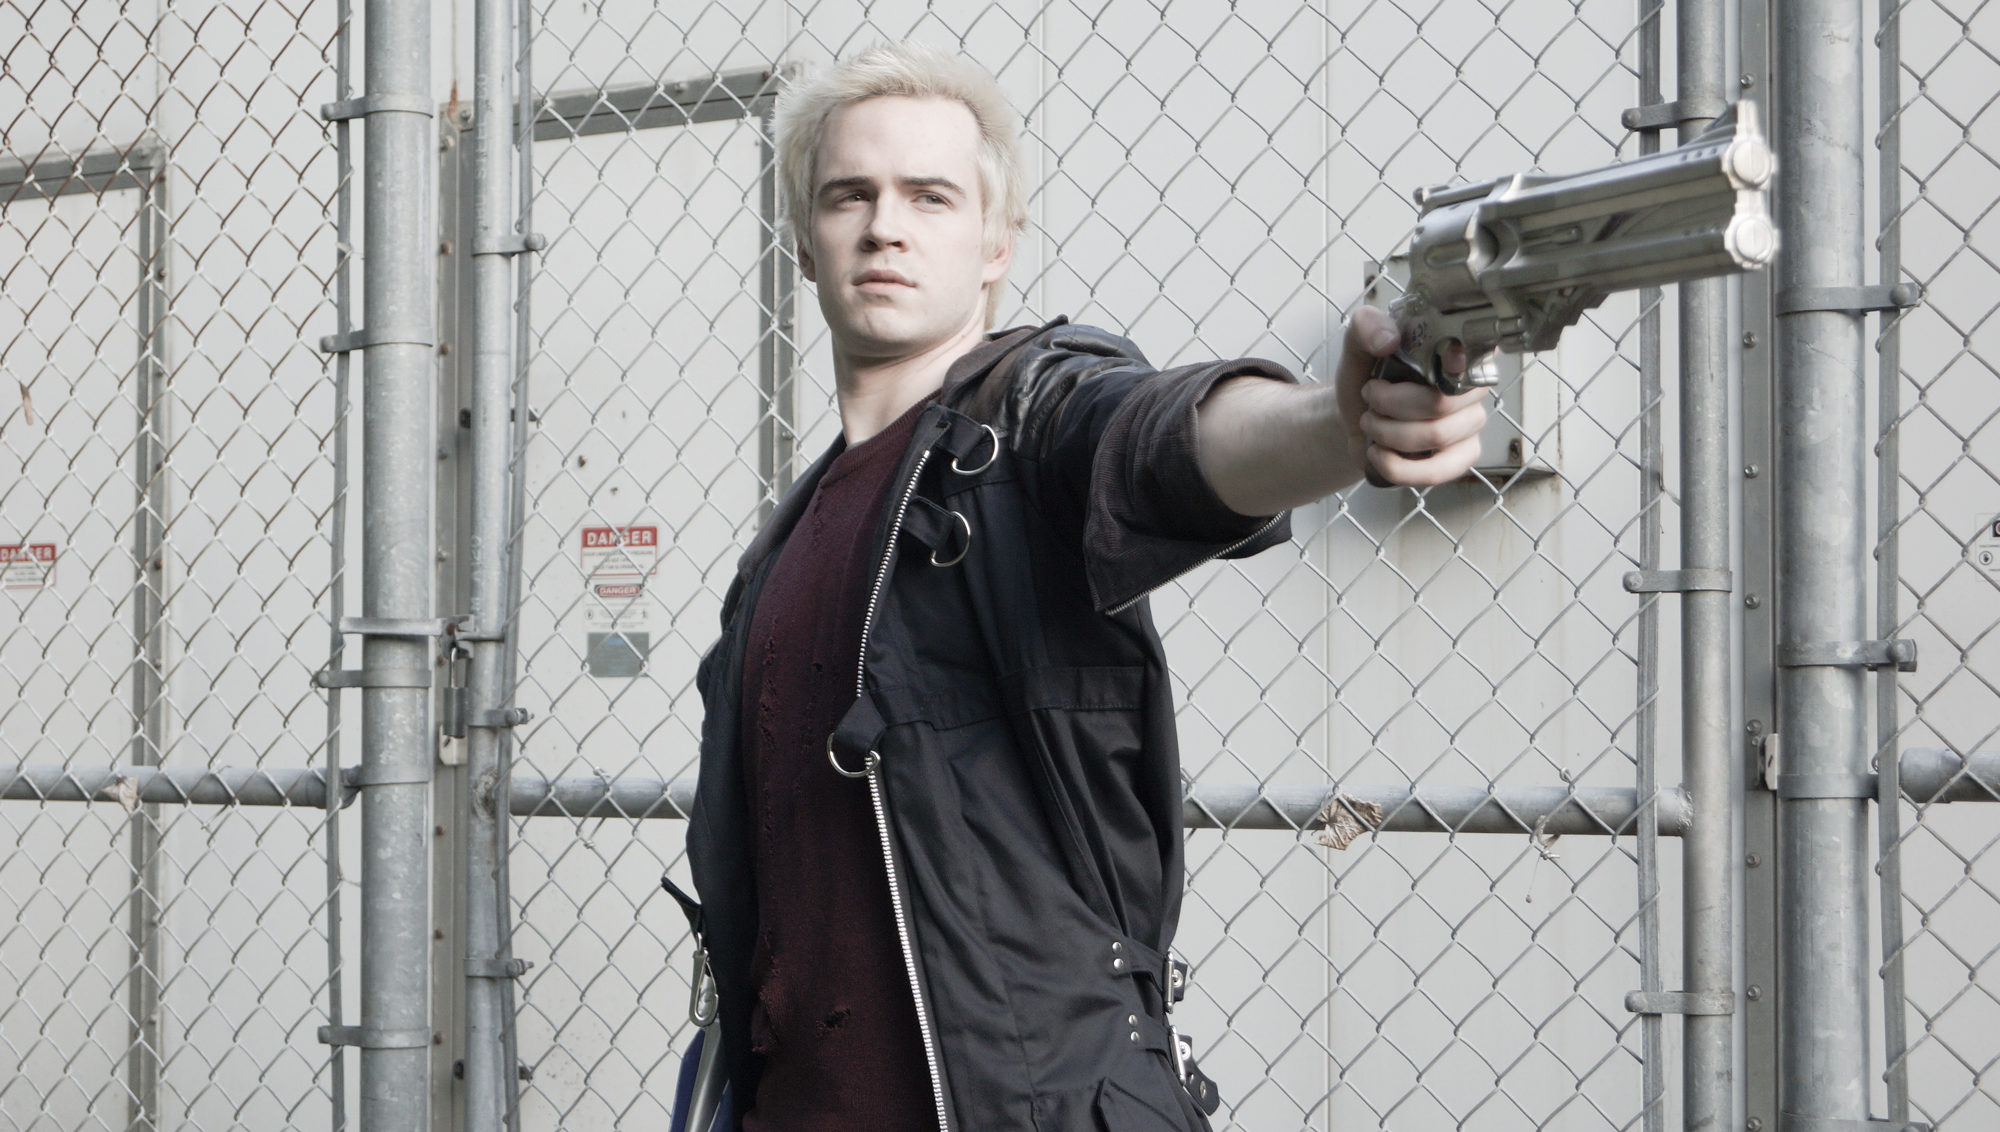
Zane as Zane

WHP Was Launched

I launched Workhorse Patterns with a LOT of help from my family and friends. It took a year from the Ione pattern concept to launch.

DSC04273

The Ione had a few iterations…of which I don’t have photos…lucky you. I bought the Robert Kaufmen “essex yarn dyed metallic rainbow” the second it was available. I’m not sure it’s even available anymore, but I knew I wanted it boxy, I wanted it 80s, and I wanted a square neckline. I’ve worked with a lot of RK’s linens & linen blends, and I know they soften up really easily and get super malleable.

Screen Shot 2019-02-19 at 8.48.03 PM

The lurex in the linen made it so that was not going to happen. This fabric is stiff, and not at all forgiving…and I tried to make a side-cinched dress…think Blondie and way too short. Instead, it looked more like a dryer hose.

Screen Shot 2019-02-19 at 8.39.36 PM.png

Not my best design moment. So, I chopped off the bottom and put it on a pile so I could get to work on Portland Frocktails for a few months. Then I came back to it, and played with the hem line. You won’t believe it, but I drafted that curve the first time I cut it. Kismet.

Then I got busy with the Sewcialists. That is a lot of work. Gillian owns that site, and I’m just an editor, but I don’t know how Gillian did it on her own for so long…it’s so much more work than….yeah. It’s a lot. It’s incredible, and inspiring, and omgtheressomuch. The Instagram account alone is both awesome and…well, it’s the original, real definition of awesome. It’s so big and so fast, slightly chaotic and very time-intensive.

So, that slowed things down a bit but I finally did get it out for testing in the fall. I was thinking “great piece for layering on turtlenecks ala Mary Tyler Moore & Rhoda!” It was even named on my desktop for awhile: RhodaRachelRuth.

Testers were really cool, all very good, and I had a great sampling of the population. Doing a broad size offering and being an unknown made that kind of impressive IMO. (Again, a lot of help from Gillian, Chloe, and the sewing community. Even a few local “big” designers were whispering loads of support from the sidelines.)

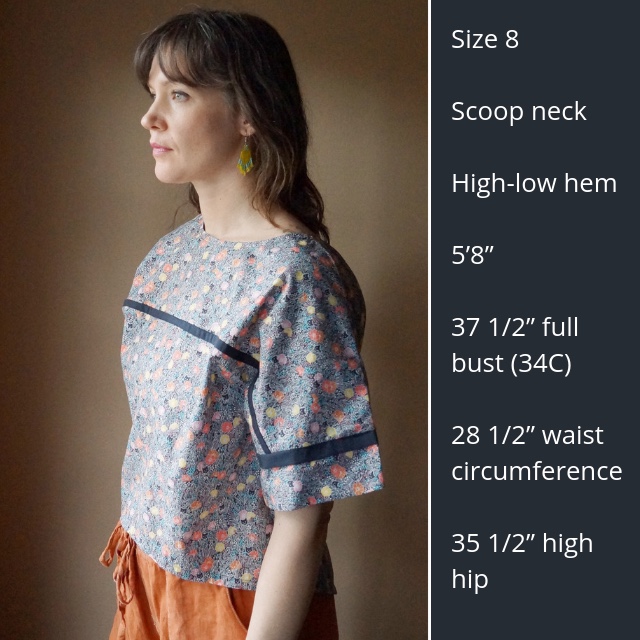
Anywho….it’s launched. While it started out with a square neckline, it seemed silly not to add a scoop and a v-neck option as well.

Ione shirt flats

I’m certainly not breaking the bank or moving any mountains at this point…it’s slow going – but honestly, I did this for 2 reasons. 1. To see if I could. I was talking with another designer who asked if I could do this…and I thought, well, theoretically, sure. Technical illustrations for print is my original professional skillset… and 2. I really LOVE the sewing community. So much inspiration and support, it really feeds me to add to the community.

Here she is. The original square.

Ione_Originals

The scoop.

Ione_scoops

And my lovely daughter modeling the v-neck.

Hazel-Ione-V-neck

I’ll have some hacks & illustrated instructions for said hacks soon that will completely change the look of this shirt. I’m also hoping I can get my mom (HI MOM!!!) to model a dress version for me soon (MOM, THAT MEANS YOU. I KNOW YOU’RE READING THIS.) I love the #sewover50 hashtag on IG, the ladies that run the @sewover50 account are so incredibly sweet, and my mom is drop-dead gorgeous. Win-win. Speaking of Instagram, the WorkhorsePatterns account has a few of the tester shots, including these side-by-side size comparison shots:

fullsizeoutput_11e5fullsizeoutput_11e6fullsizeoutput_11e7

3 different bodies, 2 necklines, 2 sizes, 3 different fabrics (lawn, quilting cotton+voile, rayon challis, respectively)

One I haven’t put measurements on yet Chloe’s latest V-neck…she made a size 18 too, but she’s 6 feet tall (granted, she added 2″ length.) Makes for a different look entirely, plus, she made it in silk!

fullsizeoutput_1243

Sigh. It’s nice having such amazing friends.

Speaking of, I’m off to edit another post…but more Workhorse Patterns are on the horizon. What do you think should be next? (MOM, you can answer that one too <3)

Catch Up Nov 2018

What is this? I’m on my OWN blog?? Seriously. WTH.

I’ve been working a lot elsewhere, to be honest. I’m an editor on The Sewcialists, which also includes doing interviews. I do so by recording a conversation, then transcribing, editing my voice out, formatting back into a cohesive interview format, and lastly organizing for blog content. My way is extremely labor intensive, but makes for really good content, so, is what it is.

As it so happens, we have an editor out on maternity leave, one on holiday, and our leader, the incredible Gillian, is out on an emergency medical leave for a bit. Editor Kate has her own super successful blog, has been working on Who We Are posts for Sewcialists which is no easy fete, and soooo Chloe and I have been working a bit of double time on the blog/email/IG and such. Woohoo!

I’ve also been working hard on my little Workhorse Patterns venture. It’s moving along…..very slowly, but moving along. The community here in Portland is so incredibly supportive. I feel like I’m not working on it enough, but I also know my propensity for burn-out, so I’m trying to be kind to myself.

The shout out to Portland also makes me want to point out this post on The People’s Sewing Army that Denise put together. She’s incredible. I want to be Denise when I grow up.

And I’ve been testing a lot for Joann/Pipedream Patterns. I am loving this unblogged Willow pattern. I’ve got some testing this weekend, in fact. I knew she was working on this pattern as I was working on my first Workhorse Pattern, and wanted it launched when I launched mine (which means I’m behind) as it would make sense for layering in the fall.

Today, and also unblogged (I need to make an unbloggedapalooza post), I’m loving my Wiksten Kimono. I made a quilted scrappy version for my muslin and have ZERO regrets.

What have you been up to? Please tell me you’re behind on something too…. 😀

PATTERN TESTER CALL OUT – Shirt Pattern

*EDIT* Currently have spots open for US sizes 30 and 32. All other spots have been filled.

30 = 55.5 inch bust with finished bust measurement at 72 inches*

32 = 57.5 inch bust with finished bust measurement at 74 inches*

*This is intentionally a “high volume” shirt to go with high waisted pants/culottes/pencil skirts and create a contrasting volume look.

Pattern tester call out. 

High volume (aka a lot of ease), woven-fabric top, pull-over with short, dolman sleeves. Hi-low curved hem. Style is intended to either go 80s boxy or can even be 70s looking if layered over a turtleneck like Rhoda would do.  Top works well for blocking & scrap busting.

Beginner/easy pattern with “burrito method” illustrations to be tested to enclose yoke.

Pattern to be sent out 9/7/18 at latest. Would like results by 9/21/18. More interested in tester feedback than professional photos.

Size range 0-32, with bust size range from 32 inches to 57.5 inches; waist 24 inches to 49.5 inches, approximately.

Please email bust/waist/height measurements if you are available to test to sewbeckyjo @ gmail dot com.

Amazon Echo Look Review

I’ve had an Amazon Echo Look for about 3 weeks now. My husband is an early adopter of tech items, both in personal interest and for his work, so often I get to benefit from that as well. He has watched me take photos of my makes for quite a few years now with various set-ups over the years with everything from a crop-body Sony DSLR to whatever current smartphone I am using (usually his previous year’s model. I get the best hand-me-downs with him testing out the bugs first.)

When the Amazon opened up sales for the new Echo Look, my dearest thought of me and how to make taking photos easier. I’m not going to lie. I was very excited.

Now that I’ve had it for a few weeks and have played with it, I’ll share my early thoughts on it.

I really, really hope it takes off. I hope everyone who posts in #MMMay or their #OOTD or whatever else buys one…and then goes to Amazon and asks for updates. The ease of the app and set up is perfect. As much as I love it and the convenience of it, it needs some work and I’ve fallen in love with too many things that were launched too early and were killed because of lack of support. I’m looking at you, Microsoft phones, Xbox Fitness App, Beats music app, etc.

Last weekend, I went into the Amazon store (local brick & mortar), and asked an employee if they could discuss the Echo Look with me. They kindly told me they didn’t even have one in the store and didn’t know anything about it. They gave me the 800 number for customer service and said they usually know more.

Two days ago I called the 800 number.

First I talked to TK, who tried to tell me that Amazon wasn’t available at this time (um, I’m in the same time-zone.) That was funny, and not in a good way. TK told me that they only trouble-shoot problems and that they can’t forward my call to the design team (which I did not ask for, I asked for someone on his team that knew about app/device updates and about using the Echo Look.) TK forwarded me to “George” – I will note that George started out with an American Southern accent which he quickly lost as he went back to his native language accent. I’m not sure what the point of that was….? I think after he realized I wasn’t some n00b complaining about not being able to get her Fire stick to work, he dropped the fake southern accent. George actually tried to first talk me into returning the device. George didn’t know anything either, and eventually told me to write a review online under the product.

The Catch-22 is amazing. The store knows nothing and points consumers to the phone people. The phone people are irritable, they do not like that I’m asking device & app update questions, they don’t know anything, and point consumers to return the product or write a review here.

Ok, now to my problems and requests for solutions. This is all taken directly from my review left on Amazon, because, yes, I really do want to keep using the device, and I really do hope it takes off. The only difference is here I’ve posted photos so you know what I mean. Amazon doesn’t need my photos – a quick look at photos in Instagram will show I’m not the only one…or I AM the only one not pulling the photos into another app first to edit.

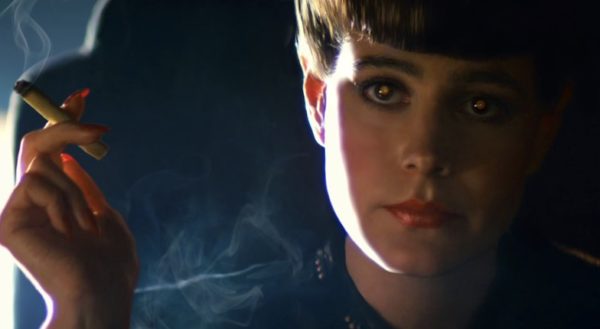
1. Pre, what, 2000, I was that person that got red-eye when not even looking at the camera. Technology and cameras have advanced so that isn’t an issue…or I pull out the DSLR and use an external flash – but even then, my DSLR is new enough it doesn’t really have those issues. The Echo Look’s 4 LEDs are SO bright, I look like a Replicant from Blade Runner. No exaggeration. It’s like you went back in time with technology. Not even looking at the camera, I still get retina refraction like crazy. I tried putting scotch tape over the LEDs to soften the impact which reduces the Replicant look by 50% but then the app doesn’t like that and tells me something is wrong and till not apply any of the filters or the blurry vignette feature (Pop.) You have to fix this. I’m NOT alone. Going through Instagram for EchoLook photos is like Replicant Tinder. You’ve got to do a hardware OS update and fix that, and/or allow the app to reduce flash brightness.

pre-run camera test – red eye while looking away AND with a hat

2. Let’s talk about Pop or the weird blurry vignette slider that isn’t really a slider. Yes, it is helpful, but please update app so that slider is really a slider. Right now it is A. Nothing. B. You’re floating in a blurry cloud C. You’re actually swimming in amniotic fluid.

No Blurry Vignette
Medium Blurry Cloud
Swimming in viscous liquid

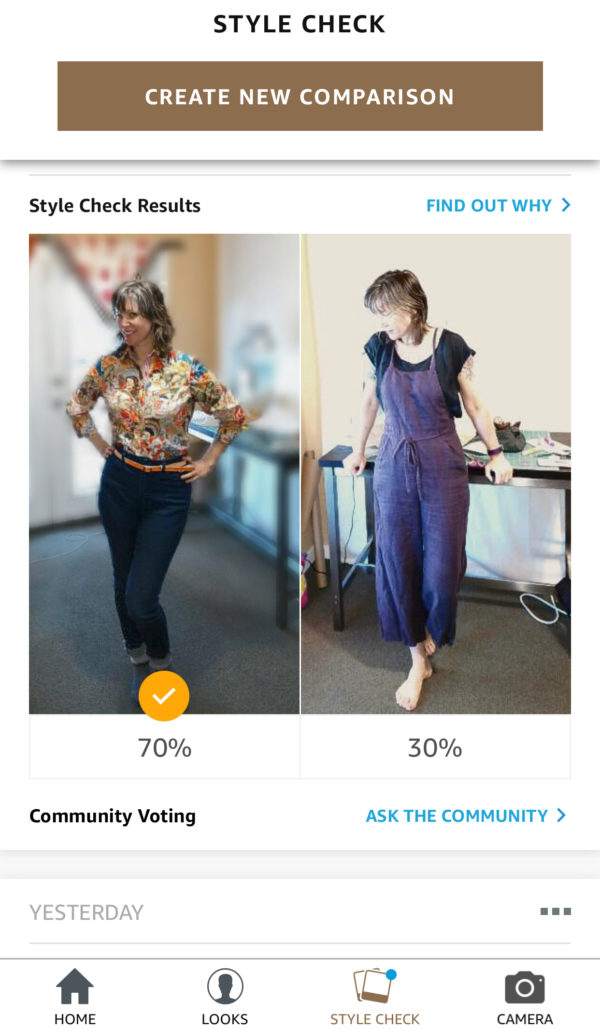
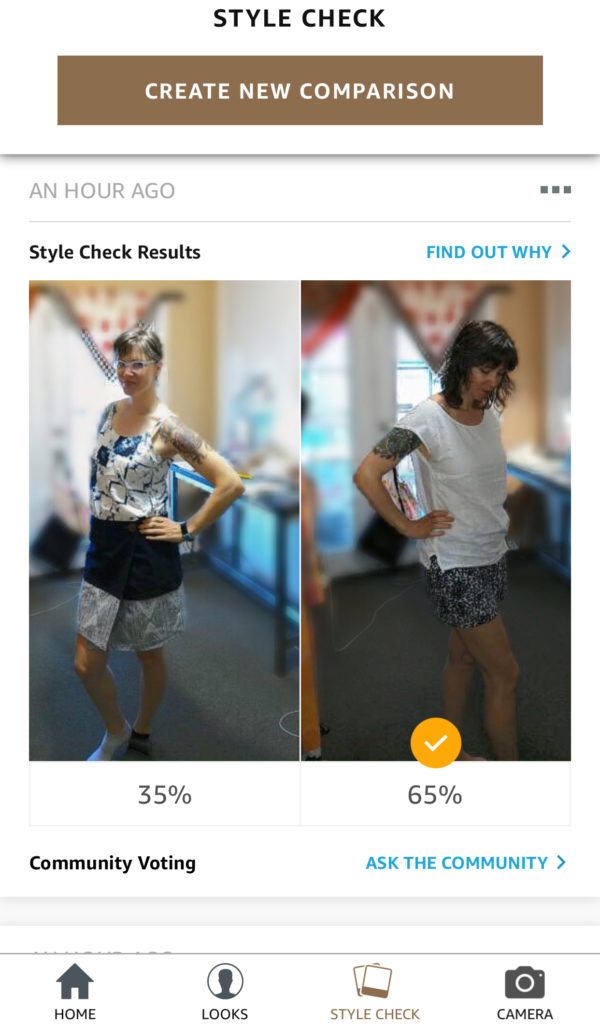
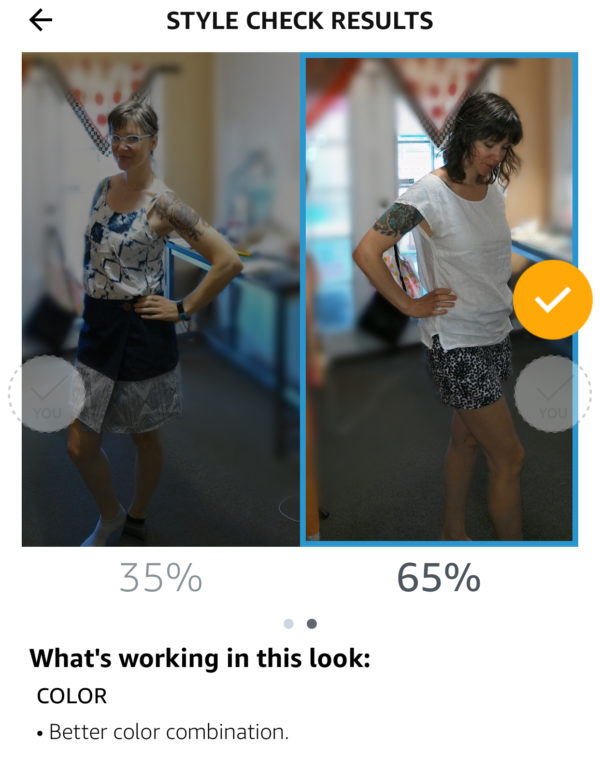
3. The fashion compare options. HAHAHA. Oh. Please. The algorithm is set to 1950. Seriously, try it. Put on, say, nice linen overalls with a wide leg, paired with a mid-volume silk shirt – totally on trend, and put it next to an outfit that looks like it was bought from Chicos (think princess seamed button up shirt in novelty print, and a defined waist-pant, and it picks the Chicos outfit every time.) Fit & Flare isn’t the only design aesthetic, thanks. Please update app to have style preferences. Think Stitch Fix or the Nordstrom version of Stitch Fix…it’s for men, so my husband uses it, not me, but they’re VERY good. You’re in the same town as Blake, just go over and ask him how they set up the Nordstrom version of Stitch Fix, ‘kay??

(Sure, maybe I didn’t need to be soooo punchy, but I was a liiiittle irritated at this point. Pinched-in waist and the term “more flattering” or “outfit shape looks better” when it really means ‘this outfit makes you look skinnier and OF COURSE that is what you care about’ is so F*CKING OLD. Just STOP.)


Chicos Vs Linen & Silk

Um, these are the same colors… right? blue and white…or blue and white?
apparently I don’t know my colors.

4. You may need a more diverse group working on this product. I’ll let you figure out that one, but I’ll give you a hint. If you gear something towards women, with ONLY women in ALL of the product demos, then maybe there should be more women, particularly women in fashion/design, involved in the process. Also…you may want to diversify your product demos… lovely range of women with POCs…all the same size and age range. And just women. Call me, I’ll help you.
5. I shouldn’t have to pull this all into PhotoShop. This should be plug-in-play directly to Instagram. You’re losing SO much with all of these issues. Your Echo Look account isn’t even used – I’ve got a stinking suspicion you’re already planning on dropping this product. I can’t find ANY reviews other than the PR release you GAVE out. I seriously don’t care what 40+ year old hetero white men not in fashion/design have to say about this product, nor what they forced their single female staffer to do with it. There’s NOTHING. Which tells me there’s suppression, and possibly such a great loss already you’re looking to bag out completely and are ready to erase it. I’d prefer you supported it instead. It wasn’t a bad idea. I prefer it to having to set up my DSLR or propping my iPhone on my tripod…but my iPhone takes way better photos and has a portrait option that rivals my DSLR. That and no replicant.

So…that’s my little soapbox for the Echo Look. I will tell you, we are huge fans of tech and I do love Amazon’s products. I really do believe there can be better living with tech. I believe the Look can help – better shopping choices means less fast fashion waste. My criticism is in hope Amazon does NOT take this as a loss. I’m not returning it because I WANT it to be better; I have hope more people will adopt it and Amazon will roll out updates.

Until then, your more human than human friend.

Fashion Sketches: Continuing Education

In the name of all that is Stephen Covey and “Sharpen the Saw,” I do try to make myself take time and learn more, refresh what I know, update my tech/knowledge, and make myself a better, more well-rounded person.

Honestly, it’s my ever-supportive husband that is keeping me updated in the tech department, and so I find myself with an iPad Pro & pencil, perfectly timed for my need (want) to update my Adobe skills. Again. This time, my Illustrator and hand-drawing.

Here’s where I’m at NOW:

I’ve never been a hand-drawer. I’ve always relied on CAD, whether CorelDraw or Adobe Illustrator, or heck, you used to be able to break apart Microsoft clipart and manipulate it if you tinkered with it long enough (can you still do that?)… What I’m saying is I’m a dinosaur completely reliant on a mouse. I’ve got mad control with a trackball and the tendinitis to prove it. lol

This is a new series to get where I want to be and:

  1. keep me accountable
  2. get any advice from the inter webs you may want to share
  3. share what I have found as I go along
  4. I’ve got some hand-drawn patterns and a few ideas up my sleeve. I want to get to the point I can share them.

Now that you know my goals at this juncture, let’s begin.

I signed up for the Craftsy Drawing Fashion Flats class from Laura Volpintesta. I also put out a “help” call on Instagram, and found Laura is not only on Instagram, but she’s sharing really great information there, has a full line of classes, and has a HUGE YouTube playlist.

I’m already learning tons from Linda’s class, but to find out she’s super generous with her knowledge, and very body-positive and diversity-positive, is just the cherry on the sundae.


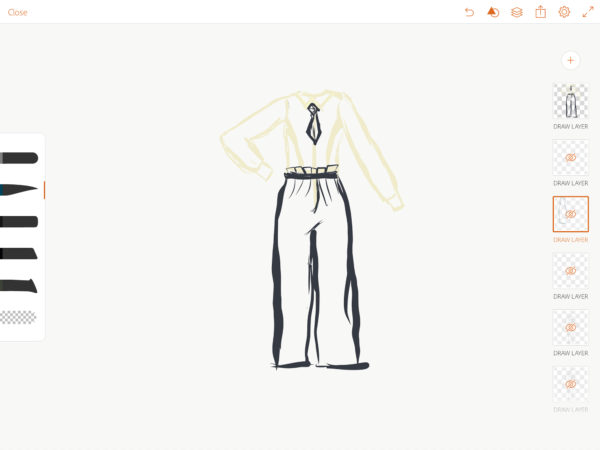
Above is Linda’s croquis imported into the Adobe Draw app on iPad Pro.

This is my first attempt at drawing over Linda’s croquis. I’m hoping to get better – because wow. That’s bad.

Pros of Adobe Draw: I can upload the croquis (or anything) to a library in Adobe Capture, then from that library, put the croquis in a layer to draw over and make visible/invisible as I need. Also, layers. Also, Adobe Draw exports to “real” Adobe Illustrator on my Mac. Ecosystems are a good thing – or at least good relationships between ecosystems. Apple Pencil response is good.

Cons: Brushes are pretty meh and all really the same. Gotta have Adobe Capture (this may or may not be an issue – if you’re used to Adobe, you know there’s always a Suite to anything you want to do…you can never have just one thing.)

This is an app called Paper – just the free version so far. I love the watercolor brush although I can’t help but think it’s hit trendy-status. This is without a croquis and using Linda’s techniques. This is also after a month of (very lackadaisical) practice.

Pros: Apple pencil handles very nicely. Watercolor brush is BOMB, and possibly soon to be as dated as using the word BOMB.

Cons: No upload ability. In fact, I don’t see any import/export capability…other than taking a screenshot. This does not bode well for my continued use. And no layers. AAAAAAAAhhhhhhh. I can’t deal.

This is Adobe Sketch. I just started playing with it last night…so be gentle on my little oil figure.

Pros: That oil brush is fun. I can import/export – see Linda’s croquis underneath my oil girl. Layers, OMG I love layers. I didn’t realize how much I loved layers until I tried to go without them. I like that I can easily change my tools to a series of 5 brushes that I want to use….I think Draw does this too.

Cons: The watercolor brush isn’t as fun or trendy as Paper’s watercolor brush, BUT it has this cool “fan” icon button that you push when you want the water color bleed to stop. So, that’s neat…for 10 minutes (ok, I’m lying, I played with it for like an hour.)

So, what’s next?

That’s only 3 apps. I get it. It’s only February. What should I try next? I see a lot of pros/cons out there for Procreate. Mostly that people not used to, say, the Adobe CC Suite think it’s too complicated, and those used to the Adobe CC Suite think too many tools are being taken away for non-pro usage. Keep in mind, Paper is too…basic for me. Basic? Yeah, I’m sticking with basic. It’s fun, but not fitting my need, how about that? Maybe I’ve already hit what I need in Adobe and need to buckle down on muscle memory/do the work?

Thoughts? Comments? Art critiques?

Photoshop + DSLR Bundle from ABM

ABM Class
ABM Class

It was 1998, maybe 1999. I was sitting at my desk in an office in an industrial sign company. My boss comes by, and unable to find the graphic designer, hands me this letterhead with edit scribbles on it, and tells me to fix it. This became my intro into learning CorelDraw.

Fast forward a couple years, and I’m working in the corporate office of a train company, mostly exec admin stuff while I’m going to college. Almost the same scenario – there was a need for a designer, they knew I had some experience, and then I spent the next 8 years or so in Adobe CS.

That was some time ago now, there were a few other stints afterwards, and while I don’t do it for a living anymore (burn out is real, man, it’s real!!), I haven’t really refreshed my knowledge or habits. Most of my Adobe training is circa 2000, and my DSLR familiarity is gleaned from pro-photographer friends.

I looked around online for a refresher course. I need some updated habits for Photoshop and to get a better handle in general. I looked at Craftsy and Youtube and blogs and pros and all that crap. I’m not going pro here, I just need a reboot. Old dog, new tricks. That sort of thing.

I settled on A Beautiful Mess’s Photoshop for Bloggers + DSLR Basics Bundle. It’s a good price, the synopsis says it’s a basic overview of both the subjects I want, I go at my pace, it’s a combo read/video with play files and PDF cheat sheets – it’s perfect for what I need.

AND I’m currently half way through in only a few days, and I’m super pleased. I’m not a true beginner, so I can bust through these really fast, but I’m learning some new habits. Like, back when I learned, we made exposure adjustments from the base image, not in a layer. That alone has been worth the cost of admission. I was all, “WOW” and “DUH” at the same time. Why did I not do it that way? Also, when I started, there was no Bridge, so when Bridge came out, I rejected it. ABM has shown me the error of my ways.

I don’t want to give it all away, but I do recommend if you find yourself in the same boat. Or maybe you’re a true beginner? I think it’s great for that too. She goes through a few parts kind of fast in the video if you’re super new to Photoshop, but it’s completely repeatable. Like, I’ve had to rewatch the same 4 seconds of a knitting video to learn it – same diff.

Besides, those darn girls are so precious, how can one not enjoy taking a class from them?

Homemade T-Shirt Stencils

Freezer paper crafts are all over the internet and that’s all well and good, but what do you do when you didn’t buy the freezer paper when you saw it, and couldn’t find it the next time you went? You buy a ginormous roll of plain white contact paper for $5!!! It will last me well past the adhesive turning to a gummy, sticky mess inside the roll. Uh…that part might not be a bonus.

Anyway, Joann Fabrics and Crafts will have a sale on t-shirts at least every other month or so when they run about $3 a pop. You’re, like, losing money if you don’t buy them for your kids. Kids grow so fast and ruin things so fast that at $3 each, there is no better deal. That, and you can afford to get a $5 pack of fabric paint and some freezer (contact) paper. Honestly, I don’t remember how much the pack of fabric paint was, but here they are at Michael’s Craft Store. Paint pens are really silly when you think about it….they’re impossible to write with…they just make big globs. Anyway, I’m getting ahead of myself.

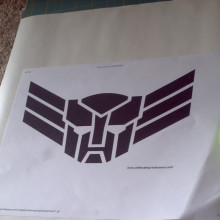
I printed a few options for the kids to choose from in making their stencils. Hazel did the Autobots Transformers symbol, Alex did a spider and I sorta winged a shot at Totoro. I just did some Google searches in images, tweaked some in PhotoShop to get make them cleaner and black/white, and the spider was actually just a stock Adobe image.

Transformer Stencil
Transformer Stencil

Tape them to the contact paper at the sides. I used a box knife to cut the pattern out, but if you have an X-ACTO set, that might be a lot easier. Obviously, this is a grown-up job. I did it on a self-healing Olfa mat, but, again, cardboard is great. It may not be pretty, but that is what tape is for.

Cutting The Stencil
Cutting The Stencil

Peel the backing off the contact paper, and stick it to the shirt. Use tape to fix any cutting errors on the contact paper. The paint will bleed through the fabric, so put something between the layers of front and back, or you’ll have the front glued to the back with the paint that leaked through. I had some plastic wrapped canvas stored for more painting projects from another sale, so I slid those in between. Cardboard would work fine or even a plastic bag flattened out.

Cut, Taped and Ready Stencil
Spider Stencil
Spider Stencil

Now it’s time to paint. Like I said, the name “paint pens” is sort of a misnomer in my opinion. You can’t really write with them, however, they do allow for controlled amounts of paint which is a good thing. We each put out a glob of the color we wanted, and used our fingers to smear around in the area to be painted. This works well – just keep in mind, big globs left behind leave big, hard, plasticky dried paint spots. When smeared to a light, but saturated, coating, it dries pretty nicely and is flexible with the fabric.

Painting With Paint Pens

In my experience with this and other stencils, you want to leave the stencil until the paint is still tacky, but not dry. If you wait until it dries, you run the risk of the stencil being glued to the shirt by the paint. If you do it while it’s too wet, there can be smearing or leaking/running paint. We did this on a fairly dry day outside (in Oregon, that’s saying something), and the paint was tacky in an hour. I left some of the detail bits in the Totoro stencil too long and had to pick them off with tweezers and a bit more force, but nor harm/foul assuming I never wanted to use the stencil again. I think one homemade Totoro t-shirt is plenty for me.

Will I do this again? Yes – but I admit I’ll probably try real freezer paper next time to see if it’s a little more wieldy and easier to cut. But the fabric pens were great – really easy, fun to use and what a fun, cheap day.

I dig a fun, cheap day.