Teaching Kids to Sew

Teaching kids to sew is so weird. I started off with the same things I always say, to anyone really, about anything; and that is: You can’t really break it. Not really. There’s always a fix. But there’s so much more when you’re teaching from zero.

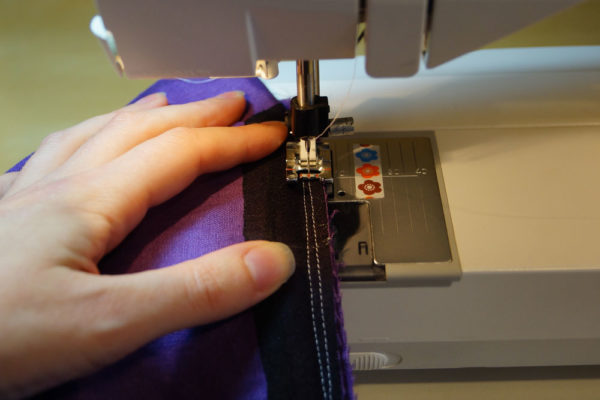
Sure, I’ve let the kids sew here and there, but this was different. I got a machine specifically for them to use. I got a very lovely Janome Magnolia 7330. Most of the time when you think the Magnolia line, you think of those mechanical ones…this isn’t one of those. This one is really damn nice and smooth for the price.

Janome Magnolia 7330

So, with the value of this machine being quite the commitment, Hazel and I have been putting in some serious time learning how to use it.

Can I tell you a secret? I am learning SO MUCH.

Teaching someone from zero is…wow. There is a lot to learn! hahaha. No wonder people are so intimidated! In all fairness, I dabbled and quit quite a few times, so I shouldn’t be so surprised, but WOW. I forgot how much there is to know.

Case in point…I told her to press her seams to the back. She asked, “What does press them to the back mean?” I am so used to the language, I actually didn’t even realize how that could be jargon to the completely new. You ever want to be humbled, try teaching children.

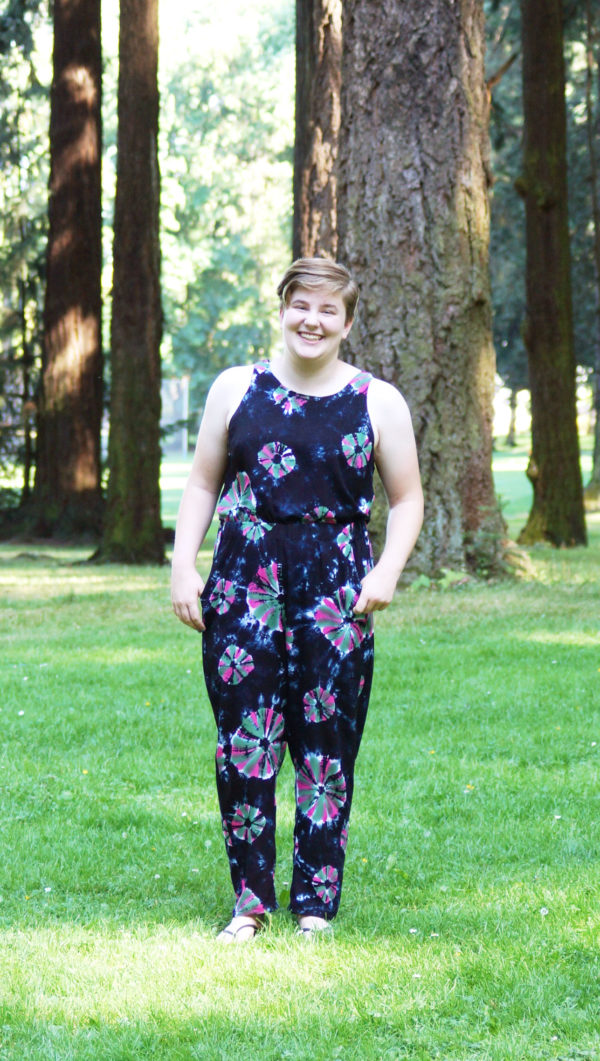
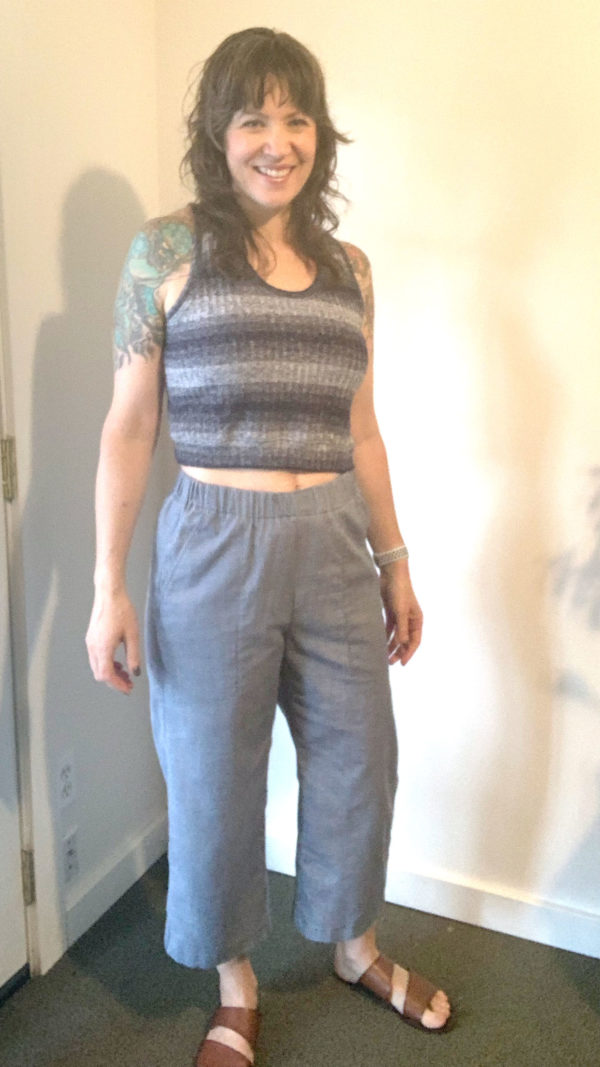
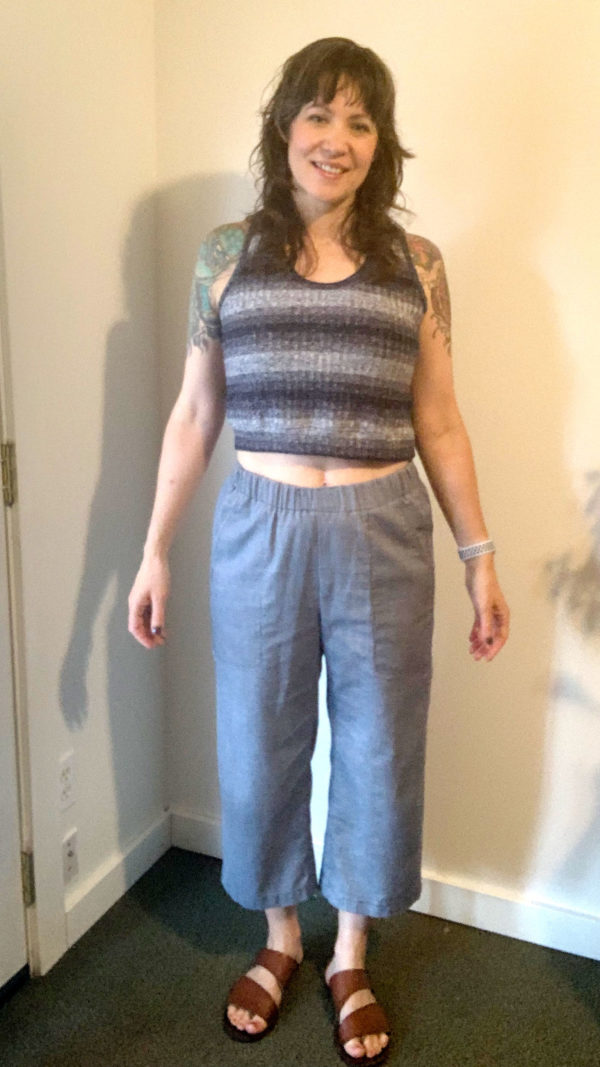
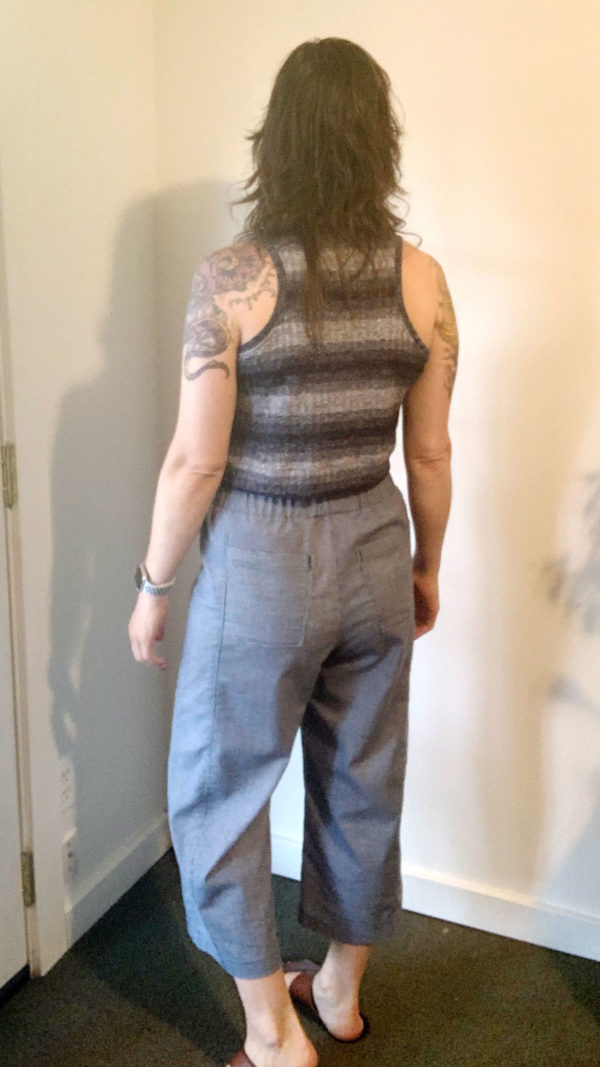
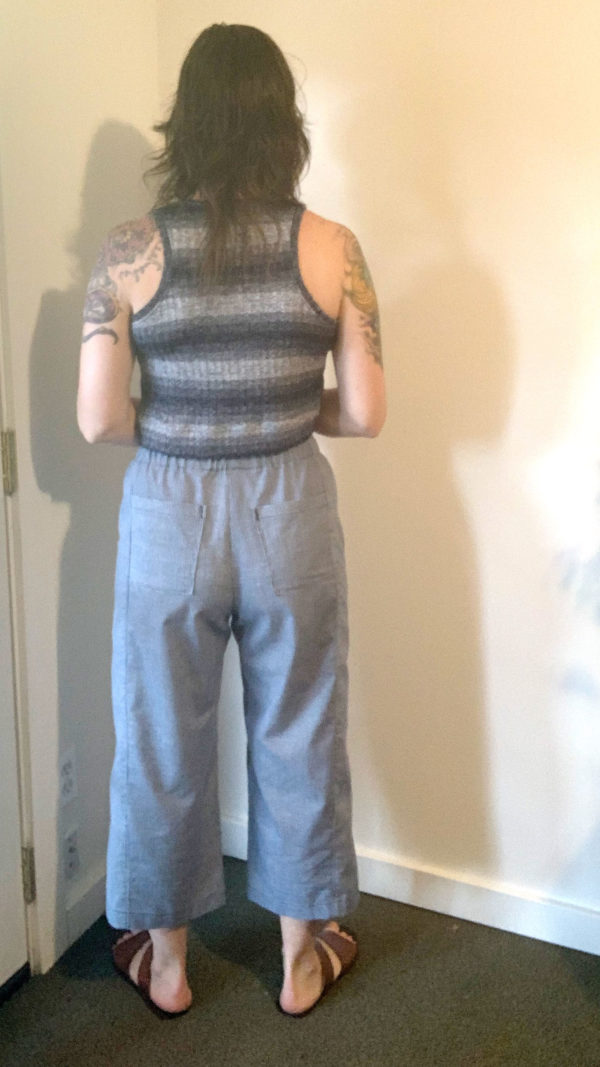
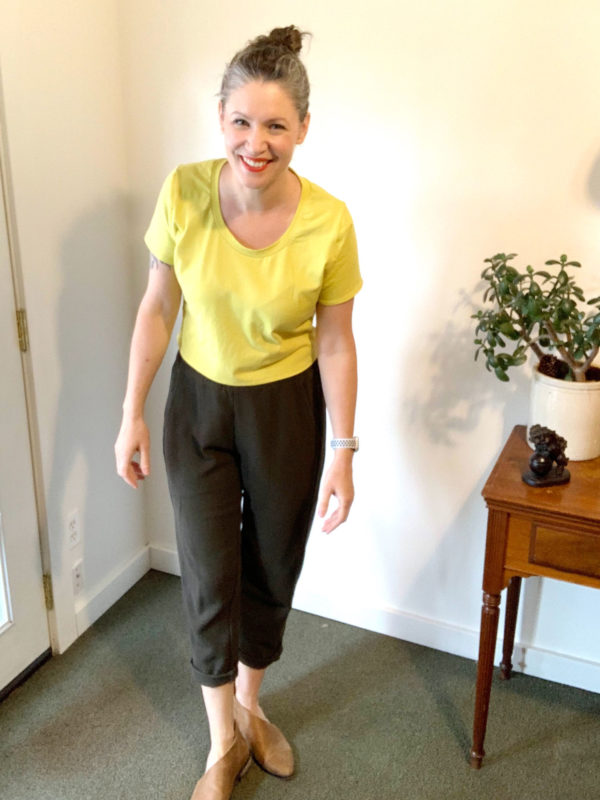
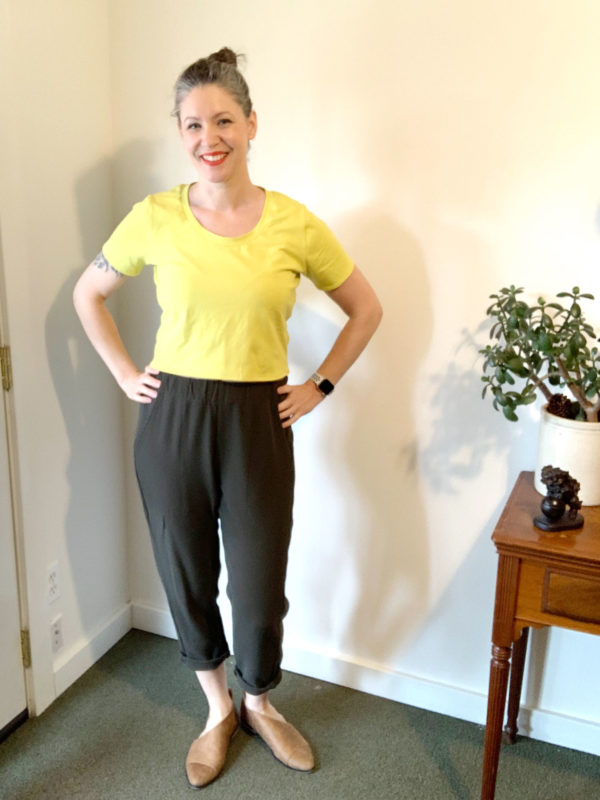
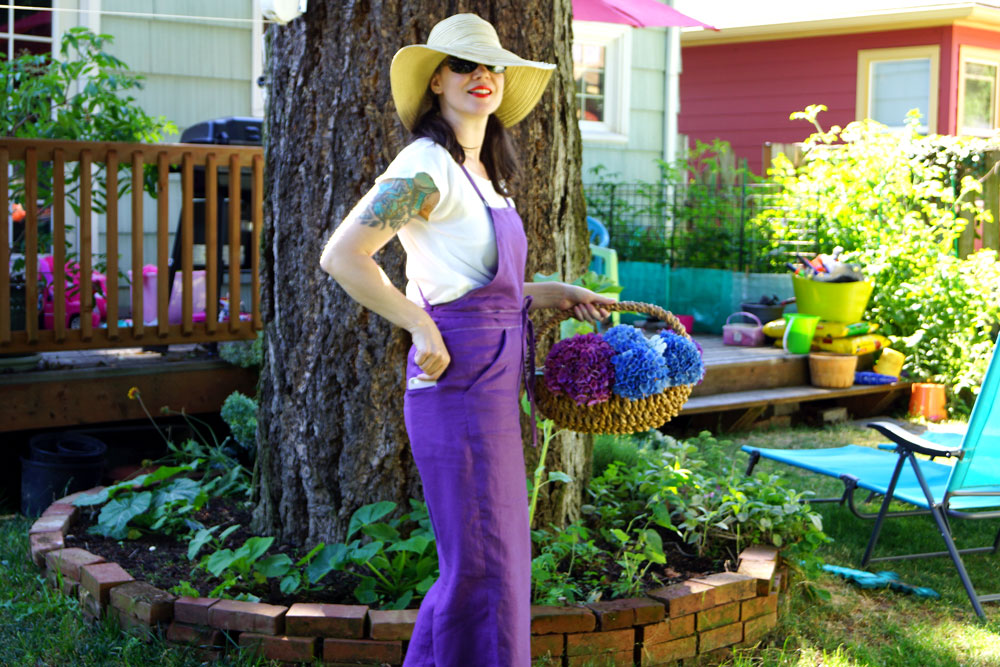
Anyway, this post isn’t about me or Janome. This is about Hazel. Look what she did!

Hazel in a blue shirt and black pants

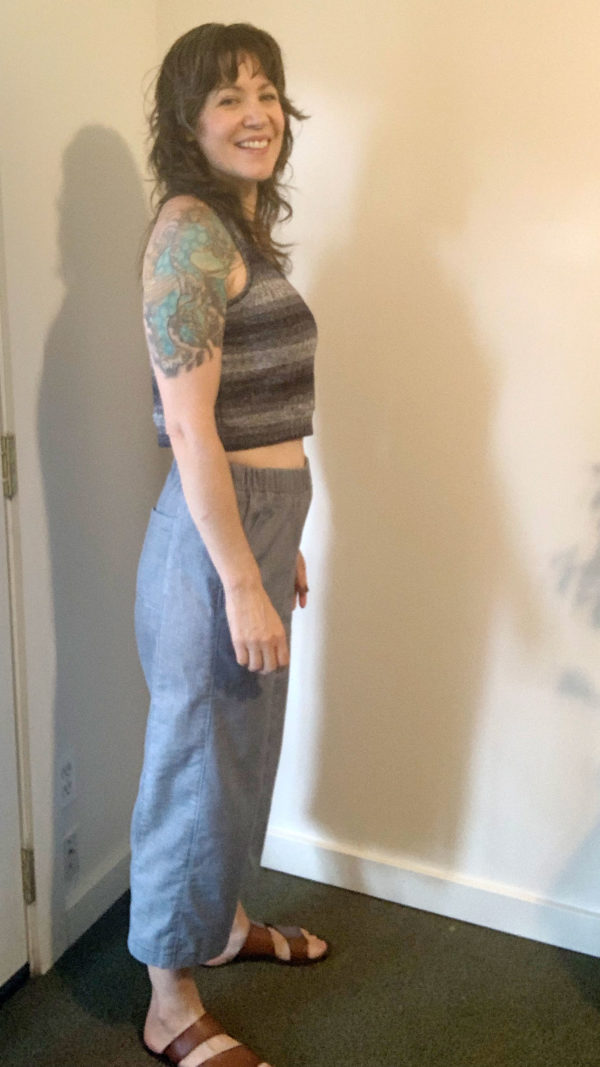
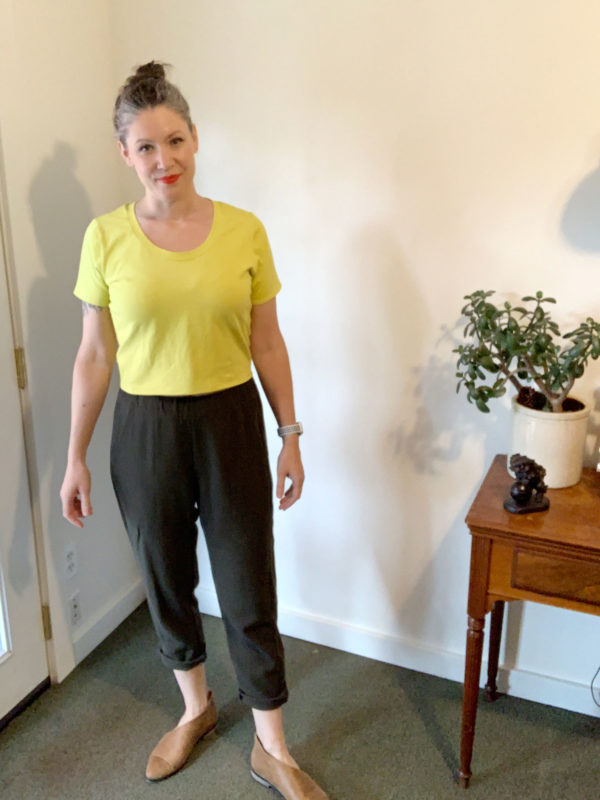
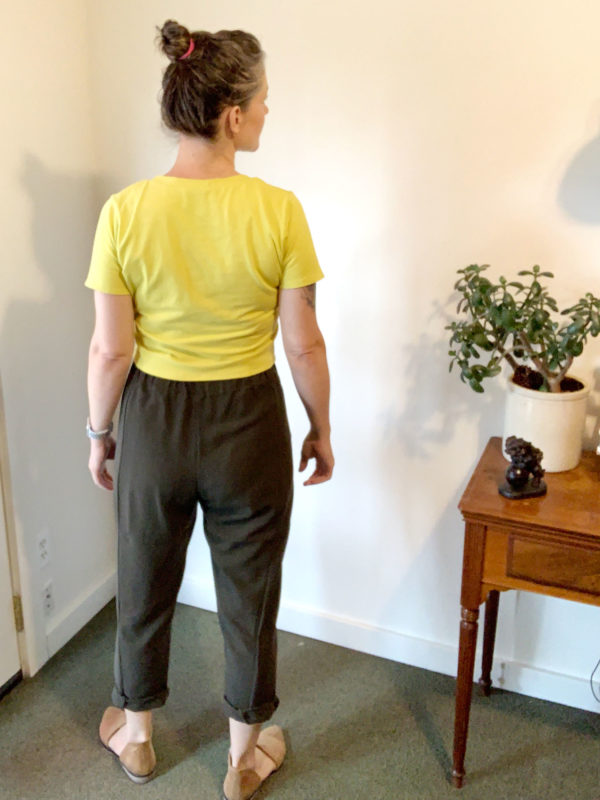
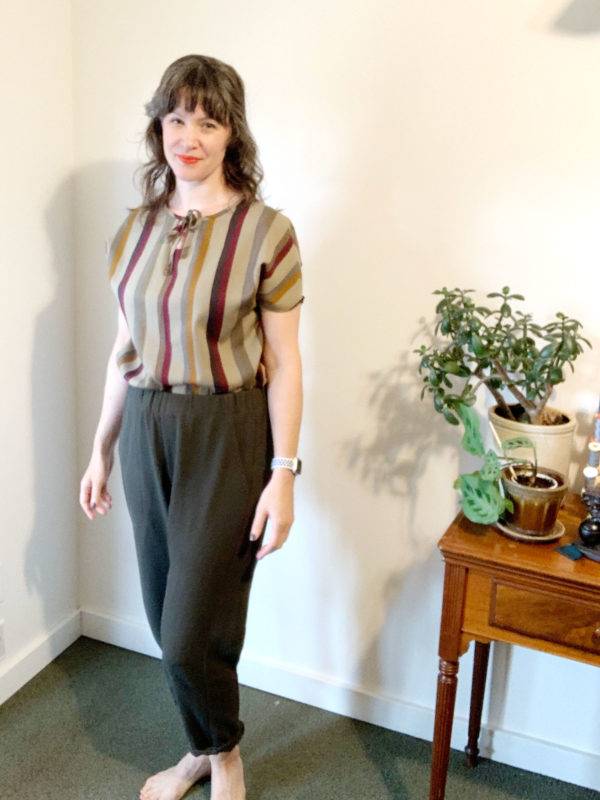
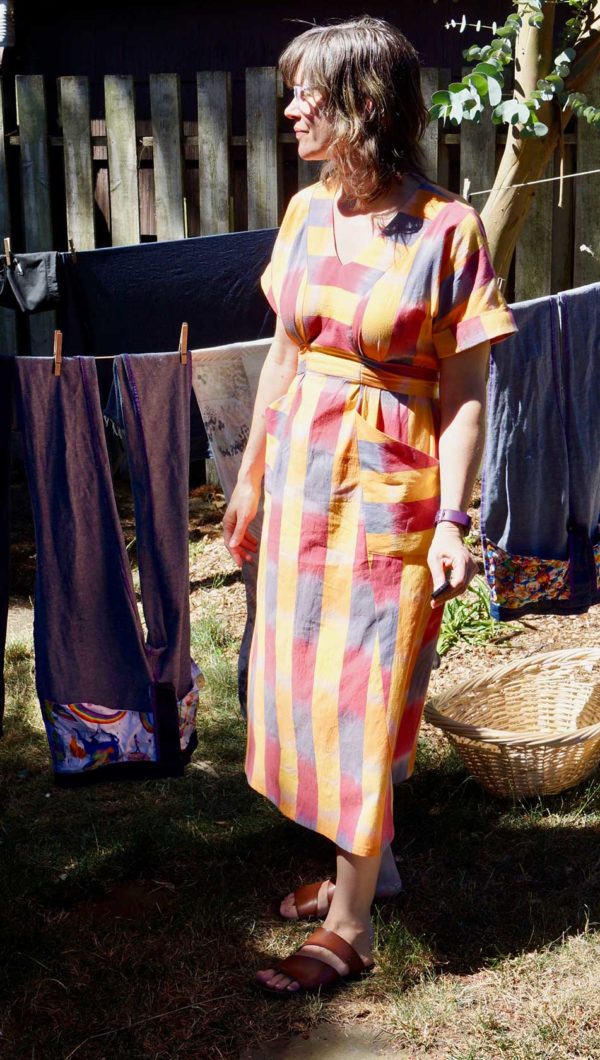
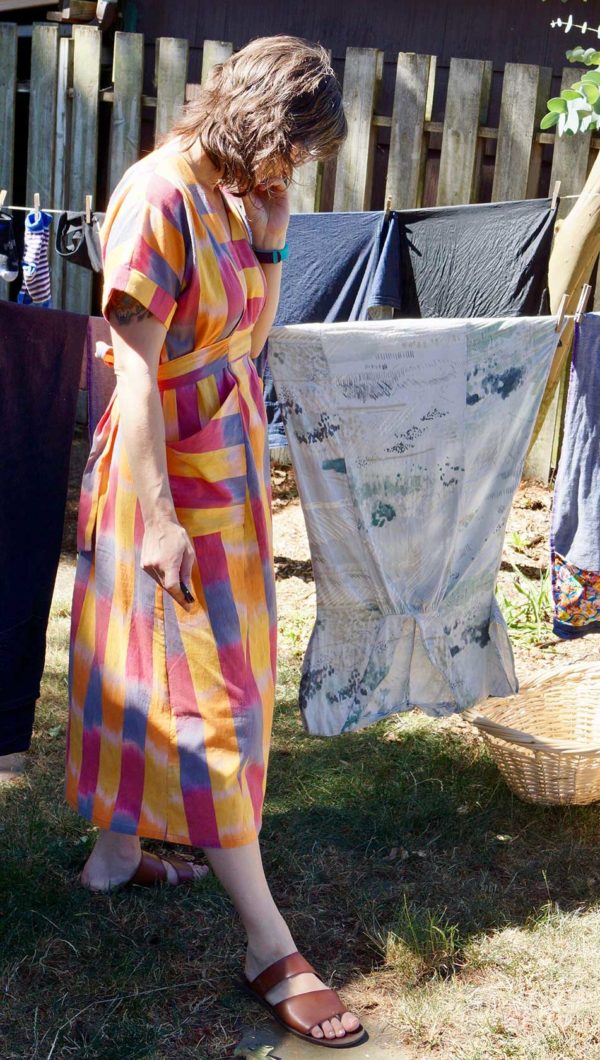
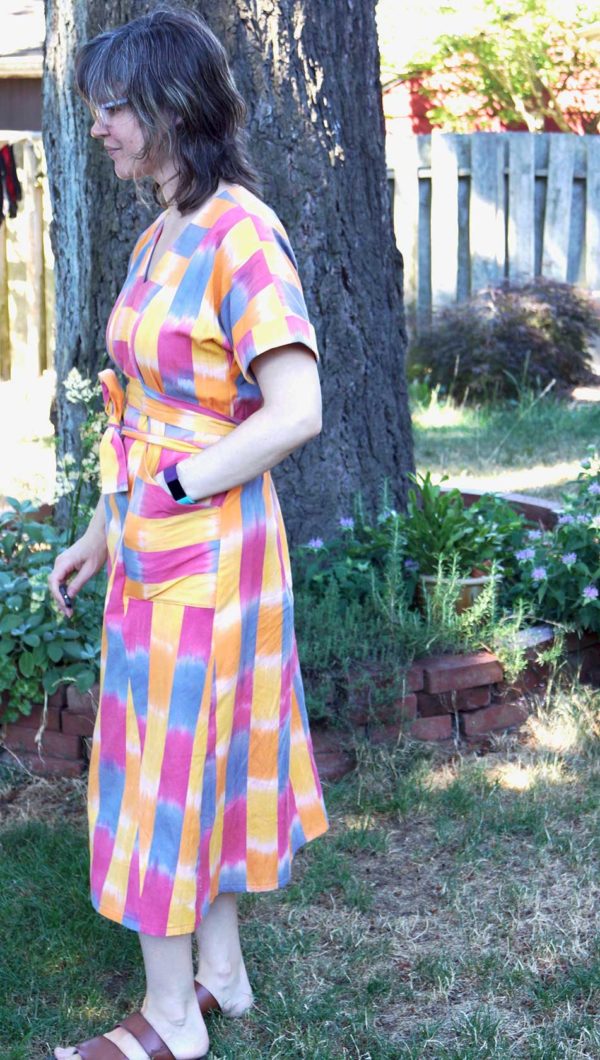
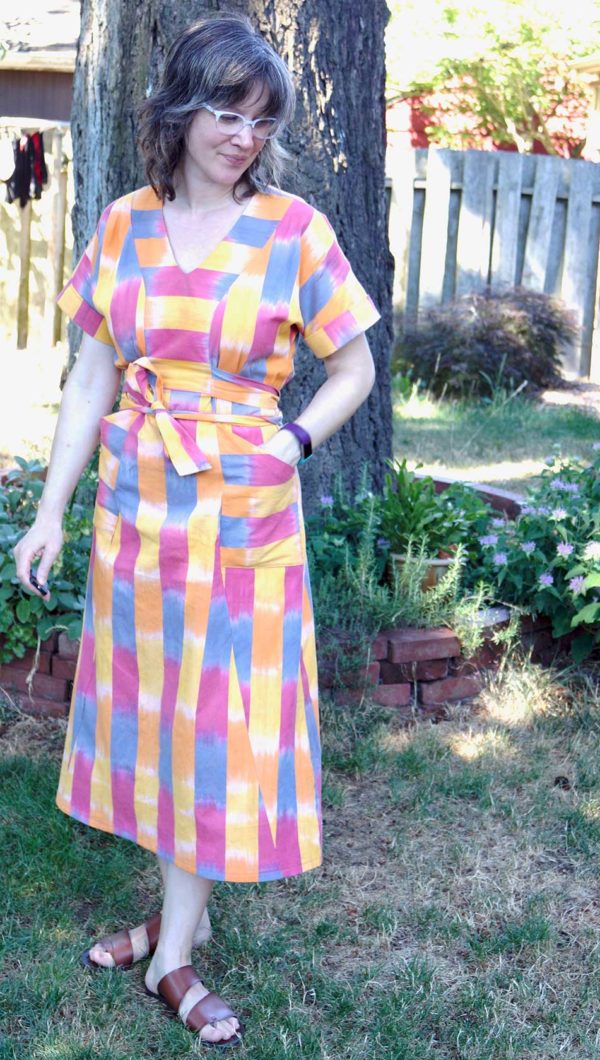
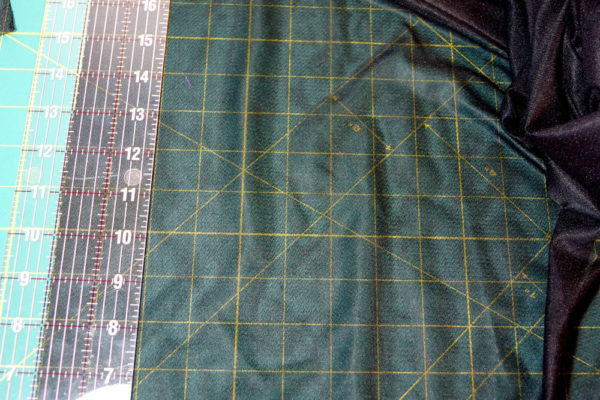
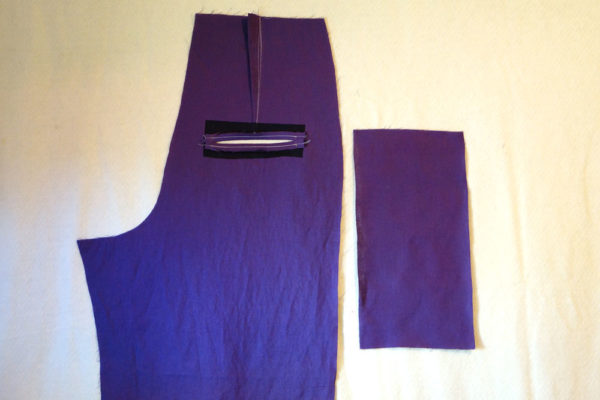
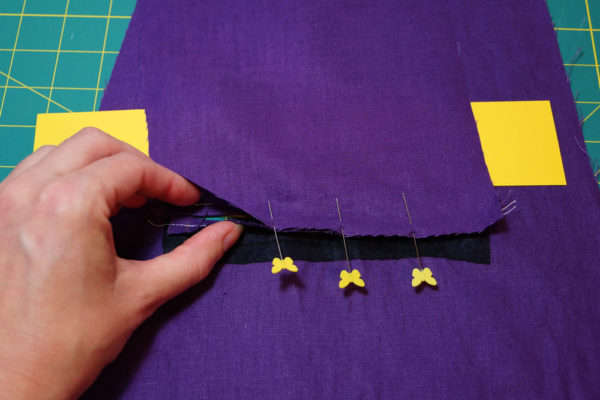
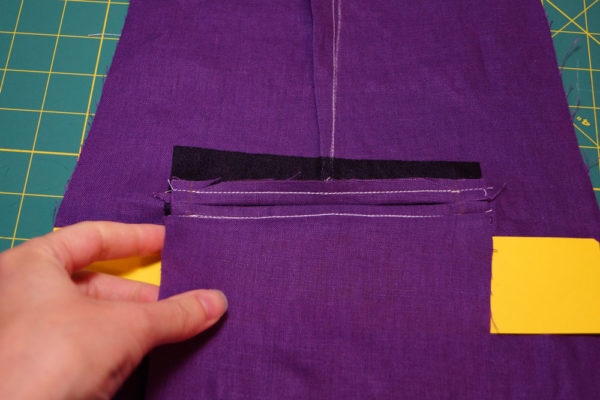
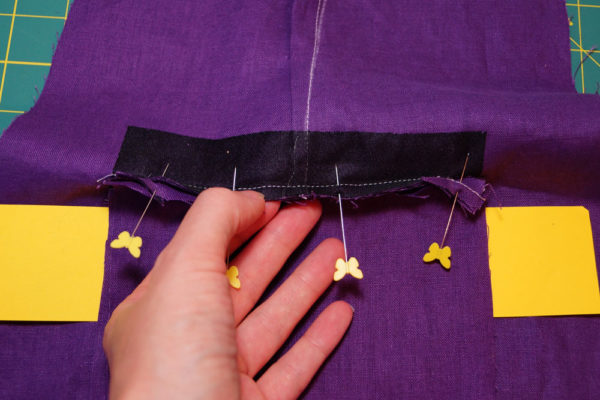
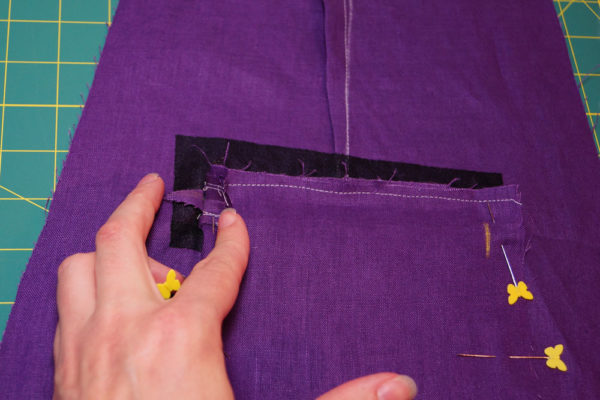
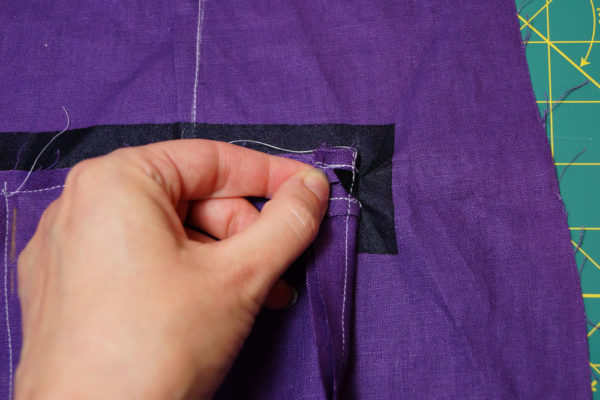
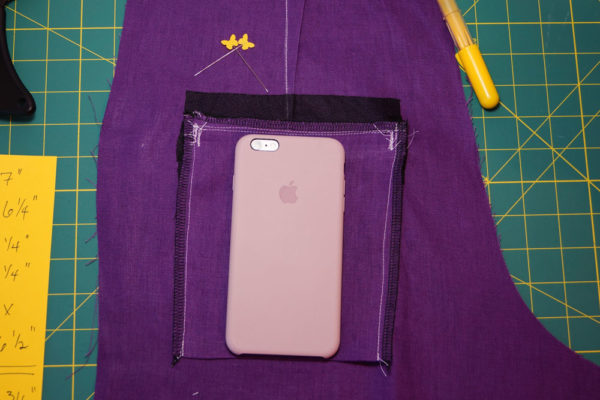
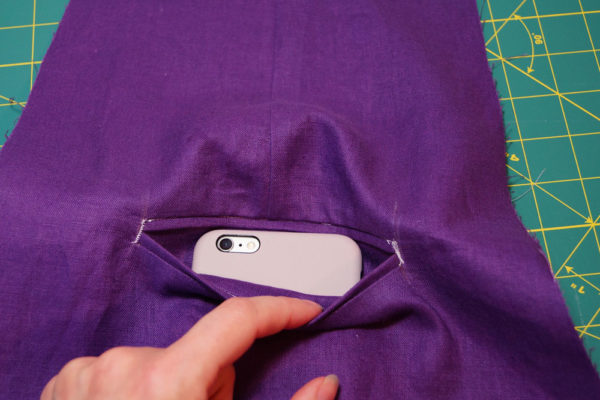
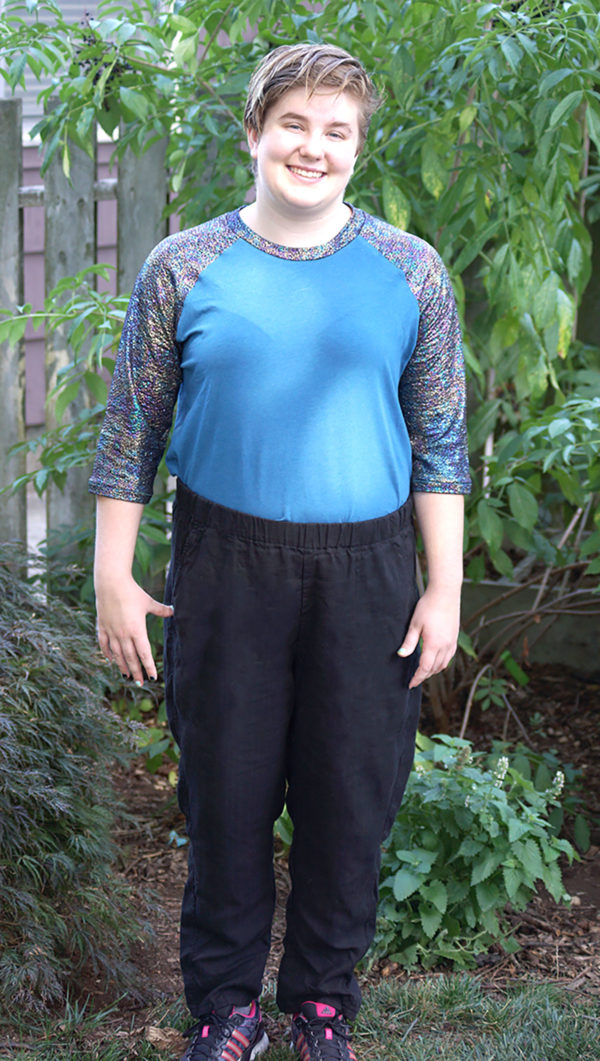
Let’s start where she did, with the pants. These are yet another Sew House 7 Free Range Slacks in View 1. I picked up some of this black rayon twill from the Sewing Studio on sale… It sews really really nicely. The weight is perfect for this pattern, and it has this tiny chevron twill weave that is really cool – as opposed to the usual just diagonal twill weave. I started Hazel on the more complicated pattern, to be honest. She took to it like a champ. Sure, there was some seam ripper work (she stole my favorite seam ripper during this time),  there was some learning why we sew straight (good thing for pattern ease), and there was learning how to put in an elastic waistband.

She also learned the best parts:

  1. No one will ever know any of the mistakes you made, so take them to your grave.
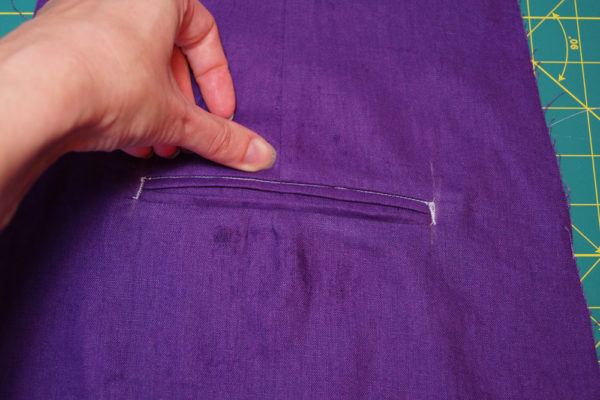
  2.  She got up at one point during the final parts of pants construction and said, “I’m actually really proud of that seam!”
  3.  A serger is your BFF when working with woven seams (and mom will change the thread on that for you still.)

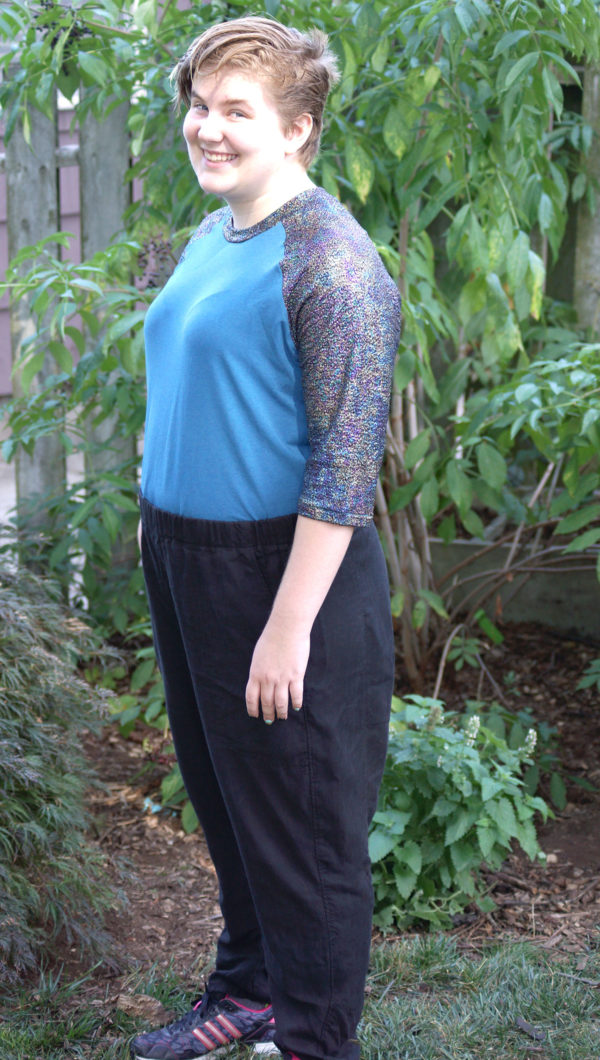
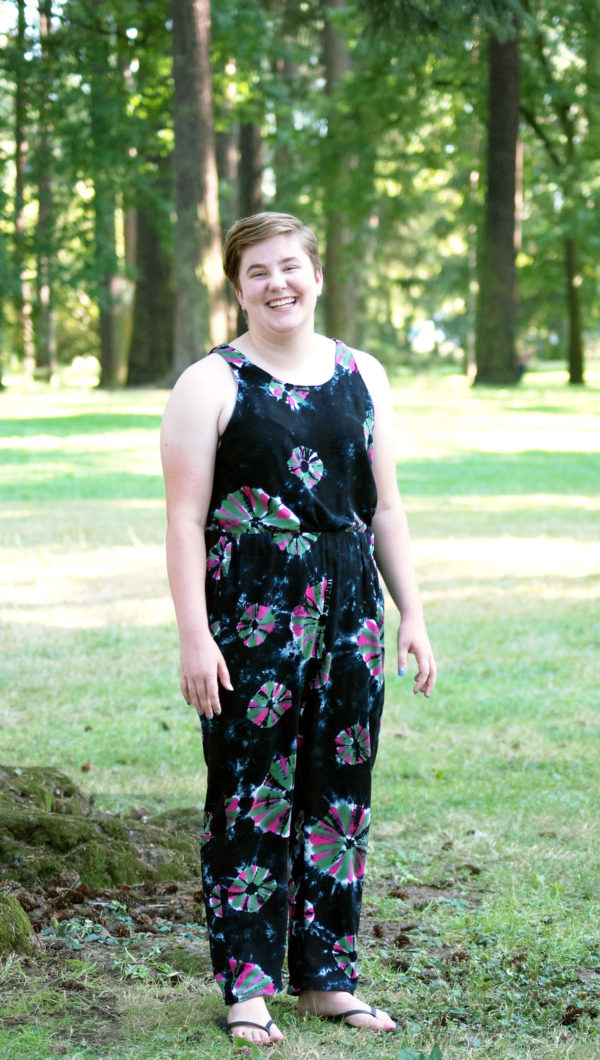
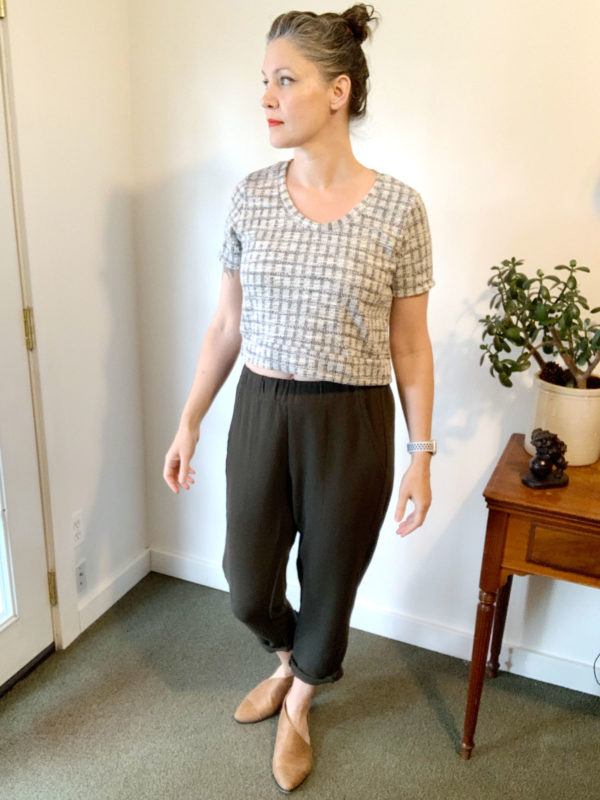
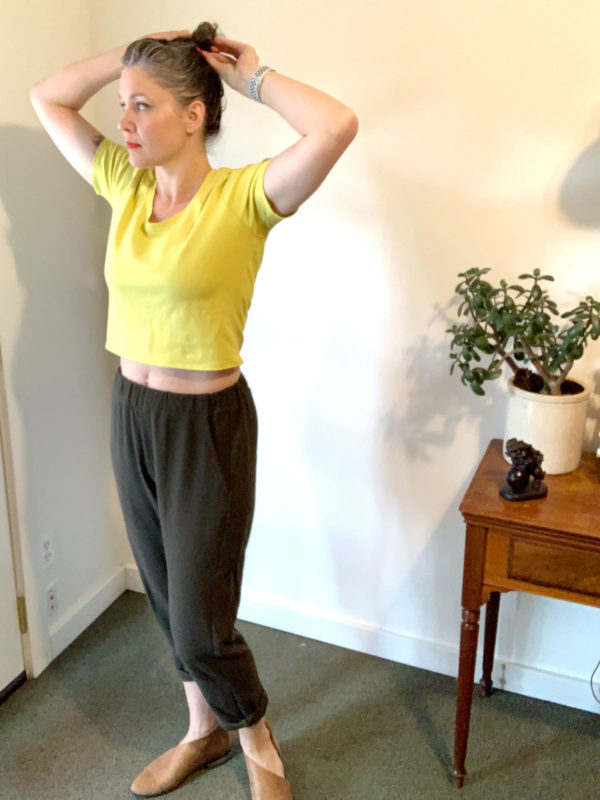
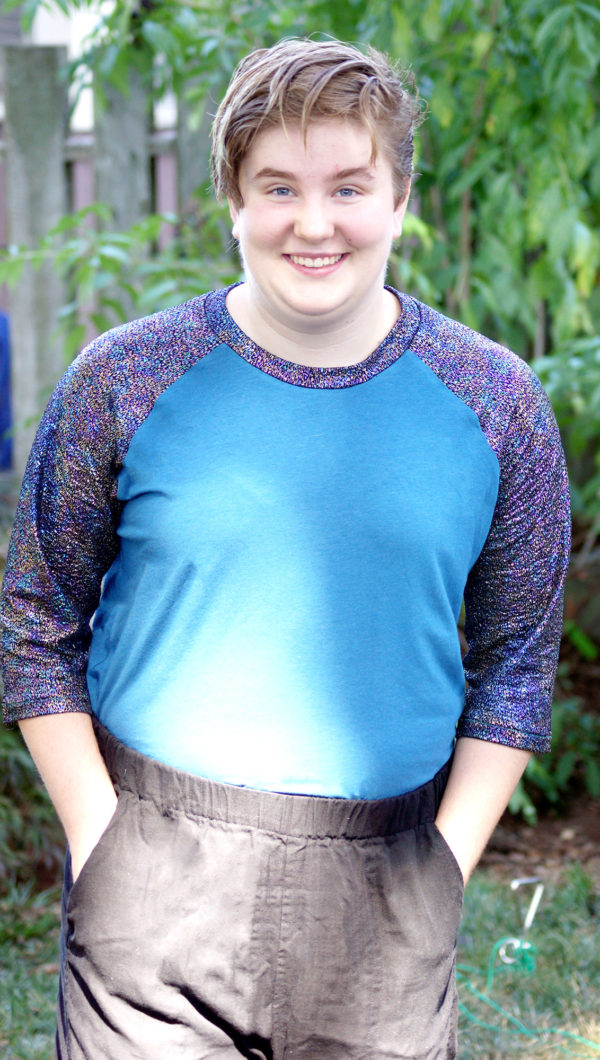
The shirt is a Thread Theory Sayward Raglan made with a bamboo knit and a goofy dance-activewear knit we saw in the remnant bin at Joann’s.

Yes, it is true. We built this entire outfit around rainbow-oil-slick-dance-fabric and we love it!

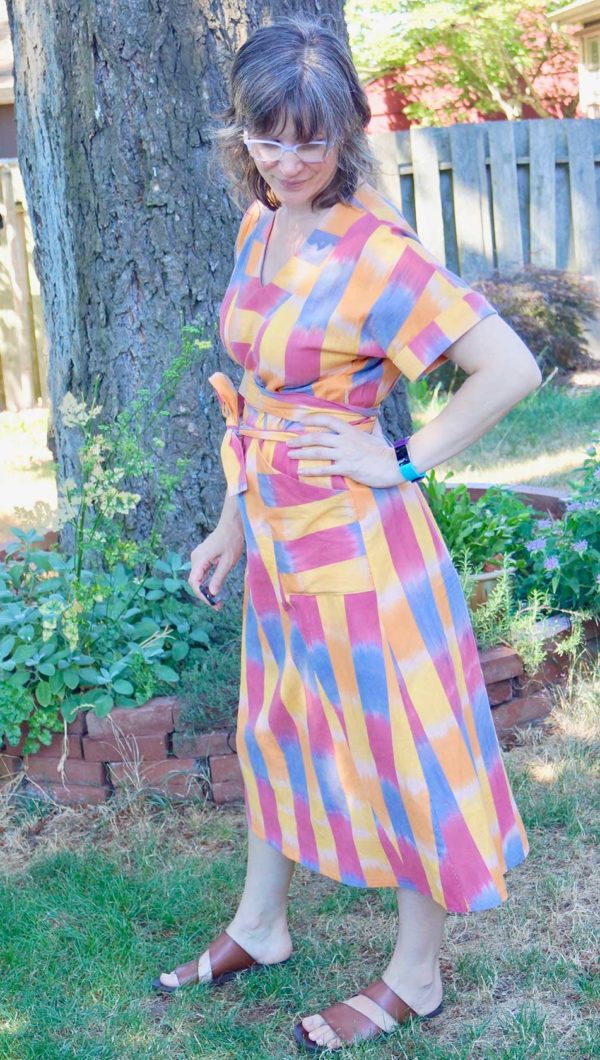
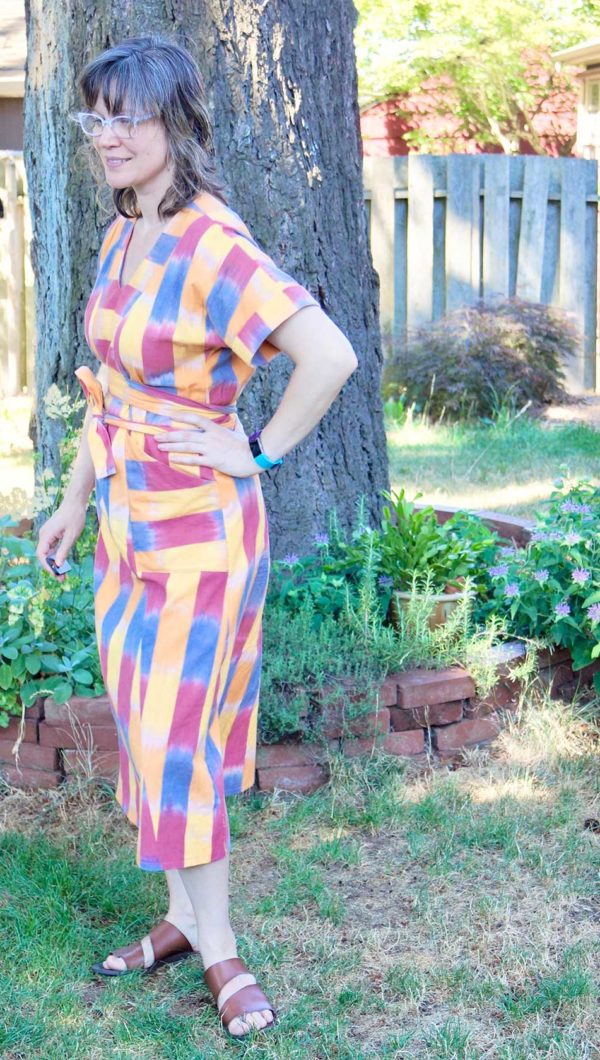
The SH7 pants are a size 16 and the Thread Theory raglan is a size Men’s Medium. Initially, I was looking for a women’s raglan…something more 70s, but I couldn’t find one that wasn’t boatneck. It’s easier to adjust the Thread Theory sleeves & shape than to redraw a neckline and binding, so I went with Thread Theory…that and I’ve had good luck with Thread Theory patterns.

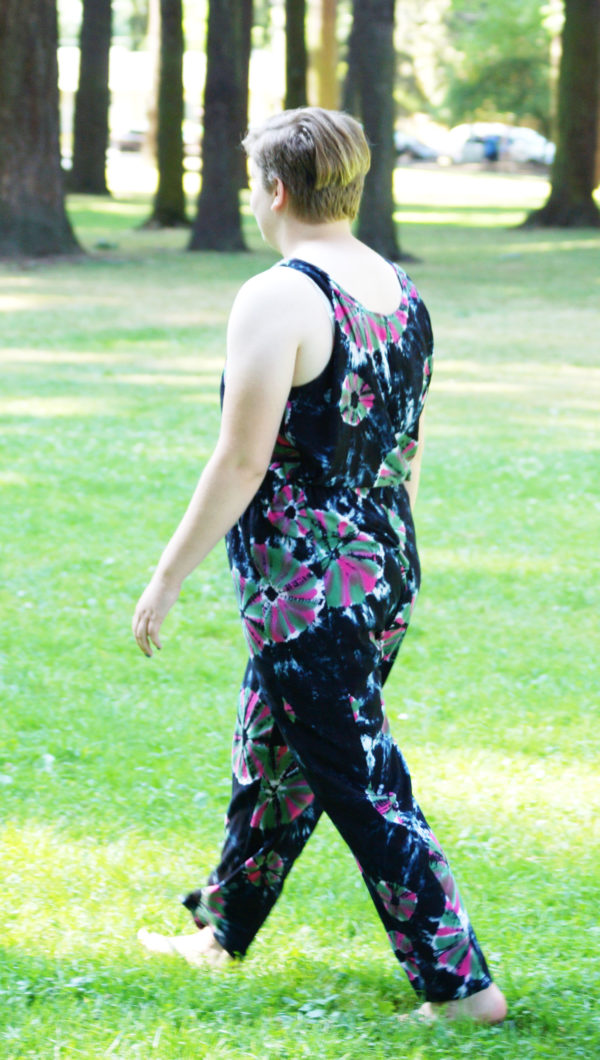
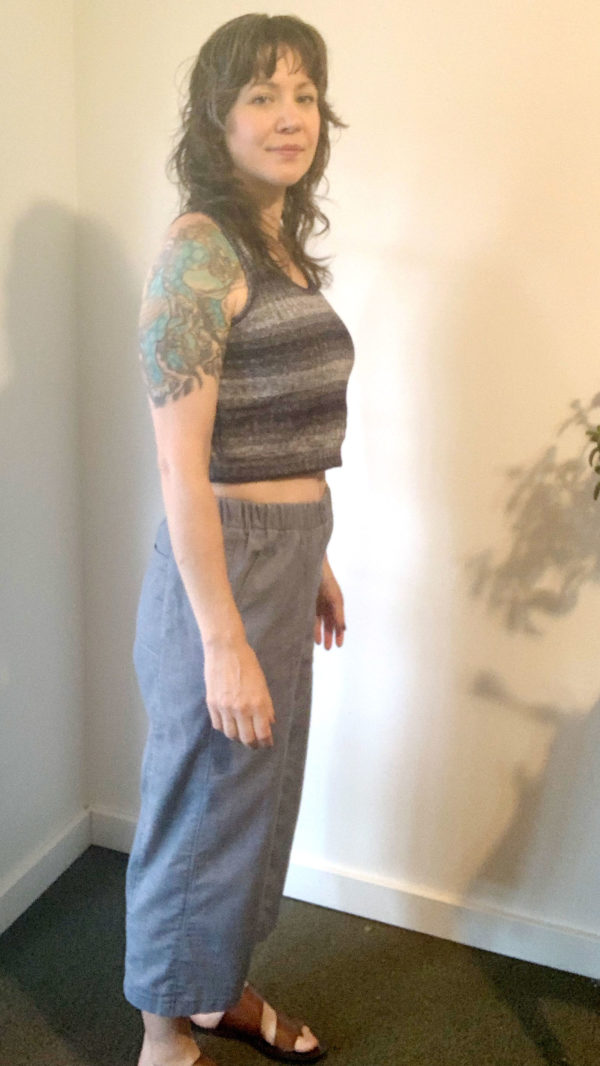
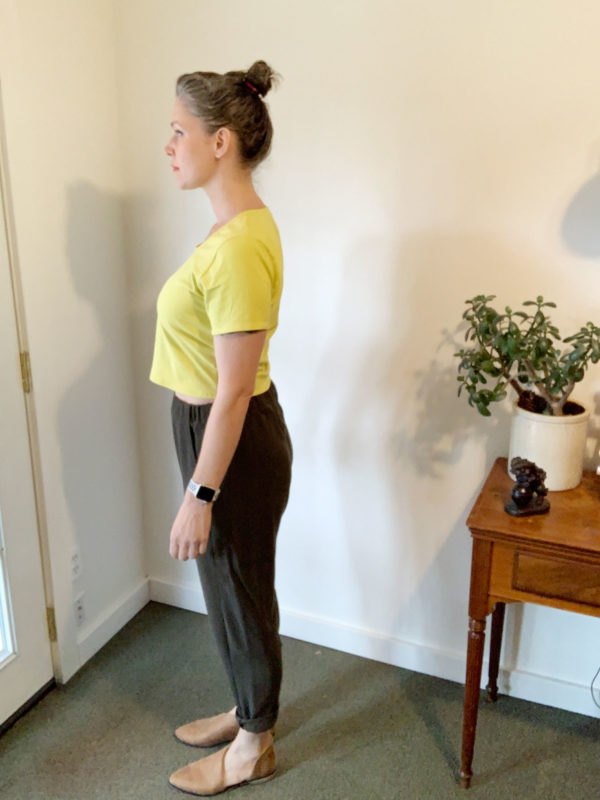
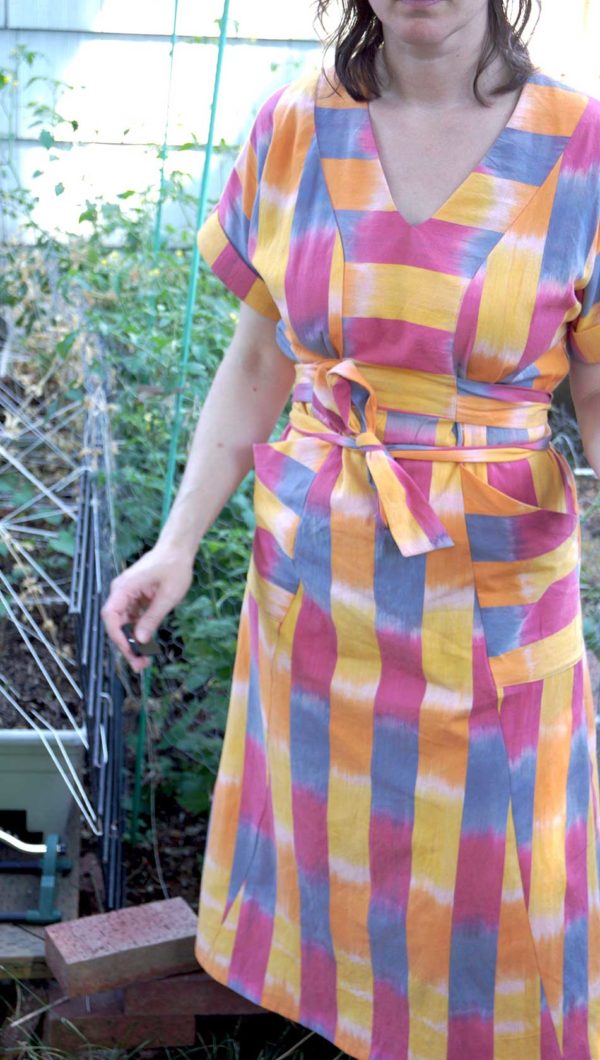
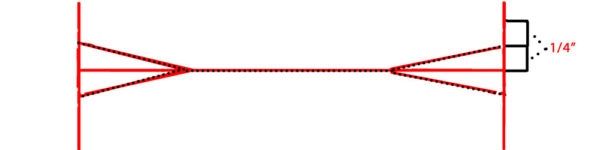
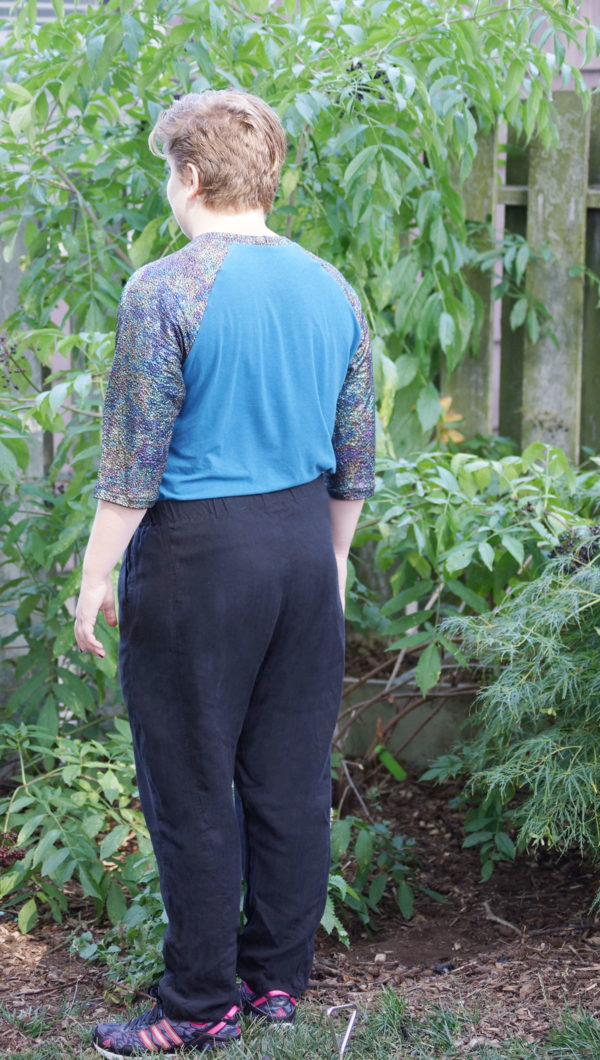
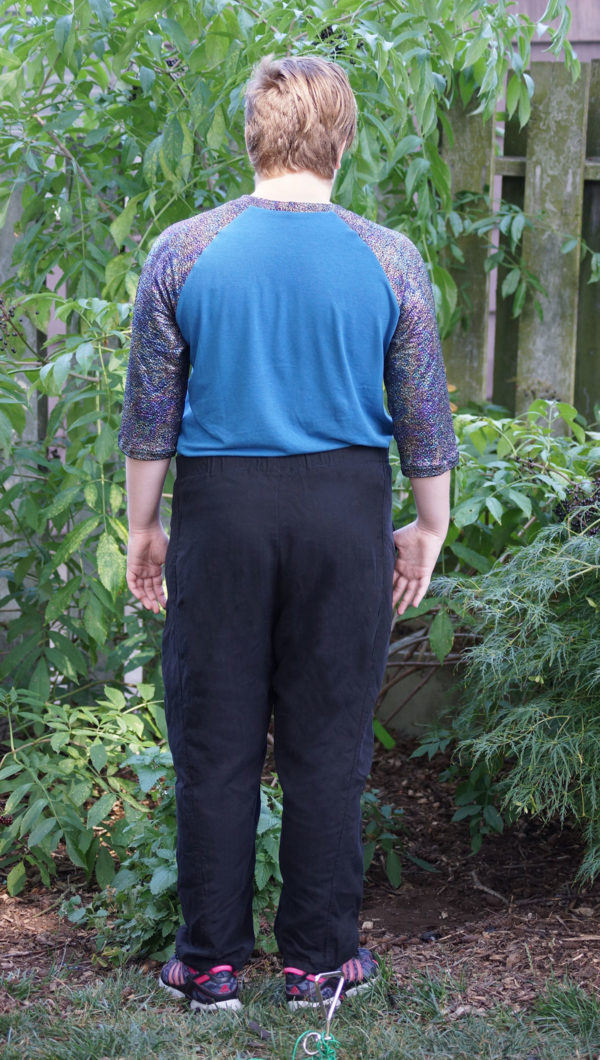
Hazel has very strong…well, everything, from 8 years of BJJ and last year she was on a dragon boat team…so there honestly wasn’t a lot of altering on the raglan other than lengthening the sleeves and shaving off a 1/4 on all the seams at the waist. I do want to point out the Thread Theory pattern is drafted perfectly. That neckband sizing is SPOT ON. Look at how flat that is! LOOK AT IT!

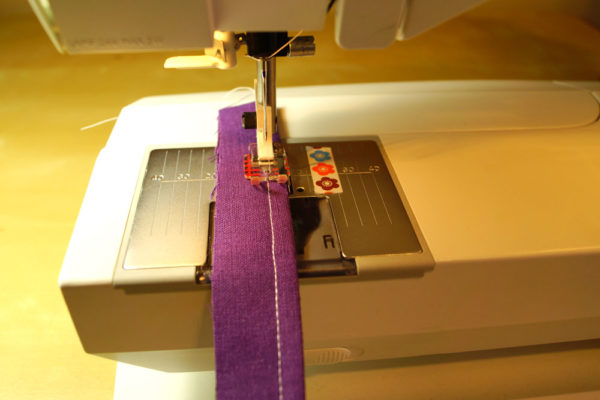
Sewing the shirt when a LOT faster. And here’s another tidbit about the Janome Magnolia. It doesn’t have a foot pressure adjustment option. SIGH. It has my favorite knit fabric stitch, the lightning stitch… BUT it just sort wants to bunch up the knit under the foot. ARGH. So…I ordered a walking foot. Hopefully that will make knits easier to sew because she REALLY loved zipping all the main seams together on my serger. Hazel did end up unpicking a few serged seams…but that’s ok. Why? Because in the end, you can’t really break it.

Have you taught anyone to sew? How did it go? Do you remember your first lessons?!

Sew House 7 Slacks View 1, Part 2: The Faux Jumpsuit

I can quit sewing these pants any time I want!!! I can!!! Actually…. I may not stop anytime soon… because….

Look at that smile!!! LOOK AT IT. That is a teenager smiling out in the wild. (ok, it’s a park.)

This is a rayon challis from Island Batiks. I’ve also made the main sample for the Ione dress in another Island Batiks rayon challis here. This faux jumpsuit incorporates a Seamwork Gretta tank as the top.

I cut a size 14 for both patterns. The rayon challis sews up great for these patterns. I’d probably not use a cheap rayon challis…you know what I’m talking about? I’ve bought some Big Box store rayon, and it wouldn’t hold up as well. A name brand like Island Batiks is just a tiny bit thicker, washes up nicer, and I’m not afraid will shred in 3 wears, you know?

And yes, I wash and dry everything. Who has time or money for anything else?

She LOVES the pants. She has already requested more pairs. My teen. Requested. More mom-made clothes. That’s a win, people.

Last shot – the rayon doesn’t quite hold the cuff in the pants, so note that if you want cuffs in the View 1 and in rayon, you’re going to have to tack them up. Dearest Daughter prefers the pants down anyway, so I’m not going to sweat it.

Ok, so this is my 3rd SH7 Free Range Pants post. Are you sick of them? What’s the accepted ratio of posting-to-patterns before they get boooorrring?

Sew House 7 Free Range Slacks View 2

In addition to sewing View 1 of the Sew House 7 Free Range Slacks, I also made up View 2. It was an accident to be honest…. I grabbed the wrong pattern pieces and cut it out before I realized it! I like to batch sew AND I’m easily distracted which is not always the best combo. I’m not mad I did though – I really love these.

I’m not sure if I had a smudge on my iPhone lens or what on these…sorry about that. I need to check my settings or just learn to always shoot with the big camera.

Anywho…These are different from View 1 in that they’re cropped and have a wide leg. This gives them a bit more of the Elizabeth Suzann aesthetic. Other than that, they are again a size 8 with zero alterations.

These are sewn in a cotton twill. I did all the top stitching and added the back pockets for this pair, as opposed to the previous wool pair which was too squishy for all the top stitching and back pockets.

I say these are not the most “flattering” design on my body, however, I wear them ALL THE TIME because #manrepeller. If something is ridiculously comfortable, we wear it.

I say perhaps not “flattering” because I have flat white girl butt: flat. Wearing loose, wide pants only enhances the flat and wide of me. I really don’t care much about “flattering;” but at the same time one can’t deny colloquialism and the effect of one’s culture and society. I have flat white girl butt.

The tank is self-drafted and from a fun ribbed sweater knit. My husband says the cropped tank with the pants looks funny – like I’m trying too hard. I say Sporty Spice? He says no. Therefore….the tank is not worn. Sometimes I heed my style editor’s advice… he doesn’t like the pants either, but I do wear them anyway. Win some, lose some, right?

What do you think about societal/cultural pressures? What about the word “flattering?” Do we need to dress to look good, or dress to feel good? Is there a middle ground? Am I, yet again, overthinking it?

Full disclosure: Peggy, the owner of Sew House 7 (SH7), is a friend, and I was sent this pattern to proof read the instructions before it went to print, as her usual proof reader was feeling under the weather. I’m not a professional proof reader, but another set of eyes is always a good thing. She did not have me test the pattern nor did she ask I make it, or blog it, or whatever. So…there’s that. Annnnnddd, I’ve made it clear before in other SH7 makes, before I even knew Peggy, I really like her patterns. Her drafting is top notch, she has more experience in her little pinky than she’ll every let on…and she’s the bees knees. 

Sew House 7 Free Range Slacks View 1

What is this? So much posting? I don’t even know! If you follow me on Instagram, you may have already seen these. I made them before Portland Frocktails, but hello! There’s no blogging when there’s Frocktails to plan! The very fact I made these is just nutzolla!

I made View A of the Free Range Slacks from Sew House 7 (SH7)  in a squishy wool blend of mysterious origins. I think my friend Mary gave it to me in a bag or maybe it was Peggy…. I should get better at noting who/what/where fabric. lol. On a burn test it definitely burned but also left that telltale pool of petrol-based synthetic. It breaths magnificently, so I know it’s mostly wool, and it washes up like a dream.

I cut a straight size 8, zero adjustments. I measured the crotch before hand, and even my long-hips and low butt fit into it without any mishaps. All worked out great. If you’re much taller than me…I’m 5’9″ on a good day, but have the torso of my 6′ friend… you may want to double check adding height.

I used the instructions to French seam the bottom 6″ of the pants for a clean roll up look, but to be honest, I’ll likely be lazier on future iterations.

Obligatory pants-sewing butt shot. Super comfy. Seriously. I wear them all time. It’s a month later and I’m wearing a pair right now.

A word about the t-shirt. This is the Hey June Union St T-shirt. This shirt is drafted perfectly – the weirdness you may see is totally my fault. I don’t remember what size I cut, likely a medium…. but I cropped it, and it looked like this:

Which is kinda too baggy for what I wanted. So then I hacked it again at the sides – totally a lazy move. I wanted it tighter…. but see… my ribs under my bust are 31.5″ and my bust apex is 38″ and that makes me, in proper bra sizing, about a DD/E cup. I often get away with a 34D or sometimes a 36C in American sizing…. but honestly they’re not comfortable. I’m better in a 32DD. This means, if I really take down a shirt to the size I need, even in a knit, I need to be doing a proper full bust adjustment (FBA.) The shoulders fit perfectly, the armscye is high and tight with good shaping like I like it… the fit issues are because I didn’t pop in an FBA.  I wear the hell out of it anyway. 

And for fun, here’s the Free Range Slacks with my own Ione in a wool challis. You can see how the pants look with a tucked in shirt, versus an intentionally cropped look.

There are a lot of pizza-friendly pants patterns out now. Have you tried any? I honestly wasn’t sure I’d like the elastic front on these, but am surprised to say I don’t even notice. They’re not drafted with too much ease there so I’m not getting a ton of bunching up in the front. I saw Gillian made the Pietra shorts, and they look really good too. I might need to give those a go…

Full disclosure: Peggy, the owner of Sew House 7 (SH7), is a friend, and I was sent this pattern to proof read the instructions before it went to print, as her usual proof reader was feeling under the weather. I’m not a professional proof reader, but another set of eyes is always a good thing. She did not have me test the pattern nor did she ask I make it, or blog it, or whatever. So…there’s that. Annnnnddd, I’ve made it clear before in other SH7 makes, before I even knew Peggy, I really like her patterns. Her drafting is top notch, she has more experience in her little pinky than she’ll every let on…and she’s the bees knees. 

PATTERN: Sew House 7 Tea House Dress

This is one of those “Why didn’t I sew this sooner?” patterns. I mean…I know why:

  1. It’s hard to find dresses/skirts that work in my lifestyle. I like to go from running and/or yoga, to playing in the garden, to vacuuming to park to desk to sewing to kid-carpool to making dinner… I don’t have a 9-to-5 job in a sea of gray cubicles anymore…I have a 24 hour job.
  2. I’ve had some pretty severe “misses” in the dress sewing category. Everything I *think* is going to be lovely, flowy, easy ends up being maternity, frumpy, terrifying. The only exception of late has been my black shroud of a Kielo dress which I love, but doesn’t work in 90+ Fahrenheit  heat.

But OHMYGOD do I love this dress. I finished it 6 days ago and I’ve worn it for 4 days, including today. In 90+ heat, hanging laundry on my “solar dryer” and THE POCKETS are perfect for clothespins!

I feel a lot like how I remember my Grandma Crouse…in her dresses, puttering around the farm house in Pennsylvania…then it dawned on me… I’ve been thinking of the pattern name in my mind as TEA HOUSE dress….DUH. This is a HOUSE DRESS. Like grandma used to wear! I can be really obtuse sometimes.

I bought 3.5 yards of this 45″ width of fabric (WOF) in the remnant section at Bolt Neighborhood Fabric Store in late May. There’s something about going in there when Mahri is working….I feel so at home. Anyway, I grabbed the fabric instantly. It reminds me of Anna Marie Horner’s fabric designs, although I don’t know the designer of this particular fabric. It’s a light cotton, likely found via a jobber or something by the lovely Gina (owner of Bolt.)

Anywho, this fabric HAD to be either a Sew House 7 Tea House Dress, the long view with the wide belt. It had to be. But….on the back of the envelope, it says for 45″ WOF, one needs 5 yards for my size. Now…I’m pretty good at pattern tetris, but not usually 1.5 yards-saving-good. I had a back-up plan of an elongated Seamwork Mojave with a belt if I couldn’t get it to fit (one Mojave hanging on the line here), but luckily I got it to fit.

Obviously, I didn’t try any pattern matching whatsoever….not that I would have if I had endless yardage. This is like a hippie-rainbow-ikat-plaid-stripe-tie dye crazy fabric. I prefer my sanity.

I couldn’t wait for perfect light to take photos – sort of pointless this time of year…so here are some clearer shots albeit in the shade. I prefer the dress tied in front. I didn’t do an FBA, and while I get some slight boob-separating from the yoke, I don’t really care. It feels fine and there’s no actual tugging, pulling, or tension marks, so I’m calling it good.

The drafting is superb. The skirt is rather flat in the front, and front-flat-yoke area makes it so I don’t feel the usual maternity vibes. This makes me just elated. It’s full and swishy enough I can do chores, walk all around, breezy in the heat, but I don’t feel like I’m going to start square-dancing.

While there is a back-box pleat under the back yoke, it doesn’t add too much volume. There’s just enough extra room to give back-shoulder movement, and walking movement in the skirt as the back is one-piece.

The midi-length is my favorite. Long enough I can put off shaving, but short enough I still get a lovely breeze in the heat.

Let’s talk about the yoke. There’s some extra work here in prepping the yoke with easing technique and also applying some interfacing. It’s quite brilliant. It actually FEELS worth the work when you’re wearing it. It molds and fits tailored around your shoulders, but not tight… If you know what good tailoring feels like, it’s like that. Then it’s combined with this easy dolman sleeve styling… Am I gushing too much? At least you know my elation is real – I don’t hide my hate for most dresses. lol

So…I want like … 5 more and I’m opening my heart to dresses a tiny bit. I like belted, but not fit/flare. I like casual workhorses with clever shaping. I’m not sure I’ll find myself with a closet full of dresses, but this one will remain a favorite for quite awhile. I’m already drawing up thoughts on dresses that would feel similar, and looking at fabrics for more Tea house-dresses.

How do you feel about a “house dress?” Any fond memories of them in your life?

2018 MMMay – What did we learn?

I had the MOST fun this year during MMMay18 – more than I have had in previous years.

What was different?

Mostly my attitude. I went into to this May with a positive, open attitude and embraced the selfie-fun.

I also went into it with a real challenge. I’m a fairly confident sewist, so I needed to find something that would kick my butt a little bit and keep me humble.

We all know where those areas are, and the only way to move past any obstacle is to take it face-on. Of course, I still hope the car engine light goes off on its own – so take this life advice with a LOT of salt

I learned that even after removing what little RTW clothing I had, and moving little/never worn me-mades into their place, I still won’t wear makes that were in the flop-category. I’m looking at you, Lisette dress.

I also learned I wear tanks layered under clothes a LOT. Mostly cheap, cotton kinds from Gap Body or Target or whatever.  I’ve just purchased these out of lazy convenience – I don’t even like how they fit. So I whipped up a racer-back tank pattern, and got a few of those done. Some scrap-busting Seamwork Geneva panties while I was at it too…. You can bet this will be my summer  uniform when it gets hot.

My biggest surprise: the Seamwork Mojave and the Colette Aster shirt. I own the patterns, but not sewn yet (story of my life.) I picked up 2 Mojave dresses and an Aster at the Colette sample sale just at the end of April.

I wore both Mojave dresses and the Aster at least 2x each during MMMay18. I wasn’t sure at first, and thought I might want to turn the Mojave dresses into shirts….I figured they’d be too much like the Lisette and I’d feel pregnant-looking, but I REALLY love them.

My lesson here is that I need to go back to the the drawing board with dresses. I know I like tight-fitting maxis like the Kielo Dress. I strongly dislike the Lisette and the Itch-to-Stitch dress I made last year. So…I’m thinking I dislike fit/flare in general, but I am ok with volume in the right places. Or perhaps, fit/flare that’s too high-waisted?

Hmmm. I am really drawn to the Sew House 7 Tea Dress, above on dress form… and I know I love the Sew House 7 Burnside bibs already… is it too much like the Lisette? Should I try the Washi super pack I already own? Should I just get my butt in gear and draft stuff like I keep meaning too?

I also wear my Akita shirts A LOT, but want something else in that category. I have a pattern I want in my head….also listed under the ‘get my but in gear and draft’ category.

Along with my Akitas, I wear my Oslo sweaters and my jeans enough that I can justify making more. Ditto button up shirts. I don’t like my Agnes tops at all, however. Those will get donated.

I’ve got a pattern test wrap dress on the table now, and a few pairs of pants in the queue before I delve into that too much, so I’ll just enjoy my Mojave sale-scores for now.

How was your MMMay? What did you learn? What are you missing? Is there some magical design out there you wish existed?

Easy Double Welt Pockets; Tutorial for Britex Fabrics

This post first appeared on Britex Fabrics blog July 25, 2017. 

Double welt pockets look so scary. There’s little dots, little triangles, blind sewing, to bias or not to bias, more blind sewing with the lining….and the worst part? You’re cutting a hole smack in the middle of fabric. There’s no going back after you cut that hole. Worse? Half the time they’re this unusable, shallow size.

I don’t like fiddley or inefficiency. I think it’s time we knocked double welts off their pedestal. I’ve made a very photo-detailed tutorial with the help of Britex Fabrics, and you’ll be whipping these out in no time.

Normally, you see something like this on your pattern piece with some other rectangle pieces with dots you’re supposed to match up:

I’m going to tell you to ignore everything but the redlines below, and throw out the other pieces:

Trust me. Practice these steps once, maybe twice on some practice fabric, and you’ll never be scared of welt pockets again.

I’m going to show you on a pair of Burnside Bibs from Sew House 7 in some YUMMY mid-weight linen from Britex Fabrics. I’ll be using contrast thread to make it easy to see, but by all means, please use matching thread.

Mark the redlines as shown above. They should look something like this (below) on your fabric. If you’re replacing a patch pocket like I am, your horizontal line is the top of your pocket, and you draw perpendicular lines where there are corner/edge dots. Often in patterns, double welts go through a dart. Re-true your line to horizontal if you’ve got a dart like I have here:

Measure the length of your horizontal line, add 1 inch total to length, and that is the length of your welt pieces. Cut 4, on grain, 2 inches wide, and stabilize with your favorite stabilizer fabric.


Stabilize the wrong side of your pocket. If you’re not sure what stabilizer to use, call Britex customer service, or go to the 4th floor, and ask someone to help you. I’m using a light knit version just to re-enforce my linen fabric, but not so heavy that it leaves an obvious delineation where the stabilizer starts and stops.

Why are we doing all of this, Becky? Because I actually USE my pockets for my phone, keys, random toys I trip on, granola bar wrappers, and other things throughout the course of a given day. If you cut your welt pieces on the bias as some instructions advise, or don’t stabilize the fabric, you’re more likely to get a warped opening that bags out after time. Also, you can see I’m going to cut right through a dart. That dart is going to create an area no longer on-grain, and I want to stabilize that area.

Fold each welt piece on the length in half, wrong sides together, press, and stitch ¼” from the fold.

Trim all 4 welt pieces to a ¼” after the seam for a total of ½” wide.

Match up the raw edges of your welt pieces to the horizontal line on your pattern, with an equal amount of overhang on each side:


Pin and remark perpendicular lines on top of your welt pieces. These are now your stop lines.

Sew on top of your previous ¼” seam, stopping and back-stitching at your stop lines.

Now, we’re going to cut. Forget those tiny triangles on your original pattern. The dotted lines are your new cutting lines on this image. Cut down the center, and cut nice, long triangles to the stop lines.

Your fabric should look like this:


Take the end “tabs” of your welts, and flip your welts to the wrong side:


Press, making sure you brought the cut “triangles” to the wrong side:

Your front should look flat. If you have any puckers, you have not cut all the way to the end of your stitch lines.

Measure for your pocket. I want my back pockets to fit my phone. I measure from the stitch line of the top welt, to the base of my phone, plus the length from the bottom welt stitch line to the base of my phone, add ¼” seam allowance for both, and the width of my welts. No need to add width seam allowance as I want to capture the edge of the welt sides.

Next to each other, this is my pocket and my pant leg:

Pin the pocket upside down to the bottom welt. It will look like this:

Sew as close as you can to the welt stitch:

Press down:

Sew top of pocket to top welt in the same manner:

Pin pocket sides, being mindful to pin those triangles (aren’t you glad you made them bigger?):

Stitch, again making sure you get as close as you can to nab those triangles:

I like to go in at this point and bar-tack down the sides, and “stitch in the ditch” along the top because I’m hard on my pockets. Note your thread will likely be matching, so this will not be so obvious. Some people like to edge-stitch all the way around the welt before attaching the pocket. You choose what you prefer on your garment.

Finish the edges how you like, and stand back to look at your work.


Wasn’t that so much less scary? No dots. No blind sewing. No too-shallow-to-use pockets! Just in time for fall sewing.


This post was written by me, Becky Johnson of sewbeckyjo.com, for Britex Fabrics. Fabric was provided as compensation, however all opinions, photos, and intellectual content contained herein is my own. The pattern used is my own purchase, and this is not an endorsement, nor was I compensated in using the pattern.