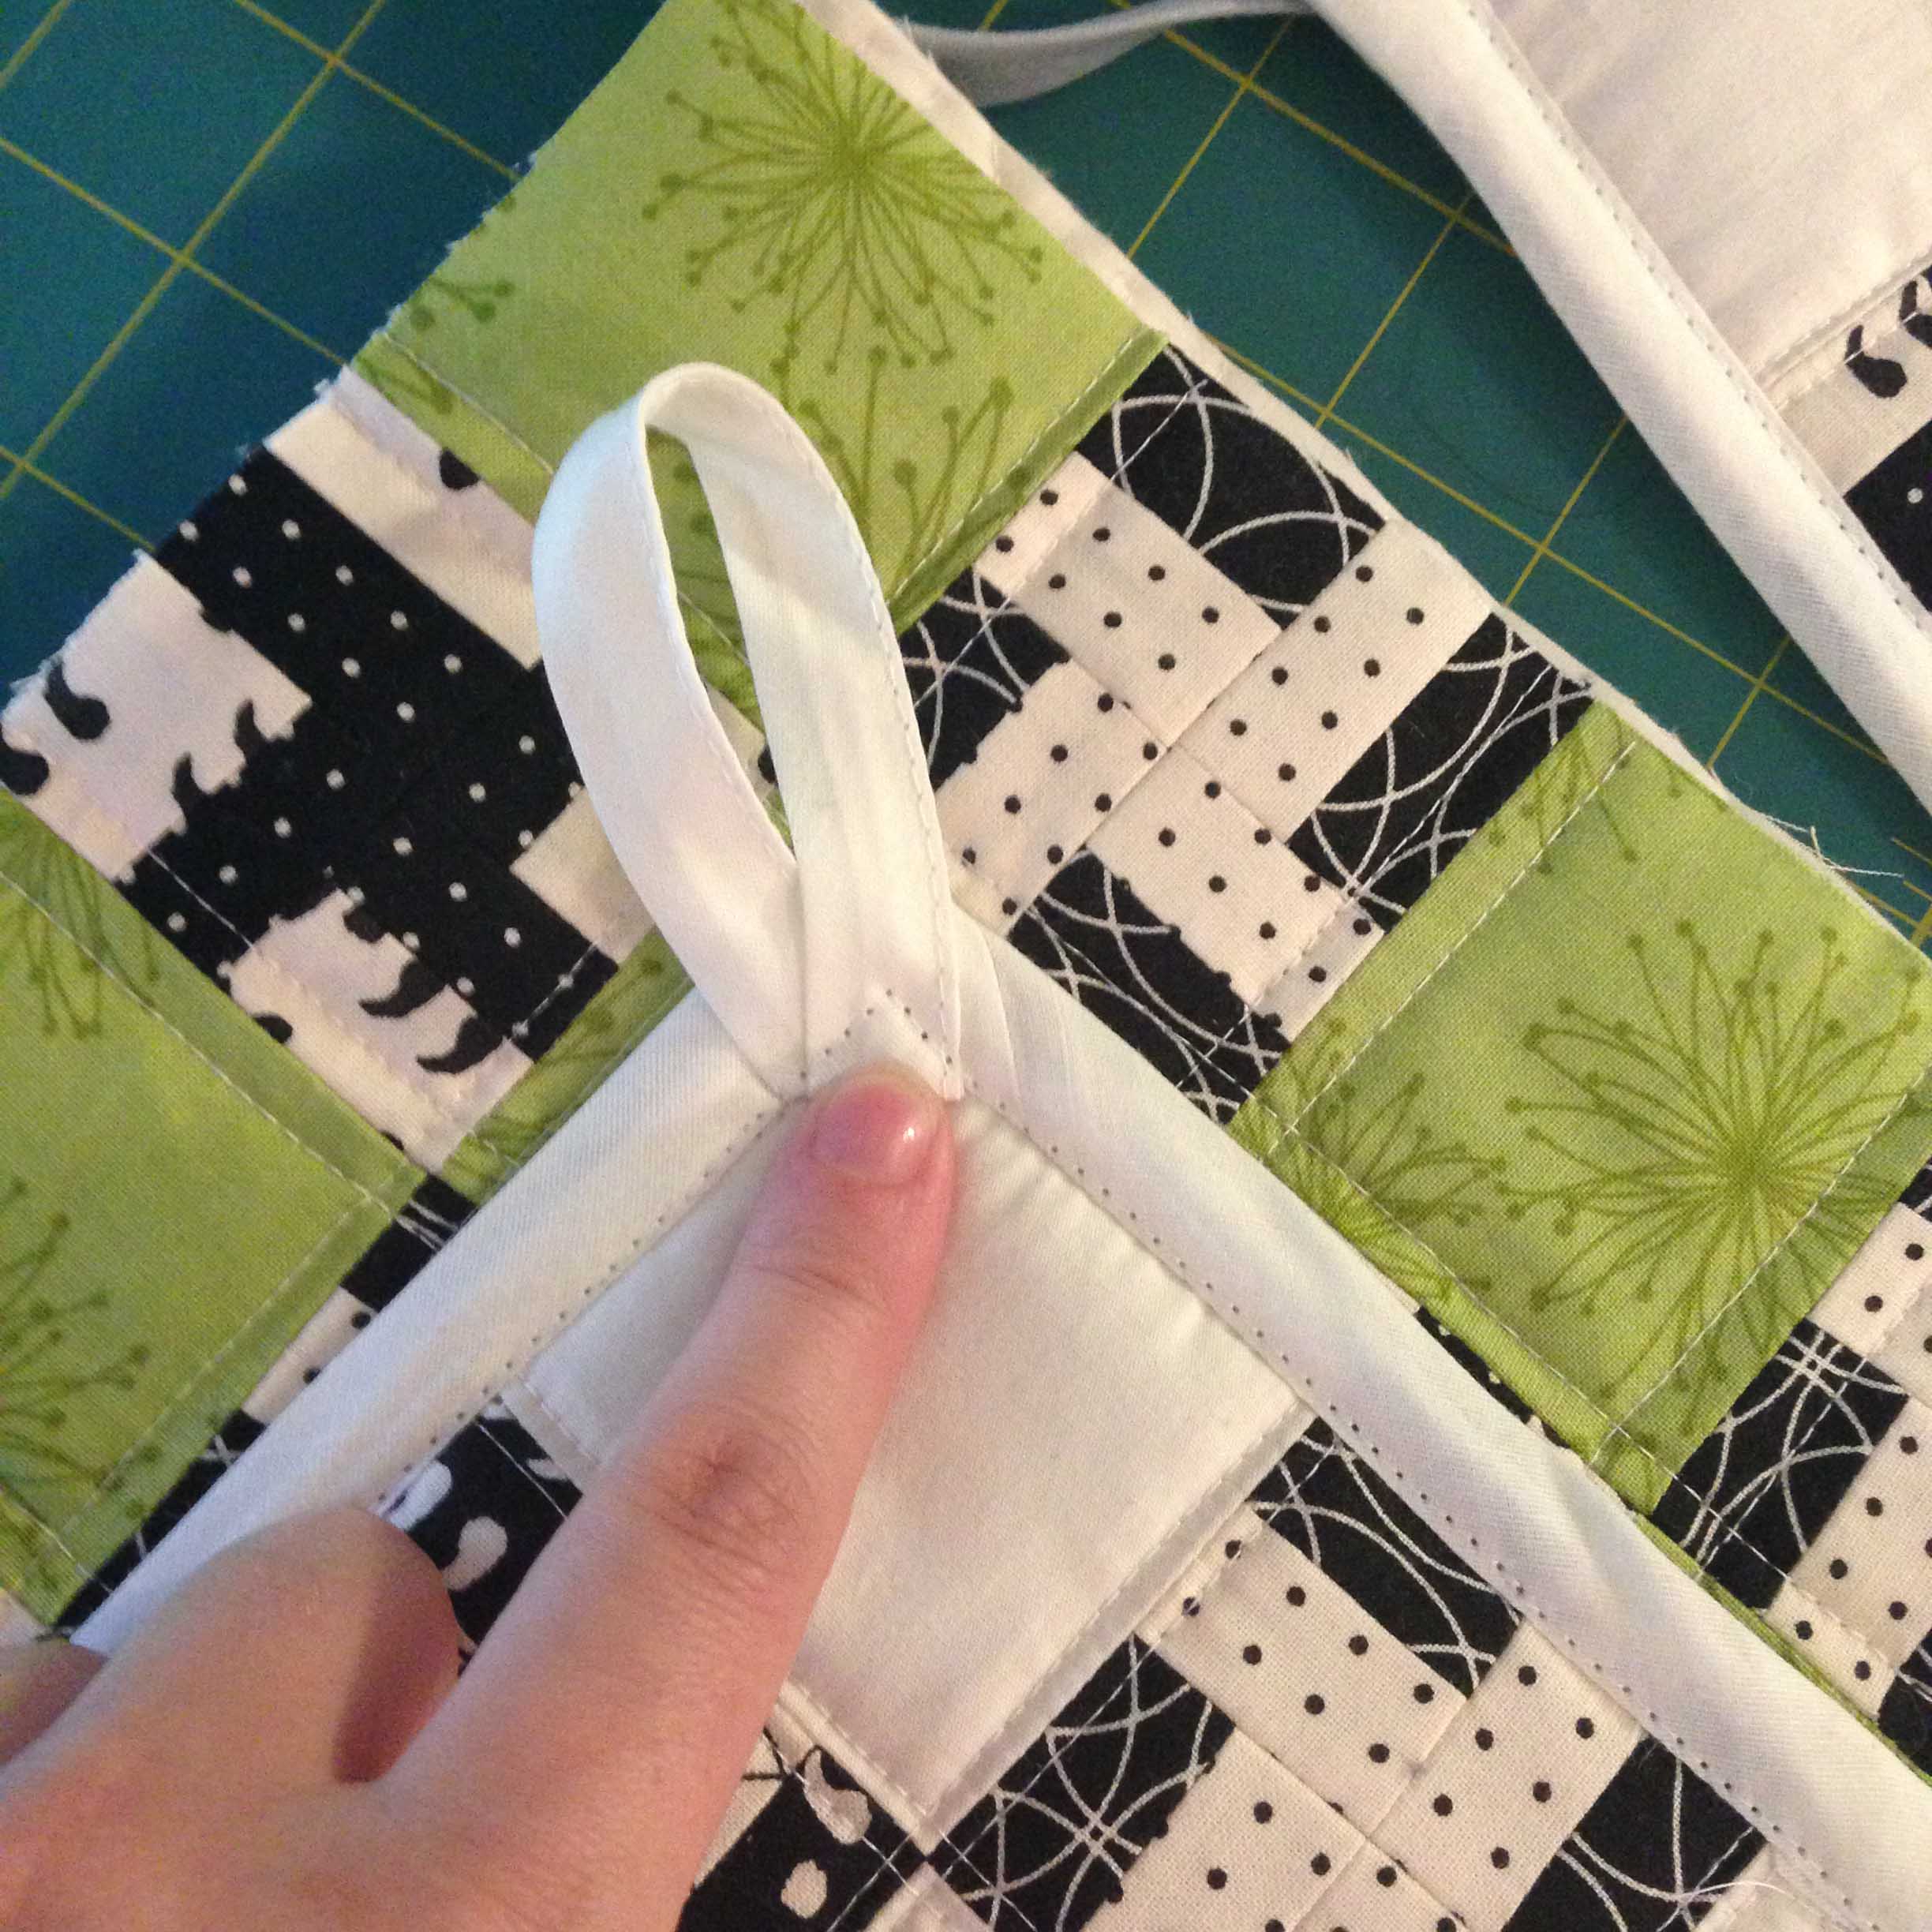
In my frenzy to babble about the potholders yesterday, I totally forgot to tell you that I busted a needle AND overloaded the motor on Ms. Viking 3 times! Her screen pops up with this exclamation point and she just stops short of swearing at me. I used InsulBright, batting, quilted tops, backing and bias tape with loops on the potholders. In the corner for the loop….that makes at least 6 layers of cotton plus the batting (low loft cotton) and the InsulBright. I get it’s thick, but my Swede did NOT like it.
Busted Needle
That cream binding is a purchased poly bias tape which my machine did not like at all with the layers. It still didn’t love the homemade gray Kona bias tape but I didn’t break anything. I was using a Schmetz Quilting needle, 90/14, Aurifil 50wt, the right settings and 3.5 stitch length….
I love my Viking but I think I’m a bit too rough. She makes garments just great, but I’m starting to eyeball Jukis more and more. I have the Elizabeth Hatman sewing circle bag pattern and I just know it’s going to be a rough ride.
I need to work on my quilt piecing and I like to try out lots of different patterns….I’m not good at committing to a whole full-sized quilt. I like to dabble. This will be a dabble post which will eventually end in, “hey, I made some potholders!”
wooo
Gripping the edge of your seat, aren’t you?
I saw this sort of mod pinwheel pattern on the Art Gallery Fabrics blog/site. That was February and I’ve been trying to think of how to apply it ever since. Go look at it. Really. It’s cute. I’ll give you a minute. Look at the measurements while you’re there…….
……..
……..
Ok, so, I wanted to take that pattern to the next level….that level where I stress my tendonitis, make my glasses prescription completely obsolete and make sure I had ample opportunity to use my seam ripper. If that is to be my measurement of success, then I am a winner!
Enter, the 2.5″ block.
mini pinwheels
You know, when you have these patterns laying out they’re really cute….when you cut them up tiny and throw them in a bundle, I don’t even think the Merry Pranksters would have had a good trip.
So I broke them up a bit with more…mellow. Mellow as a noun….I think we can thank the Merry Pranksters for that as well.
Green BlockCream
I like this photo cuz they’re up next to a traditional pinwheel pattern…
Boersma’s Pinwheel
I had a lot of quilting classes lately, and in one of the classes I used a Kona 200 thread count muslin. It’s very nice…and I thought, why let that muslin, batting and stellar (cough) quilting go to waste?
I chopped out squares, right out of the middle, of the best parts to use as the back of the potholders. That’s right. Rebel.
quilt practicequilt practice 2
Chop Shop
I dig it. I quilted the tops to the InsulBright I’ve used before and, as the directions state to do, this batting covers the bottom. It’s a bit slip-slidey to bind these together even with pinning, but it’s doable. I have a pucker here and there, but nothing being smooshed by a hot pan can’t ignore.
FMQ Potholders
I think the tops are super cute. They really weren’t that hard – I only ripped apart 2 smaller blocks in stack of 20 or so because I had the center seam a smidge off.
Potholder Quilts
This blurry photo clearly demonstrates that late at night photos on my iPhone aren’t as awesome as they seem on Instagram.
blurry
But the point really is that I was tinkering with some Quilt As You Go…and mama likes it. I’m not going to do a whole full quilt in it (SEE!) but I dig it. It turned out really cute. I’m giving these all away to some mommies I work with, and this one is all specialized with doggy fabric because this mommy rescues dogs and places them in new homes. She’s amazing.
QAYG
And the back…
Back QAYG
I still have a bit of that cartoony doggy fabric … I will have to find more dog lovers. I’m of the feline-lover persuasion myself.
But wait, there’s more. I have some UFOs out of this.
I’m calling this PIE….because, well, it looks like pie.
PIE
My photo taking failed us here…it’s on a large white rectangle…and it’s just screaming for some red Pie embroidery, isn’t it? I see a kitchen wall hanging.
And, as glimpsed above, I took some of the Boersma’s bag of scraps that I still have from the feather block and made a traditional pinwheel. I think I’m going to back and bind it in purple and keep it. Maybe. The boys in the house seem to like it.
Boersma’s Pinwheel
So…Happy Mother’s Day and I hope you get a potholder…or something. This has been my week of quilting. Stay tuned for another sewing room as science lab coming up, a kids’ craft project that uses fabric scraps and baby clothes.
One of my fave blogs to keep up on is See Kate Sew – she has a an aesthetic I can get with…it’s clean and casual with attention to detail…if you read her blog you’ll know what I mean. She’ll make patterns, do a review, make a tutorial – whatever it is…it will be simple but there are little points or details that make it special. Kate is the reason I got the binding foot I chose AND when I accidentally got a ruffler foot…I kept it.
Enter an opportunity to test her new Aztec Vest. I got the email, it had a tight deadline…I took it. I made it. It’s awesome.
The PDF printed great – it was very easy to line up and tape together. No weird pre-trimming either like I’ve had to do with others…it just went together. As an ex-print designer….I can dig it.
assembling pattern
I know the original was in a knit, and I love working with knits, but I was really envisioning a linen, Patagonia-esque thing. I prewashed and dried the bejezzus out of this Essex Linen in Jungle Green so it would work as a kid garment and could be abused later. BTW, Gutermann has a thread that matches the Jungle Green perfectly.
Jungle Green
Alex insisted on picking out brand new flannel (as if I don’t have enough) for the lining. You just can’t argue with his choice…
Snakes On A Plane
I opted for the welt pocket and about 80% of the top-stitching. Again, it’s Kate’s details that make things more than homemade…they’re custom.
Pocket
Alex LOVES it. He had to wear it to school the first chance he had.
Satisfied
I got him on a sunny day to model for me…
My Darling Boy
I used a metal, reversible zipper. Kids love the option of reversible even if they never use it. At first, I really wanted to find a vinyl zipper but I’m actually glad I couldn’t get my hands on one. The metal one is, as my man says, very substantial. It’s super quality and goes great with the linen.
Zipper Detail
I love the pockets. Everything should have pockets.
Here he is, hood up with it zipped.
Hood Up w Zip
And hood up, zipper down.
Pensive
I probably should have thought ahead a bit more and added a few inches to the waist area since I chose a woven instead of a knit…it’s a smidge snug…instead of draping flat, he has to pull it up to zip it…
woven fabric
He doesn’t care at all though…
Zipped Up
He’s very proud of his lining fabric…
Lining
The back has more top-stitching – it’s subtle but that it’s that extra something…
Back Side
Most importantly…it wears like a boy needs clothes to wear….
Action Vest
It’s his new favorite piece of clothing and he says, “I love it so much!” I secretly really do too, but truly it’s his opinion that matters and it’s definatly a winner.
I finally finished! I had plans and schemes to do more than just 2 Colette Laurel dresses but with all I took on in the last month, I’m very happy with the 2 I finished!
Mommy & Me Colette Laurel
These are both underlined in the bodice with the main fabric, which is a very light weight gingham. It’s a poly-cotton blend and before you say “Ew!”, it’s not like that. It’s super light, on the pretty sheer side, and very breathable. In fact, the only obvious ‘polyester’ thing going on is that it unravels wicked fast. I was inspired by a yard of some early 80s Concord calico I was gifted.
Laurel Pocket
Yeah. I went full Country Bumpkin. I grew up in a town called Boring. I can do that.
My Darling Hazel
Can you believe how tall she is? I’m about 5’9″ and she’s only 8 years old….this is the size 2 of the pattern.
50% Smile
I used the #1 pattern and added the pockets as well. I used the vintage calico for the 1/4″ double-folded bias tape – smaller to keep it a bit more subtle.
Neck DetailNeck Detail Up-CloseArm DetailThe Hem
I could have moved the invisible zipper up a smidge, but overall the installs on the Laurel is really smooth.
Back NecklineInvisible Zipper Install
Ok, so I did get the zipper flipped on one of the installs and had to redo a side. It’s true. It’s easy to do. I was distracted by baby cuteness.
I’m a bit rusty at embroidery. I contemplated some chicken-scratch cross stitch or something more elaborate, but stuck with simple double herringbone on the pockets with a super light weight stabilizer.
I entered the dress into the Flickr group for the Laurel dress competition. There are some amazing, amazing, amazing dresses in there. Cross your fingers for me.
We went to Burgerville today for some fast food picnic action and Hazel tested out the dress at the park. You can say all you want about a dress, but one that still looks good in this much movement and play…you know it’s a good dress. I’ve said it before about the Sorbetto, but Colette makes fabulous patterns. I used Swedish tracing paper to trace the 2 sizes without actually cutting the pattern, but I really think if you can get the print book, it’s the way to go.
Action Colette Laurel Dress Montage:
Monkey Bar Test 1Monkey Bart Test 2
Monkey Bar Test 3TeeterTotterSwing Test 1Swing Test 2Swing Test 3Burgerville In The Park
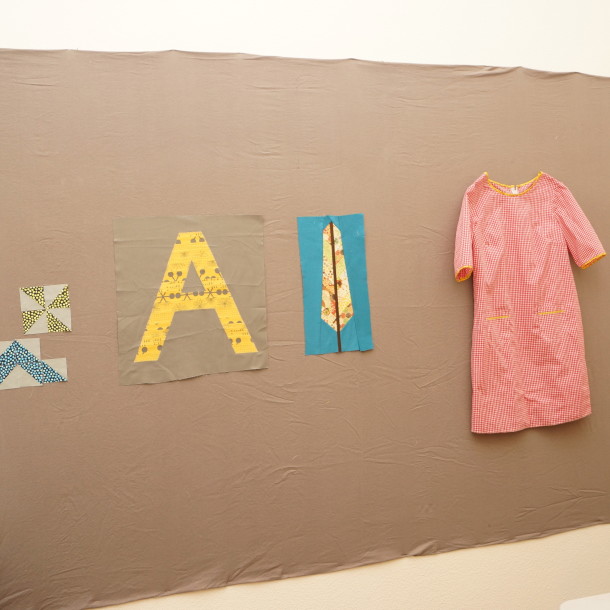
Okay, I bought a staple gun and 2 yards of 108-inch quilt backing flannel and stapled it to a wall. After putting it up, I wondered with the amount of gray I use in sewing (or am going to use since I bought so much), if gray was a good idea….
A – Feather
I don’t care. I love it. We have one, long, continuous white wall, and this is now taking up 72 inches by 108 inches of that space right in the middle. It’s great.
I was a bit worried that not using the batting-wall method would backfire in that maybe the flannel alone wouldn’t grab enough, but here it is holding up one of the Laurel dresses I’m working on just fine. I was considering putting up foam-core wrapped in batting, then wrapped in flannel…but I like the cheap and easy method better…for now anyway.
Laurel In Progress
These photos show the wrinkles in it a bit more than in real life, and gravity will take care of the rest. I pre-washed the flannel so the threads would ‘bloom’ aka get fuzzy and then projects would stick better. Just think…even if you’re not a sewing crazy obsessed nutcase like me, and you wanted to DIY cover a wall in a non-committal way but didn’t want to deal with the mess of use the starch method, this would work great. This would be great for a rental or apartment or even just a small panel of cute flannel for a kid’s room!!
I got the fabric online at Fabric.com. This sea foam green and this natural color are great too. Maybe I’ll just cover the whole place in design boards….at an average about $10 a yard….and each yard is more than double the width of a normal yard of even ‘home fabrics,’ it’s a steal. seriously – this giant piece was under $20. If one wanted to be fancy or fussy, it could easily be framed and made a bit more formal. (alliteration FTW)
This Saturday, TOMORROW, is the start of the two, count them, TWO classes by Elizabeth Hartman at Modern Domestic. I feel kind of selfish leaving for what will amount to 2 whole Saturdays…hopefully everyone will survive at home. EEEK.
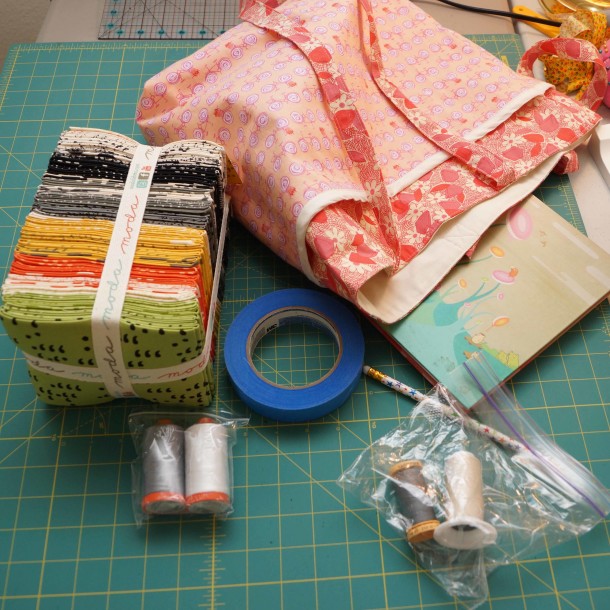
I almost didn’t, and almost grabbed the pink and purple Konas I have like in the Sorbetto post, but I settled on the mustardy-yellows with the gray print and also from FQS.
Mustard and Slate
What do you think? I have two classes, so next week I can take a different color combo…maybe I’ll venture back to my purples and pinks then?
I also picked up some Elizabeth Hartman patterns…how can you NOT want this bag? And if you don’t have any of her books, her Modern Patchwork book is great. I have the iBook version, it’s available for Kindle, and I know lots of local shops have it.
Oh, wow. Between that and working on the Laurel pattern, I seem all local stalker-y. Before you go there, go here. I am SOOOO getting the Pavlova pattern next for my knits. The lovely StephC is alllll the way in Australia now, and look how simple it is! I’ll tell you, like with music, more complicated is not necessarily better. I prefer a good, simple pattern. With pockets.
Robert, Hazel and I braved the crazy spring weather to take photos in the Colette Sorbetto blouses. It rained buckets right after this, but luckily we got some fun(ny) shots in.
If you’re on the fence about sewing apparel, this is a great starting place and it’s incredibly versatile if you’re a bit more advanced. Or maybe you just want a half-dozen more tops for spring/summer ’13 – this will do it!
Hope you enjoy…and many thanks to our photographer!
I had gotten some hand-me-down jeans for Hazel that I had just finished hemming with that fancy variegated cotton thread….
GAP shortened
when I realized the $2.50 Joann’s Fabric sale t-shirt could use some bedazzling. These shirts regularly go on sale, and like I’ve said before, if you’ve got kids, there’s no better deal.
Boring to a T
Hazel is like my own little Punky Brewster in that the more it clashes, the better. With that in mind, you can see why she would not let me toss this horrible bedazzling knit dress. We picked up the dress during the Christmas season at Walmart in a panic for clothes to wear to the Nutcracker.
Bedazzled
So, it’s time for a mish-mash up cycle! That, and much like Hazel, I’m easily distracted from what I should be working on.
The dress fabric caused a huge mess, but I did manage to remove the bottom ruffle and enough two inch strips to make new binding for the t-shirt.
Fuzzy MessRuffleHot Binding
More distractions…
The Boy
Now, to LA-style this shirt….cut off the sleeves in a sort of cap-sleeve angle…and cut out the neck line…
Cap’nRinger
Pin classy ruffle to the bottom of the shirt and run it through the serger or zig-zag/overcast stitch.
pinnedSerged
Laugh at how it looks like a big, pink mouth.
Feed Me, Seymour
Fold 2 inch strips in half, pin to sleeves on right side…both of these you want to pin to the right side, because that’s how you then flip the seam under and top-stitch it down.
Sleeve 1
Do not let serger feed dogs eat your pins. That is bad. Also, try to ignore how much lint cheap fabric is causing.
Hungry Dogs
Ok, once they’re all attached…see how poofy the seams are? You’re going to want to top stitch those down.
Bulky
Like so:
NecklineSleeveButt Ruffle
Now, take a photo of your proud daughter making a goofy face.
The Northwest Quilters group is putting on their annual quilt show this weekend. Mom and I dragged the kids to the Portland Expo center for the show. I took a few shots with my phone while there – many much more blurry than I’d like, but I thought I’d share in case you’re still on the fence about going.
Zoe was not thrilled…
Owl made with strips. Pretty clever.
Quarter circle pattern with batiks…
A “Hazel Quilt” – certainly her style.
One of Alex’s favorites…
There were a few in this optical illusion style…this was by far the simplest version and in that, I preferred it.
I’m really bummed this is blurry however with the blurry it’s easier to see the ribbon effect the colors of the half square triangles produced. Makes me start singing, “Cinderelly, Cinderelly…”
This hexagon pattern quilt…well, again, my photos don’t do it justice. The boarder alone is fantastic…and what you can’t see is each diamond/rhombus/flower/whatever you want to call it around each yellow hexagon was fussy cut and/or arranged so each one has a design…it was truly one of those quilts where you keep on noticing new details.
I dunno…tiny triangles got me…this was not the tiniest or the most tiny triangles in a quilt there…I just thought it was a neat concept.
This was Alex’s favorite quilt.
I have a thing for late 60s/early 70s aesthetic.
This is a popular Tula Pink alphabet pattern done, I think, exceptionally well. The background quilting was truly impressive and oh, my, really fine taste in fabrics.
Oh, come one. You have to appreciate it. It’s cute. See the bombers in the triangles?
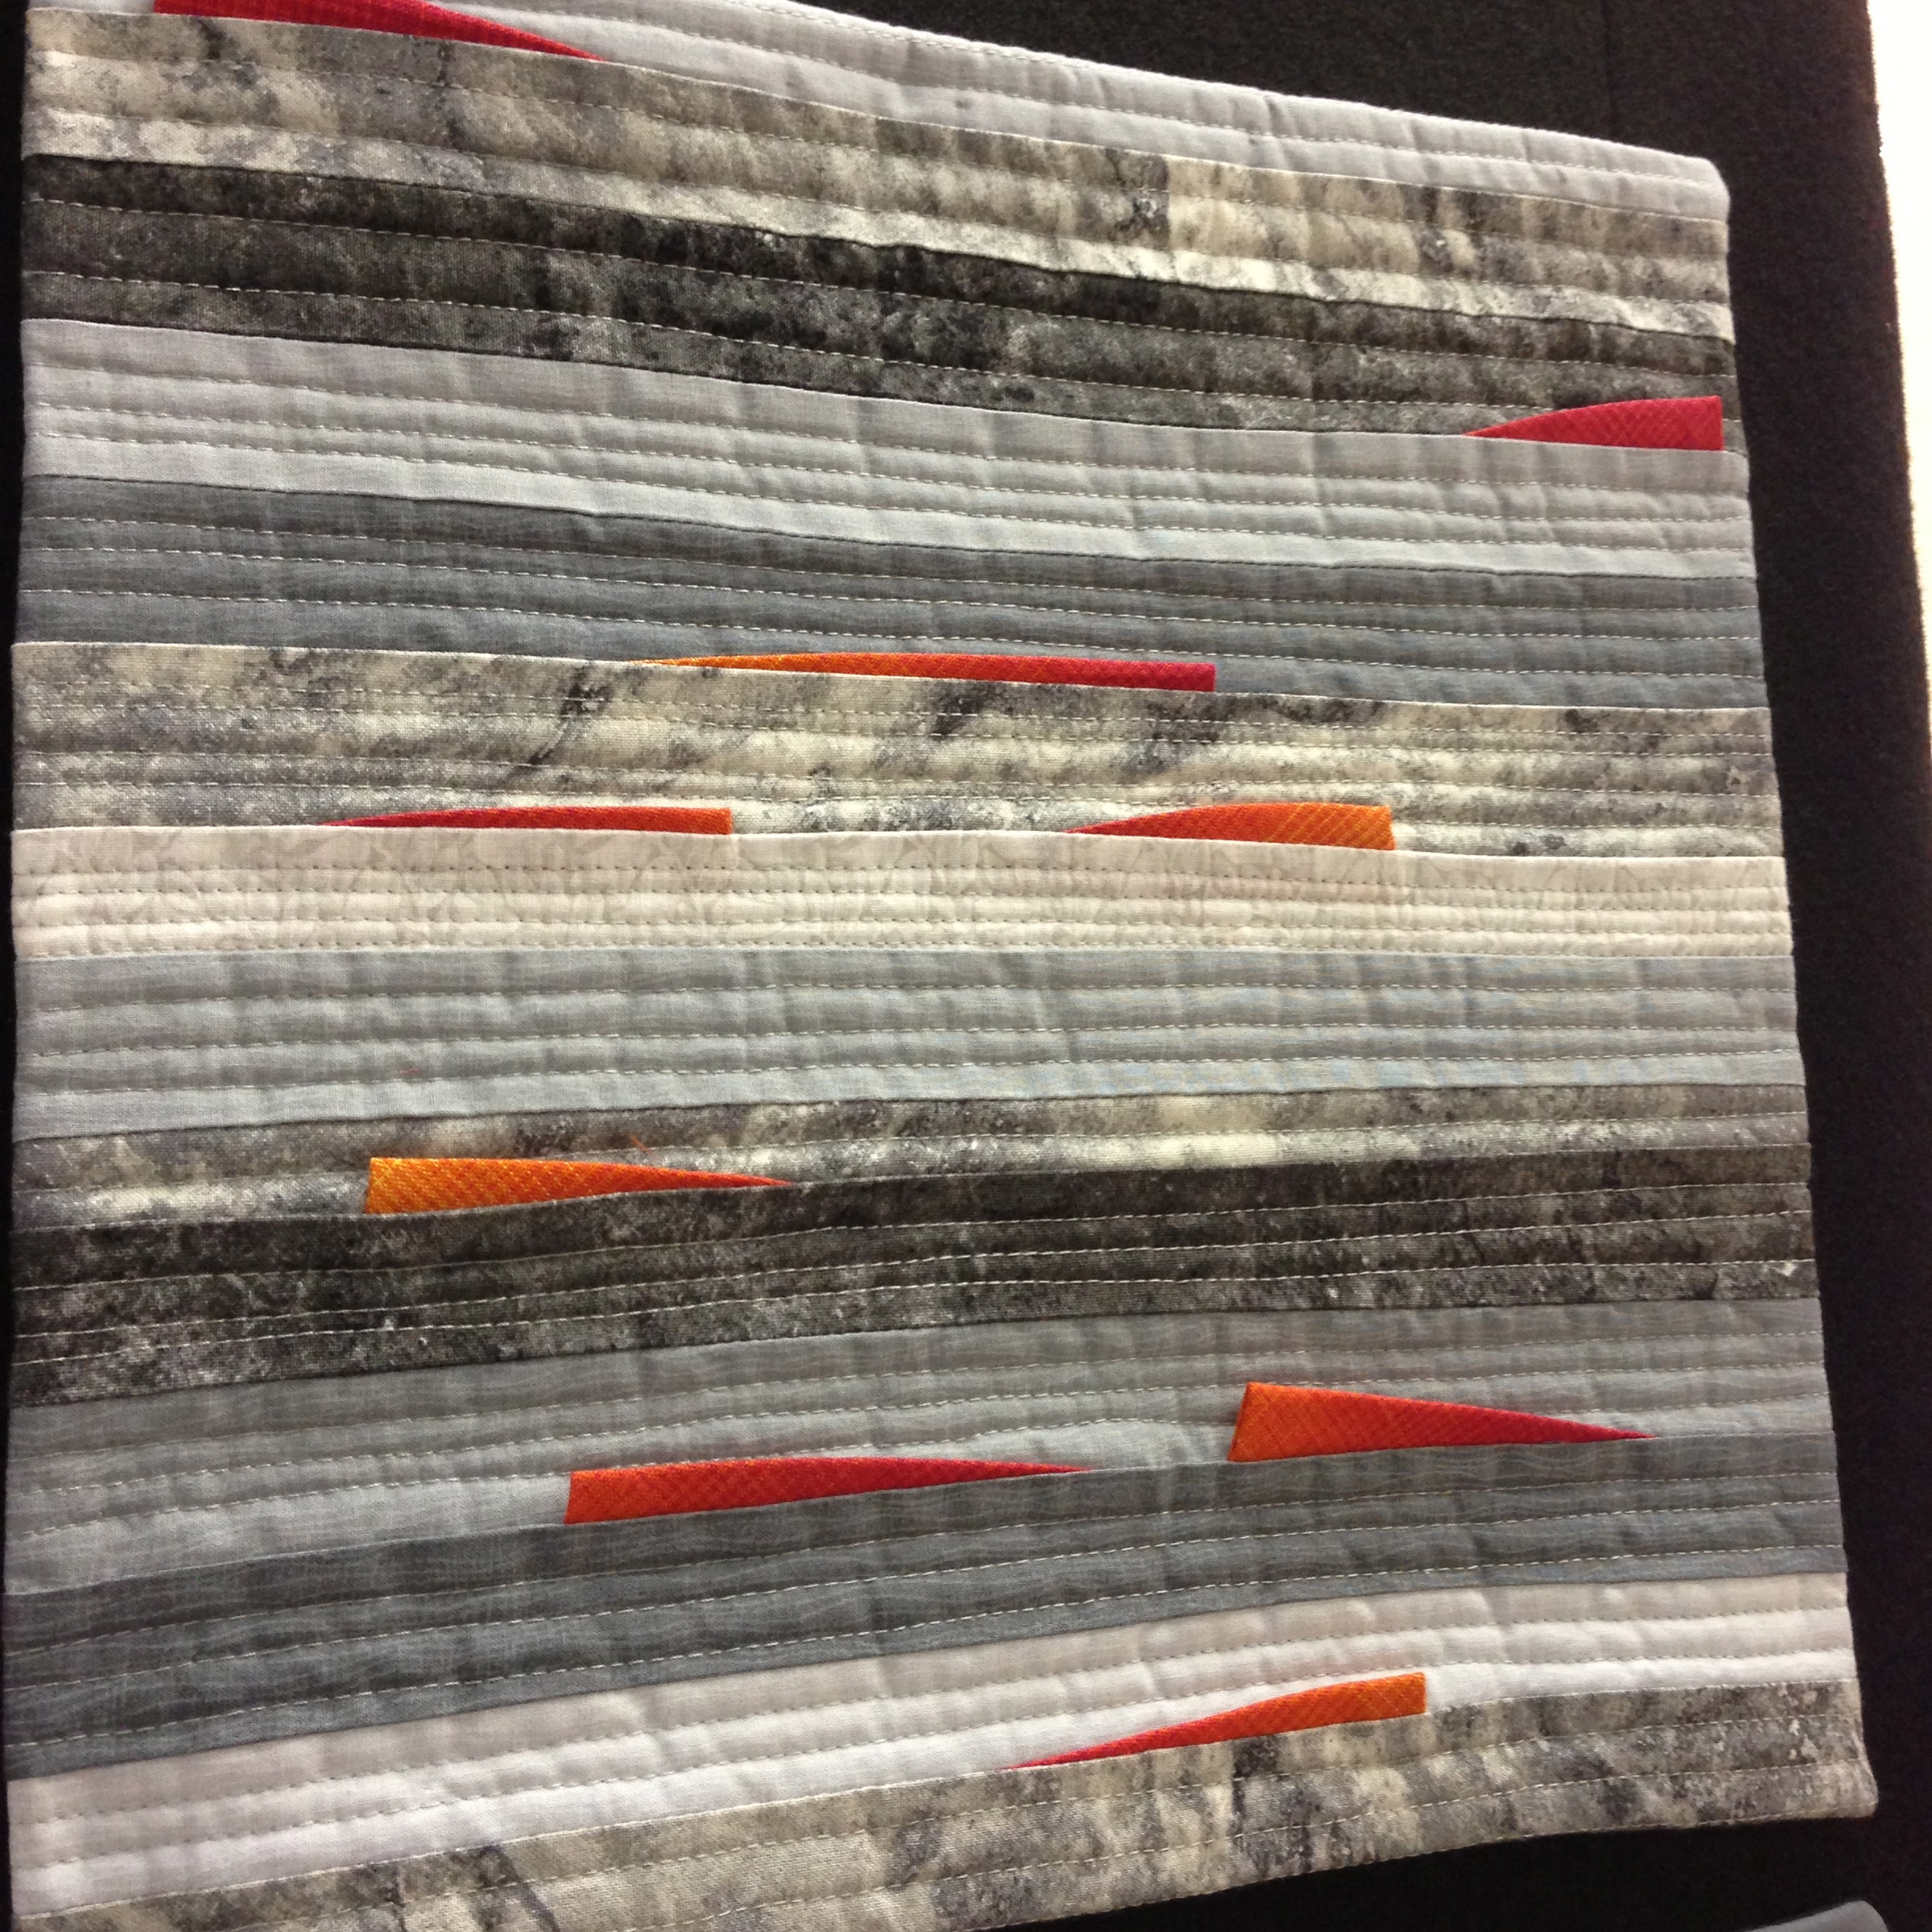
This….this I love. Simple, clean, yet surprising.
A few others in the same series…they were color studies…
I’m bummed this one is blurry. This has been a prediction of mine – more die cut, 3 dimensional quilts will be getting popular. I’m not in love with it…but it will happen all the same.
I’m a sucker for Bavarian and Swedish folk art stylings.
Fabric as painting…
Fun with wearable art…
I should have gotten a better photo of that Baltimore appliqué in the background. Oh well. Also a weakness – good indigos and sashiko.
I didn’t get a photo of the kids doing the crafts available at the show because I’m easily distracted (long story), but there was a Build A Block for Habitat for Humanity in the back of the Expo, and station set up for the kids to learn how to tie a quilt. They also had these little passports they had to answer questions in as they toured around which made it a little less boring for them (see green hint sign on brown optical illusion quilt at top). We were there for 3 hours without any major meltdowns.
There were also a few vendors, including the show sponsor, Montavilla Sewing, that had machines up for trial including long arm free motion quilting machines by Gammill, Juki and BabyLock. Many small quilt shops had booths with lots of goodies for sale and the volunteers were infinitely kind and helpful.
It’s only $5 if you use the coupon on the Montavilla site, and children under 12 are free, so there’s really no reason not to go and support our many fine, local quilt shops (like Boersma’s). There are booths specializing in imported fabrics, embroidery, chenille and anything else your heart desires….even iron-on crystals if that’s your thing.
Ah. I really love finishing a project. That moment of ‘done’ before I go off into other directions.
2 Sorbettos
There was a bias tape snafu, oh…and I wasn’t paying attention when sewing the 2nd bottom seam and let the feed dogs do this number:
Oh Sh*t
Nothing a seam ripper can’t handle, and overall it was a very simple and clean process, even doing 2 at once. In fact…the (free from Colette here) Sorbetto pattern is so easy and such a great wardrobe builder, I’d have a hard time justifying sewing one at a time.
Other than minor pleat snag above, I really was extra diligent and good about using my seam gauge and pins in the tiny hem. In this light-weight cotton and in this form, it’s important in order to get the correct drape in the final blouse.
obsessiveextra obsessive
I’m happy with how the bias tape edging turned out and super in love with the light gray color on the pattern – I think it keeps it sophisticated and keeps it from being too fussy.
I’ll get some Mommy & Me photos taken this weekend, I hope, with Hazel and I in our tops. Pacific NW weather isn’t always so predictable for such things. I think I have enough of the fabric leftover to put a little something together to have Zoe match too. We shall see.
Sigh. So…while working on the Sorbetto tops, I was ready for the bias tape section and to finish them off.
You know, when I plan out a project, that includes a mental timeline of how long things will take. While I have no problem making bias tape by hand the slow way, and I’m pretty darn good at it, I thought I’d try out a handy dandy Clover tool instead to cut my time down. I’ve seen them used on blogs and they seem so easy and carefree….yeah. Sounds good.
clover 12
You know where I’m going with this?
Standardization of labeling bias tape needs to happen. Seriously.
Bias tape, say, if it’s a 1/2 inch, that can mean folded or open 1/2 inch. It really needs to be consistently labeled on ALL things OR we as a sewing community need to decide that a 1/2 inch bias tape is ALWAYS folded or ALWAYS open. I don’t care which of the above options it is. Really. I don’t.
See this spool of bias tape I bought from Dove – it’s marked. 1/2″ …and see the D-F? Double folded.
dove spool
And this labeling needs to include bias tape tools. And patterns.
The Sorbetto pattern states a 1/4 inch seam allowance and 1/2 inch bias tape without differentiating between folded or open bias tape. Looking at the photo, I guessed 1/2 inch folded and made and executive decision to go with 1/2 inch folded for my own aesthetic reasons. I think for the most part, we can assume we mean folded. I would think so anyway.
Not so with Clover. JUST SO YOU KNOW….a 1/2 inch bias tape tool means 1/2 inch open.
See, I made a pile of 2″ strips for my 1/2″ folded bias tape…
I figured my time to make it to be about a half an hour…
clover tool
That’s right. That’s a 1/2 inch coming out of that tool. Without the center fold. Sigh.
See….this line up…The Dove 1/2″ spool, 1/2″ bias tape made by me by hand, 1/4″ bias tape made with the 1/2″ Clover tool (see what is wrong there?), some 1″ bought from Dove as well, and a WHOLE BUNCH of hand made 1/2″ bias tape.
bias tapes
But, hot damn, I make fine bias tape. Even if it does take me awhile.
bias tape by hand
I had plenty of time while making the bias tape to geek out in my head about the physics of bias tape, versus cutting on the grain. It’s pretty neat when you think about it….the weakened edge of the diamond shape flexes better around curves of a garment. Where as, if you cut with the grain, you’re fighting the square of the weave if you try to ease it around a curve…this is why, when binding a quilt with square edges, it’s not such a big deal to cut on the bias in many quilters’ opinions…you can make binding with grain-cut strips and it may even be sturdier for the whole quilt….Pretty neat to geek out on if you ask me.
I should draw something in Illustrator to show what I mean, maybe? I dunno. I assume people get the physics of it, but you never know.
I picked up this spool of yellow thread the other day because I really liked the yellow. No other reason, really. I needed a ‘contrasting thread’ for my FMQ class and it made me smile. I’m not usually one to pick yellow unless we’re talking kitchen paint….almost every kitchen looks great in yellow…but here it is…nonetheless.
I think I can blame the baby. We were playing with her blocks…
block play
and as we were playing…I was also doing a bit of color play…